Table of Contents
Advertisement
Quick Links
Advertisement
Table of Contents

Subscribe to Our Youtube Channel
Related Manuals for CYP CDPS-4KQ


Summary of Contents for CYP CDPS-4KQ
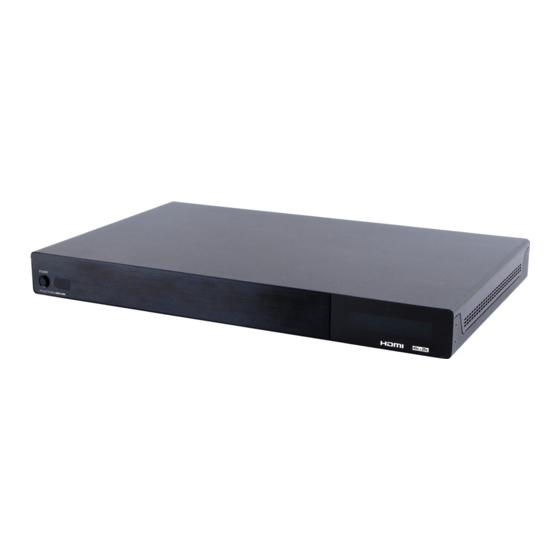
- Page 1 CDPS-4KQ 1 by 4 HDMI 4K UHD TV Wall Splitter Operation Manual Operation Manual...
- Page 3 DISCLAIMERS The information in this manual has been carefully checked and is believed to be accurate. Cypress Technology assumes no responsibility for any infringements of patents or other rights of third parties which may result from its use. Cypress Technology assumes no responsibility for any inaccuracies that may be contained in this document.
-
Page 4: Revision History
SAFETY PRECAUTIONS Please read all instructions before attempting to unpack, install or operate this equipment and before connecting the power supply. Please keep the following in mind as you unpack and install this equipment: • Always follow basic safety precautions to reduce the risk of fire, electrical shock and injury to persons. -
Page 5: Table Of Contents
CONTENTS 1. Introduction ..........1 2. Applications ........... 1 3. Package Contents ........ 1 4. System Requirements ......1 5. Features ..........2 6. Operation Controls and Functions ..2 6.1 Front Panel ........2 6.2 Rear Panel .........3 6.3 RS-232 Protocols .......5 6.4 RS-232 and Telnet Commands ..6 6.5 Telnet Control .........12 6.6 PC Application Control ....14... -
Page 6: Introduction
1. INTRODUCTION The 1 by 4 UHD TV Wall allows an HDMI 4K2K input source to be freely arranged on 4 displays (TV or monitor) with bezel correction function. Friendly control application that leads and leave the TV Wall control system never been easier. -
Page 7: Features
6.1 Front Panel POWER POWER 4K UHD 1X4 UHD TV WALL CDPS-4KQ POWER: Press POWER button to power on the unit or set to standby mode. When power is disconnected, presses this button and connected the power to reset the system back to default factory setting. -
Page 8: Rear Panel
SERVICE: This slot is for firmware update use only, work in accordantly with Power button. CONTROL: Connect to an active network for telnet control. Collocated with “CDPS-4KQ AP” application could do multi-device control. RS-232: Connect from PC/Laptop with D-Sub 9pin cables for RS-232 command sending and controlling over the device. - Page 9 2x2 Wall Source (4xDisplays) RS-232 Control Device HDMI IN HDMI OUT RS-232 3x2 Wall Source (6xDisplays) HDMI IN HDMI OUT Splitter Control Router HDMI IN HDMI OUT Control 3x3 Wall (9xDisplays) Source HDMI IN HDMI OUT Splitter Control Router HDMI IN HDMI OUT Control HDMI IN...
-
Page 10: Rs-232 Protocols
6.3 RS-232 Protocols HDMI SPLITTER REMOTE CONTROL (PC) Definition Definition ► ◄ Baud Rate: 115200bps Data Bit: 8 bits Parity: None Flow Control: None Stop Bit: 1... -
Page 11: Rs-232 And Telnet Commands
6.4 RS-232 and Telnet Commands COMMAND DESCRIPTION PARAMETER HELP(?) Show Command list NONE HELP(?) N Show Command N=Command name description RRES Request Current Output NONE Resolution SRES N1 Set Output Resolution to N1=0(640x480@60), 1(480p60), 2(576p50), 3(800x600@60), 4(848x480@60), 5(1024x768@60), 6(720p50), 7(720p60), 8(1280x768@60), 9(1280x800@60), 10(1280x960@60),... - Page 12 COMMAND DESCRIPTION PARAMETER RINS Get Input Resolution 0(VGA60), 1(VGA72), 2(VGA75), 3(VGA85), 4(WXGA60), 5(WXGA75), 6(XGA60), 7(XGA70), 8(XGA75), 9(XGA85), 10(SXGA60), 11(SXGA75), 12(SVGA56), 13(SVGA60), 14(SVGA72), 15(SVGA75), 16(SVGA85), 17(DTV_480P60), 18(DTV_576P50), 19(DTV_480I60), 20(DTV_576I50), 21(HDTV_720P50), 22(HDTV_720P60), 23(HDTV_1080I50), 24(HDTV_1080I60), 25(HDTV_1080P24), 26(HDTV_1080P50), 27(HDTV_1080P60), 28(V848_480_60), 29(V852_480_60), 30(V854_480_60), 31(V1024_852_60), 32(V1024_1024_60), 33(V1280_800_60), 34(V1280_960_60), 35(V1360_768_60),...
- Page 13 COMMAND DESCRIPTION PARAMETER 46(V2048_1080_60), 47(V2048_1152_1), 48(V2048_1152_2), 49(V2048_1152_3), 50(V3840_2160_24), 51(V3840_2160_25), 52(V3840_2160_30), 53(V4096_2160_24), 54(K_ NO_SIGNAL), 55(K_NO_ SUPPORT) ROSDD Request Current OSD NONE Display State SOSDD N1 Set OSD Display Enable/ N1=0(OFF), 1(ON) Disable ROSDH Request Current OSD NONE Horizontal Position SOSDH N1 N1=0~20 (5) Set OSD Horizontal Position to N1...
- Page 14 COMMAND DESCRIPTION PARAMETER SBRI N1 N2 Set Channel N1 Brightness N1= 1~4, N2=0~100(50) Value to N2 RCON N1 Request Chanel N1 N1=1~4 Contrast Value SCON N1 N2 Set Channel N1 Contrast N1= 1~4, N2=0~100(50) Value to N2 RSAT Request Current NONE Saturation Value RSAT N1...
- Page 15 COMMAND DESCRIPTION PARAMETER RGAA Request Current Static NONE Gateway Address SGAA X.X.X.X Set Static Gateway X=0~255 (192.168.1.50) Address RETIME Request Current Ethernet NONE Timeout SETIME N1 Set Ethernet Timeout N1=0(OFF), 1(10 Minutes), 2(20 Minutes), 3(30 Minutes), 4(40 Minutes), 5(50 Minutes), 6(60 Minutes) RLINK Request Ethernet Address...
- Page 16 COMMAND DESCRIPTION PARAMETER SBV N1 Set TV Wall Vertical Bezel N1=0~255 Correction RBEZ Request Current Bezel NONE Correction State SBEZ N1 Set Bezel Correction N1=0(Off), 1(On) Enable/Disable RMDN Request Unit ID Number NONE SMDN N1 Set Unit ID Number to N1 N1=0~255 SWDE Reset All TV Wall Settings...
-
Page 17: Telnet Control
6.5 Telnet Control To access the Telnet control in Windows 7, click on the ‘Start’ menu and type “cmd” in the Search field then press Enter. Under Windows XP go to the ‘Start’ menu and click on “Run”, type “cmd” with then press Enter. - Page 18 This will bring us into the unit which we wish to control. Type 'HELP' to list the available commands. Note: All the commands will be not executed unless followed by a carriage return. Commands are case-insensitive. If the IP is changed then the IP Address required for Telnet access will also change accordingly.
-
Page 19: Pc Application Control
Note: This action should be executed every time when the unit is power On or reset or re-run the “CDPS-4KQ AP” application. Select the unit that is to be adjusted then pressed “Connect” to connecting the unit. -
Page 20: System Settings
6.6.1 System Settings Power: Click on “Power” to power on/off the controlled unit. To control all connected units, click on “ALL IP” then click Power. From power ON to power OFF the application will disconnect the link, to power ON again please re-Connect. Factory Reset: Click on “Factory Reset”... -
Page 21: Connect Interface
6.6.2 Connect Interface Connect: Click “Connect” to link the unit. Disconnect: Click “Disconnect” to terminate the link. MAC: Click on “MAC” with the arrow down button to show all the TV Wall units and select the nominated unit/MAC for connection. ID No.: When more than one TV Wall unit is in use, it is important that ID No. -
Page 22: Tv Wall Setup (1)
6.6.4 TV Wall Setup (1) Fast TV Wall Setting: TV Wall’s fast setting. Click on hot key to pre- set the TV Wall setup. -
Page 23: Tv Wall Setup (2)
6.6.5 TV Wall Setup (2) Manual Setup: Manually setup TV wall’s setting by Rows and Columns from 1~15 and click on Send to confirm the setting. Bezel Correction Horizon & Vertical: Set up Bezel Correction figures on the selected MAC/ID No. the correction will be made on all outputs of the selected unit in once. -
Page 24: Tv Wall Setup (3)
6.6.6 TV Wall Setup (3) Save TV Wall Settings: Save current setting to Favorite up to 5 settings allows. Recall TV Wall Settings: Recall restored TV Wall settings from 5 settings. -
Page 25: I/O Setup
6.6.7 I/O Setup Output Resolution and OSD Menu Adjustment: All settings under I/ O Setup can be done with single TV Wall unit or units with a single click on “ALL IP”. Parameter and default value are as stated in RS- 232 description parameters. -
Page 26: Image Adjust
6.6.8 Image Adjust Brightness, Contrast, Saturation and Hue Adjustment: Again all settings under Image Adjust can be done with single TV Wall device or multiple TV Wall devices with single click on “ALL IP”. Parameter and default value are as stated in RS-232 description. Picture Reset: Picture Reset button is to reset all settings of Image Adjust back to factory default value. -
Page 27: Connection Diagram
7. CONNECTION DIAGRAM DVD/Blu-ray Player HDMI Input Router Power Supply HDMI IN HDMI OUT SERVICE CONTROL RS-232 DC 12V HDMI Outputs RS-232 Equipped PC/Laptop 2×2 TVs/Displays (Total 4 Screens) - Page 28 DVD/Blu-ray Player HDMI Input Router HDMI Splitter OUTPUT 1 OUTPUT 2 SmartPhone or HDMI Outputs Tablet Device HDMI IN HDMI OUT SERVICE CONTROL RS-232 DC 12V Power Supply RS-232 Equipped PC/Laptop HDMI Outputs Cascade Output HDMI IN HDMI OUT SERVICE CONTROL RS-232 DC 12V...
-
Page 29: Specifications
8. SPECIFICATIONS 8.1 Technical Specifications Video Bandwidth 300 MHz/9 Gbps Input Ports 1×HDMI (Female type), 1×Control (RJ45), 1×RS-232 (D-sub 9-pin), 1×USB (Service only) Output Ports 4×HDMI (Female type) HDMI Cable Distance 10M/8-bit 1080p, 5M/4K2K IR Frequency 30~50kHz Baud Rate 115200bps ESD Protection Human body model: ±... -
Page 30: Supported Resolutions
8.2 Supported Resolutions INPUT RESOLUTION OUTPUT RESOLUTION 640×480@60/72/75/85 640×480 1280×768@60/75 480p@60 (720×480) 1024×768@60/70/75/85 576p@50 (720×576) 1280×1024@60/75 800×600 800×600@56/60/72/75/85 848×480 480p@60 1024×768 576p@50 720p@50 (1280×720) 480i@60 720p@60 (1280×720) 576i@50 1280×768 720p@50/60 1280×800 1080i@50/60 1280×960 1080p@24/50/60 1280×1024 848×480@60 1360×768 852×480@60 1366×768 854×480@60 1400×1050 1024×852@60 1440×900... -
Page 31: Output Resolution Limitations
8.3 Output Resolution Limitations 8.3.1 Input Resolution is 3840×2160 VIDEO WALL 10X10 15X15 640×480 480p@60 (720×480) 576p@50 (720×576) ... - Page 32 8.3.2 Input Resolution is 4096×2160 VIDEO WALL 10X10 15X15 640×480 480p@60 (720×480) 576p@50 (720×576) ...
- Page 33 8.3.3 Input Resolution is 2048×1080/2048×1152 VIDEO WALL 10X10 15X15 640×480 480p@60 (720×480) 576p@50 (720×576) ...
-
Page 34: Acronyms
9. ACRONYMS ACRONYM COMPLETE TERM Command Line Interface Digital Theater System Digital Visual Interface EDID Extended Display Identification Data Graphical User Interface HDCP High-bandwidth Digital Content Protection HDMI High-Definition Multimedia Interface HDTV High-Definition Television On-Screen Display Universal Serial Bus Video Graphics Array WUXGA Widescreen Ultra Extended Graphics Array... - Page 36 CYPRESS TECHNOLOGY CO., LTD Home page: http://www.cypress.com.tw MPM-CDPS4KQ...
Need help?
Do you have a question about the CDPS-4KQ and is the answer not in the manual?
Questions and answers