
Related Manuals for CYP CDPS-4S2HSS


Summary of Contents for CYP CDPS-4S2HSS
- Page 1 CDPS-4S2HSS 4×2 SDI to HDMI Seamless Splitter with PIP Operation Manual Operation Manual...
- Page 2 DISCLAIMERS The information in this manual has been carefully checked and is believed to be accurate. Cypress Technology assumes no responsibility for any infringements of patents or other rights of third parties which may result from its use. Cypress Technology assumes no responsibility for any inaccuracies that may be contained in this document.
-
Page 3: Revision History
SAFETY PRECAUTIONS Please read all instructions before attempting to unpack, install or operate this equipment and before connecting the power supply. Please keep the following in mind as you unpack and install this equipment: • Always follow basic safety precautions to reduce the risk of fire, electrical shock and injury to persons. -
Page 4: Table Of Contents
CONTENTS 1. Introduction ..........1 2. Applications ........... 1 3. Package Contents ........ 1 4. System Requirements ......1 5. Features ..........2 6. Operation Controls and Functions ..3 6.1 Front Panel ........3 6.2 Rear Panel .........4 6.3 Remote Control ........5 6.4 OSD Menu .........6 6.5 RS-232 Protocol .......16 6.6 RS-232 and Telnet Commands ..17... -
Page 5: Introduction
1. INTRODUCTION The 4 by 2 SDI to HDMI Seamless Quad PIP Splitter is a high performance, high speed zooming/shrinking system that can be easily configure and control for quad or picture-in-picture video processing. Allowing 4 different SDI input sources to be freely selected and arranged on to HDMI displays with total of 8 different types of settings. -
Page 6: Features
5. FEATURES • Supports SD-SDI (SMPTE 259M-C, at bitrates of 270 Mbit/s) input signals up to 250M • Supports HD-SDI (SMPTE 292M, at bitrates of 1.485Gbit/s and 1.485/1.001 Gbit/s) input signals up to 200M • Supports 3G-SDI (SMPTE 424M/425M-AB, at bitrates of 2.970 Gbit/s and 2.9701/1.001 Gbit/s) input signals up to 100M •... -
Page 7: Operation Controls And Functions
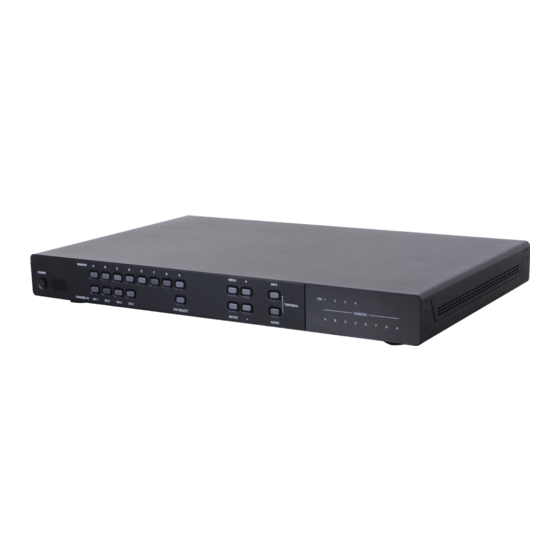
6. OPERATION CONTROLS AND FUNCTIONS 6.1 Front Panel MENU INFO WINDOW POWER POWER 720P/60Hz WINDOW CHANNEL IN CH 1 CH 2 CH 3 CH 4 FAV SELECT ENTER AUDIO 9 10 POWER Button & LED: Press this button to power on the device and the LED will illuminate in green or set it to standby mode and the LED will illuminate in Red. -
Page 8: Rear Panel
ENTER: Press this button to enter into MENU selection and confirm the selection. -/+ Buttons: Press these buttons to scroll down/up the OSD selections. INFO: Press this button to bring up the information section from the OSD menu. AUDIO: Press this button to select audio channel. Note:Press the 'INFO &... -
Page 9: Remote Control
6.3 Remote Control Info Power Power: Press this button to switch on CH 1 the device or press it again to set it to CH 2 standby mode. CH 3 Info: Press this button to show system CH 4 information. Mute Input Input CH 1~4: Press these buttons to... -
Page 10: Osd Menu
6.4 OSD Menu MAIN MENU 1ST LAYER 2ND LAYER 3RD LAYER I/O Setup Output 480p60 Resolution 567p50 720p50 720p60 1080p24 1080p25 1080p30 1080p50 1080p60 1024x768 1280x800 1280x1024 1366x768 1440x900 1600x900 1600x1200 1920x1200 NATIVE Menu Back OSD Setting Info Display On/Off 0~20 (5) H Offset 0~20 (5) - Page 11 MAIN MENU 1ST LAYER 2ND LAYER 3RD LAYER Image 0~100 (50) Brightness CH 1 Adjust Adjust 0~100 (50) CH 2 0~100 (50) CH 3 0~100 (50) CH 4 Value Reset Menu Exit 0~100 (50) Contrast CH 1 Adjust 0~100 (50) CH 2 0~100 (50) CH 3...
- Page 12 MAIN MENU 1ST LAYER 2ND LAYER 3RD LAYER Window Channel 1 Size CH1 Wxxx Hxxx Setup Select Width Unit Width Ten Width Hundred Height Unit Height Ten Height Hundred Position CH1 Hxxx Vxxx Horizontal Unit Horizontal Ten Horizontal Hundred Vertical Unit Vertical Ten Vertical Hundred Priority...
- Page 13 MAIN MENU 1ST LAYER 2ND LAYER 3RD LAYER Window Channel 2 Size CH1 Wxxx Hxxx Setup Select Width Unit Width Ten Width Hundred Height Unit Height Ten Height Hundred Position CH1 Hxxx Vxxx Horizontal Unit Horizontal Ten Horizontal Hundred Vertical Unit Vertical Ten Vertical Hundred Priority...
- Page 14 MAIN MENU 1ST LAYER 2ND LAYER 3RD LAYER Window Channel 3 Size CH1 Wxxx Hxxx Setup Select Width Unit Width Ten Width Hundred Height Unit Height Ten Height Hundred Position CH1 Hxxx Vxxx Horizontal Unit Horizontal Ten Horizontal Hundred Vertical Unit Vertical Ten Vertical Hundred Priority...
- Page 15 MAIN MENU 1ST LAYER 2ND LAYER 3RD LAYER Window Channel 4 Size CH1 Wxxx Hxxx Setup Select Width Unit Width Ten Width Hundred Height Unit Height Ten Height Hundred Position CH1 Hxxx Vxxx Horizontal Unit Horizontal Ten Horizontal Hundred Vertical Unit Vertical Ten Vertical Hundred Priority...
- Page 16 MAIN MENU 1ST LAYER 2ND LAYER 3RD LAYER Window Channel 1 Mirror On/Off Convert Convert Fade In-Out On/Off Rotation R90/L90/Up-Side Down180/Off Window Reset Menu Exit Channel 2 Mirror On/Off Convert Fade In-Out On/Off Rotation R90/L90/Up-Side Down180/Off Window Reset Menu Exit Channel 3 Mirror On/Off...
- Page 17 MAIN MENU 1ST LAYER 2ND LAYER 3RD LAYER Chromakey User 1 Minimum For Y 16~240 Setup Maximum For Y 16~240 Minimum For Cb 16~240 Maximum For Cb 16~240 Minimum For Cr 16~240 Maximum For Cr 16~240 Chromakey On/Off User 2 Minimum For Y 16~240 Maximum For Y 16~240 Minimum For Cb 16~240...
- Page 18 MAIN MENU 1ST LAYER 2ND LAYER 3RD LAYER Chromakey Cyan Minimum For Y 187~189 Setup Maximum For Y 187~189 (Cont.) Minimum For Cb 152~154 Maximum For Cb 152~154 Minimum For Cr 16~18 Maximum For Cr 16~18 Chromakey On/Off Green Minimum For Y 171~173 Maximum For Y 171~173 Minimum For Cb 40~42 Maximum For Cb 40~42...
- Page 19 MAIN MENU 1ST LAYER 2ND LAYER 3RD LAYER Chromakey Blue Minimum For Y 30~32 Setup Maximum For Y 30~32 (Cont.) Minimum For Cb 239~240 Maximum For Cb 239~240 Minimum For Cr 116~118 Maximum For Cr 116~118 Chromakey On/Off Black Minimum For Y 16~17 Maximum For Y 16~17 Minimum For Cb 127~129 Maximum For Cb 127~129...
-
Page 20: Rs-232 Protocol
Note: 1. When in 'NATIVE' resolution, the unit will read the EDID settings of the display connected to HDMI OUT A. 2. Naming character up to 9 characters. 3. Chromakey Setup only works when CH 1and CH 2 are selected. CH 1 is the background and CH 2 is the top layer to be overlaid. -
Page 21: Rs-232 And Telnet Commands
6.6 RS-232 and Telnet Commands COMMAND DESCRIPTION PARAMETER Prints all available commands to the screen HELP Prints all available commands to the screen SPOW 0/1 Set the unit power on/off 0=Off 1=On RPOW Show current power state SRES 0~18 Set output resolution 0=480p@60Hz 1=576p@50Hz 2=720p@50Hz... - Page 22 COMMAND DESCRIPTION PARAMETER ROSDH Show OSD horizontal position current SOSDV 0~20 Set OSD vertical position 0~20 ROSDV Show OSD vertical position current SOSDT 0/5~50 Set OSD display time 0 =Off/5~50 (second) ROSDT Show OSD display current time SOSDG 0~10 Set OSD transparent value 0~10 ROSDG Show OSD transparent...
- Page 23 COMMAND DESCRIPTION PARAMETER SHSIZE X Y Set image horizontal size** X=Channel 1~4 Y= 0~1920 RHSIZE 1~4 Show image horizontal size 1~4=Channel 1~4 current value** SVSIZE X Y Set image vertical size** X=Channel 1~4 Y= 0~1080 RVSIZE 1~4 Show image vertical size 1~4=Channel 1~4 current value** SHPOS X Y...
- Page 24 COMMAND DESCRIPTION PARAMETER SRECALL1~12 Set a output windows to 1=Window A, Windows A~Windows FAV4 2=Window B, 3=Window C, 4=Window D, 5=Window E, 6=Window F, 7=Window G, 8=Window H, 9=FAV 1, 10=FAV 2, 11=FAV 3, 12=FAV 4 SMIRROR 0/1 Set enable/disable mirror 0=Off effect * 1=On...
- Page 25 COMMAND DESCRIPTION PARAMETER SCHRKS 0~9 Set chromaykey color for 0=User 1 chroma key* 1=User 2 2=White 3=Yellow 4=Cyan 5=Green 6=Magenta 7=Red 8=Blue 9=Black RCHRKS Show chromakey color current to screen* SCHRC X Y Set the YCbCr color range X=0~11 for the chromakey* 0=User 1 Y Max 1=User 1 Y Min 2=User 1 Cb Max...
- Page 26 COMMAND DESCRIPTION PARAMETER SCHRSW 0/1 Set enable/disable 0=Off chromakey effect* 1=On RCHRSW Show chromakey effect current to screen* SIPM 0/1 Set IP mode to DHCP or 0=DHCP Static 1=Static RIPM Show current IP mode to screen SIPADD XXX Set static IP address xxx.xxx.xxx.xxx (xxx=0~255) RIPADD Show static current IP...
- Page 27 COMMAND DESCRIPTION PARAMETER RVICH Show output channel the video source SMUTE 0/1 Set mute audio 0=Unmuted 1=Mute RMUTE Show current mute to screen SAUDIO 1~4 Set output audio to 1~4=Input 1~4 specified source RAUDIO Show output audio source to screen SCHRE 0~4 Reset the Windows 0=All channels,...
-
Page 28: Software Application
6.7 Software Application Please download the software from www.cypress.com.tw with file name CDPS V2.000 and save it in a directory where you may use it later. Connect the unit with PC/Laptop through the Ethernet port of an active network system and open the CDPS V2.000 application. Click on Find Devices on Network and a list of the devices connected to the system will show up. -
Page 29: Telnet Control
6.8 Telnet Control To access the telnet control under MS windows, click ‘Start’ menu and type “cmd” in the search field then press enter. Under Mac OS X, go to Go→Application→Utilities→Terminal. See below for reference. Once in the command line interface (CLI) type "telnet", then the IP address, and hit enter. - Page 30 Press “Help” or “?” then hit enter to bring up all available commands. Note: Any commands will not be executed unless followed by a carriage return. Commands are case-insensitive. If the IP is changed then the IP Address required for Telnet access will also change accordingly.
-
Page 31: Webgui Control
6.9 WebGUI Control On a PC/Laptop that is connected to an active network system, open a web browser and type device’s IP address (default setting IP:192.168.1.50 ) on the web address entry bar. The browser will display device’s Image Adjust, Output Resolution, Window Setup, OSD Settings, Window Convert, Chromakey Setup &... -
Page 32: Window Setup
6.9.3 Window Setup Click on 'Windows Setup' to select the widow display format from E~H with its size and position, simply drag and pull each channel to the desired position. Once the setting is done it can be labeled and saved. -
Page 33: Osd Settings
6.9.4 OSD Settings Click on' OSD Settings' to set OSD size, timeout and transparent settings and allow info display On or Off. 6.9.5 Window Convert Click on 'Window Convert' to set each window’s appearance by mirror, fade-in-out or rotation. Note: This page is only selectable under Window mode A~D. -
Page 34: Chromakey Setup
6.9.6 Chromakey Setup Click on 'Chromakey Setup' to set each window’s chromakey. Note: This page is only selectable under Window mode A~D. 6.9.7 Ethernet Click on 'Ethernet' to set IP status, IP address and other IP related setting. -
Page 35: Connection Diagram
7. CONNECTION DIAGRAM SDI Cameras Network Router SDI Inputs SDI IN HDMI OUT CONTROL RS232 DC 12V SERVICE Power Supply Simultaneous RS-232 HDMI Outputs RS-232 Equipped PC or Notebook Display Display Screen Configurations... -
Page 36: Specifications
8. SPECIFICATIONS SMPTE Standards 259M-C, 292M, 424M/425M-AB SDI Transmission Rates 270 Mbps, 1.485 Gbps & 1.485/1.001 Gpbs, 2.970 Gbps & 2.970/1.001 Gbps Video Bandwidth 225 MHz/6.75 Gbps Input Ports 4×SDI Output Ports 2×HDMI SDI Timings Support SD-SDI: SMPTE 259M-C@270 Mbps HD-SDI: SMPTE292M@1.485 &... -
Page 37: Acronyms
9. ACRONYMS ACRONYM COMPLETE TERM Command Line Interface Digital Visual Interface Graphical User Interface HDMI High-Definition Multimedia Interface Internet Protocol Infrared Local Area Network On-Screen Display Local Area Network Picture-in-Picture Picture-out-of-Picture Serial Digital Interface SMPTE Society of Motion Picture and Television Engineers Universal Serial Bus... - Page 38 CYPRESS TECHNOLOGY CO., LTD Home page: http://www.cypress.com.tw MPM-CDPS4S2HSS...
Need help?
Do you have a question about the CDPS-4S2HSS and is the answer not in the manual?
Questions and answers