Table of Contents
Advertisement
Quick Links
Building
instructions
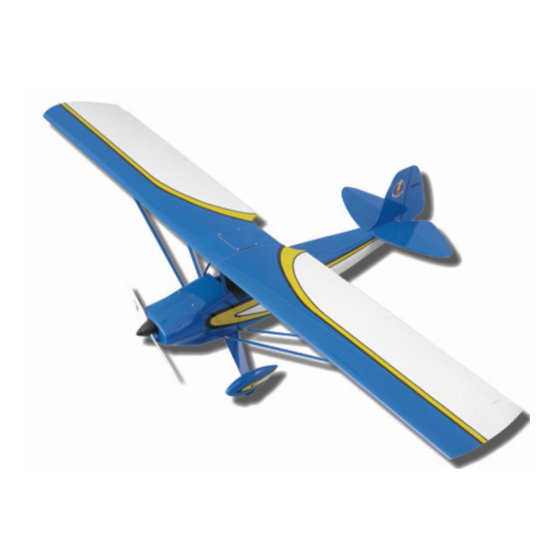
Pober Pixie
RC model aircraft
Order No. 1357/00
Specification
Wingspan
1650 mm
Length
1050 mm
Wing area
41.9 dm²
All-up weight
2000 - 2250 g
Wing loading max. approx. 54.4 g/dm²
Guarantee claims will be refuted in the case of damage caused by failure to heed the instructions. We accept no liability for
consequent damage which results from such mis-use. It is essential to keep strictly to the building instructions when completing
and operating the model. The instructions include a section which covers the safe operation of the model.
This model is by no means a plaything for children.
aero-naut Modellbau GmbH & Co KG
Stuttgarterstr. 18-22
D-72766 Reutlingen
http://www.aero-naut.de
© "aero-naut" Modellbau
Pober Pixie building instructions
Pober Pixie
1
Advertisement
Table of Contents

Related Manuals for Aeronaut Prober Pixie


Summary of Contents for Aeronaut Prober Pixie
-
Page 1: Building Instructions
Pober Pixie Building instructions Pober Pixie RC model aircraft Order No. 1357/00 Specification Wingspan 1650 mm Length 1050 mm Wing area 41.9 dm² All-up weight 2000 - 2250 g Wing loading max. approx. 54.4 g/dm² Guarantee claims will be refuted in the case of damage caused by failure to heed the instructions. We accept no liability for consequent damage which results from such mis-use. -
Page 2: Table Of Contents
Pober Pixie Contents Accessories required to build the model: ....................2 Introductory notes ............................ 2 Fuselage ..............................3 Wing strut supports..........................3 Undercarriage ............................3 Tailplane and fin ............................4 Installing the servos and “snakes” ......................5 Wings............................... 5 Wing struts............................... 6 Wing centre section .......................... -
Page 3: Fuselage
Pober Pixie Sand the internal surfaces of the GRP fuselage moulding with abrasive paper (150-grit to 180-grit) to provide a “key” for the adhesive before gluing any component to it. Trial-fit and trim all parts carefully before reaching for the glue bottle. Epoxy is heavy;... -
Page 4: Tailplane And Fin
Pober Pixie Wheel spats The wheel spats are supplied as vacuum-moulded ABS parts; see drawing (DET. 5). Cut out the spat components along the marked lines, sand the cut edges carefully and trim the • parts to fit together accurately - you will find the material is easy to cut and sand. Cut out the opening for the wheel in each wheel spat and check that the wheel spigots fit. -
Page 5: Installing The Servos And "Snakes
Pober Pixie Slit and peel off a strip of film about 10 - 15 mm wide in the centre of the top surface in the same • manner (for attaching the fin and strake). Cyano glue can also be applied directly to the film. In this case it is important to sand the joint line •... -
Page 6: Wing Struts
Pober Pixie Centre section - (DET. 9): slide the 5/4 mm Ø brass tubes into the prepared holes (wing joiner rod • sleeves - see drawing). Slide the 4 mm Ø steel rods into the pre-drilled holes in the root ribs and assemble the outboard •... -
Page 7: Covering The Wings
Pober Pixie Screw the centre section to the cabane, align it carefully and drill the rear holes 3 mm Ø. • Glue M3 captive nuts in the rear holes in the cabane, and screw the centre section to the cabane •... -
Page 8: Recommended Power Set
Pober Pixie Measure off and mark the centre of the channels, and mark the width of the channels to match the motor mount sides which you have already prepared. Cut slots in the GRP moulding to accept the motor mount side pieces. •... -
Page 9: Rc Installation, Finishing
Pober Pixie RC installation, finishing Control surfaces Glue the hinges and horns in the prepared slots. • Struts Assemble the struts as described earlier, referring to the drawing, and attach them to the model. • The struts absorb flight loads, so they must be assembled and fitted without slop, and be securely mounted. -
Page 10: Dangers And Hazards
Pober Pixie Dangers and hazards Model flying, especially under radio control, is a fascinating pastime. When you are operating your model we recommend that you make a point of observing the following basic rules, to avoid annoying or injuring other model flyers and anybody else. When you are operating a model aircraft you bear sole responsibility for your behaviour and for any consequences of your behaviour. - Page 11 Pober Pixie Access hatch Reinforcing strip – tailplane / fin Balsa triangular strip, 8 x 8 x 120 Reinforcement Obechi, 10 x 10 x 150, overlength Cockpit reinforcement Balsa, 19 x 19 x 30 Motor mount – side panel Plywood, ready made Motor mount –...
Need help?
Do you have a question about the Prober Pixie and is the answer not in the manual?
Questions and answers