Advertisement
Quick Links
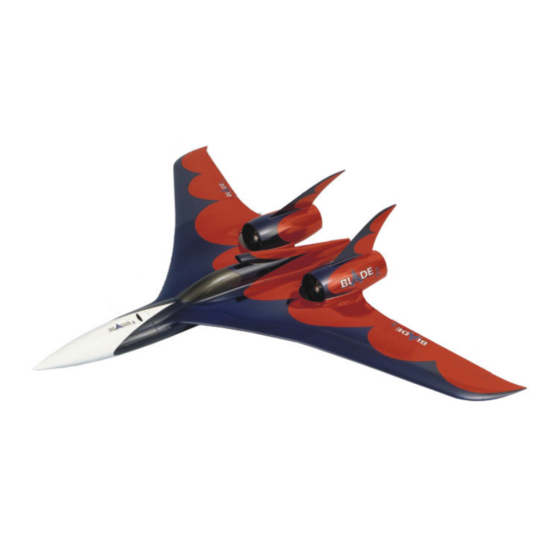
BLADE 2
Electric ducted fan model
Order No. 1356/00
Specification
Wingspan
Length
Wing area
Wing loading
All-up weight
RC functions
Aileron, elevator and rudder
Motor
"aero-naut" Modellbau GmbH & Co. KG
Stuttgarterstr. 18-22
D-72766 Reutlingen
http://www.aero-naut.de
© "aero-naut" Modellbau
Building instructions - Blade 2
1404 mm
1022 mm
35.6 dm²
73 – 106 g
2600 - 3800 g
Blade 2
Page 1
Advertisement

Subscribe to Our Youtube Channel
Related Manuals for Aeronaut BLADE 2


Summary of Contents for Aeronaut BLADE 2
- Page 1 Wing loading 73 – 106 g All-up weight 2600 - 3800 g RC functions Aileron, elevator and rudder Motor “aero-naut” Modellbau GmbH & Co. KG Stuttgarterstr. 18-22 D-72766 Reutlingen http://www.aero-naut.de © “aero-naut” Modellbau Building instructions - Blade 2 Page 1...
- Page 2 Cut out the nozzle (14) from the film supplied, and stick it to the mantle ring of the ducted fan unit from the rear using adhesive tape. Seal the underside of the motor pods by attaching the pod hatches (13) with adhesive tape. Building instructions - Blade 2 Page 2...
- Page 3 The speed controller should be located under the canopy (2) in line with the auxiliary air intake, so that it is cooled by the airflow through it. Cut a hole through the fuselage forward of the speed controller through which the cables can be routed. Building instructions - Blade 2 Page 3...
- Page 4 When an aileron command is applied: 6 mm up, 6 mm down. When an elevator command is applied: 10 mm up, 10 mm down. The elevon travels are programmed using the servo travel adjustment facility on your transmitter. Building instructions - Blade 2 Page 4...
- Page 5 (8), to keep it accurately in position when it is glued in place. Please take great care to connect the batteries with correct polarity. Sand off the burned edges from the joint areas of the formers before gluing them in the fuselage. Building instructions - Blade 2 Page 5...
- Page 6 Operating instructions - Blade 2 Installing the receiving system. The Blade 2 requires only two control functions: elevons (superimposed ailerons / elevators) and speed controller. The elevon travels must be correct if the model is to fly to its full potential.
- Page 7 Check all functions carefully before flying the model. Set slight up-elevator trim for the first flight. To launch the model the rubber should be stretched to 2.5 - 3 times its slack length. Hold the Blade 2 by the tail end of the fuselage using one finger.
Need help?
Do you have a question about the BLADE 2 and is the answer not in the manual?
Questions and answers