Table of Contents
Advertisement
Advertisement
Table of Contents

Summary of Contents for KYODO KG510
- Page 1 OPERATORS MANUAL KYODO KG510 BASE/REPEATER...
-
Page 2: Table Of Contents
KYODO KG510 OPERATORS MANUAL CONTENTS SECTION DESCRIPTION PAGE INTRODUCTION PRODUCT DESCRIPTION Features Product Description Standard Inclusions CONTROLS, INDICATORS, & CONNECTORS Front Panel Controls Rear Panel Connectors OPERATION Installation and Programming Basic Operation 4.2.1 Switch On 4.2.2 Adjust the Volume Setting 4.2.3... - Page 3 KYODO KG510 OPERATORS MANUAL CONTENTS SECTION DESCRIPTION PAGE 4.4.2.3 Redialling with DTMF 4.4.2.4 Restoring the Last DTMF Numbers to the LCD Display 4.4 3 Single Tone Encoding 4.4.4 Kill Signalling 4.4.4.1 Kill Signalling Operation Channel Scanning 4.5.1 All Channel Scan Operation 4.5 2...
-
Page 4: Introduction
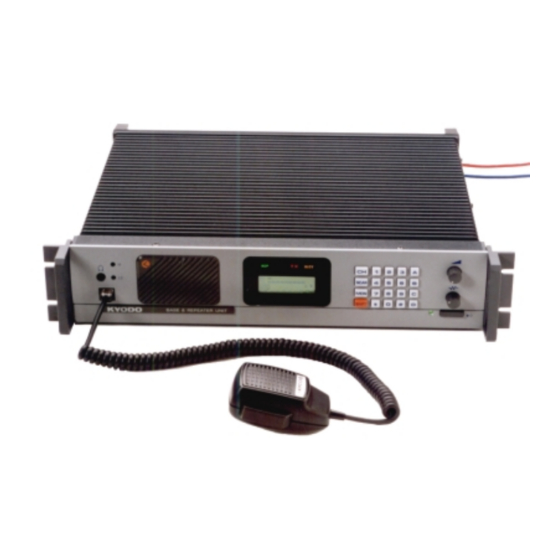
The KG510 is fitted with a large full dot matrix LCD that is used to display the Channel Numbers & Names, frequency & tone programmed information, and signalling information. All user interface keys and knobs are conveniently located on the front of the radio. -
Page 5: Standard Inclusions
1. 1. 1. 1. Headphone Socket This socket is provided to allow users to listen to the KG510 using headphones. Plugging a headphone into this socket will disconnect the built-In speaker. It does NOT include a microphone input, or TX PTT facility. - Page 6 12. Power ON/OFF Switch The Power ON/OFF Switch is used to switch the KG510 "ON" or "OFF". Press this knob to switch the KG510 "ON". Press this knob again to switch the KG510 "OFF". This knob is slightly more depressed when in the "ON"...
-
Page 7: Rear Panel Connectors
Frequency signalling. The right hand sixteen character spaces are used to display data that the user enters (e.g. 5 Tone calling sequences). These character spaces are also used by the KG510 to display messages and information directed to the user. -
Page 8: Operation
Installation and Programming As the KG510 can be installed to operate as either a Base Station or as a Repeater, some of the instructions in this document may apply to one application only, some may apply in both cases, while others may only apply if the particular function has been enabled during programming of the KG510. -
Page 9: Front Panel Operation
4.3.1 Keypad Operation The Keypad is the interface between the user and the KG510 and is used to enable or disable various functions, and to enter the required data for signalling purposes. (5-Tone) or (DTMF) shown after the described feature indicates that the described feature applies to the particular signalling format. -
Page 10: Keypad Operation Using The Shift Key
4.3.2 Keypad Operation using the [SHIFT] Key Some of the KG510's features and how it operates can be changed by using the [SHIFT] key. To make these changes, it is necessary to firstly press the [SHIFT] key followed by the other keys within a two second timeframe. -
Page 11: Changing Channels
If it is necessary to enter the "R" number sequence to activate the repeater, the [SHIFT] key must be pressed before pressing the [#] key. If a 5-Tone number is NOT displayed in the LCD, and the [#] key is pressed, then the KG510 will recall the most recent 5-Tone number and transmit it. -
Page 12: Recalling The Last Encode Sequence
Assume that your decode number is 12345, and that you wish to encode number 12346. You will input 12346, and then press the [#] key. The KG510 will encode 12346B12345. The called radio will display 12345 in their LCD indicating the calling party's number is 12345. -
Page 13: Redialling With Dtmf
4.4.3 Single Tone Encoding The KG510 has the ability to encode one of six single tone frequencies for 1, 2, 3, or 4 seconds. This function is enabled during programming of the KG510 by selecting the <Single Tone ON> field in the <Encode Menu> and setting the encode period. -
Page 14: Kill Signalling
4.4.4 KILL Signalling The KG510 has the ability to transmit a specially coded signalling sequence that will disable ("KILL") another radio. This feature is particularly useful when transceivers become misplaced, are stolen, if they are used in an incorrect manner, or if they are used for the wrong purposes. -
Page 15: Channel Scanning
If the incorrect password has been entered more than the allowed number of tries, then the KG510 becomes disabled and the following message is displayed in the LCD display: Not Ready In such cases, it is necessary to return the KG510 to your radio supplier to have the KG510 repaired. Scanning The KG510 is supplied with two scanning modes. -
Page 16: Program Channel Scan Operation
Pressing the [SCAN] key will take the KG510 out of either scanning mode and return the KG510 to normal mode. The scan symbol " " will be removed from the LCD display and the LCD will display "Scan Mode-out" for two seconds as shown below:... -
Page 17: Removing Channels From Scan List
A "beep" sound from the radio confirms correct deletion of the channel from the scan list. This function CANNOT be used in the Priority Scan mode. The KG510 automatically restores all channels to their respective scanning list as soon as the KG510 exits from the scan mode. -
Page 18: Changing Tone Signalling Systems
KYODO KG510 OPERATORS MANUAL Changing Tone Signalling Systems It is possible to switch the KG510's tone signalling system among 5-Tone sequential signalling, DTMF signalling and Non(No-Tone system) (providing the <Miscellaneous Menu> <Tone System Change> field was set to "ENABLE" during the programming of the KG510). -
Page 19: Displaying Received Tone Frequencies
To view this information in the LCD display, firstly select the required channel. Then press the [SHIFT] key and then the [7] key. You will need to keep the [7] key pressed until the KG510 has cycled through the information steps. -
Page 20: Bar Graph Displays
Press the [SHIFT] key and the [2] key a second time, and the KG510 will change from the low transmit power setting to the high transmit power setting, and the " " symbol will be displayed in the third line of the LCD display. -
Page 21: Calling Party Id Display
The KG510 has the capability to display a calling radio's ID (ANI) number after being called. When the KG510 is called, "CALL" will be displayed on the fourth line of the LCD display (and continue to flash) and the calling radio's ID number will be displayed to the right of "CALL" as shown below:... -
Page 22: Emergency Caller Display
CTCSS or DCS tone. It will then automatically retransmit any received signals. When the KG510 ceases to receive a carrier frequency, or a valid CTCSS or DCS tone, it activates the <Auto TX Reset Time> timer. This will keep the KG510 repeating (for up to 9.9 seconds depending on the programming of the KG510), and allow other users with a valid CTCSS or DCS tone to access the repeater. -
Page 23: Tx Test Mode
4.17 TX Test Mode The KG510 is provided with a TX (Transmit) Test Mode. When the KG510 is placed in the TX Test Mode, it will transmit a carrier frequency modulated with a 1KHz tone on the selected active channel. It is possible to change channels while in TX Test Mode. -
Page 24: Frequency Band Test Mode
Switch the KG510 "OFF" to exit the Frequency Band Test Mode. 4.20 Starting Message When the KG510 is Switched "ON", it will display a Starting Message in the LCD display for two seconds. The default Starting Message (using all dots) is shown below: •••••••••••... -
Page 25: Serial Number Display
KYODO KG510 OPERATORS MANUAL 4.21 Serial Number Display It is possible to display the KG510's Serial Number in the LCD Display. To do so, the Serial Number must be entered into the <Configuration Menu> <Serial No.> field during the programming of the radio. -
Page 26: Hardware Error Detection
4.23 Hardware Error Detection The KG510 automatically tests for certain hardware faults or failures, and when a fault is found, it will blink the "ALM" LED display above the LCD Display and indicate the nature of the fault in the LCD...
Need help?
Do you have a question about the KG510 and is the answer not in the manual?
Questions and answers