Sirona inEos Blue Operating Instructions Manual
Dental cad/cam system
Hide thumbs
Also See for inEos Blue:
- Operaing instructions (52 pages) ,
- Operating instruction (46 pages)
Table of Contents
Advertisement
Quick Links
Download this manual
See also:
Operating Instructions
Advertisement
Table of Contents

Subscribe to Our Youtube Channel
Related Manuals for Sirona inEos Blue


Summary of Contents for Sirona inEos Blue
- Page 1 MTKOMNN kÉï=~ë=çÑW= páêçå~=aÉåí~ä=`^aL`^j=póëíÉã áåbçë=_äìÉ léÉê~íáåÖ=fåëíêìÅíáçåë båÖäáëÜ=ErpF Operating Instructions...
-
Page 2: Table Of Contents
3.1.4 Maintenance and repair ..............3.1.5 Changes to the product..............3.1.6 Accessories..................3.1.7 In case of damage................Intended use ....................Further use of Sirona Dental CAD/CAM System .......... Certification ....................Technical description....................Design and function ..................System components..................4.2.1 Components of the inEos Blue............ - Page 3 Connecting the unit to the PC ..............Switching the unit on and starting the software..........Selecting the 3D acquisition system............. Adding inEos Blue to the device configuration ..........Connecting the unit....................Connecting the inEos Blue to the PC ............Connecting the inEos Blue to the power supply...........
- Page 4 Sirona Dental Systems GmbH Operating Instructions Sirona Dental CAD/CAM System 11.3 Free scans ....................11.3.1 Preparing the model................11.3.2 Taking a scan..................11.3.3 Performing detail scans..............11.4 Rotational scans.................... 11.4.1 Preparing the model................11.4.2 Taking a scan..................11.5 Acquiring impressions ...................
-
Page 5: Dear Customer
Operating Instructions Sirona Dental CAD/CAM System Dear Customer, Dear Customer, ® Thank you for purchasing your inEos Blue from Sirona. Improper use and handling can create hazards and cause damage. Please read and follow these operating instructions carefully and always keep them within easy reach. -
Page 6: General Information
2 General information Sirona Dental Systems GmbH 2.1 Structure of the document Operating Instructions Sirona Dental CAD/CAM System General information General information CAUTION Be sure to observe all warnings! Please observe the warning and safety information provided to prevent personal injury and material damage. Any such information is highlighted by a signal word, i.e. -
Page 7: Formats And Symbols Used
Sirona Dental Systems GmbH 2 General information Operating Instructions Sirona Dental CAD/CAM System 2.1.2 Formats and symbols used Formats and symbols used The symbols and character formats used in the present manual have the following meaning: ✔ Requests you to do something. -
Page 8: Safety
Warning: inEos connected to CEREC 3 acquisition unit WARNING No acquisitions in the patient's mouth As long as an inEos Blue is connected to a CEREC 3 acquisition unit, no acquisitions may be made in the patient's mouth using the connected CEREC 3D camera. - Page 9 WARNING No acquisitions in the patient's mouth within the patient environment As long as an inEos Blue is connected to a CEREC AC acquisition unit, no acquisitions may be made in the patient's mouth using the connected CEREC Bluecam if the inEos Blue is located outside of the patient environment.
-
Page 10: Connection Of External Equipment
3.1.3 Connection of external equipment Connection of external equipment If any equipment not approved by Sirona is connected, it must comply with the applicable standards: ● EN 60 950 for information technology equipment, and ● EN 61 010-1 for laboratory equipment. -
Page 11: Intended Use
Intended use Intended use Indications for use The Sirona Dental CAD/CAM System is intended for use in partially or fully edentulous mandibles and maxillae in support of single or multiple- unit cement retained restorations. The system consists of three major parts: TiBase, inCoris mesostructure, and CAD/CAM software. -
Page 12: Certification
3 Safety Sirona Dental Systems GmbH 3.4 Certification Operating Instructions Sirona Dental CAD/CAM System Certification Certification CE mark This product bears the CE mark in accordance with the provisions of directives 2006/95/EC (Low Voltage Directive) and 2004/108/EC (EMC Directive). CAUTION... -
Page 13: Technical Description
Design and function Design and function The inEos Blue is designed as a desktop unit and consists of several components (see Chapter "System components" [ → 13]). It is powered from the standard local power network via an external power supply unit. -
Page 14: Components Of The Ineos Blue
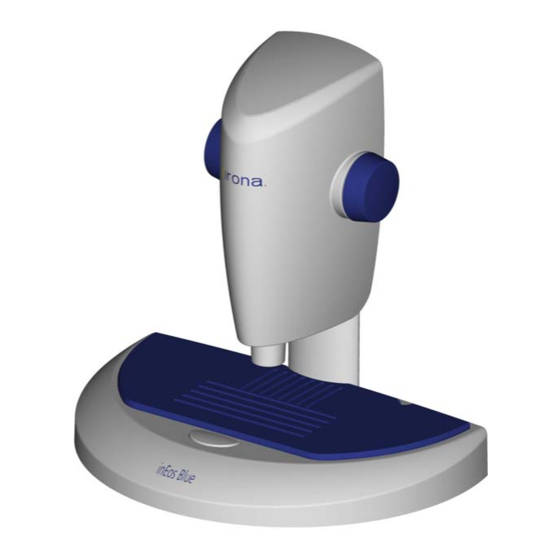
4 Technical description Sirona Dental Systems GmbH 4.2 System components Operating Instructions Sirona Dental CAD/CAM System 4.2.1 Components of the inEos Blue Components of the inEos Blue Vertical unit and front side of base plate Vertical unit Base plate Rotary knobs for height... -
Page 15: Accessories (Included In The Scope Of Supply)
Sirona Dental Systems GmbH 4 Technical description Operating Instructions Sirona Dental CAD/CAM System Rear side of base plate Main switch Supply voltage input USB port Rotation mouse 4.2.2 Accessories (included in the scope of supply) Accessories (included in the scope of supply) -
Page 16: Calibration Parts (Included In Scope Of Supply)
4 Technical description Sirona Dental Systems GmbH 4.2 System components Operating Instructions Sirona Dental CAD/CAM System Foot control 4.2.3 Calibration parts (included in scope of supply) Calibration parts (included in scope of supply) 3D acquisition system 4.2.3.1 3D acquisition system Calibration part for calibrating the 3D acquisition system. -
Page 17: Technical Data
Sirona Dental Systems GmbH 4 Technical description Operating Instructions Sirona Dental CAD/CAM System Technical data Technical data Model designation inEos Blue Power connection via power supply unit: INPUT: 100-240VAC / 47- 63Hz / 1.0 A max. permissible line voltage fluctuations: ±... -
Page 18: Transport To The Installation Site
Install inEos Blue in a protected area 3D image acquisition may be adversely affected by bright light. Set the inEos Blue up so that it is not located directly in the beam path of an extreme light source and not exposed to direct sunlight. -
Page 19: Initial Installation Of The Software
The software and drivers are installed. Connecting the unit to the PC Connecting the unit to the PC ➢ Connect the inEos Blue to the PC (see also section “Connecting the unit“ [ → 22]). 63 33 632 D3446 D3446.201.02.03.23 07.2011... -
Page 20: Switching The Unit On And Starting The Software
6 Initial installation of the software Sirona Dental Systems GmbH 6.3 Switching the unit on and starting the software Operating Instructions Sirona Dental CAD/CAM System Switching the unit on and starting the software Switching the unit on and starting the software... -
Page 21: Adding Ineos Blue To The Device Configuration
3. Click the button. The installation is now completed. Calibrating the system NOTICE Calibrating the system After installing the inEos Blue, you must calibrate the system (see the chapter entitled "Calibration" [ → 27]). 63 33 632 D3446 D3446.201.02.03.23 07.2011... -
Page 22: Connecting The Unit
Connecting the inEos Blue to the power supply Socket for power supply ➢ Connect the socket (A) of the inEos Blue to the power supply via the power supply unit included in the scope of supply. 63 33 632 D3446... -
Page 23: Connecting The Rotation Mouse
Sirona Dental Systems GmbH 7 Connecting the unit Operating Instructions Sirona Dental CAD/CAM System NOTICE Use a grounded power outlet The power supply unit must be connected to a grounded power outlet. Connecting the rotation mouse Connecting the rotation mouse... -
Page 24: Controls And Displays
Controls and displays Controls and displays Controls on the inEos Blue Controls on the inEos Blue The following controls are available on the inEos Blue: Rotary knobs for height adjustment (focusing) of the lens on the vertical unit Start button... -
Page 25: Ready Led
Sirona Dental Systems GmbH 8 Controls and displays Operating Instructions Sirona Dental CAD/CAM System Ready LED Ready LED The blue Ready LED indicates the operating status of the unit: LED not lit: Unit is switched off LED flashes: Unit is switched on and ready for operation 63 33 632 D3446 D3446.201.02.03.23 07.2011... -
Page 26: Switching The System On
Switching the system on Switching the inEos Blue on 1. Switch on the PC. 2. Switch the inEos Blue on at the main switch. Starting the software ➢ Start the software at the PC via the Windows start menu. 63 33 632 D3446... -
Page 27: Calibration
● XYZ axis alignment NOTICE Calibrate prior to initial startup Prior to initial startup of the inEos Blue, you must perform a full calibration. No further calibrations are usually required afterwards. If you remove the shifting plate, the X-Y-Z alignment must be recalibrated after reassembling the unit. -
Page 28: Calibrating The Xyz Axis Alignment
10 Calibration Sirona Dental Systems GmbH 10.3 Calibrating the XYZ axis alignment Operating Instructions Sirona Dental CAD/CAM System The window for calibrating the 3D camera system opens. You will be prompted to attach the calibration part. 2. Fasten the calibration part to the left side of the cone with the clip. - Page 29 Sirona Dental Systems GmbH 10 Calibration Operating Instructions Sirona Dental CAD/CAM System 2. Adjust the spacer as shown in the illustration between the calibration plate and the cone and move the vertical unit into the bottom position. Remove the spacer.
- Page 30 10 Calibration Sirona Dental Systems GmbH 10.3 Calibrating the XYZ axis alignment Operating Instructions Sirona Dental CAD/CAM System Step 4 Step 4 1. Position the calibration plate in position 4. Note the position of the beveled corner. The grid balls must be seated as shown in the illustration.
- Page 31 Sirona Dental Systems GmbH 10 Calibration Operating Instructions Sirona Dental CAD/CAM System Step 6 Step 6 1. Turn the calibration plate counterclockwise 90° and place it in position 3. Note the position of the beveled corner. The grid balls must be seated as shown in the illustration.
-
Page 32: Performing 3D Acquisition
The following are suitable for this purpose: CEREC Optispray (REF 61 44 179) For scanning with inEos Blue, we recommend using CEREC Stone BC plaster (REF 62 37 502). ● When preparing saw-cut models, be careful not to mill off the single Saw-cut etc. -
Page 33: Focusing The Image
Sirona Dental Systems GmbH 11 Performing 3D acquisition Operating Instructions Sirona Dental CAD/CAM System 11.1.2 Focusing the image Focusing the image ➢ Turn the rotary buttons for height adjustment. The sharpness adjustment changes. The image is then sharpened if the relevant areas are not red. -
Page 34: Operating The Foot Switch
Operating the foot switch Operating the foot switch You can use the foot switch instead of the start button of the inEos Blue. Link to inEos Blue To do this, connect the foot switch as described in the chapter entitled "Connecting the foot switch"... -
Page 35: Free Scans
Focusing the image [ → 33]. Do not touch the rotary knobs during the image acquisition process. 5. Single-click the Start button of the inEos Blue. The image is acquired. 6. Add additional scans from adjacent areas: Move the model in the desired direction by one stop position and repeat steps 4 to 5. -
Page 36: Preparing The Model
If you want to interrupt the automatic scan, single-click the Start button of the inEos Blue. The crosshairs turn green. Use the Start button to acquire additional exposures. -
Page 37: Performing Detail Scans
3. Focus the image with the rotary knobs for height adjustment; see Focusing the image [ → 33]. 4. Single-click the Start button of the inEos Blue. The first scan is taken and the crosshairs are displayed blue. 5. Add additional scans from adjacent areas: Move the model freely on the table until you have reached the next acquisition position. -
Page 38: Rotational Scans
4. Focus the image with the rotary knobs for height adjustment; see Focusing the image [ → 33]. 5. Click the Start button of the inEos Blue. 8 single scans are taken in rapid succession. Tip: You can accelerate the computing process. - Page 39 Sirona Dental Systems GmbH 11 Performing 3D acquisition Operating Instructions Sirona Dental CAD/CAM System Preparing an impression 1. Apply a matte finishing to the areas to be acquired to prevent reflections. An example of a matting agent is CEREC Optispray.
-
Page 40: Examples
2. Tighten the fastening screw until the model is fixed in place. 3. Align the platform in such a way that the model is horizontal. 4. Place the model holder on the shifting plate of the inEos Blue. The oral side points to the column of the inEos Blue. - Page 41 4. Focus the image with the rotary knobs for height adjustment; see Focusing the image [ → 33]. 5. Single-click the Start button of the inEos Blue to start the automatic scan. The first scan is taken and the crosshairs are displayed blue. If you shift the model or re-focus it, additional scans will automatically be generated.
-
Page 42: 2Rotational Scans
In this way, you can determine whether the information is complete. 2. Click the Start button of the inEos Blue twice to create single scans. The overview image is supplemented. 3. Repeat steps 1 and 2 until all required areas have been covered. -
Page 43: 3Acquiring An Antagonist
2. Focus the image with the rotary knobs for height adjustment; see Focusing the image [ → 33]. 3. Single-click the Start button of the inEos Blue to start the scan. Eight scans are acquired and included in the preparation. -
Page 44: 4Bite Registration
11 Performing 3D acquisition Sirona Dental Systems GmbH 11.6 Examples Operating Instructions Sirona Dental CAD/CAM System 8. To stop acquisition, single-click the Start button of the inEos Blue. "Buccal scan" Tip: If you selected as the bite registration system, you also have to acquire the buccal parts of the antagonist. -
Page 45: 6Terminating Acquisition
Operating Instructions Sirona Dental CAD/CAM System 2. Fasten the models in the model holder and place it on the shifting plate of the inEos Blue. The occlusal plane is vertical and points toward the column. Scan a location near the preparation. -
Page 46: Exposure Of An Inlay
3. Align the platform so that the model is positioned horizontally to the model holder plate. 4. Place the model holder on the shifting plate of the inEos Blue. The oral side points to the column of the inEos Blue. - Page 47 Start at the distal end. Be careful to include the adjacent teeth in the scan. 4. Focus the image with the rotary knobs for height adjustment. 5. Single-click the Start button of the inEos Blue to start the automatic scan. The first scan is taken and the crosshairs are displayed blue. If you shift the model or re-focus it, additional scans will automatically be generated.
- Page 48 This location must overlap roughly one half of the image previously scanned. 7. To stop acquisition, single-click the Start button of the inEos Blue. Acquiring detail scans 1. Tilt the model slightly to acquire the areas of the preparations that have not yet been exposed.
-
Page 49: 2Considering The Antagonist
11 Performing 3D acquisition Operating Instructions Sirona Dental CAD/CAM System 3. Click the Start button of the inEos Blue twice to create single scans. The overview image is supplemented. 4. Repeat steps 1 and 2 until all required areas have been covered. -
Page 50: Cleaning And Care
12 Cleaning and care Sirona Dental Systems GmbH 12.1 Care of the 3D camera system Operating Instructions Sirona Dental CAD/CAM System Cleaning and care Cleaning and care 12.1 Care of the 3D camera system Care of the 3D camera system The 3D camera system is a very sensitive optical device and must therefore be handled with the utmost care. - Page 52 tÉ=êÉëÉêîÉ=íÜÉ=êáÖÜí=íç=ã~âÉ=~åó=~äíÉê~íáçåë=ïÜáÅÜ=ã~ó=ÄÉ=êÉèìáêÉÇ=ÇìÉ=íç=íÉÅÜåáÅ~ä=áãéêçîÉãÉåíëK «=páêçå~=aÉåí~ä=póëíÉãë=dãÄe=OMNMJOMNN péê~ÅÜÉW ÉåÖäáëÅÜ=ErpF mêáåíÉÇ=áå=dÉêã~åó aPQQSKOMNKMOKMPKOP MTKOMNN ûKJkêKW= NNQ=QRS páêçå~=aÉåí~ä=póëíÉãë=dãÄe áå=íÜÉ=rp^W SP=PP=SPO=aPQQS c~Äêáâëíê~≈É=PN páêçå~=aÉåí~ä=póëíÉãë=ii` lêÇÉê=kç SQSOR=_ÉåëÜÉáã QUPR=páêçå~=aêáîÉI=pìáíÉ=NMM dÉêã~åó `Ü~êäçííÉI=k`=OUOTP ïïïKëáêçå~KÅçã...
Need help?
Do you have a question about the inEos Blue and is the answer not in the manual?
Questions and answers