Transition Networks SM8TAT2SA Install Manual
Smart managed switches, 8-/16-/24-port
gigabit poe+, 2-port 100/1000 sfp
Hide thumbs
Also See for SM8TAT2SA:
- Web user manual (249 pages) ,
- Cli reference manual (255 pages) ,
- Quick start manual (2 pages)

Related Manuals for Transition Networks SM8TAT2SA


Summary of Contents for Transition Networks SM8TAT2SA
- Page 1 SM8TAT2SA, SM16TAT2SA, and SM24TAT2SA Smart Managed Switches, 8-/16-/24-Port Gigabit PoE+, 2-Port 100/1000 SFP Install Guide 33716 Rev. A 33716 Rev. A https://www.transition.com Page 1 of 28...
-
Page 2: Contact Information
All trademarks and registered trademarks are the property of their respective owners. Copyright Notice/Restrictions Copyright © 2017 Transition Networks. All rights reserved. No part of this work may be reproduced or used in any form or by any means (graphic, electronic or mechanical) without written permission from Transition Networks. -
Page 3: Cautions And Warnings
Transition Networks SMxTAT2SA Install Guide Cautions and Warnings Definitions Cautions indicate that there is the possibility of poor equipment performance or potential damage to the equipment. Warnings indicate that there is the possibility of injury to person. Cautions and Warnings appear here and may appear throughout this manual where appropriate. Failure to read and understand the information identified by this symbol could result in poor equipment performance, damage to the equipment, or injury to persons. -
Page 4: Table Of Contents
Transition Networks SMxTAT2SA Install Guide Contents Chapter 1 Introduction ........................... 6 Key Features ..............................6 Benefits ................................6 Specifications ..............................7 Software Features ............................ 8 About This Manual ............................11 Related Manuals ............................11 Chapter 2 Introduction and Product Description .................. 12 Overview ................................ - Page 5 FCC Regulations ............................25 Canadian Regulations ..........................25 Declaration of Conformity (DoC) ....................... 26 SM8TAT2SA EU Compliance ........................26 S16TAT2SA and S24TAT2SA EU Compliance ..................... 26 SMxTAT2SA 47 CFR FCC Rules and Regulations ..................26 Electrical Safety Warnings ..........................27 Electrical Safety ............................
-
Page 6: Chapter 1 Introduction
The SMxTAT2SA delivers 8/16/24 (10M/100M/1G) RJ45 ports with 8 PoE+ ports (supports 802.3 at/af, and total up to 130W on the SM8TAT2SA) and 2 GbE SFP ports. The SMxTAT2SA provides high hardware performance and environment flexibility for SMBs and Enterprises. -
Page 7: Specifications
Slots. Includes 19” rack mount brackets and country specific power cord. Port Configuration Total Ports RJ45 (10M/100M/1G) Uplinks (100M/1G) Telnet SM8TAT2SA = 10 2 SFP Via any RJ45 port SM16TAT2SA = 18 2 SFP Via any RJ45 port SM24TAT2SA = 26... -
Page 8: Software Features
Transition Networks SMxTAT2SA Install Guide Dimensions, Weights, Mounting Dimensions (WxHxD) Weight Mounting Type Model Millimeters Inches Kilograms Pounds SM8TAT2SA 220 x 44 x 242 8.6 x 1.7 x 9.5 <2 <4.4 Desktop, Wall, Rack SM16TAT2SA 442x 44x 211 17.4x 1.7x 8.3 <3... - Page 9 Transition Networks SMxTAT2SA Install Guide IGMP limits bandwidth-intensive multicast traffic to only the requesters. Supports IGMP v1/v2 Snooping 1024 multicast groups. IGMP querier is used to support a Layer 2 multicast domain of snooping switches in IGMP Querier the absence of a multicast router...
- Page 10 Transition Networks SMxTAT2SA Install Guide IEEE 802.1ab Used by network devices for advertising their identities, capabilities, and neighbors on (LLDP) an IEEE 802ab local area network. Support LLDP-MED extensions. Web GUI Built-in switch configuration utility for browser-based device configuration Interface...
-
Page 11: About This Manual
(logon required). For Application Notes, Brochures, Data Sheets, Specifications, etc. go to the Support Library logon required). Note that this manual provides links to third party web sites for which Transition Networks is not responsible. 33716 Rev. A https://www.transition.com... -
Page 12: Chapter 2 Introduction And Product Description
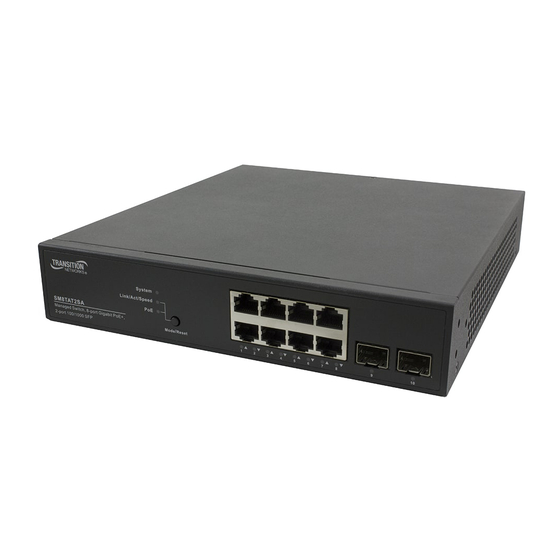
Mode/Reset button operation and functions. Front and Back Panels The front panels are similar except for port counts. The back panels are similar except for overall width. Figure 1: SM8TAT2SA Front and Back Panels Figure 2: SM16TAT2SA Front and Back Panels 33716 Rev. A https://www.transition.com... - Page 13 Transition Networks SMxTAT2SA Install Guide Figure 3: SM24TAT2SA Front and Back Panels 33716 Rev. A https://www.transition.com Page 13 of 28...
-
Page 14: Led Descriptions
Transition Networks SMxTAT2SA Install Guide LED Descriptions The LEDs on the front panel provide switch status checking and monitoring. There are three types of LEDs as follows: System LED Indicates if the switch is powered up correctly, indicates if there is a system alarm triggered for troubleshooting. - Page 15 Transition Networks SMxTAT2SA Install Guide By pressing the Mode/Reset button for less than 2 seconds to change LED modes (Link/Act/Speed Mode or PoE Mode) you can check the port status by reading the LED behaviors per the table below. Table 3: Port Status LEDs...
-
Page 16: Mode/Reset Button
Transition Networks SMxTAT2SA Install Guide When PoE Mode LED Lit Color State Description Green The port is enabled and supplying power to connected device. An abnormal state, such as overload status, has been detected in the Amber switch. RJ45 Ports The port has no active network cable connected, or it is not connected a PoE PD device. -
Page 17: Chapter 3 Installation
Transition Networks SMxTAT2SA Install Guide Chapter 3 Installation Package Contents The Switch AC Power cord (country specific) Four adhesive rubber feet Printed Quick Start Guide 19” Rack Mount brackets Caution: The switch is an indoor device. If it is to be used with outdoor devices such as outdoor IP cameras or outdoor Wi-Fi APs, then you are strongly suggested to install a surge protector or surge suppressor in order to protect the switch. -
Page 18: Mounting The Switch On Desk Or Shelf
Transition Networks SMxTAT2SA Install Guide Mounting the Switch on Desk or Shelf Step 1: Verify that the workbench is sturdy and reliably grounded. Step 2: Attach the four adhesive rubber feet to the bottom of the switch. Figure 6: Attaching the Rubber Feet 33716 Rev. -
Page 19: Mounting The Switch In A 19-Inch Rack
Transition Networks SMxTAT2SA Install Guide Mounting the Switch in a 19-inch Rack Step 1: Attach the mounting brackets to both sides of the chassis. Insert screws and tighten then with a screwdriver to secure the brackets. Figure 7: Attaching Brackets to the Switch Step 2: Place the switch on a rack shelf in the rack. -
Page 20: Connecting The Ac Power Cord
Note: With Mode set to Auto these Copper SFPs can be used: TN-SFP-T-MG, TN-GLC-T-MG, and TN-GLC-T. Note: see the related SFP device manual for important Safety warnings. See the Transition Networks page for our full line of SFP transceivers. Step 1: Insert the module into the SFP port. -
Page 21: Chapter 4 Initial Switch Configuration
Transition Networks SMxTAT2SA Install Guide Chapter 4 Initial Switch Configuration Initial Switch Configuration Using Web Browsers When you power up the switch the first time, a First Time Wizard is presented. On subsequent power ups, you can perform the initial switch configuration using a web browser. See the Quick Start Guide for First Time Wizard information. - Page 22 Transition Networks SMxTAT2SA Install Guide 255.255.255.0), and Default gateway that corresponds with your network setup. Then enter your Preferred and Alternate DNS server addresses. Click OK to change the PC’s IP address. Power up the switch to be initially configured, and wait until it has finished its start-up processes.
-
Page 23: Chapter 5 Troubleshooting, Warranty, Support And Compliance Information
Transition Networks SMxTAT2SA Install Guide Chapter 5 Troubleshooting, Warranty, Support and Compliance Information Troubleshooting The following table provides steps to troubleshoot problems by taking actions based on the suggested solutions. Table 5: Troubleshooting Procedure Symptom Possible Cause Suggested Solution 1. Check if correct power cord is connected firmly to the switch and to the AC outlet socket. -
Page 24: Recording Device And System Information
After performing the troubleshooting procedures, and before calling or emailing Technical Support, please record as much information as possible in order to help the Transition Networks Tech Support Specialist. Select the SMxTAT2SA Configuration > System > Information menu path. From the CLI, use the show commands needed to gather the information below or as requested by the TN Support Specialist. -
Page 25: Limited Lifetime Warranty
Transition Networks SMxTAT2SA Install Guide Limited Lifetime Warranty To return a defective product for warranty coverage, contact Transition Networks’ technical support department for a return authorization number. Contact Us Technical Support Technical support is available 24-hours a day US and Canada: 1-800-260-1312... -
Page 26: Declaration Of Conformity (Doc)
Transition Networks SMxTAT2SA Install Guide Declaration of Conformity (DoC) SM8TAT2SA EU Compliance The equipment is in accordance with the procedures as given in European Council Directive 2014/30/EU. The equipment Passed the test performed according to European Standard EN 55032:2012/AC:2013 Class A, EN61000-3-2:2014, EN 61000-3-3:2013 and EN 55024:2010 (IEC 61000-4-2 Edition 2.0 2008-12,... -
Page 27: Electrical Safety Warnings
Transition Networks SMxTAT2SA Install Guide Electrical Safety Warnings Electrical Safety IMPORTANT: This equipment must be installed in accordance with safety precautions. Elektrische Sicherheit WICHTIG: Für die Installation dieses Gerätes ist die Einhaltung von Sicherheitsvorkehrungen erforderlich. Elektrisk sikkerhed VIGTIGT: Dette udstyr skal installeres i overensstemmelse med sikkerhedsadvarslerne. -
Page 28: 33716 Rev. A Https://Www.transition.com
Minnetonka, MN 55343, U.S.A. tel: +1.952.941.7600 | toll free: 1.800.526.9267 | fax: 952.941.2322 sales@transition.com techsupport@transition.com customerservice@transition.com Copyright © 2017 Transition Networks. All rights reserved. Printed in the U.S.A. SMxTAT2SA Install Guide, 33716 Rev. A 33716 Rev. A https://www.transition.com Page 28 of 28...
Need help?
Do you have a question about the SM8TAT2SA and is the answer not in the manual?
Questions and answers