Table of Contents
Advertisement
Advertisement
Table of Contents

Subscribe to Our Youtube Channel
Summary of Contents for XBody Newave
- Page 1 USER MANUAL...
-
Page 2: Table Of Contents
Description of the Device and Functional Characteristics ................3 Device and Accessories ........................... 3 Safety Guide What should never be done with the XBody Newave ................5 Usage is contraindicated for the following applications..............5 Safety regulations ............................6 Precautions ................................ 6 Training intentions ............................ -
Page 3: Preface
You will also be given valuable maintenance tips to apply to your Newave to keep it in top operating condition. At the end of the manual you are going to find information related to Newave servicing and how to order replacements of worn or broken accessories. -
Page 4: General Description
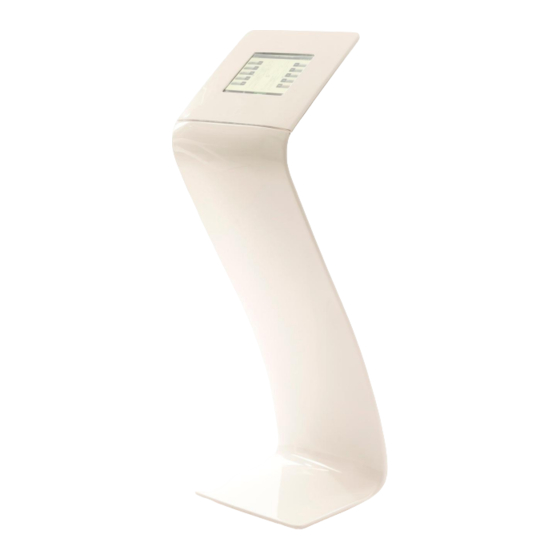
The various types of muscle work that the XBody Newave can impose are able to improve or facilitate muscle performance. - Page 5 User Manual Version: 1.7 XBody Newave machine head XBody Newave machine leg (port/standard) Spiral cable User Manual XBody Newave standard machine XBody Newave port machine Spiral cable (assembled) (assembled) The products shown on the pictures are illustrations similar to the products ordered. The delivered products might differ very slightly in appearance to those shown in the photo.
-
Page 6: Safety Guide
The safety regulations related to the Training can be found in this section. Be aware that improper use of this equipment can cause injury. XBody Hungary LLC does not take the responsibility where user negligence or improper use of the equipment has occurred. -
Page 7: Safety Regulations
The head can only be plugged into the power supply cord that is inside the leg. Do not connect it to another power source. Only the XBody USB drive – which is provided by XBody Hungary LLC – can be used with the device. -
Page 8: Training Intentions
If the client is feeling unwell inform a healthcare organization after disconnecting the client from the machine and inform XBody LLC about the incident. The first training should be started with low intensity. The intensity should be increased gradually according to your physicality. -
Page 9: Adverse Reactions
User Manual Version: 1.7 decreased to avoid sudden, overloaded (or painful) muscle contraction. After the position is acquired the intensities on the muscles pressured against the floor should be increased to the desired level gradually. The intensities of the muscle groups can only be set during the impulse periods, not in the breaks. -
Page 10: Preparing For The First Use
User Manual Version: 1.7 Preparing for the first use The following sections will guide you through the descriptions of the machine and the steps that must be done in order to set up everything for the training. Preparation of the machine for the first use Note: The assembly preparation steps covered below can be reviewed at any time by accessing www.xbodyworld.com/set-up/ The serial number of the device has to be given prior having access to the content. - Page 11 User Manual Version: 1.7 The assembled machine with the standard leg The machine assembled using the port leg should be placed on a table or a fixed stand. This is a smaller leg variant. The assembled machine with the port leg For the first step the leg should be placed on solid ground right after unpacking.
- Page 12 On the back side of the head you can find an On/Off button, a USB port and a parallel port. Only an XBody USB drive can be plugged into the device, which is provided by XBody Hungary LLC. With the help of the USB drive, the training statistics can be exported.
-
Page 13: Cables
Cables The spiral cable is manufactured by XBody Hungary LLC and is uniquely identified. It contains an NFC chip which carries the same information as the labeling on the housing of the connector. It states the type of the cable and the date of manufacturing. -
Page 14: Using The Software
The touch screen makes it very easy to use the XBody Newave trainer with the help of the different GUI views, which are currently under discussion. In this chapter the GUI is discussed in detail in order to reveal the functionality of the windows that can occur and present the navigation logic among these. -
Page 15: Detailed Description Of The Software
User Manual Version: 1.7 Program selector Manual settings Strength-muscle builder Cardiovascular Relax Video selector Video program In the next chapters these windows and their functions are discussed in detail. Detailed description of the software The software starts with the Login screen window which can be seen below. In order to access the functions of the software a successful login is required. - Page 16 User Manual Version: 1.7 After a user (administrator or trainer) is selected a PIN code is requested for authentication. To log in, the four-digit password (which is –by default– 1234 for the Administrator) can be typed with the numerical keyboard on the screen. If the given password is correct you can move on to the next screen by pressing the OK button.
- Page 17 User Manual Version: 1.7 As it could be seen from the overview, there are two modes available depending on the login: the Administrator mode and the Trainer mode. In the Trainer mode there is an extra mode called Presentation mode. First let’s discuss the available options of the Administrator mode in detail. 5.2.1 The Administrator mode After a successful login as an administrator the Administrative tasks window is displayed.
- Page 18 User Manual Version: 1.7 The left-hand side of this window is the same as it was on the Login screen window, while the right- hand side shows some information of the selected trainer. On the right side a Plus (+) button makes it possible to add a new trainer.
- Page 19 User Manual Version: 1.7 After confirming the pin code again the new trainer is registered and added to the list on the left side. An existing trainer can be edited by pressing the Edit button. During editing, a trainer can be deleted by pressing the Delete button. The window can be left by pressing the Back button at the bottom left corner of the screen.
- Page 20 User Manual Version: 1.7 The left-hand side of this window the available pass types are listed, while the right-hand side shows some information of the selected pass type. On the right side a Plus (+) button makes it possible to add a new trainer.
- Page 21 User Manual Version: 1.7 During editing, a pass type can be deleted by pressing the Delete button. The window can be left by pressing the Back button at the bottom left corner of the screen. The Statistics option leads to the Statistics window. Here the administrator can choose among the registered trainers, and have a look at on their statistics.
- Page 22 User Manual Version: 1.7 The Details button at the top right corner reveals the list of the corresponding trainings, where the trainer, the client, the training start time (YYYY-MM-DD HH:MM:SS), and the duration of each training occasion (MM:SS) are displayed. The line colors mean different things. The black colored lines are regular trainings, these produce the income.
- Page 23 User Manual Version: 1.7 The window can be left by pressing the Back button at the bottom left corner of the screen. The System option leads to the System window. The System menu contains version information about the product and a reset button that sets the machine back to its factory state. The administrator can also decide whether the presentation user should be enabled for each trainer or not.
- Page 24 User Manual Version: 1.7 The window can be left by pressing the Back button at the bottom left corner of the screen. 5.2.2 The Trainer mode After logging in with a trainer the Trainer mode is available and the Client selector window is shown. You can use training mode in two different ways.
- Page 25 User Manual Version: 1.7 On the right side a Plus (+) button makes it possible to add a new trainer. For registering a new customer the name, a valid e-mail address (as described before) and the birth date should be added. To type in the data, the virtual keyboard can be opened by tapping one of the input fields.
- Page 26 User Manual Version: 1.7 Here the sizes of the different clothing items can be given. The previous page can be accessed by pressing the Left arrow button, while more clothing sizes can be specified on the next page. An existing client can be edited by pressing the Edit button. Page: 25 / 47...
- Page 27 User Manual Version: 1.7 During editing, a client can be deleted by pressing the Delete button. In order to begin the training the selected client must buy a pass and therefore pay for the training. In Presentation mode there is no need to buy a pass, the training can begin directly since it is an opportunity to free trainings for presentation purposes.
- Page 28 User Manual Version: 1.7 The trainer can edit the data of the clients and buy new passes if desired. At the top right corner a Details button can be seen, which reveals personal data and the sizes of the different clothing items if they are given before.
- Page 29 User Manual Version: 1.7 Video Program: There are 10 predefined videos which can be used as a virtual guide for the training. Each video consists of a muscle builder and a cardiovascular part. The program selector window is constructed from program selector buttons that can be used to select the appropriate training program.
- Page 30 User Manual Version: 1.7 In this window (with any training program) you can see 10 different buttons on the left-hand and right-hand sides of the screen. Each is connected to a channel regulator which can be used to increase or decrease the intensity of the muscle group. The regulator can be used as a Slider or it can be fine-tuned with the Plus (+) and the Minus (-) buttons.
- Page 31 User Manual Version: 1.7 A trainer shall start the training with setting the channel intensities to a moderate level in the beginning of the training. Since the intensity can be increased during the stimulation period only, the trainer shall prepare to do the increase during the stimulation period. The stimulation can be stopped any time by pressing the Stop button and the training can be continued by pressing the Start button again.
- Page 32 User Manual Version: 1.7 Each parameter input value can be increased or decreased within a limited range depending on the program type. In Manual settings program every parameter can be set within their whole range. The available parameters and their whole range are the following: Program time: The time of the training in minutes.
- Page 33 User Manual Version: 1.7 Even so if continuous stimulation is used and the trainer is trying to set the frequency above 10 Hz, a warning message is displayed: If the action was unintentional this protects the client by declining the action on the popup window. If the action is intentional and the trainer is aware of the risks the dialog window shall be can be confirmed.
- Page 34 User Manual Version: 1.7 The Strength-muscle builder program uses the same parameters as the Manual settings program by default: The difference here is that the impulse pause is limited between 1-10 seconds thus continuous impulse cannot be set in this program. Also the impulse frequency is constrained between 50-85 Hertz.
- Page 35 A video can be selected by clicking on its icon. In the case of the women and men training plans the client can check the look of the selected body type on an appropriate person in XBody underwear. Page: 34 / 47...
- Page 36 User Manual Version: 1.7 Pressing the Begin button after a video is selected appears the Video training window . This window is very similar to a regular Training window but there are video control buttons on the bottom of the window. To begin the training the Play button should be pressed. A small video window appears at the center.
- Page 37 User Manual Version: 1.7 The stimulation and the training time can be suspended by pressing the Pause button or stopped anytime by pressing the Stop button which will end the training. When resuming the training after a pause the video is started from the beginning of the current exercise. The Full screen button next to the Back button makes the video appear in full screen mode which is helpful if the intensity parameters of the electrodes are set.
-
Page 38: Maintenance Information
Storage and transportation Storage of the device shall be in a dry place in ambient temperature. Two XBody Newave packages can be stored on the top of each other, and five head packages can be racked. Transportation can be done only in the original package. -
Page 39: Troubleshooting
If you don’t feel anything set the master to be 50 %. If still nothing then to 60 %. If still nothing, try it with another spiral cable. If still nothing, try it with another suit cable. If the impulse still cannot be felt, contact XBody Helpdesk. Page: 38 / 47... -
Page 40: Output Specifications
DC/DC converters on the channels. Essential performance The section describes the waveform and the calculations on the maximal outputs of the XBody Nevawe Med machine. This section also references the requirements of the standard according to essential performance and the referencing against their implementation in the XBody Newave. - Page 41 User Manual Version: 1.7 The depth of the impulse is given for one peak of the wave, so at its maximal value one pulse gives 4*400=1600 of simulation (using the four peaks of the pulse). At 100Hz this means that during 1 sec a total of 100*1.600=160 msec is the time of stimulation, which gives a D=16% duty cycle.
- Page 42 User Manual Version: 1.7 8.1.4 Hardware protection for stimulation The design of the electronics has a 10mA current limit on the DC output of the stimulation channel. A capacitor is located after the limit in order to provide the necessary stimulation power. As a last limit a 138mA current limit and with a 4.7 Ohm resistance is used, which applies as a final regulation on the current output.
-
Page 43: Service Support
User Manual Version: 1.7 Service support XBody helpdesk is available from Monday to Friday between 8:00 and 15:00 (GMT+1) via the following phone number or e-mail: +36-20-409-64-00 info@xbodytraining.com Service information In case you send our products to be checked or maintained, please follow the following steps: If possible use the original wrapping material used at the delivery. -
Page 44: Warranty
Damages caused by electricity, water, fire, high voltage, vis major or war as well as violent behavior, improper connection to the system, improper airing or other causes for which not the XBody Hungary LLC responsible for. Damaged machine or accessories which were got into that condition because of an accident, own or a 3 person’s fault, or because improper use as well as damages caused by products... -
Page 45: Labeling
Old machines must not be thrown among the domestic waste. Please follow the rules for the waste collection in that area or get into contact with the helpdesk of XBody, we take over the waste handling according to the law. The type of the output of the power supply (direct current). -
Page 46: Technical Data
User Manual Version: 1.7 12 Technical data General data Name of the product XBody Newave Function Nerve and muscle stimulating machine Producer XBody Hungary LLC Date of manufacture Serial number contains the date of manufacture (First 3 characters are the year, following 2 is the month, last 2 is the day, e.g. - Page 47 User Manual Version: 1.7 Newave head parameters Input voltage 12 VDC Maximum power 25 W Quantity of programs 4 + 10 programs; 10 output channels Output voltage per channel 0 – 50 V Maximum impulse per channel 4.05 W ( at 500...
Need help?
Do you have a question about the Newave and is the answer not in the manual?
Questions and answers