
Subscribe to Our Youtube Channel
Related Manuals for Value Hobby screamer 40


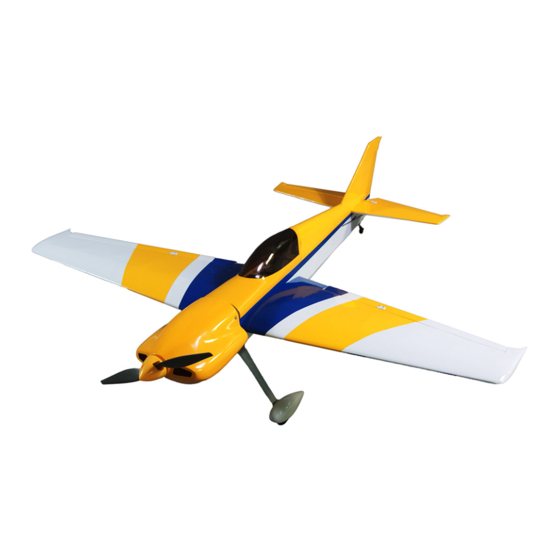
Summary of Contents for Value Hobby screamer 40
- Page 1 Screamer 40 Almost‐Ready‐to‐Fly INSTRUCITION MANUAL Specifications Wingspan: 49in (1250mm) Length: 47in (1200mm) Wing Area: 465sq in (30sq dm) Flying Weight (EP): Approx. 4.7lbs (2100g)
-
Page 2: Dear Customer
AMA sanctioned sites. Value Hobby guarantees this model to be free of defects in materials and workmanship at the date of purchase. This warranty does not cover any parts damaged by use or modifications. In no way shall Value Hobby’s liability exceed the original cost of the purchased model. -
Page 3: Safety In Flying
Examination Unpack your airplane and examine the components. Check for damage of any kind. If you see any damage, please contact Value Hobby immediately. Covering Your airplane was packed in plastic at the factory without any wrinkles in the covering. You may notice some wrinkles now;... -
Page 4: Recommended Radio Equipment
www.valuehobby.com/js-40.html RECOMMENDED RADIO EQUIPMENT Product Quantity Radio Flysky I6 6CH transmitter and receiver set FLY-RC-4572 5(nitro) Servo Towerpro MG996R standard servo TWP-SV-0372 4 (electric) Y-Harness Universal Servo Y-Harness 12-Inch (Futaba "J" and JR Compatible) AMS-AC-0870 RECOMMENDED POWER SETUP Product Motor Gforce G32 4250-800KV brushless motor XYH-MT-0177 Hobbywing Flyfun 60A OPTO Brushless ESC... - Page 5 www.valuehobby.com/js-40.html Main Parts of Airplane Cowling x 1 Fuselage w/ canopy x 1 Wing panel x 2 Horizontal stabilizer x 1 Elevator half x 2 Fin x 1 Rudder x 1...
- Page 6 www.valuehobby.com/js-40.html Small Parts and Accessories Cowling mounting screw M3 x 12 4pcs Rail mounts for engine 1pair Mounting screws for rail mounts M4 x 20mm 4pcs M4 washer 10pcs Motor box 1pcs Mounting screw for motor and motor box: socket head screw M4 x 16 8pcs Lock nut for motor M4 4pcs M4 washer for motor 4pcs Fuel tank 240cc 1pcs...
-
Page 7: Section1. Aileron Installation
www.valuehobby.com/js-40.html Section1. Aileron Installation Section2. Aileron Servo & Linkage Installation Step1. Use the hobby knife to remove the covering Step1. Prepare an aileron servo by installing servo for the servo opening. horn, grommets and brass eyelets. Step2. Put the servo in position on the servo hatch, Step2. - Page 8 www.valuehobby.com/js-40.html Step4. Install the servo onto the servo mounting Step7. Slide the push rod through the pushrod using the screws provide with the servo. connector and position the control horn on the aileron. Use a pen to mark the mounting holes for the control horn.
- Page 9 www.valuehobby.com/js-40.html Step9. With the aileron centered, tighten the screw Section3. Stabilizer and Elevator Installation on the push rod connector. Step1. Remove the covering from the fuselage as shown. Step10. Cut off the excess push rod. Step2. Slide the horizontal stabilizer into the slot in the fuselage, with the leading edge pushed forward in the slot.
- Page 10 www.valuehobby.com/js-40.html Step3 Check the distance from each stabilizer tip to Step5. Remove the stabilizer from the fuselage, each wing tip. These measurements must also be and use hobby knife to remove the coverings along equal. the line drawn in the previous step. Step4 The last alignment step is making sure the wing and stabilizer are parallel.
- Page 11 www.valuehobby.com/js-40.html Step7. Apply the epoxy to the exposed area on the Step10. Drill the hole on the elevator for the bottom and top of the stabilizer, slide the stabilizer elevator joiner wire. back into the slot and double-check the alignment of the stabilizer.
- Page 12 www.valuehobby.com/js-40.html Section4. Vertical Tail and Tailwheel Step4. Apply epoxy in the groove and the hole for the tail gear wire, and then glue the tailwheel Installation assembly to the rudder. Step1. Insert three CA hinges into the slots in the rudder.
-
Page 13: Section5. Elevator And Rudder Servo Installation
www.valuehobby.com/js-40.html Section5. Elevator and Rudder Servo Section6. Main Landing Gear Installation Installation Step1. Use two wheel collars to install the wheel to Step1. Insert the elevator pushrod and rudder the M6 x 35mm axle. pushrod (1.8 x 600mm) into the guide tube in the fuselage. - Page 14 www.valuehobby.com/js-40.html Step4. Use a M2.5 x 12 self-tapping screw to Section7. Wing Installation secure the wheel pant to the landing gear. Step1. Attach the assembled wing panels to the fuselage using the aluminum wing joiner. Step5 Repeat steps through 1 to 4 for the remaining wheel.
-
Page 15: Section8. Motor Installation
www.valuehobby.com/js-40.html Section8. Motor Installation Step5. Use four M3 x 12mm screws to secure the cowling to the fuselage. Step1. Prepare a motor with prop adapter installed Step2. Install the motor box onto the fuselage using four M4 x 16mm socket head screws. Step6. - Page 16 www.valuehobby.com/js-40.html Section9 Recommended CG Range test your radio For the first flights, the recommended center of Step1. Before fly, be sure to range check your radio gravity location is 115mm (4-1/2inch) behind the as manufacturer’s instruction manual of your leading edge of the wing against the fuselage. radios Step2.
- Page 17 2016-07-11...
Need help?
Do you have a question about the screamer 40 and is the answer not in the manual?
Questions and answers