
Related Manuals for Value Hobby Easy Stik 15 EPP ARF


Summary of Contents for Value Hobby Easy Stik 15 EPP ARF
-
Page 1: Instruction Manual
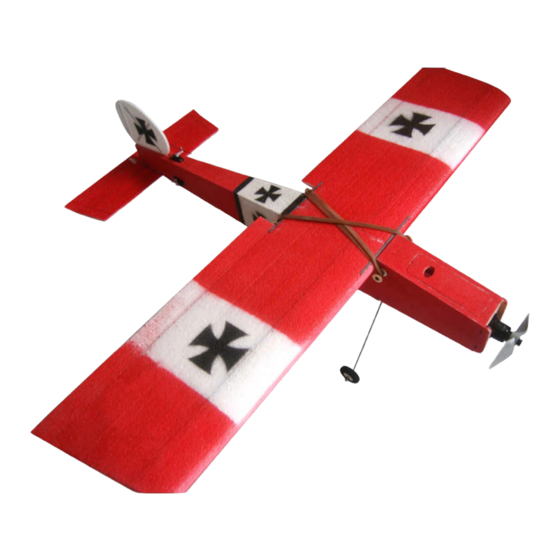
Easy Stik 15 EPP ARF Instruction Manual Specifications Wingspan: 41.0 in (1040 mm) Length: 35.8 in (910 mm) Wing Area: 315 sq in (20.3 sq dm) Flying Weight: 1.4 lbs (650 g) -
Page 2: Dear Customer
Dear Customer, Congratulations on your purchase of Easy Stik 15 EPP ARF from Value Hobby. We thank you for your generous support, and hope you enjoy your new airplane. At Value Hobby, we hope to offer competitive prices, good performance, and products that you can setup and use with ease. -
Page 3: Safety In Flying
Set Metric Allen Wrenches Scissors Small Pliers Wire Cutters Masking tape Optional – Heat gun Before Starting Assembly Examination Unpack your airplane and examine the components. Check for damage of any kind. If you see any damage, please contact Value Hobby immediately. - Page 4 www.valuehobby.com/easystik15-epp.html RECOMMENDED RADIO EQUIPMENT Product Quantity Flysky T6 6CH transmitter and receiver set FLY-RC-2563 Radio Servo Towpro MG90 metal gear micro servo TWP-SV-0359 Servo Extension Universal Servo extension 12-inch AMS-AC-0560 Y-Harness Universal Servo Y-Harness 12-Inch AMS-AC-0869 RECOMMENDED POWER SETUP Product Motor Gforce E400 2830-1200KV brushless motor SAT-MT-1886...
- Page 5 www.valuehobby.com/easystik15-epp.html Main Parts and Accessories:...
- Page 6 www.valuehobby.com/easystik15-epp.html List: 1. M3*15 (0.6 in) socket head screw for mounting motor 4pcs 2. M3 blind nut 3pcs 3. 150mm (5.9in) hook and loop tape 4. Main landing gear 5. Plywood spacer for securing the landing gear 6. Wheel collar 2pcs 7.
-
Page 7: Section1. Servo And Wing Installation
www.valuehobby.com/easystik15-epp.html Step5. Attach two panels together through the wing Section1. Servo and Wing Installation tube and hot glue. Step1. Use a hobby knife to cut a notch on the wing for burying the aileron servo lead. Step2. Press the wire lead into the slot. Note: there is 1.5 degree dihedral angle. -
Page 8: Section2. Aileron Servo Linkage Installation
www.valuehobby.com/easystik15-epp.html Step7. Cut off the excess wing tube protruding from Step3. Install the servo arm to the aileron servo. the wing. Slide the one end of the pushrod wire through the connector and install the z bend to the control horn. Once the pushrod wire is 90 degrees aligned with servo arm, and the aligned with the hinge line. -
Page 9: Section3. Horizontal Tail And Vertical Tail Installation
www.valuehobby.com/easystik15-epp.html Step4. Insert the vertical tail into the slots in the Section3. Horizontal Tail and Vertical fuselage. Make sure the tail is vertical with the Tail Installation horizontal stabilizer, and then glue it to the fuselage. Step1. Use a ruler to make the center line in the horizontal tail. - Page 10 www.valuehobby.com/easystik15-epp.html Step.3 Install the servo arm to the rudder servo. Step5. Finish the elevator servo installation. Install the z bend to the control horn and slide the pushrod wire through the pushrod connector. Position the control horn on the rudder to make the pushrod wire is 90 degree aligned with the servo arm and the holes on the control horn is aligned with the hinge line.
-
Page 11: Section5. Landing Gear Installation
www.valuehobby.com/easystik15-epp.html Step3. Inset the plywood spacer into the slots and Section5. Landing Gear Installation use thin CA to secure the landing gear to the fuselage Step1. Slide one wheel collar onto the wheel axle, then the wheel and then the remaining wheel collar. -
Page 12: Section6. Installing The Wing To Fuselage
www.valuehobby.com/easystik15-epp.html Step3. Repeat the same process to install the Section6. Installing the Wing to second rod. Fuselage Step1. Glue the two carbon fiber strips to the wing as shown. Step4. Use two rubber bands to secure the wing to the fuselage. Step2. -
Page 13: Section7. Motor Installation
www.valuehobby.com/easystik15-epp.html Section7. Motor Installation Section8. CG and Control Throws Step1. Install the motor onto firewall using four The recommended CG is 56mm (2.2in) from the blind nuts and four m3*15mm socket head screws. leading edge of the wing. Control throws Aileron 25 degrees up and down Rudder 25 degrees left and right Elevator 25 degrees up and down... - Page 14 www.valuehobby.com 2013-8-19...
Need help?
Do you have a question about the Easy Stik 15 EPP ARF and is the answer not in the manual?
Questions and answers