Hand Held Products Dolphin 7600 Series User Manual
Hide thumbs
Also See for Dolphin 7600 Series:
- User manual (102 pages) ,
- User manual (102 pages) ,
- Manual (13 pages)
Table of Contents

Related Manuals for Hand Held Products Dolphin 7600 Series


Summary of Contents for Hand Held Products Dolphin 7600 Series
- Page 1 ® Dolphin 7600 Series Microsoft® Windows® CE 5.0 User’s Guide...
- Page 2 Hand Held Products, Inc. (“Hand Held Products”) reserves the right to make changes in specifications and other information contained in this document without prior notice, and the reader should in all cases consult Hand Held Products to determine whether any such changes have been made. The information in this publication does not represent a commitment on the part of Hand Held Products.
-
Page 3: Table Of Contents
Table of Contents Chapter 1 - Agency Approvals Label Locations........................... 1-1 Regulatory and Safety Approvals for all Dolphin Terminals ............1-2 FCC Compliance..........................1-3 Chapter 2 - Getting Started Out of the Box............................. 2-1 Desktop ............................... 2-2 Command Bar ............................. 2-2 Icons in the Command Bar ...................... - Page 4 Chapter 5 - Using the Image Engine Overview .............................5-1 Available Image Engines........................5-1 Depth of Field ..........................5-1 Supported Bar Code Symbologies.......................5-2 Activating the Engine ..........................5-3 Decoding..............................5-3 Capturing Images..........................5-5 Chapter 6 - Communication Communication Options........................6-1 Installing Additional Software......................6-1 Connecting the USB Cable........................6-2 ActiveSync Communication........................6-3 Connecting the Terminal to a Wireless Network ................6-6 Adding Programs From the Internet ....................6-6...
- Page 5 Chapter 9 - Dolphin HomeBase Overview .............................9-1 Front Panel ............................9-2 Back Panel ............................9-3 Powering the Dolphin HomeBase .......................9-3 Charging the Main Battery ........................9-4 Mounting the Dolphin HomeBase .......................9-5 Back Panel Dimensions ........................9-5 Mounting Guidelines........................9-5 Bottom Panel Dimensions ........................9-6 Dolphin HomeBase Technical Specifications ..................9-7 Chapter 10 - Dolphin QuadCharger Overview ............................10-1 Front Panel ............................10-1...
- Page 6 Rev B Dolphin® 7600 Series User’s Guide...
-
Page 7: Chapter 1 - Agency Approvals
Agency Approvals Label Locations Dolphin 7600 mobile computers meet or exceed the requirements of all applicable standards organizations for safe operation. However, as with any electrical equipment, the best way to ensure safe operation is to operate them according to the agency guidelines that follow. -
Page 8: Regulatory And Safety Approvals For All Dolphin Terminals
5627 BT Eindhoven The Netherlands Hand Held Products shall not be liable for use of our product with equipment (i.e., power supplies, personal computers, etc.) that is not CE marked and does not comply with the Low Voltage Directive. Laser Safety Label LASER LIGHT. -
Page 9: Fcc Compliance
FCC Compliance Dolphin terminals meet or exceed all applicable standards and have been manufactured to the highest level of quality. Dolphin Batch Terminal Dolphin Batch terminals comply with part 15 of the FCC rules. Operation is subject to the following two conditions: (1) this device may not cause harmful interference, and (2) this device must accept any interference received, including interference that may cause undesired operation. -
Page 10: Canadian Compliance
Cet appareil numérique de la Classe B est conforme à la norme NMB-003 du Canada. For European Community Users Hand Held Products complies with Directive 2002/69/EC OF THE EUROPEAN PARLIAMENT AND OF THE COUNCIL of 27 January 2003 on waste electrical and electronic equipment (WEEE). - Page 11 The crossed out wheeled bin symbol informs you that the product should not be disposed of along with municipal waste and invites you to use the appropriate separate take-back systems for product disposal. If you need more information on the collection, reuse, and recycling systems, please contact your local or regional waste administration.
- Page 12 1 - 6 Rev B Dolphin® 7600 Series User’s Guide 1/17/2007...
-
Page 13: Chapter 2 - Getting Started
Step 1. Install the Main Battery Use only the Li-ion battery packs provided by Hand Held Products. The use of any battery pack not sold/manufactured by Hand Held Products in a Dolphin terminal will void your warranty and may result in damage to the Dolphin terminal or bat Step 2. -
Page 14: Desktop
Step 3. Boot the Terminal Windows CE The terminal begins booting as soon as power is applied and runs by itself. Do NOT press any keys or interrupt the boot process. When the boot process is complete, the Desktop (see page 2-2) appears and the terminal is ready for use. Windows Mobile The terminal begins booting as soon as power is applied and runs by itself. -
Page 15: Icons In The Command Bar
Icons in the Command Bar Command Bar (see page 2-2) contains a number of icons that indicate the status of various functions on the terminal. Status Icon Meaning Opens the Start menu. Icons Between the Arrows Because there may be more icons than the device can display, use the left and right arrows to scroll through the icons. Accesses the Bluetooth radio. -
Page 16: Using Windows Explorer
Pop-Up Menus With pop-up menus, you can quickly choose an action for an item. 1. Tap and hold the stylus on the item name. The pop-up menu appears. 2. Lift the stylus, and tap the action you want to perform. The contents of pop-up menus change according to the program you’re in. -
Page 17: Chapter 3 - Terminal Hardware Overview
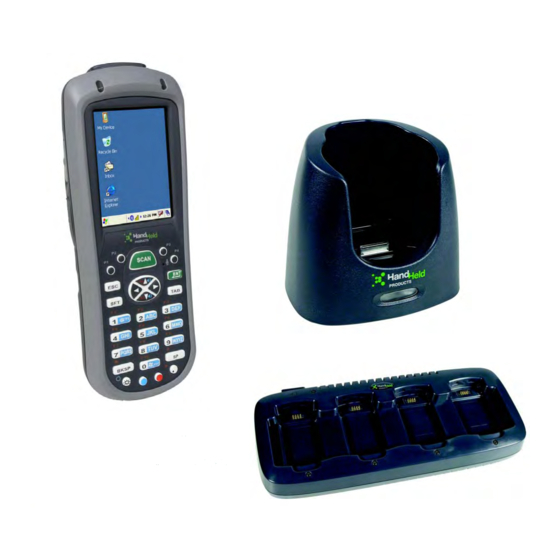
Terminal Hardware Overview The Dolphin 7600 includes a number of standard terminal configurations as well as charging and communication peripherals and accessories to maximize the efficiency of your application setting. Standard Terminal Configurations There are two standard Dolphin 7600 configurations: Dolphin 7600 WPAN Dolphin 7600 WPAN/WLAN •... -
Page 18: Front Panel Features
Dolphin 7600 devices ship with a screen protector already installed over the touch screen lens to help prevent damage to the touch screen. Do NOT remove this screen protector before initial use. Hand Held Products recommends using screen protectors, especially for applications that require high-volume interfacing with the touch screen. -
Page 19: Display Backlight
Display Backlight The touch screen display has a backlight that is programmed to turn off after a specified period of time that the device is idle. To change the default timeout parameters, tap Start > Settings > Control Panel > Display > Backlight tab. To adjust the intensity of the backlight, tap Start >... -
Page 20: Back Panel Features
Back Panel Features Image Engine Window Stylus Slot Accessory Attachment Speaker Finger Saddle Installed Battery I/O Connector Accessory Attachment This button can be used with various accessories; see Using the Accessory Attachment on page 3-9. Finger Saddle This is a slightly depressed and angled area of the back panel that is designed to cradle or “saddle” your pointer finger while holding the terminal. -
Page 21: Side Panel Features
Side Panel Features DC Power Headset Side IrDA Port Jack Jack Button Side Door Note: This graphic shows the left side of the Dolphin 7600 terminal. DC Power Jack The DC power jack receives external power from the Dolphin power cable that comes in the box with the terminal. When connected to the Dolphin Power Cable, the terminal is powered and the main battery pack is charging. -
Page 22: Top Panel Features
Top Panel Features Access Door Image Engine Window (with engine) *Pull the plastic tab to remove the plastic film cover over the image engine window before activating the image engine. Access Door For more memory, you can install optional memory cards by removing this door. For details, see Installing Memory Cards on page... - Page 23 4. When the access door is open, slide the SD card into the appropriate slot until it clicks into place. SD cards must be inserted with the label side facing forward (toward the touch screen). Note: To remove an installed SD card while the access door is open, tap on the edge lightly to unlock the card; the card will pop out just enough for you to grab its edge and pull it out.
-
Page 24: Bottom Panel Features
Bottom Panel Features I/O Connector Hand Strap Slot Hand Strap Slot There is an adjustable, elastic hand strap available for purchase with the Dolphin 7600 terminal. When installing the hand strap, you loop the elastic strip through this slot. For instructions, see Attaching the Hand Strap on page 3-9. -
Page 25: Using The Accessory Attachment
The accessory attachment on the back panel fits universal swivel clips designed for belts or even pedestal mounts (not available from Hand Held Products). Simply insert the tab into the slot until you hear a click or follow the instructions that came with the clip or accessory. -
Page 26: Dolphin 7600 Peripherals
The available Li-ion battery packs provide the main power supply for the terminal. For more information, see Battery Power page 3-11. For information on how to purchase these items, contact a Hand Held Products sales representative. 3 - 10 Rev B Dolphin® 7600 Series User’s Guide... -
Page 27: Battery Power
Main Battery Pack Use only the Li-ion battery packs provided by Hand Held Products. The use of any battery pack not sold/manufactured by Hand Held Products in a Dolphin terminal will void your warranty and may result in damage to the Dolphin terminal or bat... -
Page 28: Checking Battery Power
• Although your battery can be recharged many times, it will eventually be depleted. Replace it after the battery is unable to hold an adequate charge. • If you are not sure the battery or charger is working properly, please send it to Hand Held Products or an authorized Hand Held Products service center for inspection. -
Page 29: Internal Backup Battery
Internal Backup Battery Located inside the terminal, the backup battery is a 2.4V nickel metal hydride (NiMH) battery. The internal backup battery prevents the terminal from being reset when you remove the main battery pack. This battery retains RAM data and allows the real-time clock to remain operational for up to 30 minutes. If the terminal is left without the main battery pack for more than 30 minutes, the internal backup battery discharges and needs to be recharged to function according to specifications. -
Page 30: Resetting The Terminal
Resetting the Terminal There are two ways to reset the Dolphin terminal: a soft reset and a hard reset. Soft Reset (Warm Boot) A soft reset re-boots the device without losing RAM data. You would perform a soft reset 1) when the terminal fails to respond, 2) after installing software applications that require a reboot, or 3) after making changes to certain system settings. -
Page 31: Changing The Memory Allocation
Changing the Memory Allocation You can adjust file storage vs. program memory in System Properties. 1. Tap Start > Settings > Control Panel > Memory tab. 2. Move the slider to adjust the memory allocation and tap OK. The changes take effect immediately. Care and Cleaning of the Dolphin Terminal When needed, clean the image engine window and the LCD display with a clean, non-abrasive, lint-free cloth. -
Page 32: Dolphin 7600 Terminal Technical Specifications
SDK for C/C++, C# and Visual Basic developers for Windows CE 5.0 Environment (Requires Visual Studio 2005 Professional Editions or higher) Supported Software PowerNet™ Terminal Emulation (TNVT, 3270, 5250), Hand Held Products MSM (remote device management), and ITScriptNet Installed Applications Hand Held Products Power Tools and Demos and ITScriptNet Ready-To-Go applications... - Page 33 Dolphin 7600 Terminal Technical Specifications Construction High impact resistant PC/ABS housings Magnesium alloy internal chassis with component shock mounts Structural 4 ft. (1.2m) multiple drops to concrete, all axis, across operating temperature range Air: +/- 12k Vdc Direct: +/- 8k Vdc Environmental IP54 rating Dimensions...
- Page 34 3 - 18 Rev B Dolphin® 7600 Series User’s Guide 1/17/2007...
-
Page 35: Chapter 4 - Using The 29-Key Keyboard
Using the 29-Key Keyboard Overview The 29-key numeric-shifted-alpha keyboard buttons are recessed under the overlay for maximum durability. The keyboard panel is backlit for maximum viewability in various lighting conditions. Hardware Application Buttons Scan Escape Navigation Keys Enter Shift Alpha Indicators Backspace Space Power... -
Page 36: Hardware Application Buttons
Hardware Application Buttons These four buttons are programmed to launch software applications from the Desktop. Hardware Application Buttons You can customize these settings in the Buttons setting. Tap Start > Settings > Control Panel > double-tap Buttons Buttons Column Matching Hardware Button P1—P4 Buttons P1—P4 marked on the overlay. -
Page 37: Function Keys
Function Keys Function keys are those keys that perform specific functions and usually have the name of the function they perform. Name Function Backlight Toggles the keyboard backlight on and off. Backspace Backspace moves the cursor back one space and deletes each time the key (BKSP) combination is pressed. -
Page 38: Modifier Keys
Modifier Keys Modifier keys modify the next key pressed to perform functions or type special characters. The Dolphin 7600 has blue and red modifier keys with a color-coded overlay so you can see what the key combination does. Name Function Blue and Modifies the next key pressed. -
Page 39: Toggling Between Alpha And Numeric Modes
Toggling Between Alpha and Numeric Modes The 29 key keyboard defaults to numeric mode. Numeric mode is when you type numbers with the number keys. Alpha mode is when you type letters or characters with the number keys. The keyboard switches between alpha and numeric modes easily. Alpha Mode Switching to Alpha Mode To switch modes, tap the Blue modifier key... -
Page 40: Blue Key Combinations
Blue Key Combinations Alpha Mode Double-tap the Blue modifier key to switch to Alpha mode. Character Character Lowercase Uppercase: Double-tap SFT pqrs PQRS wxyz WXYZ Start menu Start menu Functions Press the Blue key once in combination with the next key. Key Combination Function Suspend/Resume... -
Page 41: Red Key Combinations
Red Key Combinations Key Combination Function/Special Character Red + Left Arrow Backspace Red + Right Arrow Space Red + Up Arrow Page up Red + Down Arrow Page down Red + ESC (hold) Soft reset (warm boot) Red + TAB (hold) Hard reset (cold boot) Red + 1 Red + 2... - Page 42 4 - 8 Rev B Dolphin® 7600 Series User’s Guide 1/17/2007...
-
Page 43: Chapter 5 - Using The Image Engine
Using the Image Engine Overview ™ The Dolphin 7600 terminal houses a compact image engine using Adaptus Imaging Technology that instantly reads all popular 1D and 2D bar codes and supports omni-directional aiming and decoding. The image engine can also capture digital images, such as signatures and pictures of damaged inventory. -
Page 44: Supported Bar Code Symbologies
Supported Bar Code Symbologies The Dolphin 7600 image engines support the following bar code symbologies: Symbology Type Symbology Name 1D Symbologies Codabar Matrix 2 of 5 Code 3 of 9 Plessey Code 11 PosiCode Code 32 Pharmaceutical (PARAF) Code 93 Straight 2 of 5 IATA Code 128 Straight 2 of 5 Industrial... -
Page 45: Activating The Engine
Activating the Engine SCAN When a scanning application is open, press the Scan key to activate the image engine. You can also press one of the side buttons (see Side Button on page 3-5), which are programmed to activate the image engine in a scanning application by default. - Page 46 Sample Bar Codes You can use the following bar codes to verify decoding: Sample 128 Sample PDF417 Code 128 PDF417 Test Message Omni-Directional Scanning Positions The high-vis aiming pattern frames the bar code to provide you with the best scanning performance. Note: To achieve the best read, the aiming beam should be centered horizontally across the bar code.
-
Page 47: Capturing Images
Capturing Images The image-capture process is an intuitive, split-second operation for experienced users. By following basic guidelines, however, new users can easily develop their own technique and, with practice, quickly learn to adapt to different application environments. Image Preview When the imaging process is initiated, the touch screen displays a preview of the object. This is a live video image of what the imager is currently viewing and has a slightly degraded appearance compared to the captured image. - Page 48 5 - 6 Rev B Dolphin® 7600 Series User’s Guide 1/17/2007...
-
Page 49: Chapter 6 - Communication
Installing Additional Software Dolphin terminals ship with the operating system, radio drivers, and custom Hand Held Products software loaded onto the device. These are the default programs that install when your terminal first boots up. You can install additional software programs to the terminal provided that the following parameters are met: •... -
Page 50: Connecting The Usb Cable
Connecting the USB Cable Connect the USB cable to the I/O connector to facilitate USB communication between the Dolphin device and host workstation. Connector Host Workstation Cable *Power Connector Port *This is a communication-only cable until you plug the power cable into the power port. Connecting the Power Cable The power port on the back end of the USB connector fits the power cable that comes with each Dolphin 7600 device. -
Page 51: Activesync Communication
When communicating via ActiveSync, your terminal must be connected to the host workstation with a communication peripheral sold/manufactured by Hand Held Products, such as the Dolphin HomeBase or Dolphin Charge/Communication cable. Use of any peripheral not sold/manufactured by Hand Held Products may damage your terminal and will void the warranty. - Page 52 Setting Up the Dolphin Terminal The Dolphin terminal defaults to USB communication out of the box. To verify and/or change the default setting, tap Start > Settings > Control Panel > PC Connections.) Must be checked to connect with a workstation. Tap to change the connections settings.
-
Page 53: Adding Programs Via Activesync
2. Read any installation instructions, Read Me files, or documentation that comes with the program. Many programs provide special installation instructions. 3. Connect the terminal to the workstation via Hand Held Products communication peripheral. If the File is an Installer An installer program is one that installs to the workstation and the terminal simultaneously;... -
Page 54: Connecting The Terminal To A Wireless Network
Connecting the Terminal to a Wireless Network Establishing the terminal on a wireless network depends heavily on your network infrastructure. You will need specific information from your network administrator. Whatever your network specifics, some general steps apply: 1. The on-board radio drivers must be enabled for the terminal to transmit a signal. 2. -
Page 55: Infrared Communication
Infrared Communication The BT Service tab beams files and data between the terminal and other devices equipped via the IrDA port. The maximum data transfer speed is 115 Kbps. IrDA Port Location IrDA Port Transferring Files and Information Note: We recommend disabling the Bluetooth radio before transferring data via infrared. If the Bluetooth radio remains enabled, the Beam File function will pick up MAC addresses as well as IrDA ports. -
Page 56: Using Activesync For Irda Communication
6. As the file gets ready to send, the button at the bottom reads “Pending…” 7. While the file is transmitting, the button at the bottom reads “Sending…” and the command bar displays the percentage sent. 8. When the file is sent, a Success message displays. Tapping OK brings you back to the BT Service tab. Using ActiveSync for IrDA Communication 1. -
Page 57: Chapter 7 - Managing The 802.11B/G Radio
Managing the 802.11b/g Radio Overview The Dolphin 7600 has an optional 2.4 GHz 802.11b/g WLAN (Wireless Local Area Network) radio that uses Direct Sequence Spread Spectrum (DSSS) technology. The radio is interoperable with other 802.11b/g Wi-Fi-compliant products including access points (APs), PCs via PC card adapters and other wireless portable devices. Server-Assigned IP Addresses Please note that all server-assigned IP addresses use Dynamic Host Configuration Protocol (DHCP). -
Page 58: Configuring The 802.11B/G Radio
Configuring the 802.11b/g Radio ® The Dolphin 7600 contains the Cisco AEGIS Client (the Client), a comprehensive IEEE 802.1X tool to set up the on-board 802.11b/g radio. The Client is a standards-based implementation of IEEE 802.1X and can be configured to work with almost any network equipment–wired or wireless–that supports the 802.1X authentication standard. -
Page 59: Main Window
Icon Color Indicators The color of the icon in the command bar and on the main window indicates the connection and authentication status of the radio. Command Port Color Status Bar Icon Icon Yellow Authentication is in process. Green Authentication succeeded. Authentication failed. - Page 60 Client Menu Menu Item Description Close Closes the Client's interface, while leaving the client running. Start/Stop Starts or stops 802.1X authentication. After you finish the initial configuration, tap the network interface and tap Start. If the port is already active, tap Stop first, then Start to force the program to read the new configuration file.
- Page 61 Menu Item Description Event Log Displays the event log in a custom viewer. The Event Log is a text file that contains system information; each entry is listed sequentially with a time/date stamp and text message. Tap Refresh to query the system again and update the log file while you are reading it.
-
Page 62: Setup Windows
Setup Windows Use the following navigation aid to examine the configuration options for each set of configuration windows: Configuring a Port (see page 7-7) • Wireless Networks Tab (see page 7-7) • Protocol Tab (see page 7-8) Configuring Client Authentication (see page 7-12) •... -
Page 63: Configuring A Port
Configuring a Port On the main window, tap on a port and select Configure on the Port Menu. Complete both the Wireless Networks Tab (see page 7-7) and the Protocol Tab (see page 7-8). Wireless Networks Tab Field Description Available Networks Displays the networks the device recognizes as available to connect to. Move to Configured Activates after the available networks have been retrieved. - Page 64 Protocol Tab The Protocol tab configures parameters that apply to all the networks the selected port connects to. Field Description Protocol Settings These are the timer intervals and retry settings defined in the 802.1X standard. They determine how long the supplicant state machine will wait in a given state. These parameters shouldn’t be modified without an understanding of the supplicant state machine.
-
Page 65: Configuring A Network Profile
Configuring a Network Profile You can configure a network based on an AP in range, create a new network, or modify the default (see page 7-7) network. Both methods start on the Wireless Networks Tab (see page 7-7) and open the following tabs: •... - Page 66 Field Description Do active scan Select this option whenever the AP (or client, for ad hoc mode) is not broadcasting its SSID. Note: This option is not available when Associate with any available network is selected. Authentication Select the authentication profile associated with this network and tap View. The drop-down list contains client profile names created in the User tab of the client configuration area;...
- Page 67 WPA Settings Tab This tab controls the WPA settings. This tab window is available only if Provide encryption key dynamically is selected on the WEP Mgmt tab is selected. Field Description WPA Mode This drop-down list contains the following options: •...
-
Page 68: Configuring Client Authentication
Configuring Client Authentication Each user account needs to define the protocol and the credentials used to authenticate a user. When you start and stop on a port, you are enabling and disabling the authentication established here. Note: Fields will be grayed out if not relevant to the selected protocol. On the main window, tap Client >... - Page 69 Field Description Authentication This is the authentication method to be used: • MD5-Challenge type • TLS • LEAP • TTLS • PEAP Your network administrator should let you know the protocols supported by the RADIUS server. The RADIUS server sits on the network and acts as a central credential repository for Access Servers that receive the radio signals and ultimately block or allow users to attach to the network.
- Page 70 System Tab Define logging settings and the port manager timeout period. Field Description Log Level These settings control the detail of the log messages generated by the Client. Each level is cumulative. By default, all errors, warnings, and information events are logged. Each entry records a severity code (of 1 [debug message] to 4 [error] asterisks), a time stamp, and a message.
- Page 71 Server Tab The Server tab controls how the Client authenticates the server that handles the 802.1X protocol on the network side. This applies only to the TLS, TTLS, and PEAP authentication methods and is used to tell the Client what server credentials to accept from the authentication server to verify the server.
-
Page 72: Wep Encryption Without 802.1X Authentication
WEP Encryption Without 802.1X Authentication 1. Double-tap the Client icon on the command bar 2. On the Main Window (see page 7-3), tap the port and select Configure on the popup menu. 3. On the Wireless Networks Tab (see page 7-7), select the SSID in the list of Configured Networks and tap Properties. (You may have to move the SSID from the list of Available Networks to the list of Configured Networks or add the SSID.) 4. -
Page 73: Certificates
Certificates During configuration, you may have specified one or two certificates to use during the authentication process. Certificate Requirements The specified identity should match the Issued to field in the certificate and should be registered on the authentication server that is used by the authenticator (i.e., a RADIUS server). In addition, your certificate must be valid on the authentication server. This requirement depends on the authentication server and generally means that the authentication server must know the issuer of your certificate as a trusted Certificate Authority (CA). - Page 74 6. On the Main Window (see page 7-3) tap Client > Configure. 7. Tap the Server tab and verify that the certificate appears the Certificate issuer must be drop-down list. 8. Tap OK to save the setting and close the port configuration. 7 - 18 Rev B Dolphin®...
-
Page 75: Advice And Workarounds
Advice and Workarounds Issue Possible Causes and Solutions The Client will not start on the device with an Perform a hard reset. error message about missing files. • Ensure that the radio is activated; Activating the 802.11b/g Radio (see The wireless network interface (port) does not page 7-1). -
Page 76: Checking Radio Status
Checking Radio Status The WLAN Manager displays radio operating statistics for the 802.11b/g radio. Single-tap on the WLAN Manager icon in the command bar and select Open on the WLAN Manager menu. Tap Start > Settings > Control Panel > double-tap WLAN Manager . - Page 77 Field Description More Info Displays detailed radio information: Ping Enables you to ping an IP address: Type in an IP address and tap Ping. The results display below the Ping button. BSS ID Displays the status of the Basic Service Set (BSS): •...
- Page 78 7 - 22 Rev B Dolphin® 7600 Series User’s Guide...
-
Page 79: Chapter 8 - Bluetooth Manager
Bluetooth Manager Overview Each Dolphin 7600 contains a Bluetooth radio whose driver installs each time the device boots up. Enabling the Bluetooth Radio Single-tap the Bluetooth icon in the command bar Tap Start > Programs > Bluetooth Manager and tap the ON button to activate the Bluetooth radio. Use the left and right arrows in the upper right corner to scroll through the tab windows. -
Page 80: Setting Tab
Setting Tab Field Description Power This setting enables and disables the radio. BT Device ID Address The MAC address from the radio driver. Name The first time you open the Bluetooth manager, the default name of the Dolphin device appears. Rename Click this button to type in a unique name for the Dolphin terminal. -
Page 81: Serial Port Tab
Serial Port Tab On the Serial Port tab, you can register virtual COM server ports used by the Dolphin terminal to host its Bluetooth services. You can also register client ports used by the Dolphin terminal to access the Bluetooth services of other devices. Field Description Registered Bluetooth Serial Ports: This list contains the current COM ports in use. -
Page 82: Connecting To Bluetooth Printers
Connecting to Bluetooth Printers To connect to a Bluetooth printer, you need to register that printer as a new client port on the Serial Port tab. 1. In the Bluetooth Manager, tap the Serial Port tab and tap Register New Client Port. 2. - Page 83 5. Select Serial Printer and tap OK. 6. Select COM from the COM Prefix drop-down list. 7. Select the appropriate COM port number from the COM Index drop-down list. Dolphin® 7600 Series User’s Guide Rev B 8 - 5 1/17/2007...
- Page 84 8. Tap OK. When you have successfully connected, a Registered O.K. dialog box appears. 9. On the Serial Port tab, verify that the COM port is connected to the printer. (The MAC address of the printer will appear in the Server Addr column.) 8 - 6 Rev B Dolphin®...
-
Page 85: Connecting To Bluetooth Devices Other Than Printers
Connecting to Bluetooth Devices Other Than Printers 1. Power on the Bluetooth radio and tap the BT Service Tab. 2. Tap Scan Device Services, then Scan Device on the Scan Device window. The Bluetooth Manager scans for Bluetooth devices and services in range and displays them on the Scan Device Window. Note: To see a list of what the icons on this window mean, see Scan Device Window... -
Page 86: Scan Device Window
7. On the Scan Device window, double-tap on the same service and select Active on the popup menu. The service must be active to use as a wireless connection. 8. The service will now appear with a checkmark to indicate that it’s an active connection Note: For more information about the popup menu, see Popup Menu on page... -
Page 87: Popup Menu
Popup Menu Double-tap on a found device and a popup menu appears that enables you to connect to that device and use the service. Menu Item Description Trusted &/or Changes the found device to a trusted or untrusted device. Untrusted Untrusted devices Appear with a icon. -
Page 88: Bluetooth Activesync
Bluetooth ActiveSync 1. On the BT Service tab, tap Scan Device Service and retrieve a device with ActiveSync services 2. You need to activate the service. Double-tap on the service and select Trusted, then Active on the popup menu. Note: You may need to authenticate the connection by entering a PIN. If not, tap No on the authentication popup window. For more details, see Connecting to Bluetooth Devices Other Than Printers on page... -
Page 89: Chapter 9 - Dolphin Homebase
Hand Held Products will void the warranty and may damage the terminal. Use only the Li-ion battery packs provided by Hand Held Products. The use of any battery pack not sold/manufactured by Hand Held Products in a Dolphin terminal will void your warranty and may result in damage to the Dolphin terminal or bat Dolphin®... -
Page 90: Front Panel
Front Panel Terminal Well Dock LED Terminal Well Place the Dolphin terminal in this well to communicate with a host device, power the terminal, and charge its battery. Dock LED Turns solid green when the Dolphin terminal is properly seated in a powered HomeBase. When this light is on, the terminal is connected to the HomeBase. -
Page 91: Back Panel
ActiveSync (see ActiveSync Communication on page 6-3). Hand Held Products recommends that you leave the HomeBase connected to its power source at all times, so that it is always ready to use. Dolphin® 7600 Series User’s Guide Rev B... -
Page 92: Charging The Main Battery
Charging the Main Battery The HomeBase powers the terminal and fully charges its main battery pack in less than four hours. As battery packs charge, the charging circuitry follows the two-step charging process (CC-CV) that is recommended for Li-Ion batteries. The process monitors changes in temperature, current, and voltage. -
Page 93: Mounting The Dolphin Homebase
Mounting the Dolphin HomeBase If you want to mount the HomeBase to a vertical surface, be sure to provide enough workspace with good lighting for the user to view and operate the Dolphin terminal while it is seated in the HomeBase. Back Panel Dimensions .15 in. -
Page 94: Bottom Panel Dimensions
Note: The pivot connector should be facing straight out the bottom panel (as shown) when mounting the HomeBase to a vertical surface. Bottom Panel Label HomeBase Hand Held Products, Inc. www.handheld.com FOR HOME OR OFFICE USE Tested to Comply With FCC Standards This Class B Digital apparatus complies with Canadian ICES-003. -
Page 95: Dolphin Homebase Technical Specifications
Dolphin HomeBase Technical Specifications Structural Dimensions 4 in. high X 4.4 in. wide X 3.7 in. deep (10.2 cm. X 11.2 cm. X 9.4 cm.) Weight 11.2 oz. (318g) Material Polycarbonate ABS blend Color Gray Mounting Two keyholes on the back panel for wall-mounting Capacity One Dolphin terminal Environmental... - Page 96 9 - 8 Rev B Dolphin® 7600 Series User’s Guide 1/17/2007...
-
Page 97: Chapter 10 - Dolphin Quadcharger
Hand Held Products will void the warranty and may damage the terminal. Use only the Li-ion battery packs provided by Hand Held Products. The use of any battery pack not sold/manufactured by Hand Held Products in a Dolphin terminal will void your warranty and may result in damage to the Dolphin terminal or bat... -
Page 98: Back Panel
Back Panel Power Supply Connector Power Switch Power Supply Connector Use this connector to attach the power supply to the QuadCharger. The universal power supply accepts input voltages between 90-265 volts. Power Switch Toggle the power switch to turn the QuadCharger on and off. Supplying Power to the QuadCharger Use the power adapter cable that comes with the Dolphin QuadCharger so that the input voltage is adjusted appropriately. -
Page 99: Battery Charging
Battery Charging Inserting and Removing Battery Packs To insert a battery pack, place the end of the battery without the locking tab into the bottom of the charging pocket and snap the battery into place with a hinging motion. To remove a battery pack, push the locking tab down and pull the battery away from the charging slot with a hinging motion. Charging Process The QuadCharger charges Dolphin 7600 Li-ion battery packs in four hours. -
Page 100: Mounting The Quadcharger
Mounting the QuadCharger The QuadCharger should be mounted on a dry, stable surface such as a desktop or workbench, or a flat, vertical surface such as a wall. Mounting Location When choosing a location for the QuadCharger: • Keep in mind that the mounting location must allow users easy access to power switch and power connector. •... -
Page 101: Troubleshooting
NO USER SERVICEABLE PARTS. OPENING VOIDS WARRANTY. USE AUTHORIZED OUTPUT: 4.2VDC @ 1350 mA(4) HAND HELD PRODUCTS, INC BATTERY PACK ONLY. OTHER TYPES OF BATTERIES MAY BURST CAUSING INJURY TO PERSONS AND DAMAGE. DO NOT CHARGE ALKALINE BATTERIES. INDOOR USE ONLY. NICHT IM FRIEN BENUTZEN. NE PAS UTILISER a L’EXTERIEUR. -
Page 102: Dolphin Quadcharger Technical Specifications
Dolphin QuadCharger Technical Specifications Structural Dimensions 11 in. long X 4.8 in. wide X 1.5 in. high (27.9 cm. X 12.2 cm. X 3.8 cm.) Weight 15.1 oz. (428g) Material Case: Polycarbonate ABS blend Color: Gray Mounting Use DIN rail slide to mount to a desktop or wall; see DIN Rail Dimensions on page Capacity... -
Page 103: Product Service And Repair
Product Service and Repair Hand Held Products provides service for all its products through service centers throughout the world. To obtain warranty or non- warranty service, return the unit to Hand Held Products (postage paid) with a copy of the dated purchase record attached. -
Page 104: Technical Assistance
Technical Assistance If you need assistance installing or troubleshooting, please call your Distributor or the nearest Hand Held Products technical support office: North America/Canada Telephone: (800) 782-4263, option 4 (8 a.m. to 6 p.m. EST) Fax number: (315) 685-4960 E-mail: natechsupport@handheld.com... -
Page 105: Limited Warranty
(E) repair or service of the product by anyone other than Hand Held Products or its authorized representatives. This warranty shall extend from the time of shipment for the duration published by Hand Held Products for the product at the time of purchase ("Warranty Period"). - Page 106 11 - 4 Rev B Dolphin® 7600 Series User’s Guide 1/17/2007...
- Page 108 Hand Held Products, Inc. 700 Visions Drive P.O. Box 208 Skaneateles Falls, NY 13153-0208 ™ 76-CE-UG Rev B 1/17/2007...
Need help?
Do you have a question about the Dolphin 7600 Series and is the answer not in the manual?
Questions and answers