Hand Held Products Dolphin 9550 User Manual
Windows powered pocket pc 2002
Hide thumbs
Also See for Dolphin 9550:
- User manual (314 pages) ,
- Quick start manual (36 pages) ,
- Quick start manual (16 pages)
Table of Contents
Advertisement
Quick Links
Advertisement
Table of Contents
Troubleshooting

Related Manuals for Hand Held Products Dolphin 9550


Summary of Contents for Hand Held Products Dolphin 9550
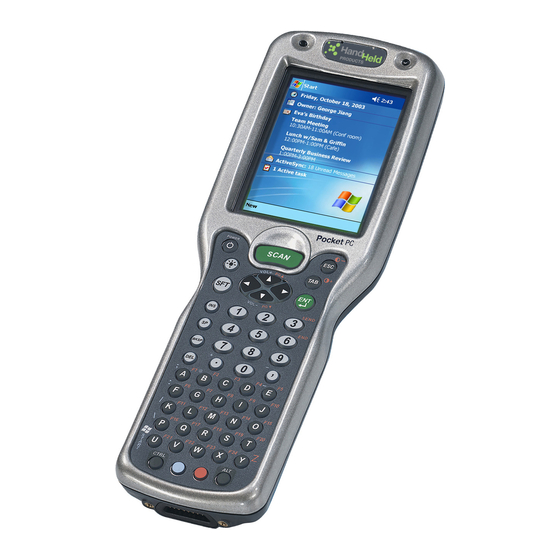
- Page 1 ® Dolphin 9500/9550 Mobile Computer Windows® Powered Pocket PC 2002 ™...
- Page 2 Disclaimer Hand Held Products, Inc. d/b/a HHP (“HHP”) reserves the right to make changes in specifications and other information contained in this document without prior notice, and the reader should in all cases consult HHP to determine whether any such changes have been made.
-
Page 3: Table Of Contents
Chapter 1 - Introduction Required Safety Labels ... 1-2 Location... 1-2 Dolphin 9500/9550 Batch Terminal... 1-2 Regulatory and Safety Approvals for all Dolphin 9500/9550 Terminals ... 1-3 Dolphin 9500/9550 WLAN or WPAN Radio ... 1-4 FCC Compliance... 1-5 Dolphin 9500/9550 Batch Terminal... 1-5 Dolphin 9500/9550 RF Terminal with 802.11b and/or Bluetooth Radio... - Page 4 Checking Battery Power... 3-12 Storing Batteries ... 3-12 Guidelines for Battery Use and Disposal ... 3-12 Dolphin 9500/9550 Technical Specifications ... 3-13 Chapter 4 - Using the Dolphin 9500/9550 Mobile Computer Entering Data ... 4-1 Today Screen ... 4-2 Navigation Bar ... 4-3 Command Bar...
- Page 5 Verify That Beam Settings Are Set to Receive ... 6-6 IrDA Port Location on the Terminal ... 6-6 Sending and Receiving Information... 6-7 Troubleshooting... 6-8 Using an ISP ... 6-9 Adding Programs Directly from the Internet ... 6-9 Dolphin® 9500/9550 Mobile Computer User’s Guide...
- Page 6 Send a File ... 8-16 Browse Remote Device ... 8-18 Receive Contact or File ... 8-22 Enable File Sharing ... 8-22 Using the Dialer ... 8-24 Get Connected Wizard ... 8-26 Dial-up to Your Network ... 8-29 Dolphin® 9500/9550 Mobile Computer User’s Guide...
- Page 7 Pocket Excel... 9-25 Tips for Working in Pocket Excel ... 9-25 Chapter 10 - Dolphin 9500/9550 HomeBase Overview... 10-1 Dolphin 9500/9550 HomeBase Parts and Functions ... 10-2 Front Panel ... 10-2 Rear Panel ... 10-4 Powering the HomeBase... 10-5 HomeBase Serial Connector ... 10-6 Charging the Main Battery...
- Page 8 Equipment Requirements ... 10-8 Setting up the HomeBase for RS-232 Communications ... 10-8 Setting up the HomeBase for USB Communication ... 10-10 Communicating with the Dolphin 9500/9550 Terminal ... 10-12 Verifying Communication... 10-12 Verifying Data Transfer ... 10-12 Mounting the HomeBase ... 10-13 Desk Mounting ...
- Page 9 Chapter 13 - Dolphin 9500/9550 QuadCharger Overview... 13-1 Dolphin QuadCharger Parts and Functions ... 13-1 Front Panel ... 13-1 Rear Panel... 13-2 Supplying Power to the QuadCharger ... 13-3 Inserting and Removing Battery Packs... 13-3 Storing Batteries ... 13-3 Charging Batteries in the QuadCharger ... 13-3 Using the Battery Analyzer...
- Page 10 Dolphin® 9500/9550 Mobile Computer User’s Guide...
-
Page 11: Chapter 1 - Introduction
This User’s Guide The Dolphin 9500/9550 Mobile Computer User’s Guide is designed to provide you with the information you need to make the most of your Dolphin terminal. Sections on the basics, safety, battery use, accessories, and service make this guide a complete source of information. -
Page 12: Required Safety Labels
Safety labels appear on the back panel of both terminals. On the Dolphin 9500 units, the required information is contained in the label. On the Dolphin 9550, some required information is embedded in the plastic and the rest is in the label. -
Page 13: Regulatory And Safety Approvals For All Dolphin 9500/9550 Terminals
Regulatory and Safety Approvals for all Dolphin 9500/9550 Terminals Parameter U.S.A Canada European Community The CE Mark on the product indicates that the system has been tested to and conforms with the provisions noted within the 89/336/EEC Electromagnetic Compatibility Directive and the 73/23/EEC Low Voltage Directive. -
Page 14: Dolphin 9500/9550 Wlan Or Wpan Radio
Dolphin 9500/9550 WLAN or WPAN Radio The Dolphin® 9500/9550 RF terminal is designed to comply with the most current applicable standards on safe levels of RF energy developed by the Institute of Electrical and Electronics Engineers (IEEE) and the American National Standards Institute (ANSI) and has been recommended for adoption by the Federal Communications Commission (FCC). -
Page 15: Fcc Compliance
Dolphin mobile computers meet or exceed all applicable standards and have been manufactured to the highest level of quality. Dolphin 9500/9550 Batch Terminal Dolphin 9500/9550 Batch terminals comply with part 15 of the FCC rules. Operation is subject to the following two conditions: 1. This device may not cause harmful interference. -
Page 16: Dolphin 9500/9550 802.11B And/Or Bluetooth R&Tte Compliance Statement
Canada Europe Mexico Dolphin 9500/9550 802.11b and/or Bluetooth R&TTE Compliance Statement The HHP Dolphin 9500RF and Dolphin 9550RF are in conformity with all essential requirements of the R&TTE Directive (1999/ 5/EC). This equipment has been assessed to the following standards: Parameter R&TTE... -
Page 17: Chapter 2 - Getting Started
Intel PXA255 400MHz RISC processor for fast processing and is built to run the Pocket PC 2002 platform. Dolphin 9500/9550 computers are available with different types of 2D imagers and wireless radios to meet most any enterprise mobile data collection requirement. -
Page 18: Dolphin 9500/9550 Models And Options
Dolphin 9500/9550 Models and Options HHP’s family of Dolphin 9500/9550 mobile data collection terminals includes these models: Dolphin 9500 Batch This is a Pocket PC mobile computer with a unique, ergonomic shape designed for single-handed use. The standard Dolphin 9500 is available with 64 MB RAM and 32 MB non-volatile Flash. The industrial, mechanical connector supports serial RS-232 up to 115 Kbps and USB communications up to 12 Mbps. -
Page 19: Dolphin 9500/9550 Peripherals
The Dolphin Net Base is a four-slot charging/communication cradle that holds, powers, charges, and communicates with the terminal in each slot. Communications occurs via Ethernet and dynamically-assigned IP addresses. For more information about the Dolphin Net Base, please consult the Dolphin 9500/9550 Net Base Quick Start Guide. Dolphin QuadCharger™... -
Page 20: Dolphin 9500/9550 Accessories
Each of the following items is sold separately to enhance your Dolphin 9500/9550 terminals capabilities. Charging/Communication Cables USB and serial cables connect the Dolphin 9500/9550 directly to both a peripheral device for communication and a power source for charging. Dolphin Mobile Charger This charging cable plugs the terminal directly into a vehicle cigarette lighter/power port to power the terminal and charge the battery pack. -
Page 21: Bar Code Symbologies Supported
OCR A and OCR B Postal Codes Postnet and most international 4 state codes Australian Post British Post Canadian Post China Post Japanese Post KIX (Netherlands) Post Korea Post Planet Code Dolphin® 9500/9550 Mobile Computer User’s Guide 2 - 5... -
Page 22: Using The Dolphin 9500/9550 For The First Time
Step 2. Install the Main Battery Pack Use only the Li-ion battery packs provided by HHP. The use of any battery pack not sold/manufactured by HHP in the Dolphin 9500/9550 terminal will void your warranty and may result in damage to the Dolphin terminal or battery. - Page 23 Mobile Charger to the 17-pin connector and plug the cable into a power outlet. When the Li-ion battery is not installed in the terminal, place the battery pack in the Dolphin QuadCharger. Dolphin® 9500/9550 Mobile Computer User’s Guide D OL P H IN 9 5 0...
- Page 24 Bootloader Keyboard Kernel Tap the target firmly and accurately at each location on the screen. The target will continue to move until the screen is aligned. > > tab > Start Settings System Dolphin® 9500/9550 Mobile Computer User’s Guide Screen...
- Page 25 Note: HHP recommends using screen protectors for Dolphin 9500/9550 terminals; especially for those terminals used within applications that require high-volume interfacing with the touch screen. Screen protectors help prevent damage to the touch screen and are easily installed. Screen protectors can be purchased at any major computer retail store or directly from HHP, Inc.
- Page 26 All configurations of the Dolphin 9500/9550 install HHP Demos and HHP Utilities. If the terminal is configured with a wireless radio, the appropriate radio drivers (*.cabs) and utilities for each radio install.
- Page 27 4. Press the ESC key to close the demo. Sample Bar Codes You can use the following bar codes to verify decoding: Sample 128 Code 128 For more information, see Decoding Dolphin® 9500/9550 Mobile Computer User’s Guide on page 4-6. Sample PDF417 PDF417 Test Message 2 - 11...
-
Page 28: Resetting The Terminal
If the main battery and back-up battery are ever fully discharged of power, the terminal performs a hard reset when power is restored. The terminal will be restored to its original state. All data stored in RAM memory will be lost. 2 - 12 Power on page Dolphin® 9500/9550 Mobile Computer User’s Guide 5-11. -
Page 29: Chapter 3 - Dolphin 9500/9550 Overview
Dolphin 9500/9550 Overview System Features Processor The Dolphin 9500/9550 terminal is equipped with an Intel X-Scale 400MHz RISC microprocessor that runs on a 100 MHz RAM BUS, making it one of the most powerful Pocket PC platforms on the market. Operating System The Pocket PC platform is a compact, highly efficient, scalable operating system. -
Page 30: Front Panel Features
Decode LED - Located in the upper left corner, this LED lights green when a scanned bar code is successfully decoded. Display The Dolphin 9500/9550 terminals feature a 3.5” liquid crystal display (LCD) touch screen and is covered with an industrial, protective lens. The video graphic array (VGA) resolution is 1/4 (240 X 320 pixel). The touch screen is activated with the stylus (included with the terminal) or a finger. - Page 31 Keyboard The Dolphin 9500/9550 series features three keyboard options: 35-key numeric/alpha keyboard, 43-key numeric/alpha keyboard, and 56-key full alpha/numeric keyboard. Each keyboard is backlit for easy viewing in various lighting conditions and contains centrally located keys for both right- and left-hand operation. The silver background of both the keys and the overlay enhances the readability of each.
-
Page 32: Back Panel Features
Back Panel Features Because the back panel of the Dolphin 9500 and the Dolphin 9550 are different, each is featured in its own section. Dolphin 9500 The following graphic describes features on the back panel of the Dolphin 9500 terminal. - Page 33 Speaker The Dolphin 9500/9550 terminal has an integrated speaker that sounds audio signals as you scan bar code labels and enter data. The operating frequency range is 500Hz at 71 dB up to 80 dB. The speaker can also be used for playing sounds (e.g., WAV files).
-
Page 34: Dolphin 9550
Dolphin 9550 This section describes the back panel of the Dolphin 9550. It contains the same features as the Dolphin 9500 described in the previous section with the additions of • a pistol-grip handle to hold and maneuver the terminal with greater ease, •... - Page 35 Wrist Lanyard Fastener A wrist lanyard is available for Dolphin 9550 terminals that you can attach to the handle in this location an. Rubber Bumpers The following graphic shows the Dolphin 9550 in a nose-down position, resting on its rubber bumpers.
-
Page 36: Side Panel Features
Audio Jack Dolphin 9500/9550 terminals contain a 2.5mm audio jack for stereo audio playback. This jack serves as both a stereo headset interface or as a microphone (on the Dolphin 9500 GSM configuration). In both cases, you must use a 2.5mm plug. -
Page 37: Bottom Panel Features
Mechanical Connector The bottom panel of the Dolphin 9500/9550 features a custom, industrial-grade connector with 17 pins. When seated in a Dolphin 9500 series peripheral, the terminal is powered, the main battery charged, and communication occurs via this connector. All Dolphin 9500 series peripherals are designed to work exclusively with this connector. -
Page 38: Batteries
Batteries The Dolphin 9500/9550 features intelligent battery technology. It is comprised of two types of battery power: the main battery pack installed in the back panel and the backup battery located inside the terminal. They are designed to work together to prevent data loss when the terminal is in use over long periods. -
Page 39: Managing Battery Power
Managing Battery Power Data and files saved on the Dolphin 9500/9550 terminal may be stored in RAM, so it is important to maintain a continuous power supply to the terminal. When the main battery pack becomes low, the Low Battery Charge icon appears in the notification tray at the top of the screen. -
Page 40: Checking Battery Power
• Although your battery can be recharged many times, it will eventually be depleted. Replace it after the battery is unable to hold an adequate charge. • If you are not sure the battery or charger is working properly, please send it to HHP or an authorized HHP service center, for inspection. 3 - 12 Dolphin® 9500/9550 Mobile Computer User’s Guide... -
Page 41: Dolphin 9500/9550 Technical Specifications
Bluetooth radio Physical 9.6"L x 3.45"W x 1.66"D at display (24.53 x 8.76 x 4.23 cm), 2.7"W x 1.5"D at grip (6.9 x 3.8 Dimensions: Dolphin® 9500/9550 Mobile Computer User’s Guide Image Engine Options on page 2-2. Bar Code Symbologies Supported... - Page 42 USB or serial cables that charge and communicate with the terminal directly–without a cradle. cables 7.4V, 14.8 watt hour Li-ion rechargeable main battery for the Dolphin. Li-Ion Battery Pack Regulatory Approvals US/Canada, R&TTE FCC-CE-Radio Country: 3 - 14 Dolphin® 9500/9550 Mobile Computer User’s Guide...
-
Page 43: Chapter 4 - Using The Dolphin 9500/9550 Mobile Computer
Using the Dolphin 9500/9550 Mobile Computer Entering Data To enter data, you may: • Use the 35-key, 43-key, or 56-key keyboards • Capture images or scan bar code data into data fields • Use the Soft Input Panel (SIP) to enter text •... -
Page 44: Today Screen
Tap to view notification messages. Tap to change volume or mute all sounds. Tap to change date and time. Tap to open an item. Your day at a glance. Tap to view connection status. Dolphin® 9500/9550 Mobile Computer User’s Guide... -
Page 45: Navigation Bar
Drag the stylus off the button so that the command is not carried out. New button. Dolphin® 9500/9550 Mobile Computer User’s Guide Tap to change volume or mute the device. Tap to quickly select a program you have recently used. -
Page 46: Pop-Up Menus
4 - 4 Tap and hold to display the pop-up menu. Lift the stylus and tap the action you want. Tap outside the menu to close it without performing an action. Dolphin® 9500/9550 Mobile Computer User’s Guide... -
Page 47: Selecting Programs
Note: Some programs have abbreviated labels for check boxes and drop-down lists. To see the full spelling of an abbreviated label, tap and hold the stylus on the label. Drag the stylus off the label so that the command is not carried out. Dolphin® 9500/9550 Mobile Computer User’s Guide 4 - 5... -
Page 48: Imager
To Decode a Bar Code 1. Point the Dolphin 9500/9550 terminal directly at the bar code. The imager faces straight out the top panel. The aiming beam should be oriented in line with the bar code to achieve optimal decoding. A range of 4-10 inches (10-25 cm) from the bar code is recommended. - Page 49 (mil size) should be read closer to the unit. Symbologies with larger bars or elements (mil size) should be read farther from the unit. The following chart displays the imager’s aiming positions: Linear bar code 2D Matrix symbol Dolphin® 9500/9550 Mobile Computer User’s Guide 4 - 7...
-
Page 50: Capturing Images
The Scan Key The Scan key captures images on both the Dolphin 9500 and the Dolphin 9550 terminals. It is the only way to capture an image on the 9500, while on the 9550, you can also use the scan trigger on the pistol-grip handle. -
Page 51: Using The Keyboards
Using the Keyboards The Dolphin 9500/9550 series features three keyboard options: 35-key numeric/alpha keyboard, 43-key alpha/numeric keyboard, and 56-key full alpha/numeric keyboard. Each keyboard is backlit for easy viewing in various lighting conditions and contains centrally located keys for both right- and left-hand operation. The silver background of both the keys and the overlay enhances the readability of each. - Page 52 The Power key puts the terminal into and wakes the terminal from suspend mode. Power Key The SCAN key activates the scan on both Dolphin 9500/9550 terminals. It also “wakes” the SCAN Key terminals from sleep mode. Its position allows convenient one-handed image-taking and/or bar code decoding.
- Page 53 Other functionality varies according to the application in use. Using the Modifier Keys All three versions of the Dolphin 9500/9550 keyboard feature the standard PC keyboard modifier keys, Shift (SFT), Alt, and Control (CTRL) as well as Blue and Red modifier keys.
-
Page 54: 35-Key Numeric/Alpha Keyboard
The letters on the overlay above specific number keys indicate what letter will be typed when you press that key in alpha mode. 4 - 12 SCAN key Shift key CTRL, Blue, Red, ALT Modifier keys Escape key Tab key Enter key Delete key Backlight key Dolphin® 9500/9550 Mobile Computer User’s Guide... -
Page 55: 43-Key Alpha/Numeric Keyboard
Numeric mode is when you type numbers with the letter keys. The numbers on the overlay above specific letter keys indicate what number will be typed when you press that key in Numeric mode. Dolphin® 9500/9550 Mobile Computer User’s Guide SCAN key Escape key... -
Page 56: 56-Key Full Alpha/Numeric Keyboard
Key Combinations There are keyboard combinations for specific functions and special characters on each keyboard. For charts of the key combinations associated with each keyboard layout, see the Appendix A of the Dolphin 9500/9550 User’s Guide. 4 - 14 Dolphin® 9500/9550 Mobile Computer User’s Guide... -
Page 57: Adjusting The Backlight
Red Modifier key + TAB to increase the contrast All three keyboards have red indicators over each key to indicate which key to press in combination with the red modifier key to adjust the contrast. Dolphin® 9500/9550 Mobile Computer User’s Guide Backlight on page 4-10. 4 - 15... - Page 58 Using the System Settings Tap Start > Settings > System tab > Contrast. The current settings are displayed. Use the slider to adjust the contrast to the desired setting. Tap OK to save adjustments. 4 - 16 Dolphin® 9500/9550 Mobile Computer User’s Guide...
-
Page 59: Communication Media Options
3-9. IrDA Port The IrDA port enables the Dolphin 9500/9550 to transmit data via pulses of light to and from other IrDA-compliant devices, such as printers and PCs or to other Dolphin 9500/9550 terminals. 802.11b Radio The Dolphin 9500/9550 may be equipped with a WiFi®-compliant, interoperable 2.4 GHz 802.11b direct sequence spread spectrum wireless local area network (WLAN) radio. -
Page 60: Radio Options
802.11b • Bluetooth Dolphin 9500/9550 terminals can be configured with more than one radio. Bluetooth and 802.11b radios are co-operational, which means that you can operate one or both radios simultaneously. Radio Driver Installation Radio drivers (usually *.cab files) install during the autoinstall whenever the mobile computer is initialized; when first turned on or after a hard reset. - Page 61 None and tap Apply. For more information about 802.11b radios, see For more information about Bluetooth radios, see Dolphin® 9500/9550 Mobile Computer User’s Guide Wireless LAN Communications with 802.11b Wireless PAN Communications with Bluetooth on page 7-1.
-
Page 62: Entering Text Using The Input Panel
When you use the input panel, your terminal anticipates the word you are typing or writing and displays it above the input panel. When you tap the displayed word, it is inserted into your text at the insertion point. The more you use your Dolphin 9500/9550 terminal, the more words it learns to anticipate. -
Page 63: Using The Block Recognizer
To edit or format typed text, select it by dragging the stylus across the text. You can cut, copy, and paste text by tapping and holding the selected words and then tapping an editing command on the pop-up menu, or by tapping the command on the Edit menu. Dolphin® 9500/9550 Mobile Computer User’s Guide 4 - 21... -
Page 64: Input Panel Options
You can set input options by going to Start > Settings > Personal tab > Input.The following graphics are the tab windows where you can customize the input panel to your preferences: Input Method tab Word Completion tab Options tab 4 - 22 Dolphin® 9500/9550 Mobile Computer User’s Guide... -
Page 65: Writing On The Screen
You can cut, copy, and paste written text in the same way you work with typed text: tap and hold the selected words and then tap an editing command on the pop-up menu, or tap the command on the Edit menu. Dolphin® 9500/9550 Mobile Computer User’s Guide Tap the Pen button and use your stylus like a pen. -
Page 66: Drawing On The Screen
Edit menu. To resize a drawing, make sure the Pen button is not selected, and drag a selection handle. 4 - 24 The drawing box indicates the boundaries of the drawing. Pen button. Dolphin® 9500/9550 Mobile Computer User’s Guide... -
Page 67: Status Icons
To choose reminder types and sounds, tap Start > Settings > Personal tab > Sounds & Notifications (see page 5-2). The options you choose here apply throughout the terminal. Dolphin® 9500/9550 Mobile Computer User’s Guide Personal Tab 4 - 25... -
Page 68: Finding And Organizing Information
You can move files in File Explorer by tapping and holding the item you want to move, and then tapping Cut or Copy and Paste on the pop-up menu. 4 - 26 Select the sort order for the list. Tap the folder name to open it. Tap and hold to create a new folder. Dolphin® 9500/9550 Mobile Computer User’s Guide... -
Page 69: Chapter 5 - Settings
Enables you to customize buttons, input methods, menus, etc. - see System tab Enables you to adjust system settings - see Connections tab Enables you to establish network and connection settings - see Dolphin® 9500/9550 Mobile Computer User’s Guide System tab System Tab on page Connections tab... -
Page 70: Personal Tab
Note: Personal settings are stored in RAM memory. They are replaced by system defaults after each hard reset. For more information about resets, see 5 - 2 Input Panel Options Soft Reset (Warm Boot) on page 2-12. on page 4-22. Dolphin® 9500/9550 Mobile Computer User’s Guide... -
Page 71: Adding A Program To The Start Menu
File Explorer opens to My Documents by default; to see a list of all folders, tap the folder name and then My Device. 2. Tap and hold on the program, then tap Copy on the pop-up menu. Dolphin® 9500/9550 Mobile Computer User’s Guide 5 - 3... - Page 72 5. Navigate to the Start Menu folder (Windows > Start Menu). 6. Right-click on an empty area and select Paste. 7. On the terminal, tap the Start menu. 8. Verify that program appears. For more information, see ActiveSync Help. 5 - 4 Dolphin® 9500/9550 Mobile Computer User’s Guide...
-
Page 73: System Tab
Displays the information the terminal uses to identify itself to other devices. It can be important to know this information if the Dolphin terminal is going to be part of a networked system of devices. Dolphin® 9500/9550 Mobile Computer User’s Guide 5 - 5... -
Page 74: Backlight
7-10. 5 - 6 Displays the system’s default name. This is the name used by ActiveSync. Displays the description of the device ID. Setting the Time and Date Dolphin® 9500/9550 Mobile Computer User’s Guide Adjusting on page 2-10. The Status... -
Page 75: Irda Config
3. Perform a soft reset; see Soft Reset (Warm Boot) 4. Go to Start > Settings > System tab > IrDA and verify that the screen says “IrDA is now DISABLED.” Dolphin® 9500/9550 Mobile Computer User’s Guide on page 2-12. 5 - 7... -
Page 76: Memory
To increase Program or Storage memory, tap, hold, and drag the slider towards the kind of memory you want to increase. The three fields adjust automatically; Program memory decrease when you increase Storage memory and vice versa. 5 - 8 Dolphin® 9500/9550 Mobile Computer User’s Guide... - Page 77 Select Storage Card and the Storage Card tab displays the current capacity and usage statistics of the installed storage card. Dolphin® 9500/9550 Mobile Computer User’s Guide The total MB of memory capacity of the selected memory. The MB currently being used.
- Page 78 Find Enables you to search for large files using storage memory. It opens the Find screen with Larger than 64KB already selected in the Type field. 5 - 10 Remove Programs on page Dolphin® 9500/9550 Mobile Computer User’s Guide 5-13.
-
Page 79: Power
(number of decimal places allowed, for example), currency (using the $ or € € symbol, for example), time, and date. These specifications apply to all screens, including the Today screen. Dolphin® 9500/9550 Mobile Computer User’s Guide 5 - 11... - Page 80 The Region tab displays an overview of the region selected in the drop-down list at the top. The terminal is loaded with a number of pre-programmed regional settings. Select one from the list. 5 - 12 Dolphin® 9500/9550 Mobile Computer User’s Guide...
-
Page 81: Remove Programs
(My Device > IPSM > Autoinstall) will re-install after the next hard reset. For information about the Autoinstall process, see Autoinstall on page 2-10. For information about the hard reset process, see Hard Reset (Cold Boot) on page 2-12. Dolphin® 9500/9550 Mobile Computer User’s Guide 5 - 13... - Page 82 For more detailed memory information, tap memory of “Adjust memory allocation.” along the bottom margin. It opens the Memory system setting. For information about memory settings, see Memory on page 5-8. 5 - 14 Dolphin® 9500/9550 Mobile Computer User’s Guide...
-
Page 83: Screen
2-8. ClearType Dolphin 9500/9550 displays support ClearType font rendering. ClearType is a Microsoft technology that dramatically increases the readability of text on LCD displays. Select the Enable ClearType, tap OK, and perform a soft reset; see Soft Reset (Warm Boot) on page 2-12. -
Page 84: Connection Settings
6-5. Connections Enables you to configure your network connections for internet and work, create new connections, and set default connections. Network Adapters Enables you to configure your network adapters. 5 - 16 Using Infrared Dolphin® 9500/9550 Mobile Computer User’s Guide... -
Page 85: Connections Tab
This tab enables you to name or, rather, re-name “Internet Settings” to a name of your own choosing. If you enter a new name and tap OK, that name appears in drop-down lists instead of “Internet Settings.” Dolphin® 9500/9550 Mobile Computer User’s Guide 5 - 17... - Page 86 Select the appropriate Baud rate for both the modem and the network you’re using. • (Tap Advanced to enter Port Settings, TCP/IP, and Name Servers; see 5 - 18 Advanced Settings on page 5-19.) Dolphin® 9500/9550 Mobile Computer User’s Guide...
-
Page 87: Advanced Settings
Port Settings, TCP/IP, Name Servers. You should not need to change advanced settings. If you do, verify with your network administrator that you have the correct information. Dolphin® 9500/9550 Mobile Computer User’s Guide 5 - 19... - Page 88 • Use the server-assigned IP address (recommended) or enter a specific IP address in the field provided • Use Slip • Use software compression • Use IP header compression Tap OK to save settings. 5 - 20 Dolphin® 9500/9550 Mobile Computer User’s Guide...
- Page 89 The VPN tab enabled you to create virtual private network for your work settings. Proxy Server tab The Proxy Server tab enables you to connect to the internet via a proxy server. Dolphin® 9500/9550 Mobile Computer User’s Guide To Configure Internet Settings on page 5-18.
- Page 90 See Name Servers tab on page 4. Tap OK and you are returned to the VPN tab. 5 - 22 5-20 for information about completing this tab. 5-21 for information about completing this tab. Dolphin® 9500/9550 Mobile Computer User’s Guide...
- Page 91 3. Enter the Proxy server information in the field provided and tap Advanced. 4. Complete the fields • HTTP address and Port • WAP and Port - enter the wireless access point identifier for the network Dolphin® 9500/9550 Mobile Computer User’s Guide 5 - 23...
-
Page 92: Deleting Connections
Creating a Custom Connection The Dolphin 9500/9550 terminal comes loaded with Internet Settings and Works Settings as options in the drop-down lists on the Connections tab. You can create new settings of each type. After they are saved, custom settings appear in the drop-down lists on the Connections tab. - Page 93 Tap the Modem tab. The Modem tab opens. From there, complete the rest of the process for setting up a work connection. For more information, see Work Settings Dolphin® 9500/9550 Mobile Computer User’s Guide on page 5-21. 5 - 25...
-
Page 94: Connecting
(Internet and Work), select the desired setting. Tap Connect and the terminal begins connecting to the network. Note: The Connect button is active only when the selected connection setting is valid. 5 - 26 Dolphin® 9500/9550 Mobile Computer User’s Guide... -
Page 95: Network Card Connections
The third field on the Connections tab (see page 5-17) enables you to select the connection setting of your network card. You can have your network card use your internet or work settings. Tap OK to save settings. Dolphin® 9500/9550 Mobile Computer User’s Guide 5 - 27... -
Page 96: Network Adapters
To see the IP addresses and Name Servers of a network adapter, select one in the list, and tap Properties. Server-assigned IP addresses use DHCP. 5 - 28 Dolphin® 9500/9550 Mobile Computer User’s Guide... -
Page 97: Editing Properties
Do NOT perform a hard reset after modifying a network adapter. Hard resets return the terminal to factory defaults. FOr more information, (see Hard Reset (Cold Boot) Dolphin® 9500/9550 Mobile Computer User’s Guide Soft Reset (Warm Boot) on page 2-12). - Page 98 5 - 30 Dolphin® 9500/9550 Mobile Computer User’s Guide...
-
Page 99: Chapter 6 - Communications
Communications Overview You can exchange information between your Dolphin 9500/9550 and other mobile devices, a desktop computer, a network, or the Internet. You have the following connection options: • Connect to your desktop computer and synchronize via Microsoft ActiveSync v3.7 or higher. -
Page 100: Using Activesync
Requirements To synchronize, ActiveSync version 3.7 or higher must be installed on both your desktop computer and the Dolphin 9500/9550 terminal. Dolphin 9500/9550 terminals ship with ActiveSync 3.7 already installed. Therefore, you must install ActiveSync 3.7 on your desktop computer from the Microsoft Companion CD that came with your terminal. -
Page 101: Synchronizing From The Terminal
4. Double-click the *.exe or *.setup.exe file. The installation wizard begins. Follow the directions on the PC screen. The installation process includes transferring the software to the terminal. Dolphin® 9500/9550 Mobile Computer User’s Guide View connection status. Tap to connect and synchronize. - Page 102 After installation on the terminal is complete, tap Start > Programs and the program and its icon appears on the Programs screen. Tap it to open the program. 6 - 4 Autoinstall on page Hard Reset (Cold Boot) on page 2-12. Dolphin® 9500/9550 Mobile Computer User’s Guide 2-10. Remember, a...
-
Page 103: Using Infrared
Using Infrared Dolphin 9500/9550 terminals contains infrared or IrDA ports on the left side panel (see IrDA Port on page 3-8). Using these ports, you can send and receive data between the terminal and other devices equipped with infrared. This can include, but is not limited to, Pocket PC information such as Contacts and Tasks, as well as software upgrades. -
Page 104: Verify That Beam Settings Are Set To Receive
Settings > Connections tab > Beam. The Beam Settings window should appear as follows: IrDA Port Location on the Terminal The above graphics shows a Dolphin 9500 terminal. The location is the same on both Dolphin 9500 and Dolphin 9550 terminals. For more information, see... -
Page 105: Sending And Receiving Information
4. Select Beam File. The information begins transmitting to the other device. Receiving: 1. Align the IrDA ports. 2. Have the owner of the other device send the information to you. 3. Your terminal automatically begins receiving it. Dolphin® 9500/9550 Mobile Computer User’s Guide 6 - 7... -
Page 106: Troubleshooting
If the Beam Settings are not set to receive or you’ve aligned two IrDA ports and the terminal is still not receiving, go to Start > Programs > Infrared Receive. The terminal searches for the sending device. If the terminal cannot find the sending device, the following message appears: 6 - 8 Dolphin® 9500/9550 Mobile Computer User’s Guide... -
Page 107: Using An Isp
4. Tap the file, such as an *.exe file. The installation wizard begins. Follow the directions on the screen. For more information about working with Pocket Internet Explorer, see Dolphin® 9500/9550 Mobile Computer User’s Guide Inbox on page 9-12. - Page 108 6 - 10 Dolphin® 9500/9550 Mobile Computer User’s Guide...
-
Page 109: Chapter 7 - Wireless Lan Communications With 802.11B
Direct Sequence Spread Spectrum (DSSS) technology to spread the signal continuously over a wide frequency band. It provides a data rate of up to 11 Mbps. In addition, the open software architecture makes the Dolphin 9500/9550 a complete solution for a variety of wireless mobile data collection applications. -
Page 110: Status Tab
Shows the Network Name and the MAC address of: - the access point the radio is associated with in AP mode, or - the creator of IBSS into which the radio is joined in peer-to-peer (Ad-Hoc) mode. 7 - 2 Dolphin® 9500/9550 Mobile Computer User’s Guide... - Page 111 Tap this button to clear IP Address input and the ping statistics field. Ping Tap this button to ping the IP address entered in the input field. Ping Statistics Shows the pinging IP address and the pinging results. Dolphin® 9500/9550 Mobile Computer User’s Guide 7 - 3...
-
Page 112: Config Tab
The channel it uses and the WEP method it applies, if any. The icon stands for WEP Key-On, and for WEP Key-Off. Supported data rate of the access point or the peer station. Dolphin® 9500/9550 Mobile Computer User’s Guide , or a peer station... - Page 113 If adding an SSID with WEP Key Off, the Settings window does not display and the SSID is added directly to the Preferred Profile table when you tap the Add button. Dolphin® 9500/9550 Mobile Computer User’s Guide 7 - 5...
- Page 114 Move the highlighted profile down to decrease the automatic association priority. To Create a New Profile 1. Tap the New button and the following screen displays: 2. Enter the values for the new profile in the information fields and tap OK. 7 - 6 Dolphin® 9500/9550 Mobile Computer User’s Guide...
- Page 115 Note: The SSID, Type, TX Rate, and Channel fields are unchangeable in Access Point mode, whereas TX Rate and Channel fields can be changed in Peer-to-Peer mode. Dolphin® 9500/9550 Mobile Computer User’s Guide This option means that … WEP Key Off...
- Page 116 Delete button and the following screen displays: From the pop-up window select the option of your choice and tap Yes to confirm or No to cancel. 7 - 8 Dolphin® 9500/9550 Mobile Computer User’s Guide...
-
Page 117: Advanced Tab
Resets all the settings to default values (Always Enable for Power Save Mode, Automatic based on WEP setting for Authentication Algorithm, and Auto TX Preamble for Preamble Mode). Apply Applies the change to new card setting. Dolphin® 9500/9550 Mobile Computer User’s Guide Default setting. AP must use WEP method. 7 - 9... -
Page 118: About Tab
This icon appears on the Programs window only if an 802.11b radio is installed. 3. The Status icon is now active in the bottom tray. When you tap it, a menu of configuration options appears. 7 - 10 Dolphin® 9500/9550 Mobile Computer User’s Guide... - Page 119 Note: The Status Icon changes to a crossed lock for the WEP-On AP or a station. Dolphin® 9500/9550 Mobile Computer User’s Guide Selecting This Option… Turns on the radio. LED is on and the Link Icon displays with signal strength.
-
Page 120: 802.11B Wireless Security Supplement
The client software supports the following EAP authentication methods: • MD5 • LEAP • TLS/SmartCard • TTLS • PEAP There is a worksheet for each method. Complete the worksheet for the method you choose. 7 - 12 Dolphin® 9500/9550 Mobile Computer User’s Guide... - Page 121 ____ A particular CA is required:________________________ 4. Are intermediate certificates allowed? ____ No. ____ Yes. 5. What is the name of the server? _____________________________ This usually includes the server’s domain, for example: server.big_school.edu. Dolphin® 9500/9550 Mobile Computer User’s Guide 7 - 13...
- Page 122 ____ A particular CA is required: _______________________ 9. Are intermediate certificates allowed? ____ No. ____ Yes. 10. What is the name of the server? This usually includes the server’s domain, for example: server.big_school.edu. _____________________________ 7 - 14 Dolphin® 9500/9550 Mobile Computer User’s Guide...
- Page 123 ____ A particular CA is required: _______________________ 9. Are intermediate certificates allowed? ____ No. ____ Yes. 10. What is the name of the server? This usually includes the server’s domain, for example: server.big_school.edu. _____________________________ Dolphin® 9500/9550 Mobile Computer User’s Guide 7 - 15...
-
Page 124: Configuring The Pocket Pc Client
You manage ports on this screen. Port Status icon 2. Tap the Client menu and select Configure. The Configuration Authentication screen appears displaying the User tab. 3. On the User tab 7 - 16 Dolphin® 9500/9550 Mobile Computer User’s Guide... -
Page 125: Running Aegis Client
The port is not in use or is disabled. Gray Either the AEGIS Client isn’t running, or the port is not bound to the 802.1X protocol. Dolphin® 9500/9550 Mobile Computer User’s Guide System Settings Tab on page 7 - 17... -
Page 126: Configuring The Aegis Client Software
3. Server identity tab - used only for the TLS, TTLS, and PEAP authentication methods. It tells the Client what server credentials to accept from the authentication server to verify the server. 7 - 18 Dolphin® 9500/9550 Mobile Computer User’s Guide... - Page 127 This parameter specifies the authentication protocol operating within the secure tunnel. The following protocols are presently supported for TTLS: EAP-MD5, CHAP, PAP, MS-CHAP and MS-CHAP-V2. For PEAP the supported protocols are EAP-TLS, EAP-MS-CHAP-V2, and GTC. Dolphin® 9500/9550 Mobile Computer User’s Guide 7 - 19...
- Page 128 The interval at which the client polls the ports. This is used under different circumstances, for instance after physical changes such as card removal or insertion have been detected. This value should not be changed from the 10-second default unless so advised by technical support. 7 - 20 Dolphin® 9500/9550 Mobile Computer User’s Guide...
- Page 129 When activated, the server name field identifies a domain and the certificate must have a server name belonging to this domain or to one of its sub-domains (e.g., zeelans.com, where the server is blueberry.zeelans.com). Dolphin® 9500/9550 Mobile Computer User’s Guide 7 - 21...
-
Page 130: Port Setting Menus
Removes an adapter from the port list. When the 802.1X protocol binds to an adapter, it is added to the port list. This usually happens when the adapter is in the device and the Client software is installed, or Install Protocol is selected from the Client menu. 7 - 22 Dolphin® 9500/9550 Mobile Computer User’s Guide... - Page 131 Selecting this option binds the 802.1X protocol to the WLAN adapter currently installed on the device. The WLAN adapter then appears in the port list. For more information about network adapters, see Network Adapters Exit Terminates the client, which stops the 802.1X protocol. Dolphin® 9500/9550 Mobile Computer User’s Guide on page 5-28. 7 - 23...
-
Page 132: Port Setting Parameters
DHCP-assigned IP address upon boot-up. This option is ignored if the given adapter has a static IP address. 7 - 24 Dolphin® 9500/9550 Mobile Computer User’s Guide... -
Page 133: Certificate Management
CertAdd screen. 4. Select a certificate from the list. A pop-up will ask if you want to install the certificate. 5. Tap OK. The certificate is loaded in the correct certificate store. Dolphin® 9500/9550 Mobile Computer User’s Guide 7 - 25... - Page 134 7 - 26 Dolphin® 9500/9550 Mobile Computer User’s Guide...
-
Page 135: Chapter 8 - Wireless Pan Communications With Bluetooth
Wireless PAN Communications with Bluetooth Overview Dolphin 9500/9550 terminals are available with a Bluetooth radio for (Wireless Personal Area Network) WPAN usage. When the mobile computer is first initialized, the *.cab file and module for Bluetooth are installed. Powering Up the Bluetooth Radio Driver Before using the radio, make sure that the Bluetooth radio is powered up. -
Page 136: Assign Com Ports
3. As needed, view and/or enable/disable the Bluetooth COM port assignments. Tap OK. Note: The Bluetooth Phone port cannot be disabled. For more information about COM ports, see the Com Port Assignment Table on page A-12. 8 - 2 Dolphin® 9500/9550 Mobile Computer User’s Guide... -
Page 137: Discover Bluetooth Device(S)
• Do not use this method to bond with a printer! The third-party printing software included on the installation CD also handles bonding. 1. If not open, launch the Bluetooth Devices folder. Tap on the Bluetooth icon in the Today screen. Select Advanced Features, then Bluetooth Devices. Dolphin® 9500/9550 Mobile Computer User’s Guide 8 - 3... - Page 138 3. Alternatively, after selecting a device, tap on the Bond icon. Or tap on Device, then select Bond. 4. The Bluetooth Device Bonding Wizard launches. Follow the wizard to bond with your selected device. 8 - 4 Dolphin® 9500/9550 Mobile Computer User’s Guide...
-
Page 139: View Device Properties
2. Select a device. Tap on the Properties icon, or tap on Device then select Properties. Alternatively, you can tap and hold your stylus on the Bluetooth device you want to view information about. In the pop-up menu, select Properties. Dolphin® 9500/9550 Mobile Computer User’s Guide 8 - 5... -
Page 140: Set Up Your Favorite Device
4. After setting a device as your favorite, its icon appears in the Bluetooth Devices folder with a heart next to it. Change Views You can switch between the Large Icons or Details views for the Bluetooth Devices folder. 1. In Bluetooth Devices, tap on View. 8 - 6 Dolphin® 9500/9550 Mobile Computer User’s Guide... -
Page 141: Delete A Device From The Folder
2. Tap and hold your stylus on the device you wish to delete. In the pop-up menu, select Delete. 3. Alternatively, after selecting a device, tap on the Delete icon. Or tap on Device then select Delete. 4. A Confirm screen appears. Tap Yes. Dolphin® 9500/9550 Mobile Computer User’s Guide 8 - 7... -
Page 142: Turn Radio Transmitter On/Off
3. The Bluetooth Card radio transmitter shuts off. The Bluetooth icon in the task tray becomes gray, as well as relevant menu options (e.g., Get Connected!). 4. To turn the radio transmitter back on, tap on the gray Bluetooth icon. In the pop-up-menu, select Turn Transmitter ON. 8 - 8 Dolphin® 9500/9550 Mobile Computer User’s Guide... -
Page 143: Bluetooth Activesync
Note: If the computer you want to connect to is not listed, tap Find to begin a search. Proceed as described in Scenario #3 on page 8-10. (b) Your mobile computer attempts to connect to your selected computer. Dolphin® 9500/9550 Mobile Computer User’s Guide 8 - 9... - Page 144 (d) The Connect To screen appears, reporting that it is trying to connect to Wireless ActiveSync. (e) After a successful connection is made, the status screen reports Connected. Now you are ready to synchronize, if desired. 8 - 10 Dolphin® 9500/9550 Mobile Computer User’s Guide...
-
Page 145: Bluetooth Lan Access
(d) After a successful connection is made, the status screen reports Connected. (e) Now you are ready to access your LAN for Internet access, files, etc. SCENARIO #2: Your Bluetooth Devices folder contains a favorite access point. Dolphin® 9500/9550 Mobile Computer User’s Guide 8 - 11... - Page 146 Refresh to search again. (c) After you tap Select, a service discovery phase begins. (d) If the LAN requires a Passkey, a screen appears, asking for the Passkey. Enter the passkey, then tap OK. 8 - 12 Dolphin® 9500/9550 Mobile Computer User’s Guide...
- Page 147 (e) After a successful connection is made, the screen reports Connected. Now you are ready to access your LAN for Internet access, files, etc. Dolphin® 9500/9550 Mobile Computer User’s Guide 8 - 13...
-
Page 148: Obex
• In the next screen, select your business card and tap OK. If your business card is not listed, tap Contacts to create one. When you return to the Object Sharing screen, tap OK. 8 - 14 Dolphin® 9500/9550 Mobile Computer User’s Guide... -
Page 149: Send A Contact
Note: If the other device is also using the Bluetooth Connection Kit, you can set it up to receive a contact by tapping the Bluetooth icon. In the pop-up menu, tap Transfer via Bluetooth > Receive Contact or File. 2. Now you are ready to send a contact. Go to your Contacts folder. Dolphin® 9500/9550 Mobile Computer User’s Guide 8 - 15... -
Page 150: Send A File
Note: If the other device is also using the Bluetooth Connection Kit, you can set it up to receive a file by tapping the Bluetooth icon. In the pop-up menu, tap Transfer via Bluetooth > Receive Contact or File. 8 - 16 Dolphin® 9500/9550 Mobile Computer User’s Guide... - Page 151 5. In the next screen, tap on the file you wish to send. You can use the Folder and Type drop-down menus to search for your file. Also, you can scroll horizontally to view the folder, date, size, type, and location of each file. Dolphin® 9500/9550 Mobile Computer User’s Guide 8 - 17...
-
Page 152: Browse Remote Device
Bluetooth > Browse Remote Device. 3. If your mobile computer has no devices in the Bluetooth Devices Folder that supports OBEX File Transfer, then it begins to search for Bluetooth devices nearby. 8 - 18 Dolphin® 9500/9550 Mobile Computer User’s Guide... - Page 153 (the local device). The very bottom of the screen reports the connection status. Send/Receive File(s) or Folder(s) • Single-tap items to select them for transfer. • Double-tap on a folders to open it and see its contents. Dolphin® 9500/9550 Mobile Computer User’s Guide 8 - 19...
- Page 154 Create local folder, as applicable. 2. On the Dolphin 9500/9550, you can also tap and hold your stylus on an item in either the remote or local device that you wish to put in a new folder. In the pop-up menu, select Create folder.
- Page 155 3. After a few seconds, the contents view of the remote device is refreshed. Connect/Disconnect To connect to the remote device, do the following: 1. Make sure the remote device has file sharing enabled. Dolphin® 9500/9550 Mobile Computer User’s Guide 8 - 21...
-
Page 156: Receive Contact Or File
5. After you receive the file or contact, the “Receive Contact or File” feature is automatically disabled. Enable File Sharing 1. Tap on the Bluetooth icon. In the pop-up menu, tap Transfer via Bluetooth > Enable File Sharing. 8 - 22 Dolphin® 9500/9550 Mobile Computer User’s Guide... - Page 157 3. After successfully connecting to the remote device, the screen report Connected. 4. If two minutes passes before you connect, tap Wait Again. 5. File sharing is enabled until you end it by tapping Cancel. Dolphin® 9500/9550 Mobile Computer User’s Guide 8 - 23...
-
Page 158: Using The Dialer
3. Tap and hold your stylus on the contact you wish to dial to. In the pop-up menu, select Dial Contact. Alternatively, you can tap on Tools and select Dial Contact. 8 - 24 Dolphin® 9500/9550 Mobile Computer User’s Guide... - Page 159 The following string can also be included in a phone number: (',') The Dialer cannot dial a phone number containing non-numeric characters other than those listed above. HHP recommends that you follow the standard Microsoft Outlook format for phone numbers. Dolphin® 9500/9550 Mobile Computer User’s Guide 8 - 25...
-
Page 160: Get Connected Wizard
3. Follow the next screen(s) to prepare your specific phone for Bluetooth connections. You may need to do 1, 2 or all of the following steps: (a) Naming your Bluetooth phone (b) Setting your Bluetooth phone in Discoverable mode (c) Preparing your Bluetooth passkey. 8 - 26 Dolphin® 9500/9550 Mobile Computer User’s Guide... - Page 161 Note: The screens below are for the Nokia 7650. 3. As directed on the next two screens, assign the phone a unique name, set the phone to Discoverable mode, and tap Next. Dolphin® 9500/9550 Mobile Computer User’s Guide 8 - 27...
- Page 162 7. Continue to the last screen of the wizard and tap Finish. Now proceed to STEP 6 to complete the bonding process and, if desired, set up automatic connections. Note: Directions for these procedures are provided in Dial-up to Your Network, starting on the next page. 8 - 28 Dolphin® 9500/9550 Mobile Computer User’s Guide...
-
Page 163: Dial-Up To Your Network
Note: Remember what you name the connection. In the future, you will need to select it to start the connection. 3. Tap Next. 4. In the Phone number field, enter the dial-up number. Tap Next. Dolphin® 9500/9550 Mobile Computer User’s Guide 8 - 29... - Page 164 Make up a 4-16 digit passkey, enter it on the phone, then enter it on the Dolphin 9500/9550. Note: The Bluetooth icon on the Today screen blinks to indicate a connection. c) After successfully bonding, you can set up the phone to automatically connect to your Dolphin 9500/9550 without requiring a passkey.
- Page 165 • Scroll to 10 Bluetooth, then press SELECT. • Scroll to 4 View Paired Devices, then press SELECT. • Highlight the Dolphin 9500/9550, then press OPTIONS. • Scroll to 3 Request Connection Authorization, then press NO. To use a different Bluetooth phone for dial-up networking, you can use the same connection setup, but you must make the new phone your favorite.
- Page 166 8 - 32 Dolphin® 9500/9550 Mobile Computer User’s Guide...
-
Page 167: Chapter 9 - Applications
Applications This chapter describes the applications that ship already installed on your Dolphin 9500/9550 terminals. Calendar: Scheduling Appointments and Meetings Use Calendar to schedule appointments, including meetings and other events. You can check your appointments in one of several views (Agenda, Day, Week, Month, and Year) and easily switch views by using the View menu. -
Page 168: Entering An Appointment
Tap to choose from predefined text. Tap to choose from previously entered locations. Tap to select a time. Tap to select a date. Notes is a good place for maps and directions. Entering an Appointment Dolphin® 9500/9550 Mobile Computer User’s Guide... -
Page 169: Using The Summary Screen
3. From the list of e-mail addresses you’ve entered in Contacts, select the meeting attendees. The meeting notice is created automatically and placed in the Outbox folder. For more information on sending and receiving meeting requests, see Calendar Help and Inbox Help. Dolphin® 9500/9550 Mobile Computer User’s Guide Tap to change appointment. -
Page 170: Contacts
Tap to see additional phone numbers and e-mail addresses. Tap to display or edit the contact details. Tap and hold to display a pop-up menu of actions. Contact Application Dolphin® 9500/9550 Mobile Computer User’s Guide... -
Page 171: Creating A Contact
• Tap , Find, enter the contact name, select Contacts for the type, and then tap Go. Dolphin® 9500/9550 Mobile Computer User’s Guide Tap to return to the contact list (the contact is saved automatically). -
Page 172: Using The Summary Screen
When you tap a contact in the contact list, a summary screen is displayed. To change the contact information, tap Edit. 9 - 6 Tap to change contact information. Contacts Summary Screen View contact details. Tap to view notes. Dolphin® 9500/9550 Mobile Computer User’s Guide... -
Page 173: Tasks
Use Tasks to keep track of what you have to do. Tap to create a new task. Note: To change the way information is displayed in the list, tap Tools > Options. Dolphin® 9500/9550 Mobile Computer User’s Guide Select the category of tasks you want displayed in the list. - Page 174 9 - 8 Tap to return to the task list (the task is saved automatically). Tap to choose from predefined subjects. Notes is a good place for maps and drawings. Creating a Task Dolphin® 9500/9550 Mobile Computer User’s Guide...
-
Page 175: Using The Summary Screen
Using the Summary Screen When you tap a task in the task list, a summary screen is displayed. To change the task, tap Edit. Tap to change task. Dolphin® 9500/9550 Mobile Computer User’s Guide View task details. Tap to show and hide additional summary information. -
Page 176: Notes
Tap to open a note or play a recording. Tap and hold to display a pop-up menu of actions. Tap to record. Tap to show or hide the Recording toolbar. Notes Application Dolphin® 9500/9550 Mobile Computer User’s Guide... -
Page 177: To Create A Note
2. Create your note by writing, drawing, typing, and recording. For more information about using the input panel, writing and drawing on the screen, and creating recordings, see Dolphin® 9500/9550 Mobile Computer User’s Guide Using the Dolphin 9500/9550 Mobile Computer... -
Page 178: Inbox
The next time you connect, Inbox downloads the complete messages you’ve marked for retrieval and sends the messages you’ve composed. 9 - 12 Dolphin® 9500/9550 Mobile Computer User’s Guide... -
Page 179: Using The Message List
Using the Message List Messages you receive are displayed in the message list. By default, the most recently received messages are displayed first in the list. Dolphin® 9500/9550 Mobile Computer User’s Guide Select the service and folder you want to display. - Page 180 9 - 14 Tap to return to the message list. Tap to delete this message. Tap to view the previous or next message. Tap to reply to or forward this message. Viewing A Message Dolphin® 9500/9550 Mobile Computer User’s Guide...
-
Page 181: Composing Messages
To move a message to another folder, in the message list, tap and hold the message, tap Move to on the pop-up menu, and select the desired folder. To create additional folders, tap Tools > Manage Folders. Dolphin® 9500/9550 Mobile Computer User’s Guide Tap to show or hide the complete header. -
Page 182: Folder Behavior With A Direct Connection To An E-Mail Server
This synchronization of folders occurs whenever you connect to your mail server, create new folders, or rename/delete folders when connected. 9 - 16 Dolphin® 9500/9550 Mobile Computer User’s Guide... -
Page 183: Pocket Internet Explorer
9-18. To add a favorite link while browsing, go to the page you want to add, tap and hold on the page, and tap Add to Favorites on the pop-up menu. Dolphin® 9500/9550 Mobile Computer User’s Guide 9 - 17... -
Page 184: The Mobile Favorites Folder
The Mobile Favorites folder was created on your desktop computer when you installed ActiveSync. It enables you to create Favorite Links on your desktop computer that you can transfer to your Dolphin 9500/9550 terminal. Those Favorite Links are then available for selection when browsing the internet on your terminal. -
Page 185: Using Avantgo Channels
2. In Pocket Internet Explorer, tap the Favorites button to display your list of favorites 3. Tap the AvantGo Channels link. 4. Tap Activate. Dolphin® 9500/9550 Mobile Computer User’s Guide Tap the favorite you want to view. Tap to add or delete a folder or favorite link. - Page 186 When synchronization is complete, tap the AvantGo Channels link in your list of favorites to see a few of the most popular channels. To add or remove channels, tap the Add or Remove link. 9 - 20 Dolphin® 9500/9550 Mobile Computer User’s Guide...
-
Page 187: Companion Programs
Windows Media Player™ for Pocket PC, Microsoft Dolphin 9500/9550 when shipped but may be installed from the Microsoft Companion CD. Pocket Word Pocket Word works with Microsoft Word on your desktop computer to give you easy access to copies of your documents. You can create new documents on the terminal, or you can copy and paste documents from your desktop computer. -
Page 188: Typing Mode
Tap to return to the Tap and hold to see a document list (changes are pop-up menu of actions. saved automatically). Tap to show or hide the toolbar. Tap to change formatting options. Tap to format text. Dolphin® 9500/9550 Mobile Computer User’s Guide... -
Page 189: Writing Mode
Written words are converted to graphics (metafiles) when a Pocket Word document is converted to a Word document on your desktop computer. Dolphin® 9500/9550 Mobile Computer User’s Guide Using the Dolphin 9500/9550 Mobile Computer With Space button selected, drag to insert space. -
Page 190: Drawing Mode
Tap an arrow to Tap to select formatting options, see your choices. such as line weight, fill color, and line color. Using the Dolphin 9500/9550 Mobile Computer Resize an object by dragging the selection handles. on page 4-1. Dolphin® 9500/9550 Mobile Computer User’s Guide... -
Page 191: Pocket Excel
Then tap Format > Row or Column > Unhide. For more information on using Pocket Excel, tap Start > Help. Dolphin® 9500/9550 Mobile Computer User’s Guide Cell contents appear here as you enter them. - Page 192 9 - 26 Dolphin® 9500/9550 Mobile Computer User’s Guide...
-
Page 193: Chapter 10 - Dolphin 9500/9550 Homebase
Dolphin 9500/9550 HomeBase Overview As the hub of your Dolphin 9500/9550 system, the Dolphin HomeBase charging and communication cradle supports both RS- 232 and USB communications, which make it able to interface with the majority of PC-based enterprise systems. When a terminal is seated in the HomeBase, its main battery pack charges in less that four hours. -
Page 194: Dolphin 9500/9550 Homebase Parts And Functions
Dolphin 9500/9550 HomeBase Parts and Functions Front Panel DOCK LED AUX Battery LED Terminal Well Place the Dolphin terminal in this well to communicate with a host device, power the terminal, and charge its battery pack. If the host device is a desktop computer that uses ActiveSync, synchronization begins immediately. While seated in the terminal well, the main battery installed in the terminal charges. - Page 195 If using the USB port This color Green LED Dolphin® 9500/9550 Mobile Computer User’s Guide means… Serial data is being sent from the Host Device to the Dolphin HomeBase. Serial data is being sent from the Dolphin HomeBase to the Host Device.
-
Page 196: Rear Panel
This USB Port is full-speed and 2.0 compliant. Using a USB cable, you can connect the HomeBase to a peripheral device, such as a desktop computer or printer. When the Dolphin 9500/9550 is seated in the terminal well, it is connected to the peripheral device via the HomeBase. -
Page 197: Powering The Homebase
1. Connect the HHP power cable to the DC jack on the rear panel of the HomeBase. 2. Connect the HHP power cable to the power adapter. 3. Plug the power adapter cable into the power source. 4. The HomeBase is now powered. Dolphin® 9500/9550 Mobile Computer User’s Guide 10 - 5... -
Page 198: Homebase Serial Connector
The following diagram displays the pin diagram of the serial connector of the HomeBase. Note: Signals referenced are for a DTE device. The HomeBase is at a right-angle to the printed circuit board (PCB). The ninth pin has a ring indicator (RI). 10 - 6 Dolphin® 9500/9550 Mobile Computer User’s Guide... -
Page 199: Charging The Main Battery
1. Insert the end of the battery without the locking tab into the bottom of the auxiliary well opening. 2. Snap the battery into place with a hinging motion. The Aux Battery LED lights orange. 3. Use the AUX Battery LED to monitor charging progress. Dolphin® 9500/9550 Mobile Computer User’s Guide Power on page 5-11. -
Page 200: Communications
The HomeBase also supports USB communications via the USB port located on the back. The HomeBase acts as a USB device by interfacing the USB signals of the Dolphin 9500/9550 to the USB of the host computer. Using a standard USB cable, the HomeBase’s USB interface allows the Dolphin terminal to communicate with a personal computer or to be networked through a... -
Page 201: Setting Up The Terminal
3. Check the Enable synchronization box and select the desired option from the pull-down list; 115200 Default is recommended for an RS-232 connection. 4. Tap OK. 5. Place the Dolphin in the cradle. The Dolphin 9500/9550 attempts to start an ActiveSync connection with the desktop computer automatically. Setting up the Desktop Computer ActiveSync must be installed and configured for RS-232 on the desktop computer to sync successfully with a Dolphin 9500/9550 device that is configured for RS-232 communication. -
Page 202: Setting Up The Homebase For Usb Communication
Note: You can have the USB connection box checked in addition to the serial cable box without affecting processing. However, you would most likely use one or the other. Setting up the HomeBase for USB Communication The Dolphin 9500/9550 terminal is defaulted to support USB communications out of the box. Required Equipment: • HomeBase with power supply •... - Page 203 Setting up the Desktop Computer After the USB HomeBase is installed, you can use ActiveSync to connect to a Dolphin 9500/9550 terminal that is properly seated in the HomeBase. These instructions assume that ActiveSync v3.7 is installed on your PC.
-
Page 204: Communicating With The Dolphin 9500/9550 Terminal
The Allow USB connection with this desktop computer box must be checked. Do not check the serial cable box . Communicating with the Dolphin 9500/9550 Terminal To initiate communications between the Dolphin 9500/9550 and its peripheral, complete these steps: 1. Insert the Dolphin 9500/9550 into the terminal well of the HomeBase. -
Page 205: Mounting The Homebase
Please be advised that the bottom panel of the HomeBase contains four rubber feet - one at each corner - that help keep it stable and secure when resting on a flat surface. Those rubber feet should be removed with pliers before wall mounting the HomeBase. Dolphin® 9500/9550 Mobile Computer User’s Guide 10 - 13... - Page 206 Rear Panel 10 - 14 Open slot for cords on page 10-4. Attach the bottom panel to the mounting bracket - match the holes to the secured screws Turn the secured HomeBase right side up. Dolphin® 9500/9550 Mobile Computer User’s Guide...
-
Page 207: Chapter 11 - Dolphin 9500/9550 Mobile Base
When a terminal is seated in the Mobile Base, its main battery pack charges in less than four hours. The serial connector supports RS-232 communication and power out to peripheral devices, such as hand held scanners. As the hub of your Dolphin 9500/9550 mobile data collection system, the Mobile Base performs three important functions: charging, communications, and storage. -
Page 208: Mobile Base Parts And Functions
Data is being sent from the Host Device to the Dolphin Mobile Base. Data is being sent from the Dolphin Mobile Base to the Host Device. Data is being sent at high data rates. Dolphin® 9500/9550 Mobile Computer User’s Guide Mounting Brackets... -
Page 209: Bottom Panel
Power Supply Connector Power Supply Connector Use this connector to attach an HHP power cable to the Dolphin 9500/9550 Mobile Base. The Mobile Base can be powered by an external DC power source of between 11 VDC to 48 VDC. -
Page 210: Powering The Dolphin Terminal
2. Slide the terminal, imager window up and the LCD visible, into the terminal well of the Mobile Base until it stops. 3. When the Dolphin terminal is properly seated, the DOCK LED on the Mobile Base illuminates solid green. The terminal begins charging automatically. 11 - 4 Dolphin® 9500/9550 Mobile Computer User’s Guide... -
Page 211: Installing The Dolphin Mobile Base
The latch sits on top of the spring arm assembly and holds the back of the terminal securely in place. The graphic above displays the mounting of a Dolphin 9500 terminal. There is another Dolphin Mobile Base that contains a special latch to accommodate the pistol-grip handle on the Dolphin 9550. Dolphin® 9500/9550 Mobile Computer User’s Guide... -
Page 212: Powering The Dolphin Mobile Base
The Mobile Base must be powered by a 12 to 48 volt DC source. 11 - 6 Bottom Panel Bottom Panel on page 11-3. Both the power and Dolphin® 9500/9550 Mobile Computer User’s Guide on page... -
Page 213: Setting The Mobile Base Up For Communications
Refer to this table if you want to make your own cables. To do so, you must determine if your host RS-232 device is • 9-pin or 25-pin and • configured as a DCE or DTE device. Dolphin® 9500/9550 Mobile Computer User’s Guide IBM AT DB9 IBM XT DB25... -
Page 214: Mobile Base Serial Connector
500mA at 5V. Configuring the Dolphin Terminal Communications Properties must be configured appropriately on the Dolphin 9500/9550 terminal for it to communicate with the Mobile Base. - Page 215 4. Select the appropriate baud rate for connecting to the RS-232 Host Device; ‘11520 is the default. 5. Tap OK and close the ActiveSync window on the Dolphin 9500/9550 terminal. 6. Place the Dolphin in the Mobile Base. Synchronization begins immediately.
- Page 216 11 - 10 Dolphin® 9500/9550 Mobile Computer User’s Guide...
-
Page 217: Chapter 12 - Dolphin 9500/9550 Chargebase
Intelligent battery charging makes the Dolphin ChargeBase a safe and convenient storage receptacle for your Dolphin terminal. Capacity The ChargeBase can hold up to four Dolphin 9500/9550 terminals. Each charging slot charges each terminal independently of the other slots. Use only Dolphin 9500 series peripherals, power cables, and power adapters. Use of peripherals, cables, or power adapters not sold/manufactured by HHP will void the warranty and may damage the terminal. -
Page 218: Dolphin Chargebase Parts And Functions
The ChargeBase contains four terminals wells. Each well • Holds and charges the main battery pack of one Dolphin 9500/9550 terminal. • Contains the companion to the industrial-grade, 17-pin connector on the bottom panel of Dolphin 9500/9550 terminals. • Has two LEDs on the front: the Dock LED and the Charge LED. -
Page 219: Power Supply
4. Plug the power cord into a standard wall outlet. 5. On the power adapter, turn the power switch to the ON position. The LEDs illuminate as the ChargeBase powers up. 6. The ChargeBase is ready to begin charging terminals. Dolphin® 9500/9550 Mobile Computer User’s Guide Power Adapter Power... -
Page 220: Inserting And Removing Terminals
To remove a terminal, grasp it firmly in your hand and lift it up and out of the terminal well. The LEDs for the terminal well turns off. 12 - 4 E S C TA B E N T SE ND EN D DE L AL T Dolphin® 9500/9550 Mobile Computer User’s Guide... -
Page 221: Charging Terminals In The Chargebase
2. Insert a terminal into a terminal well; see Inserting and Removing Terminals on page 12-4. 3. The Charge LED lights green to indicate that the terminal is powered and charging. Dolphin® 9500/9550 Mobile Computer User’s Guide 12 - 5... -
Page 222: Mounting The Chargebase
• The ChargeBase should be oriented so that users can easily read the labels. Bottom Panel The bottom panel of the Dolphin 9500/9550 ChargeBase offers two mounting options: insert a DIN Rail in the available slot for desk mounting or secure two mounting brackets with the available screw slots. - Page 223 2. Turn the ChargeBase and DIN Rail right side up. 3. Secure the DIN Rail to a stable, flat horizontal surface. Dolphin® 9500/9550 Mobile Computer User’s Guide 12 - 7...
-
Page 224: Using The Mounting Brackets
1. Secure the screws into the four screw slots on the bottom panel. Insert the heads into the round end and slide towards the narrow end until the screw is secure. 2. Attach the bottom panel to the two mounting brackets. Open Slot for Connector Cables 12 - 8 Screws in slots Mounting Brackets Dolphin® 9500/9550 Mobile Computer User’s Guide Nuts and Bolts... - Page 225 3. Using the nuts and bolts, secure the mounting brackets to the bottom panel. 4. Secure the mounting brackets to an appropriate horizontal surface. Dolphin® 9500/9550 Mobile Computer User’s Guide 12 - 9...
- Page 226 12 - 10 Dolphin® 9500/9550 Mobile Computer User’s Guide...
-
Page 227: Chapter 13 - Dolphin 9500/9550 Quadcharger
Use only the Li-ion battery packs provided by HHP. The use of any battery pack not sold/manufactured by HHP in the Dolphin 9500/9550 terminal will void your warranty and may result in damage to the Dolphin terminal or battery. Dolphin QuadCharger Parts and Functions... -
Page 228: Rear Panel
Use this connector to attach the power supply to the QuadCharger. The universal power supply accepts input voltages between 90-265 volts. 13 - 2 Using the Battery Analyzer on page 13-2. Using the Battery Analyzer Power Switch Power Supply Connector Dolphin® 9500/9550 Mobile Computer User’s Guide on page 13-4. on page 13-4. -
Page 229: Supplying Power To The Quadcharger
3. Insert batteries into the appropriate slots. The Status LED for each slot turns orange to indicate that the battery has begun a charge cycle. 4. When the Status LED turns green, the battery in the slot has completed charging. Dolphin® 9500/9550 Mobile Computer User’s Guide ° °... -
Page 230: Using The Battery Analyzer
The Dolphin QuadCharger is accumulating battery pack information during the entire Analyze cycle. Do NOT remove the battery until the cycle has been completed. 13 - 4 Status LEDs on page 13-2. Dolphin® 9500/9550 Mobile Computer User’s Guide... -
Page 231: Mounting The Quadcharger
To mount the QuadCharger, you slide the DIN rail slot along the bottom panel and secure it. Then, using the appropriate nuts and bolts, secure the DIN rail to the desk or wall. Desk Mounting The following graphic displays how to mount the QuadCharger to a desk: Dolphin® 9500/9550 Mobile Computer User’s Guide 13 - 5... -
Page 232: Troubleshooting
An error occurred during the self-diagnostic test for that particular charging pocket. Call HHP Product Service and request an RMA. For additional warranty and return information, see and Service on page 14-1. Dolphin® 9500/9550 Mobile Computer User’s Guide Warranty, Support,... -
Page 233: Chapter 14 - Warranty, Support, And Service
Limited Warranty Hand Held Products, Inc., d/b/a HHP (“HHP“) warrants its products to be free from defects in materials and workmanship and to conform to HHP’s published specifications applicable to the products purchased at the time of shipment. This warranty does not cover any HHP product which is (i) improperly installed or used;... -
Page 234: Return Information
HHP Brazil Telephone: +55 (21) 2494-7060 Fax: +55 (21) 2494-5033 E-mail: suporte@hhp.com.br Asia Pacific HHP Asia/Pacific Telephone: +852-2511-3050 Fax: +852-2511-3557 E-mail: chuie@hhp.com Japan HHP Japan Telephone: +813 5842 6325 Fax: +813 5842 6335 E-mail: KobayashiT@hhp.com Dolphin® 9500/9550 Mobile Computer User’s Guide... -
Page 235: Technical Assistance
European Ofc: +31 (0) 40 29 01 600 U.K. Ofc: +44 1925 240055 E-mail: euro_support@HHP.com Asia: Telephone: +852-2511-3050 E-mail: asia_support@HHP.com Latin America: Telephone: (239) 263-7600 E-mail: la_support@HHP.com Assistance Online You can also access technical assistance online at: 14 - 3 http://www.hhp.com/hhp/service/contacttech.tpl. Dolphin® 9500/9550 Mobile Computer User’s Guide... - Page 236 14 - 4 Dolphin® 9500/9550 Mobile Computer User’s Guide...
-
Page 237: Appendix A - Keyboards
This appendix provides useful tools for programming and managing your Dolphin 9500/9550 terminal. General Windows Keyboard Shortcuts Use the keyboard shortcuts in the chart below to navigate the Dolphin 9500 and Dolphin 9550 terminal keyboards. These are standard keyboard shortcuts for Windows applications. -
Page 238: 43-Key Alpha/Numeric Keyboard
Blue key + R Blue key + S Blue key + T Blue key + U Blue key + X Blue key + Y Dolphin® 9500/9550 Mobile Computer User’s Guide Function/Special Character - (minus) _ (underscore) START A - 2... -
Page 239: Red Key Functions And Characters
* Exit the mouse utility prior to adjusting the contrast. Key Combinations Use the key combinations listed below to access certain keyboard functions or to use special characters that are not defined on the 43-key version of the Dolphin 9500/9550 keyboard. Key/Key Combination NUM + SFT + A... - Page 240 SFT + Blue + X Miscellaneous Key Combinations Key/Key Combinations NUM + ALT + 3 + 9 NUM + ALT + 3 + 4 A - 4 Function/Special Characters > Function/Special Characters ‘ “ Dolphin® 9500/9550 Mobile Computer User’s Guide...
-
Page 241: 35-Key Numeric/Alpha Keyboard
Blue key + F1 Blue key + F2 Blue key + F3 Blue key + F4 Blue key + SP Blue key + DEL Dolphin® 9500/9550 Mobile Computer User’s Guide Function/Special Character Blue key + . Blue key + , A - 5... -
Page 242: Key Combinations
ALT Key Combinations Key/Key Combinations Hold the ALT key down as you type in the numbers. A - 6 Function/Special Character Function/Special Characters ALT + 3 + 9 ALT + 3 + 4 & ‘ “ Dolphin® 9500/9550 Mobile Computer User’s Guide... -
Page 243: 56-Key Full Alpha/Numeric
Red key + SFT Red key + A Red key + B Red key + C Red key + D Dolphin® 9500/9550 Mobile Computer User’s Guide Function/Special Character Blue key + . Blue key + , Blue key + B... - Page 244 Red key + P Red key + Q Red key + R Red key + S Red key + T Red key + U Red key + V Red key + X Red key + Y Dolphin® 9500/9550 Mobile Computer User’s Guide...
-
Page 245: Key Combinations
SFT + . (period) SFT + , (comma) ALT Key Combinations Key Combinations Hold the ALT key down as you type in the numbers. Dolphin® 9500/9550 Mobile Computer User’s Guide Function/Special Character SFT + 1 SFT + 2 SFT + 3... -
Page 246: Com Port Assignment Table
If IrDA is disabled, this com port becomes available. See Disable the IrDA Port on page 5-7. Unassigned. These are available for selection only when connecting to devices that use virtual com ports, such as Bluetooth. Dolphin® 9500/9550 Mobile Computer User’s Guide... - Page 248 ™ 95/9550/UG Rev B...