Table of Contents
Advertisement
Quick Links
Advertisement
Table of Contents

Subscribe to Our Youtube Channel
Related Manuals for WOOSIM PORTI-P440


Summary of Contents for WOOSIM PORTI-P440
- Page 1 PORTI-P440 MODEL (4INCH PANEL PRINTER) Rev. 3.0 WOOSIM SYSTEMS Inc. #501, Daerung Technotown 3th, 448, Gasan-Dong, GeumChun-Ku, Seoul, Korea Tel : +82-2-2107-3700 Fax : +82-2-2107-3707 URL: http://www.woosim.com All specifications are subjected to change without notice http://www.woosim.com...
- Page 2 Copyright ⓒ2010 by Woosim Systems Inc. All rights reserved. The information contained in this manual is the property of Woosim Systems Inc. And may not be reproduced in whole or in part without the prior written permission of Woosim System Inc.
- Page 3 Porti-P440 Rev. 3.0 ¦ Introduction The PORTI-P440 is an extremely simple and functional panel printer. It is the ideal solution for applications which require the immediate printing of data on a paper, whether they be of an industrial, professional or laboratory nature.
-
Page 4: Operating Precautions
Porti-P440 Rev. 3.0 ¦ Operating Precautions Please follow the precautions below to enjoy and maintain the full performance of the printer. Using the Printer ● Be careful not to drop or bump the printer on a hard surface. ● Do not install the printer in direct sunlight or such areas. - Page 5 Porti-P440 Rev. 3.0 ¦ Note This equipment has been tested and found to comply with the limits for a Class B digital device, pursuant to Part 15 the FCC Rules. These limits are designed to provide reasonable protection against harmful interference in a residential installation.
-
Page 6: Table Of Contents
Porti-P440 Rev. 3.0 CONTENTS 1. Outline ............................7 1.1. Model classifications .........................7 1.2. Product Part Number System .....................7 1.3. Specifications ..........................8 2. Setting up the printer ........................9 2.1. Printer & Accessories ........................9 2.2. Printer Features ........................10 2.3. Panel Installation ........................11 2.4. -
Page 7: Outline
Porti-P440 Rev. 3.0 1.1. Model classifications PORTI–P440 Model name Interface A0 : UART Power None : DC 9V 1.2. Product Part Number System Model n ame Interface S pec. Wired Wireless RS-232C Bluetooth SC30 IrDA None RS-485 Parallel None Serial/Bluetooth Part No. ⇒ S40/A1 Example) 1. -
Page 8: Specifications
Porti-P440 Rev. 3.0 1.3. Specifications Item Specification Print method Direct thermal line printing 92cpl (MAX) Characters per line Character size Eng. : 9×24dots, 12×24dots Kor. : 16×24dots, [24×24dots] Simplified/Traditional Chinese, Arabic, Cyrillic, Russian, Tukish, Optional Characters Greek, Japanese, Persian, Latin9 and Others upon request. -
Page 9: Setting Up The Printer
Porti-P440 Rev. 3.0 2.1. Printer & Accessories When unpacking your printer box make sure it contains the printer and all accessories. If any accessories are missing or damage, please contact your dealer for assistance. Thermal roll paper Porti-P440 http://www.woosim.com 2012-02-06... -
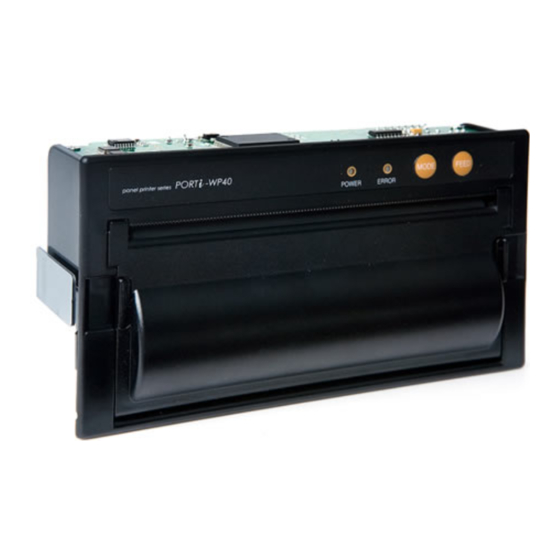
Page 10: Printer Features
Porti-P440 Rev. 3.0 2.2. Printer Features Part Name ▶ Dimensions ▶ http://www.woosim.com 2012-02-06... -
Page 11: Panel Installation
Porti-P440 Rev. 3.0 2.3. Panel Installation Uses the bracket(option) and the printer once more will be able to fix to the panel. http://www.woosim.com 2012-02-06... -
Page 12: Replacing Paper Roll
Porti-P440 Rev. 3.0 2.4. Replacing paper roll Note : Be sure to use paper rolls that meet the specifications. Do not use paper rolls that have the paper glued to the core because the printer cannot detect the paper end correctly. -
Page 13: Set Operation Mode
Porti-P440 Rev. 3.0 2.5. Set operation mode Change the mode and option using the MODE Code. l MODE button : use for changing OPTION status. (Error Lamp) l FEED button : use for changing MODE status. (Power Lamp) [Example] The defaults of the printer are :... - Page 14 Porti-P440 Rev. 3.0 When you press FEED Button once again, Power Lamp flickers 6 times Error Lamp flickers once. ® Press MODE Button twice, Error Lamp flickers 3 times. And then the density has set to Density igh. When you press FEED Button once again,...
- Page 15 Porti-P440 Rev. 3.0 POWER Lamp ERROR Lamp Option (Green) (Red) UART Communication Port Protocol UART 9600 bps 19200 bps Baud Rate 38400 bps 57600 bps 115200 bps 7 Data bit Data Bit 8 Data bit No Parity Parity Bit Odd Parity...
-
Page 16: Specified Power Supply
Porti-P440 Rev. 3.0 2.6. Specified power supply The following specifications are requested for power supply. Input : DC 9V / Max 3A Avoid using power supply which its power capacity of power current is extremely high. http://www.woosim.com 2012-02-06... -
Page 17: Interface
Porti-P440 Rev. 3.0 3.1. UART(RS-232C or TTL) The Porti-P440 printer has UART(RS-232C or TTL) interface and power connector is connected by 8 pin female connector. In the following table, the signals present on the connector are listed: Pin no. Signal name... -
Page 18: Using The Printer
Porti-P440 Rev. 3.0 4.1. Control panel u Button - FEED : When the printer is on, paper can be feed manually by pressing and holding the FEED button for more than one second. - MODE : MODE Button is for use to change communication mode. -
Page 19: Consumable Parts
Porti-P440 Rev. 3.0 5.1. Recommended paper Type : Thermal Paper Paper width 113mm Paper thickness : 60±5㎛ Outer diameter : Ø38mm or less Recording side : Outside of roll Cautions 1. Do not paste the paper to the core. And the roll paper which has near end mark printing on its near end is recommended.
Need help?
Do you have a question about the PORTI-P440 and is the answer not in the manual?
Questions and answers