
Related Manuals for burroughs smartsource series


Summary of Contents for burroughs smartsource series
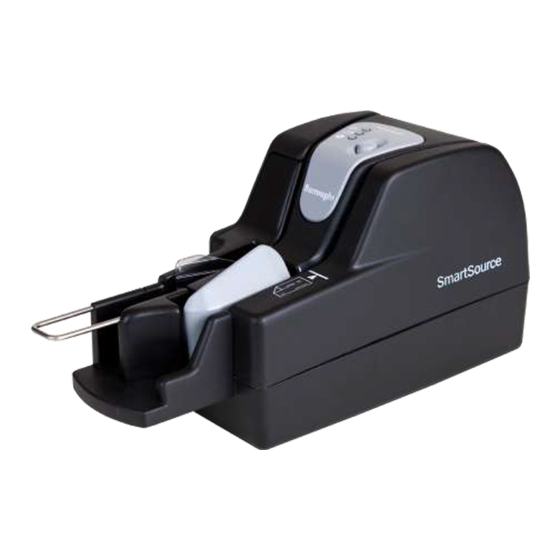
- Page 1 ® SmartSource Series Installation and Operations Guide December 2015 4326 9562-007 © 2015 Burroughs, Inc. All rights reserved.
- Page 2 The only warranties made by Burroughs, Inc., if any, with respect to the products described in this document are set forth in such agreement. Burroughs cannot accept any financial or other responsibility that may be the result of your use of the information in this document or software material, including direct, special, or consequential damages.
-
Page 3: Table Of Contents
Contents Section 1 Setting up the Unit ................1-1 Select a Place for the Unit ..............1-1 Need Help? .................... 1-2 Unpack the Box and Check for These Items! ........1-3 SmartSource Value, Professional, and Expert Units ......1-4 Install the Floor Extender ............... 1-5 Install the Franker Option ............... - Page 4 Contents Remove Front Image Camera “Removable Wall” ......... 3-5 Remove Franker Roller (if Present) and Rear Image Camera “Removable Wall” ................3-7 Clean Rear Image Camera “Removable Wall” (and, if Necessary, Replace Ink Pad) ............3-8 Remove Staples, Paper Clips, and Visible Debris from the Track ....................
- Page 5 Tables Table 3-1 Cleaning Supplies for Rapid and Detailed Cleaning ..........3-2 Table 3-2 SmartSource Series Cleaning Kit ................3-2 Table 3-3 SmartSource Series Starter Kit .................. 3-3 Table 4-1 Replacement Items ..................... 4-2 4326 9562-007...
- Page 6 Tables This page intentionally blank 4326 9562-007...
-
Page 7: Setting Up The Unit
Expert units draw a maximum of 60 watts of power from a 100 to 240 VAC, 50/60 Hz outlet. All units draw 2.0 amps (maximum) of current from the included 24 VDC power supply. Each unit must be operated with Burroughs power supply 75-0580-904 and no other. 4326 9562-007... -
Page 8: Need Help
Plug the SmartSource into a line conditioning device or an uninterruptible power source (available from Burroughs supplies). Need Help? Burroughs Help Desk 1-800-BURROUGHS (1-800-287-7684) Burroughs on the worldwide web (for general product information and training videos) www.burroughs.com Burroughs supplies and replacement items www.burroughsstore.com... -
Page 9: Unpack The Box And Check For These Items
Setting up the Unit Unpack the Box and Check for These Items! 4326 9562-007... -
Page 10: Smartsource Value, Professional, And Expert Units
Setting up the Unit SmartSource Value, Professional, and Expert Units 4326 9562-007... -
Page 11: Install The Floor Extender
Install the Inkjet Cartridge Option To install the ink cartridge, use the instructions packed next to the Inkjet Cartridge pouch in the unit shipping box. For additional/replacement cartridges, order the Inkjet Cartridge (82-2120-984) from Burroughs (see Section 4 of this guide). 4326 9562-007... -
Page 12: Inkjet Cartridge Capacity
Setting up the Unit Inkjet Cartridge Capacity The operational life of the inkjet cartridge varies with Endorsement application parameters Number of endorsement lines per document Number of characters printed per line Character font selection Print quality settings ... -
Page 13: Value And Professional Units
Setting up the Unit Value and Professional Units 4326 9562-007... -
Page 14: Expert Units
Setting up the Unit Expert Units 4326 9562-007... -
Page 15: Operating The Unit
Section 2 Operating the Unit Power On and Off 1. Turn the unit ON or OFF using the switch on the back of the unit. a. Press “|” on the power switch to turn the unit ON. b. Press “O” on the power switch to turn the unit OFF. 2. -
Page 16: Status Lights
Operating the Unit Status Lights Three lights on the top of the unit indicate the status of the unit and the software application that runs on the host PC. You should consult your application documentation for information on the meaning of the bottom light, the application status light. When lit, this light is always yellow (solid or blinking). -
Page 17: Expert Lcd Display
Operating the Unit Expert LCD Display The display may provide additional information, depending on your application. Set Up for Document Flow When you prepare to process documents, you should Adjust the position of the check limiter on Professional and Expert units ... -
Page 18: Adjust The Check Limiter (Professional And Expert Units)
Operating the Unit Adjust the Check Limiter (Professional and Expert Units) On Professional and Expert units, adjust the position of the check limiter to match the length of the longest checks or papers in the batch you will process (if the items are longer than the pocket). Note: The check limiter is optional on Value units. -
Page 19: Remove The Covers
Operating the Unit Remove the Covers All units – Expert, Professional, and Value -- have two top covers, an outer cover and an inner cover. 1. Remove the top inner and outer covers. Grasp each cover and lift it straight up and off the unit. -
Page 20: Adjust The Endorser Height
Operating the Unit Adjust the Endorser Height The endorser height can be manually adjusted to one of two (2) print positions. 1. Press the tab toward the cartridge to release it. 2. Slide the ink cartridge housing up or down to the desired height until it clicks into place. - Page 21 Operating the Unit Caution When processing the smallest documents on Open Professional units, (minimum size for documents is 2.9 in. x 2.0 in.), the endorser top print position is too high to endorse properly. Check that the endorser print position is correct when feeding small documents.
- Page 22 Operating the Unit 3. On all units, do not raise the endorser above the top print position. If you do, make sure the endorser cable is pushed back through the slot and underneath the base plate when you move the endorser back to a print position. There should be no loop or bulge in the cable above the base plate.
-
Page 23: Document Preparation
Operating the Unit Document Preparation It is important to properly prepare documents for processing. Otherwise, unit performance may be less than satisfactory. You should review documents for acceptable size and condition, and carefully follow the steps in this section to prepare documents for processing. ... - Page 24 Operating the Unit Remove check stubs and adding machine tapes. Repair torn, damaged paper, or place each damaged item in a carrier envelope. Do not use tape to repair areas with code line or encoded amount information. 2-10 4326 9562-007...
-
Page 25: Align Checks For Loading
Operating the Unit Align Checks for Loading On Professional and Expert units, make sure to arrange checks so that printed sides face up, and all face the same direction. The date line on checks should be in the upper right corner. ... -
Page 26: Inserting Documents (Professional And Expert Units)
Operating the Unit Inserting Documents (Professional and Expert Units) Insert items one at a time or in batches that fit easily in the feeder. Note: Depending on the feeder size ordered, your unit may stop after processing 50 items. ... - Page 27 Operating the Unit 2. Slide documents forward to the end of the feeder bay - printed sides face the side of the unit, not the feeder flag. Caution If feeding more than one item, do not slide or push items into the unit past the end of the feeder bay.
-
Page 28: Processing Documents - Professional And Expert Units (Document Flow)
Operating the Unit Processing Documents – Professional and Expert Units (Document Flow) 1. To initiate document processing, use either your application software user interface, or press and release the Start/Stop button. Note: Start/Stop Button functions are dependent on your application. Refer to your application instructions. -
Page 29: Inserting Documents (Value Units)
Operating the Unit Inserting Documents (Value Units) Wait for two green status lights. Insert documents into the feeder bay, one item at a time. Printed sides face the side of the unit, not the feeder flag. Slide each document forward into the feeder bay. The document bottom edge should touch and be aligned with the feeder floor. -
Page 30: Remove Items From Pocket And Check Work (All Units)
Operating the Unit Remove Items from Pocket and Check Work (All Units) To prevent jams, you should remove items from the pocket when the pocket is nearly full. Pocket capacity is approximately 100 items. Verify that endorsements are clearly printed, and that image quality is acceptable (if the application allows image viewing.) Stopped Document in Track Conditions If an item stops in the track, or does not fully enter a pocket, it must be removed from the track... -
Page 31: Clearing Stopped Items In Track
Operating the Unit Clearing Stopped Items in Track When an item stops in the track, there are two methods to clear the track: Use the Start/Stop button to move the item to a pocket (Professional and Expert units). Manually remove the item from the track (all units). -
Page 32: Using The Start/Stop Button To Move Stopped Items To A Pocket (Professional And Expert Units)
Operating the Unit Using the Start/Stop Button to Move Stopped Items to a Pocket (Professional and Expert Units) You should first try to flush the stopped item from the track using the Start/Stop button. 1. Press and hold down the Start/Stop button for three (3) seconds to move the item through the track to the pocket(s). -
Page 33: Manually Removing Stopped Items From The Track (All Units)
Operating the Unit Manually Removing Stopped Items from the Track (All Units) 1. Remove items starting at the pocket area first, and work back to the feeder area. 2. To remove items from inside the unit, remove covers if necessary and check the location of the stopped item in the track. - Page 34 Operating the Unit c. For items stopped on the feeder side of the unit, pull the item out toward the back of the unit. 3. Replace the unit covers if they were taken off of the unit to remove items from the track.
-
Page 35: Cleaning The Unit
This section identifies which cleaning procedures are required, illustrates how to properly complete these procedures, and describes the cleaning supplies. Burroughs has available, through the Burroughs Store website, a variety of cleaning supplies and replacement items specifically designed to maintain the SmartSource units. -
Page 36: Cleaning Supplies
Cotton Wiping Cloths (6 in. x 6 in.) (box of 150) 75-2010-884 The SmartSource Series Cleaning Kit (supply order number 75-6190-992) shown in Table 3-2 provides a selection of cleaning supplies for the SmartSource in various quantities. All of the items in the cleaning kit can be ordered separately although not in the same quantities shown for this kit. -
Page 37: Detailed Cleaning Sequence
Cleaning the Unit The SmartSource Series Starter Kit (supply order number 75-0820-995) includes cleaning supplies as well as replacement items. Table 3-3 shows the contents of the Starter Kit. (Section 4 of this guide has complete information on all replacement items.) All of the items in this kit can be ordered separately. -
Page 38: Turn Unit Off
Cleaning the Unit Turn Unit Off WARNING Turn the unit off as shown in the following illustrations. 4326 9562-007... -
Page 39: Remove Inner And Outer Covers
Cleaning the Unit Remove Inner and Outer Covers 1. Remove the top inner and outer covers. Grasp each cover and lift it straight up and off the unit. Remove Front Image Camera “Removable Wall” 4326 9562-007... - Page 40 Cleaning the Unit On SmartSource Professional units that have the ultraviolet option, there are ultraviolet (UV) LEDs underneath the front image camera wall glass. WARNING LASER RADIATION DO NOT VIEW THE IMAGER LIGHT SOURCE DIRECTLY WITH MAGNIFYING LENSES. CLASS 1M LASER PRODUCT 4326 9562-007...
-
Page 41: Remove Franker Roller (If Present) And Rear Image Camera "Removable Wall
Cleaning the Unit Remove Franker Roller (if Present) and Rear Image Camera “Removable Wall” 4326 9562-007... -
Page 42: Clean Rear Image Camera "Removable Wall" (And, If Necessary, Replace Ink Pad)
Cleaning the Unit Clean Rear Image Camera “Removable Wall” (and, if Necessary, Replace Ink Pad) 4326 9562-007... -
Page 43: Remove Staples, Paper Clips, And Visible Debris From The Track
Cleaning the Unit Remove Staples, Paper Clips, and Visible Debris from the Track Caution Metal objects such as paper clips and staples that fall underneath the metal base plate may damage the unit. Before using the micro-duster to blow air along the paper path, inspect the track for such items as staples and paper clips and remove them from the unit. -
Page 44: Blow Air Along Entire Track (Paper Path) With Micro-Duster
Cleaning the Unit Blow Air Along Entire Track (Paper Path) with Micro- duster 3-10 4326 9562-007... -
Page 45: Clean Front And Rear Image Glass And "Fixed" Rear Image Camera Wall
Cleaning the Unit Clean Front and Rear Image Glass and “Fixed” Rear Image Camera Wall Note: Use a new, unused Cleaning Pad 75-1804-907 for this cleaning procedure. 1. Clean the entire image glass surface by wiping with Cleaning Pad 75-1804-907 whenever document images contain black horizontal streaks. - Page 46 Cleaning the Unit 2. Clean the fixed rear image camera wall by wiping with Cleaning Pad 75-1804-907. Clean the area indicated in the picture below, but do not wipe with the pad inside the small rectangular cutout in the image wall or wipe the image glass again. 3-12 4326 9562-007...
-
Page 47: Clean Ink Off The Endorser Cartridge And Cartridge Housing
IMPORTANT The Burroughs enhanced ink cartridge (Burroughs Store part number 82-2120-984) greatly reduces or eliminates the requirement to clean the cartridge print head in order to maintain print quality. Use of the legacy cartridge (Burroughs Store part number 80-2120-873) may require periodic cleaning of the cartridge print head. - Page 48 Cleaning the Unit a. On Open Professional and Open Expert units, do the following to remove the cartridge. Press down on the cartridge housing latch to open the cartridge housing. 3-14 4326 9562-007...
- Page 49 Cleaning the Unit Pull the cartridge up and out of the housing. 2. Dampen a clean, lint-free cloth with a small amount of water. Caution The cloth should not be too wet as water must not drip into or remain on the unit.
- Page 50 Caution Do not use alcohol to wipe the cartridge nozzles. This will cause damage. Do not use the Image Glass Cleaning Pads from Burroughs (75-1804-907) to wipe the cartridge nozzles. These pads are pre-saturated with isopropyl alcohol that will cause damage to the cartridge.
- Page 51 Cleaning the Unit 7. Use a clean section of the cloth, or moisten another lint-free cloth with a small amount of water. Hold the cloth gently against the cartridge contacts on the bottom of the cartridge for three seconds. Then, wipe the contacts in one direction only, sideways, as shown here.
- Page 52 Cleaning the Unit 10. Insert the cartridge back into the cartridge housing. Make sure that it is pushed in completely. On Value and early Professional and Expert units, the front edge of the cartridge should line up with the red line on the cartridge platform sticker.
- Page 53 Cleaning the Unit On SmartSource Open series units, place the cartridge back inside the housing assembly and push it down into place. Press the top of the cartridge housing assembly down until it is latched and closed. 4326 9562-007 3-19...
- Page 54 Cleaning the Unit 11. If print quality does not improve, repeat steps 1 through 10 of this procedure one more time. 12. If print quality still does not improve after two cleanings, the cartridge may be empty or defective. Replace the cartridge. 3-20 4326 9562-007...
-
Page 55: Ordering Replacement Items
Feeder kit The Burroughs Store website offers a variety of certified replacement parts to keep the SmartSource unit operating at a high level of performance. Additionally, a limited number of parts are available to address incidents involving accidental damage and/or loss. -
Page 56: Table 4-1 Replacement Items
Includes: 25 separator belts Power supply 75-0580-904 — AC power cord Order by contacting the Burroughs Help Desk at 1-800-BURROUGHS (1-800-287-7684). Specify style number B25-LC. A representative will assist you in determining the correct type of plug for your country. 4326 9562-007... - Page 57 Ordering Replacement Items Table 4-1 Replacement Items (cont.) Description Machine Style Supply Order No. USB 2.0 cable, A male to B male, 6’ 16-1308-994 Top Cover, Outer, Gray All, except 75-0581-902 SmartSource Open series Professional –A1 Top Cover, Outer, Black 75-0860-935 Professional –PKT Top Cover, Inner, Gray...
- Page 58 Ordering Replacement Items This page intentionally blank 4326 9562-007...
-
Page 59: Solving Problems
Section 5 Solving Problems Although infrequent, problems that occur are often due to these conditions in the unit: paper jams or stops, multiple document feeding, and debris. When such a problem occurs, the light pattern on top of the unit is as shown here: Note: You should consult your application documentation for information on the meaning of the bottom light, the application status light. - Page 60 Solving Problems Possible operational problems that can occur when adequate document preparation is not performed, or when the unit is not properly maintained, are listed below: Paper clip/staples/debris in track Increased double feeds (worn separator) Power supply (including unit not plugged in properly, bad AC power outlet) ...
-
Page 61: Paper Clip/Staples/Debris In Track
Solving Problems Paper Clip/Staples/Debris in Track Use the check scanner cleaning card to clean the track. Use the track clearing spatula to clear the track. If helpful, take out the removable front and rear image camera walls. 4326 9562-007... -
Page 62: Document Double-Feeds Increase
Solving Problems Document Double-Feeds Increase Turn the separator (triangle-shape). 4326 9562-007... -
Page 63: All Problems
Solving Problems All Problems Power Supply Symptom Possible Cause Solution Unit does not power up. AC power cord not plugged into an Plug AC power cord into a known No green light on top of unit AC power outlet. working AC power outlet. after pressing On/Off switch. -
Page 64: Communications/Connections (Continued)
Solving Problems Communications/Connections (continued) Symptom Possible Cause Solution Unit does not connect to Network connection problem. Verify that two lights near the local network (Expert units). Ethernet connector (back of unit) indicate normal network activity. One light on indicates a good connection. -
Page 65: Indicators/Controls
Solving Problems Indicators/Controls Symptom Possible Cause Solution See “Power Supply” conditions. No top green light on top of Multiple causes. unit. Papers do not feed when Start/Stop button held down too Press/tap Start/Stop button Start/Stop button pressed. long. momentarily to start feeding paper. Unit makes noises but won’t See “Feeder.”... -
Page 66: Feeder
Solving Problems Feeder Symptom Possible Cause Solution Items do not feed correctly. When the Start/Stop button is Swap the two feed rollers. Clean or pressed, the feeder can be heard replace them if problem persists. trying to feed paper, but the blue- topped feed rollers don’t turn. -
Page 67: Feeder (Continued)
Solving Problems Feeder (continued) Symptom Possible Cause Solution Items skew as they feed. (All units except Professional units (All units except Professional units with automatic feeder flag.) The with automatic feeder flag.) See floor extender is not installed Section 1 to correctly install floor correctly. - Page 68 Solving Problems Feeder (continued) Symptom Possible Cause Solution Symptom Possible Cause Solution Automatic feeder flag does Dirty feeder sensor. Blow air with Micro-duster through the paper path – where feeder bay not close. (Professional units with automatic feeder flag.) touches unit. (cont.) Defective feeder sensor.
-
Page 69: Reader
Solving Problems Reader Symptom Possible Cause Solution The magnetic and/or optical Checks have poor print quality. Internal items (like cash tickets or readers have excessive batch headers) should be replaced reject rates. with a fresh supply. If possible, ask document or check provider to correct print quality problems. -
Page 70: Image
Solving Problems Image Symptom Possible Cause Solution See “Feeder” – “Items skew as they Images are skewed. Multiple causes. feed.” Dark horizontal streaks on Dirt or ink on image glass. Perform or repeat the cleaning tasks described in Section 3 – wipe the all images. -
Page 71: Endorser
Solving Problems Endorser Symptom Possible Cause Solution Blurry or light print. Ink accumulation on inkjet cartridge Clean the inkjet cartridge nozzles nozzles or contacts. and contacts. See Section 3 for cleaning procedures. Inkjet cartridge out of ink, or low on Replace the inkjet cartridge. -
Page 72: Endorser (Continued)
Solving Problems Endorser (continued) Symptom Possible Cause Solution Excessive ink spots or Ink accumulation around cartridge Clean the area around the cartridge horizontal lines of ink on the housing window. housing window. See Section 3 for back of processed cleaning procedures. documents. -
Page 73: Pockets
Solving Problems Pockets Symptom Possible Cause Solution Documents buckle and jam Check limiters not set correctly. Move the check limiter out far in pockets, stack poorly. enough to accommodate the longest document. (All units except Professional units (All units except Professional units with automatic feeder flag.) Pocket with automatic feeder flag.) fingers damaged, missing, or... -
Page 74: Parts
Solving Problems Parts Symptom Possible Cause Solution Covers/top covers cracked Handling or accidental damage. Contact Burroughs for or broken. replacements. 5-16 4326 9562-007...
Need help?
Do you have a question about the smartsource series and is the answer not in the manual?
Questions and answers