Table of Contents
Advertisement
Advertisement
Table of Contents

Related Manuals for burroughs SmartSource Advantage


Summary of Contents for burroughs SmartSource Advantage
- Page 1 Document Imaging Scanner Advantage SmartSource User's Manual www.burroughs.com...
-
Page 2: Preface
I49-004544 A July 2010 Document Capture Technologies, Inc. 4255 Burton Drive, Santa Clara, CA 95054 408.436.9888, www.docucap.com SmartSource Advantage User's Manual... -
Page 3: Fcc Compliance Statement
FCC Compliance Statement This equipment (SmartSource Advantage) has been tested and found to comply with the limits for a Class B digital device, pursuant to Part 15 of the FCC rules. These limits are designed to provide reasonable protection against harmful interference in a residential installation. -
Page 4: Safety Precautions
• This scanner should be situated away from heat sources such as radiators, heat registers, stoves, or other products (including amplifiers) that produce heat. Service: • When you need a repair service, unplug the scanner from the power outlet and consult qualified service personnel. • When replacement parts are required, use replacement parts that are specified by the manufacturer or have the same characteristics as the original parts. SmartSource Advantage User's Manual... -
Page 5: Table Of Contents
Table of Contents Preface................................. 2 FCC Compliance Statement ........................3 Safety Precautions ............................4 Knowing About Your Scanner ........................6 Features of SmartSource Advantage ..................... 6 Installation Requirements ........................8 Taking a Closer Look ..........................9 Front/Back View ..........................9 Open View ............................10 Initial Setup ..............................11... -
Page 6: Knowing About Your Scanner
• Portable, compact and convenient — With a perfect small size, SmartSource Advantage reforms your imagination about a sheet-fed scanner. From the office to the home, the coffee shop to the hotel, SmartSource Advantage easily affords users portable and mobile opportunities for document capture on the go. • Superb ability to handle documents in versatile materials — SmartSource Advantage lets users easily digitize patient IDs, business cards, bank statements, legal documents, insurance papers, and medical records in just seconds. - Page 7 Color dropout — Red, green and blue colors can be dropped out to allow for clearer and more accurate forms processing with problematic color documents. – Preset setting — This feature allows you to save the predefined scanning values, and then retrieve them later for scanning same types of materials, which brings fast and convenient access for users. – Document enhancement — This feature brings out and improves the readability of text in a document that includes other elements such as color, pictures, or graphs. SmartSource Advantage User's Manual...
-
Page 8: Installation Requirements
Installation Requirements In order to use your SmartSource Advantage, your computer must satisfy the following system requirements: • CD-ROM drive (for installing software) • Color display with 24-bit color output capability • 512 MB RAM or more • Pentium IV PC or higher with a Hi-Speed USB (USB 2.0) port • Microsoft Windows 2000, XP, Vista or 7 SmartSource Advantage User's Manual... -
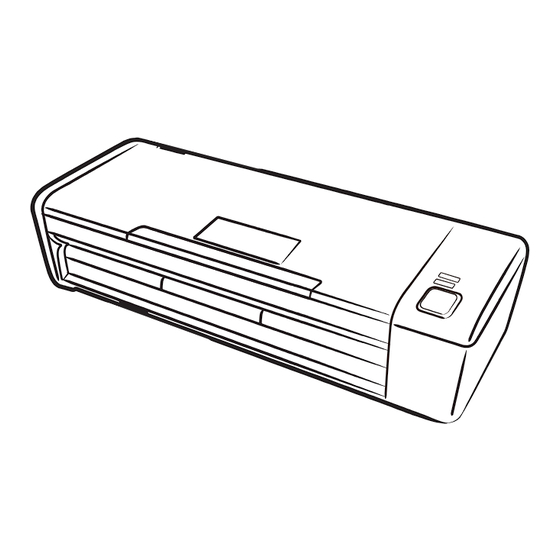
Page 9: Taking A Closer Look
Allows users to customize the button to perform its preferred functions via software settings. ERROR Indicator (Red) Indicates if errors happen when the scanner is running. READY Indicator (Green) Indicates the scanner is ready to scan. Power Connector Connects the scanner to the power adapter. Hi-Speed USB Port Connects the Hi-Seed USB (USB 2.0) cable to the computer. Feed Roller Assembly Used to feed documents into the feeder. SmartSource Advantage User's Manual... -
Page 10: Open View
The cover of the scanner. Feed Roller Assembly Used to feed documents into the feeder. Glass Surfaces The places where the CIS cartridges are stored. Separation Roller Assembly Used to separate each sheet when a stack of documents are fed into the feeder. Pick Rollers Used to pick up documents into the feeder. Output Rollers Used to eject documents after scanning. Card Tray Holds the card to be fed into the feeder. SmartSource Advantage User's Manual... -
Page 11: Initial Setup
Following Three Easy Steps After unpacking your scanner package, follow the steps in order for a quick and easy installation process. Step 1: Unpacking Package Contents After unpacking your scanner package, please check for the major components listed below. Scanner Power Adapter Hi-Speed USB Cable Software CDs SmartSource Advantage User's Manual... -
Page 12: Step 2: Installing The Software
Important: You must install all software before connecting your scanner. Always close any open programs and turn off anti-virus utilities before installing software. Turn on your computer. Place the SmartSource Advantage CD-ROM into your CD-ROM drive. Follow the on-screen instructions to install the driver and software. Note: If the ScanWizard DI software installer... -
Page 13: Step 3: Connecting The Scanner
Connect one end of the Hi-Speed USB cable to your computer. Connect the other end of the Hi-Speed USB cable to the scanner’s USB port. Document Feed Tray Open the top cover (document feed tray) to turn on the scanner. Once the scanner is detected by your system, the LED (green) will brighten, and the scanner is ready to scan. SmartSource Advantage User's Manual... -
Page 14: Positioning Documents
Load and center the stack of documents onto the document feed tray, with the side to be scanned facing down and the top edge facing toward the feeder. Then, slide the two guide arms toward the stacked papers if needed. SmartSource Advantage User's Manual... -
Page 15: To Load Cards
Document Notices Note: There are several precautions and reminders about using the scanner correctly. Please refer to the section below for details. • The scanner is not designed for scanning photos; doing so may damage your originals. Burroughs accepts no responsibility for damage that may arise from misuse of equipment. • The scanner can handle document specifications: – Paper size: Min. 3.15" x 2.1" (80 mm x 51 mm) -
Page 16: Customizing The Function Button
Customizing the Function Button SmartSource Advantage is equipped with one programmable function button (F1) that can be customized to automate a number of predefined operations, such as scanning to a file, sending an image to your printer, scanning for OCR, etc. Customizing is done through the “Save Settings to Function Button” command, as explained below. Launch ScanWizard DI (either as a stand-alone by clicking the program icon, or by using the “File-Import” or “Scan” command from an application program). -
Page 17: Care And Cleaning
Care and Cleaning To ensure optimal performance from SmartSource Advantage, it is important to clean several critical parts of the scanner on a regular basis. Cleaning the Scanner Glass Surfaces To open the scanner cover, hold the two sides of the scanner cover and pull them up firmly. -
Page 18: Cleaning The Rollers
The inner side of the Feed-Roller Assembly scanner cover The bottom of the scanner Note: Do not attempt to spin or rotate the rollers while cleaning, for it may damage the drive train mechanism of the scanner. SmartSource Advantage User's Manual... -
Page 19: Maintenance
Scanner cover Push down and then pull the cover lever to open the roller cover first. Hold both sides of the rollers to pull out the separation roller assembly from its compartment. Separation roller assembly Roller cover SmartSource Advantage User's Manual... - Page 20 To insert the new separation roller assembly into its compartment, insert the axles on both sides of the rollers into the slots on both sides of the compartment. Close the roller cover completely so that it clicks into place. Roller cover Note: • The recommended replacement point for the separation roller assembly is approximately 20,000 sheets. • Please contact your local resellers for purchasing new separation roller assembly. SmartSource Advantage User's Manual...
-
Page 21: Replacing The Feed Roller Assembly
Replacing the Feed Roller Assembly Open the scanner cover. Locate the feed roller assembly at the bottom of the scanner. Scanner cover Feed roller assembly Loosen the screws on the roller cover with a screwdriver. Then hold the roller cover and pull it out carefully. Roller cover SmartSource Advantage User's Manual... - Page 22 Finally, push down the feed roller assembly flat into its compartment. Put the roller cover back and tighten the screws to lock the roller cover at the bottom of the scanner. Note: • The recommended replacement point for your feed roller assembly is after scanning approximately 30,000 sheets through the feeder. • Please contact your local resellers for purchasing the new feed roller assembly. 22 SmartSource Advantage User's Manual...
-
Page 23: Appendix
Note: Do not take out a jammed paper by force from the scanner when the scanner cover closes. By doing so, it may damage the rollers and cause the scanner to work improperly. SmartSource Advantage User's Manual... -
Page 24: Troubleshooting
After clicking Scan, a blank screen appears. Uninstall and reinstall the ScanWizard DI software. When trying to scan, an error message appears on your screen that reads, “ADF is not ready or no paper”. Make sure there are papers on the document feed tray. Make sure the top edges of the papers have been inserted into the feeder. SmartSource Advantage User's Manual... - Page 25 Check if the separation roller assembly becomes worn and needs to be changed. 8. When trying to scan, an error message appears on your screen that reads, “Code -206, ADF paper jam or roller failure. ” Click OK first, then open the scanner cover, as illustrated in the previous section “Fixing Paper Jams”. • If the problem is occurring from a paper jam, follow the procedures laid out in the “Fixing Paper Jams” section. • If the problem is occurring from situations other than a paper jam, follow the procedures laid out in the “Position Documents” section. Finally, close the scanner cover and restart scanning. SmartSource Advantage User's Manual...
-
Page 26: Specifications
Interface Hi-Speed USB 2.0 Dimensions (L x W x H) 11.29" x 4.33" x 2.71" (287 mm x 110 mm x 69 mm) Weight 2.64 lbs. (1.2 kg.) Voltage AC100V-240V, 50-60 Hz, 0.5A max. (Input) DC 12V, 1.5A (Output) Power consumption 15 W max. Power supply Voltage MFR Model No. (AC/DC adapter) 100V to 240V APD WA-18G12U (US/TWN) 100V to 240V APD WA-18G12G (EU) 100V to 240V APD WA-18G12K (UK) 100V to 240V APD WA-18G12N (AU) 100V to 240V APD WA-18G12S (Korea) 100V to 240V APD WA-18H12 Environment Operating temperature: 50° to 95°F (10° to 35°C) Relative humidity: 10% to 80% SmartSource Advantage User's Manual...
Need help?
Do you have a question about the SmartSource Advantage and is the answer not in the manual?
Questions and answers
can i purchase a download for this scanner,mrs-600adf