Honeywell MX7 TECTON User Manual
Hide thumbs
Also See for MX7 TECTON:
- Reference manual (366 pages) ,
- User manual (354 pages) ,
- Quick start manual (13 pages)

Related Manuals for Honeywell MX7 TECTON


Summary of Contents for Honeywell MX7 TECTON
- Page 1 MX7 Tecton™ Mobile Computer ® ® with Microsoft Windows Embedded CE 6.0 User’s Guide...
- Page 2 Disclaimer Honeywell International Inc. (“HII”) reserves the right to make changes in specifications and other information contained in this document without prior notice, and the reader should in all cases consult HII to determine whether any syuch changes have been made. The information in this publication does not represent a commitment on the part of HII.
-
Page 3: Table Of Contents
Table of Contents Chapter 1 - MX7 Tecton Agency Compliance Laser Warnings ........................1-1 Laser Label Location......................1-1 Laser Safety Statement .......................1-1 Model Number and Serial Number Labels ................1-1 FCC Part 15 Statement......................1-1 FCC 5GHz Statement ......................1-2 Canadian Compliance......................1-2 CE Mark ..........................1-3 RF Notices ...........................1-3... - Page 4 Tapping the Touch Screen with a Stylus ................2-12 Calibrating the Touch Screen .................... 2-12 Setting the Display Backlight Timer................... 2-12 Applying the Touch Screen Protective Film............... 2-12 Setting the Date and Time Zone..................2-13 Set Power Scheme Timers....................2-13 Battery Power Scheme ....................
- Page 5 Bluetooth (Optional)....................... 5-3 RFTerm (Optional)......................5-3 Avalanche ........................5-3 Software Development ....................5-3 Utilities ........................... 5-3 MX7 Tecton Command-line Utilities ................5-5 Desktop ..........................5-6 Desktop Icons ........................ 5-6 Taskbar.......................... 5-6 My Device Folders ......................5-7 Wavelink Avalanche Enabler (Optional) ................ 5-7 Internet Explorer ......................
- Page 6 Settings........................5-10 Transcriber........................5-10 Windows Explorer......................5-10 Taskbar........................5-10 Taskbar Icons ......................5-12 Upgrading the Operating System ..................5-13 Introduction ........................5-13 Updates and Language Options .................. 5-13 Preparation ........................5-13 Procedure ........................5-13 Update Help......................... 5-14 Battery State and OS Upgrade ..................5-14 Control Panel........................
- Page 7 MX7 Tecton with a Disabled Touch Screen..............5-64 Reset and Loss of Host Re-connection ............... 5-64 ActiveSync Help......................5-64 Configuring the MX7 Tecton with HSM Connect (or LXEConnect) ........5-65 Install HSM Connect ....................5-65 Using HSM Connect ....................5-65 Chapter 6 - AppLock (Application Locking) Introduction..........................
- Page 8 Introduction ........................7-10 MX7 Tecton with Label ....................7-11 MX7 Tecton without Label ................... 7-11 Bluetooth Reader Beep and LED Indications ..............7-12 Bluetooth Printer Setup ..................... 7-12 Chapter 8 - Data Collection Wedge Introduction.......................... 8-1 Symbol or Honeywell scanner ..................8-1 Hand Held Products Imager ..................
- Page 9 Installation ......................... 10-1 Installing the Enabler on Mobile Devices................10-1 Enabler Uninstall Process ....................10-2 Stop the Enabler Service....................10-2 Update Monitoring Overview ..................... 10-2 Mobile Device Wireless and Network Settings ..............10-2 Preparing a Device for Remote Management ..............10-3 Remote Management Utility (RMU)................
- Page 10 Battery Cleaning, Storage and Service ................13-10 Cleaning........................13-10 Storage ........................13-10 Service........................13-10 Chapter 14 - Cradles Unpacking your Cradles ....................14-1 Overview..........................14-1 Preparing the Cradle for Use..................... 14-1 Tethered Scanners and the MX7 Tecton Cradles ............. 14-2 viii...
- Page 11 DC/DC Power Supply Installation, Screws on Side of Lid ......... 14-29 Vehicle 12V Bare Wire Adapter ................. 14-32 Vehicle Cradle LED ....................14-34 Docking the MX7 Tecton in a Powered Vehicle Cradle ..........14-35 Removing the MX7 Tecton from a Powered Vehicle Cradle ........14-36 Powered Vehicle Cradle Help..................14-36 Chapter 15 - Technical Specifications MX7 Tecton Hardware.......................
- Page 12 Serial Port ........................15-3 Vehicle Mounted Cradle ....................15-4 Serial Port ........................15-4 Power Connector Port ....................15-5 Battery Charger ......................... 15-5 Electrical ........................15-5 Temperature ........................ 15-5 Dimensions ........................15-5 Chapter 16 - Customer Support Technical Assistance......................16-1 Product Service and Repair....................16-1 Limited Warranty .......................
-
Page 13: Chapter 1 - Mx7 Tecton Agency Compliance
MX7 Tecton Agency Compliance MX7 Tecton mobile computers meet or exceed the requirements of all applicable standards organizations for safe operation. However, as with any electrical equipment, the best way to ensure safe operation is to operate them according to the agency guidelines that follow. -
Page 14: Fcc 5Ghz Statement
Honeywell. The correction is the responsibility of the user. Caution: Any changes or modifications made to this equipment not expressly approved by Honeywell may void the FCC autho- rization to operate this equipment. -
Page 15: Ce Mark
Nijverheidsweg 9-13 5627 BT Eindhoven The Netherlands Honeywell shall not be liable for use of our product with equipment (i.e., power supplies, personal computers, etc.) that is not CE marked and does not comply with the Low Voltage Directive. RF Notices This device (FCC ID: KDZLXE-MX7T and IC ID: 1995B-LXEMX7T) contains transmitter Module FCC ID: TWG-SD- CMSD30AG and IC ID: 6616A-SDCMSD30AG. - Page 16 1 - 4...
-
Page 17: Chapter 2 - Getting Started
MX7 Tecton Battery Charger, Desktop Cradle, Passive Vehicle Mounted Cradle, and Powered Vehicle Mounted Cradle. Note: The MX7 Tecton may have a Microsoft Windows CE 6 or Microsoft Windows Mobile 6.5 operating system. This guide is for the MX7 Tecton with a Windows CE 6 operating system... -
Page 18: Initial Setup For Mx7 Tecton
Initial Setup for MX7 Tecton Following are steps you might take when setting up a new MX7 Tecton. Follow the links for further instruction for each step. Con- tact Technical Assistance (page 16-1) if you need additional help. Note: Installing or removing accessories should be performed on a clean, well-lit surface. When necessary, protect the work surface, the MX7 Tecton, and components from electrostatic discharge. -
Page 19: Components
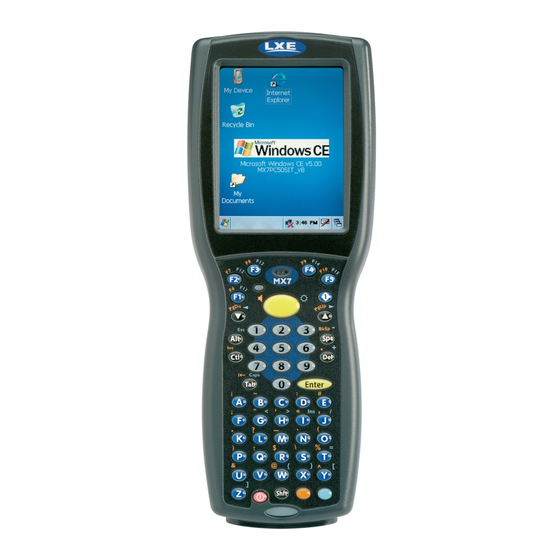
Components Front View 1. Scanner/Imager Aperture 2. Speaker 3. System Status LED 4. Scan Button 5. Orange Key (Sticky Key) 6. Blue Key (Sticky Key) 7. Scan Status LED 8. Cable Port 9. On / Off Button 10. Alpha Lock LED (32 Key keypad only) 55-key Keypad 32-key Keypad... -
Page 20: Back View
Back View 1. Scanner/Imager Aperture 2. Stylus and Stylus Pocket 3. Trigger Handle Attach Points 4. Main Battery 5. Battery Fastener 6. Cable Port I/O Port and Cables Input / Output Port (I/O) Cable: Multipurpose RS232 and Power (MX7055CABLE) Cable: Multipurpose USB and Power (MX7052CABLE) 2 - 4... -
Page 21: Scanner / Imager Aperture
Adapter: RS232 PC port to D9 male (MX7058CABLE) Scanner / Imager Aperture 1. Scanner Aperture 2. MX7 Tecton Front Caution: Never stare directly into the beam aperture. If Continuous Scan Mode has been enabled (disabled by default, setting can be changed by user), the laser is always on and decoding and the laser beam is emitted continuously. -
Page 22: Handle
Handle 1. Imager / Scanner Aper- ture 2. Trigger 3. Handle 4. Tether Attach Point Handstrap 1. Handstrap 2. Handstrap Retainer Bracket and mounting screws 3. Handstrap Clip 2 - 6... -
Page 23: Keypads
Keypads 55 Key Primary Delete ANSI Keypad 1. System Status LED 2. Volume Control Icon 3. On Off Button 4. Scan Status LED 5. Orange Key (Sticky Key) 6. Blue Key (Sticky Key) 7. Enter Key 8. Scan Button 9. Diamond Key 10. -
Page 24: End User License Agreement (Eula)
End User License Agreement (EULA) When a new MX7 Tecton starts up a EULA is displayed on the touch screen. It remains on the screen until the Accept or Decline button is tapped with a stylus. Tap the Accept button to accept the EULA terms and the MX7 Tecton continues the startup pro- cess. -
Page 25: Rebooting The Mx7 Tecton
Only use Honeywell batteries as replacements: MX7A380BATT / MX7392BATT or a Low Temperature (CS) Battery : MX7A381BATT / MX7393BATT / MX7396BATTERY. The MX7 Tecton will not function unless the battery pack is in place and securely latched. Any work in progress should be saved prior to replacing the battery pack. -
Page 26: Inserting The Battery
Note: The MX7 Tecton Battery Charger is designed for an indoor, protected environment. New batteries must be fully charged prior to use. The main battery can be recharged in an AC powered Battery Charger after the battery has been removed from the MX7 Tecton or its packing material when new. -
Page 27: Leds And Indicators
The Scan Status oval shaped indicator is situated below the keypad and next to the On button. LEDs (Light Emitting Diodes) are located on the front of the MX7 Tecton. They are: • System Status LED indicates power management status. It is located at the top left of the keypad, below the F3 key. -
Page 28: Tapping The Touch Screen With A Stylus
Setting the Display Backlight Timer The backlight settings use Honeywell-determined default timeouts. Different timeouts can be set for the backlights when using main battery or external power. The backlights timer can be disabled for a particular mode by unchecking a check box. When the backlight timer is disabled (check box is unchecked), the backlight never turns off (or dims) in that mode. -
Page 29: Setting The Date And Time Zone
Setting the Date and Time Zone Note: The first time the MX7 Tecton is powered up, or the device powers up from a reset/cold boot, the time may be reset to the factory default value. Set the current date, time, time zone and assign a daylight savings location using control panels. Or double-tap the Date icon in the taskbar to begin. -
Page 30: Using The Keypad
Speaker volume can be adjusted to a comfortable level for the listener by using key presses or by changing settings in a control panel. Speaker sounds can be disabled. Using the Keypad Note: Speaker sounds must be enabled before the following key sequences can adjust the volume. The volume is increased or decreased one step each time the volume key sequence is pressed. -
Page 31: Setting Terminal Emulation Parameters
• the alias name or IP address (Host Address) and • the port number (Telnet Port) of the host system to properly set up your host session. 1. Make sure the MX7 Tecton network settings are configured and functional. If you are connecting over wireless LAN (802.11 ), make sure your MX7 Tecton is communicating with the Access Point. -
Page 32: Using The Input Panel / Virtual Keyboard
Using the Input Panel / Virtual Keyboard The input panel / virtual keyboard is always available when needed e.g., text entry. Place the cursor in the text entry field and, using the stylus: • Tap the Shift key to type one capital letter. •... -
Page 33: Connecting To Bluetooth Devices
MX7 Tecton. To connect Bluetooth devices, the MX7 Tecton should be as close as possible and in direct line of sight (distances up to 32.8 feet or 10 meters) with the targeted Bluetooth device during the discovery and pairing process. -
Page 34: Attaching The Handstrap
Attaching the Handstrap Note: Either the trigger handle is attached to the MX7 Tecton or the handstrap is attached, not both. In the absence of a trigger handle, the handstrap should be used at all times. The handstrap is pre-installed on a MX7 Tecton. -
Page 35: Attaching The Trigger Handle
Attaching the Trigger Handle Either the trigger handle or the handstrap is attached, not both. Honeywell recommends that, in the absence of a trigger handle, the handstrap be used at all times. Pressing the trigger on the trigger handle activates the integrated scanner and functions the same as the Scan button on the keypad. -
Page 36: Handle With Two Screws
Periodically check the trigger handle for wear and the connection for tightness. If the handle gets worn or damaged, it must be replaced. If the trigger handle connection loosens, it must be tightened or replaced before the MX7 Tecton is placed back in service. -
Page 37: Assembling The Carry Case
The voice case does not require the clear plastic protector. 5. Slide the MX7 Tecton into the case, making sure the touch screen and keypad (including the Scan LED) are visible and accessible through the front openings of the case. -
Page 38: Adjusting Headset / Microphone And Securing The Cable
2. Connect to Headset Cable 1. Connect the MX7 Tecton voice cable I/O connector to the I/O port on the MX7 Tecton. 2. Slide the voice cable ends of the headset assembly and the voice cable together until they click shut. Do not twist or bend the connectors. -
Page 39: Connecting The Usb Client And Power Cable
1. Holding the cable I/O connector, pinch the catch release buttons in until the catches are open. Connect the cable to the MX7 Tecton I/O port by matching the shape of the I/O connector on the cable with the shape of the I/O connector at the base of the MX7 Tecton. -
Page 40: Assembling The Ac/Dc Power Supply
MX7 Tecton. External power is now being supplied to the MX7 Tecton. Whenever possible, use the AC power adapter with the MX7 Tecton to conserve the main battery power and maintain a charge in the internal battery. -
Page 41: Startup Help
New batteries must be fully charged prior to first use. Li-Ion batteries (like all batteries) gradually lose their capacity over time (in a linear fashion) and never just stop working. This is important to remember – the MX7 Tecton is always ‘on’ even when in the Suspend state and draws a small amount of battery power at all times. - Page 42 2 - 26...
-
Page 43: Chapter 3 - Hardware Configuration
System Hardware 802.11 a/b/g Wireless Client The MX7 Tecton has an 802.11 network card that supports diversity with two internal antennas. The CPU board does not allow hot swapping the network card. WEP, WPA and LEAP are supported. Central Processing Unit The CPU is an 806MHz Marvell PXA-320 CPU. -
Page 44: Video Subsystem
MX7 Tecton and inserted in the MX7 Tecton Battery Charger which simultaneously charges up to four battery packs in four hours. A new main battery pack can be fully charged in 6 hours when it is in an MX7 Tecton connected to AC power and 3.5 hours when it is in the MX7 Tecton battery charger. -
Page 45: Audio Support
The Base Laser scanner does not decode Codablock, Code93i or Telepen symbologies. The integrated scan engine activates when the Scan button on the front of the MX7 Tecton is depressed or when the trigger on an installed trigger handle is depressed. The Data Collection application is available to set scanner/imager options. -
Page 46: Keypads
Keypads 55 Key Keypads ANSI Primary Delete ANSI Primary Backspace 5250 Primary Delete Using the 55 Key Alpha-Numeric Keypad There are three options available for the 55 key keypad: 55 key Alphanumeric Keymap - Primary Delete (page 12-1). 55 Key 5250 Alphanumeric KeyMap - Primary Delete (page 12-6). -
Page 47: Key Keypad
32 Key Keypad Triple Tap Alpha Using the 32 Key Numeric with Triple Tap Alpha 32 key Numeric-Alpha Keymap (page 12-16) • When using a sequence of keys that require an alpha key, first press the Alph key. Use the Shft sticky key or the Caps key sequence (Blue+Tab) for upper case alphabetic characters. -
Page 48: Display
Cold Storage Battery There is no change in the way the Cold Storage battery is inserted into and removed from the MX7 Tecton battery well. Battery Life – minimum 2.5 hours while the unit is roaming, powered on with ambient temperature -10°C (14°F) or above, Display backlight turned on, Keypad LED backlight on, radio connected to Access Point, and scanner decoding bar codes. - Page 49 Recharging Cold Storage Batteries The Cold Storage battery pack can be recharged to full capacity while in a Cold Storage MX7 Tecton connected to an external power source and also while the Cold Storage battery pack is inserted in the charging bay in a powered MX7 Tecton cradle.
- Page 50 3 - 8...
-
Page 51: Chapter 4 - Power Modes And Batteries
• the display backlight is on until the Backlight timer expires The MX7 Tecton After a new MX7 Tecton has been received, a charged main battery inserted, and the Power key tapped, the MX7 Tecton is always On until both batteries are drained completely of power. -
Page 52: Batteries
A suspended MX7 Tecton maintains settings for a minimum of two days using a main battery that has reached the Low Warning point and a fully charged Super-cap internal battery. The MX7 Tecton retains data, during a main battery hot swap, for at least 5 minutes. -
Page 53: Handling Batteries Safely
Handling Batteries Safely • Never dispose of a battery in a fire. This may cause an explosion. • Do not replace individual cells in a battery pack. • Do not attempt to pry open the battery pack shell. • Be careful when handling any battery. If a battery is broken or shows signs of leakage do not attempt to charge it. Dispose of it using proper procedures. - Page 54 4 - 4...
-
Page 55: Chapter 5 - Software Configuration
The examples found in this section are to be used as examples only, the configuration of your specific MX7 Tecton computer may vary. The fol- lowing sections provide a general reference for the configuration of the MX7 Tecton and some of its optional features. -
Page 56: Warmboot
(page 5-55) control panel tap the Warmboot button. The MX7 Tecton immediately warmboots. • Using the Start menu, select Start > Run and type WARMBOOT in the text box. Press Enter. The MX7 Tecton immediately warmboots. The WARMBOOT text command is not case-sensitive. -
Page 57: Software Load
Avalanche Update Settings panel through the Enabler Interface. Software Development The CE API Programming Guide documents CE API calls for the MX7 Tecton. It is intended as an addition to the standard Microsoft Windows CE API documentation. A Software Developers Kit (SDK) and additional information about software development can be found on the Technical Support Portal. - Page 58 (*.REG), or sound files (*.WAV). The mechanism is the same as listed above, but the appropriate CE application is called, depending on file type. Note: Registry entries may vary depending on software revision level and options ordered with the MX7 Tecton. LAUNCH.EXE and Persistent Storage...
-
Page 59: Mx7 Tecton Command-Line Utilities
Note: The REG.TXT file is not saved in persistent storage. To use the REG.TXT file as a reference in the event of a restart, Copy the file to the System folder on the MX7 Tecton or store a copy of the REG.TXT file on a PC is recommended. -
Page 60: Desktop
MX7 Tecton. The MX7 Tecton Desktop appearance is similar to that of a desktop PC running a Windows operating system. At the bottom of the screen is the Start button. Tapping the Start Button causes the Start Menu to pop up. It contains the stan- dard Windows menu options: Programs, Favorites, Documents, Settings, Help, and Run. -
Page 61: My Device Folders
Operating System in Secure Storage Wavelink Avalanche Enabler (Optional) Note: If the user is NOT using Wavelink Avalanche to manage their MX7 Tecton, the Enabler should not be installed on the MX7 Tecton(s). The following features are supported by the Wavelink Avalanche Enabler when used in conjunction with the Avalanche Manager. -
Page 62: Start Menu Program Options
Start Menu Program Options The following list represents the factory default program installation. Your system may contain different items from those shown below, based on the software and hardware options purchased. Program Function Communication Stores Network communication options Connect Run this command after setting up a connection Start (or Stop Begin / end connection to FTP server FTP Servers... -
Page 63: Command Prompt
Exit the command prompt by typing exit at the command prompt or tap File > Close. eXpress Scan The eXpress Scan utility allows an administrator to scan bar codes to provide the initial network and Avalanche MX7 Tecton Server address configuration. This eliminates the need to edit radio parameters manually on the MX7 Tecton. -
Page 64: Settings
Settings Start > Settings The Settings menu option may include the following: Control Panel All control panels Network Shortcut to the Network and Dialup Connections control panel. Connect to a network, create a new connection, and adjust parameters for client connections. Taskbar Set Taskbar parameters Transcriber... - Page 65 General Setting Default Always on Top Enabled Auto hide Disabled Show Clock Enabled Advanced Expand Control Panel Tap the check box to have the Control Panel folders appear in drop down menu format from the Settings > Control Panel menu option. Clear Contents of Document Folder Tap the Clear button to remove the contents of the Document folder.
-
Page 66: Taskbar Icons
Refer to Start > Help for an explanation of standard Windows CE taskbar icons. Following are a few of the MX7 Tecton unique taskbar icons that may appear in the Taskbar. These icons are in addition to the Windows CE taskbar icons. -
Page 67: Upgrading The Operating System
2. Put the MX7 Tecton in Suspend Mode and remove the main battery pack. 3. Lift the rubber barrier and slide the SD card out of the slot. Do not remove the rubber barrier. The MX7 Tecton may not have a SD card in the slot because the OS is in flash. -
Page 68: Update Help
The operating system will not be able to execute the OS update when the battery level is too low (25% or less), as there is a high risk that the power remaining in the battery expires when executing the update and the MX7 Tecton will be left in an inoperable state. -
Page 69: Control Panel
Set network logging options. 5-44) Owner (page 5-47) Set the MX7 Tecton owner details (name, phone, etc). Enter notes. Enable / disable Owner display parameters. Enter Network ID for the device – user name, password, domain. Password (page 5-49) Set OS access password properties for signon and/or screen saver. - Page 70 Option Function PC Connection (page Control the connection between the MX7 Tecton and a local desktop or laptop computer. 5-50) Peripherals (page 5- Set the touch screen and scan aperture heaters on or off, if installed. Power (page 5-52) Set Power scheme properties. Review device status and properties.
-
Page 71: About
The Versions tab displays the versions of many of the software programs installed. Not all installed software installed on the MX7 Tecton is included in this list and the list varies depending on the applications loaded on the MX7 Tecton. -
Page 72: Accessibility
Accessibility Start > Settings > Control Panel > Accessibility Customize the way the MX7 Tecton keyboard, sound, display, mouse, automatic reset and notification sounds function. There are a few changes from general Windows desktop Accessibility options. The following exceptions are due to a limitation in the Microsoft Windows CE operating system: •... -
Page 73: Battery
Battery control panel. Jacked is shown in the Status box when the Main battery is receiving external power. The main battery is charged/recharged when the MX7 Tecton is docked in a powered cradle or directly cabled to an exter- nal power source. -
Page 74: Brightness
Brightness Start > Settings > Control Panel > Brightness Move the slider to increase or decrease screen brightness intensity. Click OK and any change is in effect immediately. Brightness setting does not affect the Backlight (page 5-26) timeout setting. 5 - 20... -
Page 75: Certificates
Note: Digital certificates are date sensitive. If the date on the MX7 Tecton is incorrect, wireless authentication will fail. The Certificates stores lists the certificates trusted by the MX7 Tecton user. These values may change based on the type of network security resident in the client, access point or the host system. -
Page 76: Date / Time
Date / Time Start > Settings > Control Panel > Date/Time - or - Time in Desktop Taskbar Use this MX7 Tecton panel to set Date, Time, Time Zone, and assign a Daylight Savings location. Setting Default Current Time Midnight... -
Page 77: Device Management
Device Management Start > Settings > Control Panel > Device Management Allows a Device Management client (the device equipped with a Microsoft Windows CE operating system) to work with a Microsoft Systems Management Server. Specify the server name or IP address of management server and tap the check box if a secure connection is to be used. Refer to the Microsoft.com website for more information on device management for Windows CE equipped devices. -
Page 78: Dialing
Dialing Start > Settings > Control Panel > Dialing Set dialup properties for internal modems (not supplied or supported). Setting Default Location Work or Car Area Code 425 or blank Tone Dialing Enabled Country/Region 1 or blank Disable Call Waiting Disabled (blank) 5 - 24... -
Page 79: Display
The display might also called the touch screen. Select the desktop background image and appearance scheme for the MX7 Tecton. Using the options on the Backlight tab, set the display backlight and keypad backlight timers when running on battery or external power. - Page 80 Appearance There is very little change from general desktop PC Appearance options. Select a scheme from the dropdown list and make changes to the parameters. The default is High Contrast White for monochrome displays and Windows Standard for color displays. Tap the Save button to save any changes, renaming the scheme if desired. Tap the Delete button to delete schemes.
-
Page 81: Input Panel
Adjust backlight brightness by moving the slider. Changes are in effect immediately. Input Panel Start > Settings > Control Panel > Input Panel Set the current MX7 Tecton keys and data input method. Setting Default Input Method... -
Page 82: Internet Options
Start > Settings > Control Panel > Internet Options Set options for MX7 Tecton Internet connectivity. Select a tab. Tap the ? button for help using Windows CE Help installed in your MX7 Tecton. Adjust the settings and tap the OK button. The changes take effect immediately. - Page 83 5 - 29...
- Page 84 5 - 30...
-
Page 85: Keyboard
Keyboard Start > Settings > Control Panel > Keyboard Set keypad key map, keypad key repeat delay, and key repeat rate. Setting Default Repeat character Enable Repeat Delay Short Repeat Rate Slow Adjust the character repeat settings and tap the OK button to save the changes. 5 - 31... -
Page 86: Keypad
KeyPad Start > Settings > Control Panel > KeyPad Icon Use this control panel option to assign key functions to mappable keys available on your MX7 Tecton, determine application launch sequences and program command Run sequences. Setting Default Notes KeyMap... - Page 87 KeyMap Assign settings by clicking radio buttons and selecting keys from the drop down boxes. Tap the OK button when fin- ished. The changes take effect immediately. Remap Key to a Single Key 1. Select the modifier key from the Modifier Mode options. 2.
- Page 88 Remap Key to a Sequence of Unicode Values Up to 16 Unicode values may be specified for the key sequence. The sequence can consist of keys and Unicode values. 1. Select the modifier key from the Modifier Mode options. 2. Select the key to be remapped from the Key pulldown list. 3.
- Page 89 LaunchApp The default for all text boxes is Null or “ ”. The text boxes accept string values only. Note that executables and parameters are not checked for accuracy by the keyboard driver. If the launch fails, the MX7 Tecton emits a single beep, if the launch is successful, it is silent. The Launch App command is defined for use by system administrators.
- Page 90 Note that executables and parameters are not checked for accuracy by the keyboard driver. If the launch fails, the MX7 Tecton emits a single beep, if the launch is successful, the MX7 Tecton is silent. The Run Cmd command is defined for use by system administrators. These instructions call the ShellExecuteEx API, which opens documents directly.
-
Page 91: License Viewer
Start > Settings > Control Panel > Mixer The MX7 Tecton has a speaker (located above the scan button). It is active when a headset is not connected to the device. Use the settings on these panels to adjust the volume, record gain and sidetone for microphone input, speaker and speaker output. - Page 92 Output Tap and hold the Output sliders and move them either left or right, or tap the left and right arrows, to adjust Speaker volume decibel level. Input Sidetone -- Click (enable) the Enabled radio button. To disable Sidetone, tap (enable) the Disabled radio button. 5 - 38...
-
Page 93: Mouse
Mouse Start > Settings > Control Panel > Mouse Use this option to set the double-tap sensitivity for stylus taps on the MX7 Tecton touch screen. 5 - 39... -
Page 94: Mx7T Options
Set options such as IP V6, TimeSync, Touch screen enable and CapsLock. Also set Status Popup taskbar icon display options for the Admin and User. It may be necessary to warmboot the MX7 Tecton after making desired changes. A pop up window indicates if a warmboot is required. - Page 95 By default, CapsLock is off after a warmboot. Check this box to turn CapsLock on after a warmboot. Touch Screen Disable By default, the MX7 Tecton touch screen is enabled. To disable the touch screen after a warmboot, tap to put a checkmark in this check box.
- Page 96 Status Popup Options on this tab configure the Status Popup window. When the Status popup window is displayed, it is placed on top of the window in focus and hides any data beneath it. It is closed by pressing the assigned Status User or Status Admin key.
-
Page 97: Network And Dialup Options
Creating a New Connection 1. On the MX7 Tecton, select Start > Settings > Control Panel > Network and Dialup Connections. A window is dis- played showing the existing connections. 2. Assuming the connection you want does not exist, double-tap Make New Connection. -
Page 98: Network Capture
Network Capture Start > Settings > Control Panel > Network Capture Verify the MX7 Tecton Date / Time (page 5-22) before using the logging utilities to ensure meaningful data. The Network Capture panels provide configuration options for logging utilities. Two types of logging are configurable: Netlog is a Windows CE utility that monitors network traffic. - Page 99 Command Function options Specifies the option to perform. See the table below for the option parameters and values. load Loads and starts Netlog. start Starts the Netlog process of logging the network traffic. stop Stops Netlog from logging network traffic. unload Unloads Netlog.
- Page 100 NDISLog NDISLog creates a .TXT file that can be viewed with any text editor program that supports .TXT files. start Starts logging the network traffic. stop Stops logging network traffic. file Specifies the name of the file to which NDISLog information is stored. Save File Button Stores the file name.
-
Page 101: Owner
Owner Start > Settings > Control Panel > Owner Set the MX7 Tecton owner details. The Network ID is used when logging into a remote network. Setting Default Identification Tab Name Blank Company Blank Address Blank Telephones Blank Display owner ID at power-on... - Page 102 Enter user name, password and domain to be used when logging into network resources. 5 - 48...
-
Page 103: Password
Start > Settings > Control Panel > Password Use this panel to set MX7 Tecton user access to control panels and power up password properties. Important: This password must be entered before performing a cold boot. Contact Technical Assistance if entering a power- on or screen saver password does not allow you to disable this password protection or perform a cold boot. -
Page 104: Pc Connection
PC Connection Start > Settings > Control Panel > PC Connection Use these options to control a cabled connection (USB, serial) between the MX7 Tecton and a nearby desktop/laptop com- puter. Setting Default Enable direct connection Enabled Connect using USB Client Unchecking the Enable direct connections check box disables ActiveSync on the MX7 Tecton. -
Page 105: Peripherals
Peripherals Start > Settings > Control Panel > Peripherals This panel is used to enable and disable the touch screen heater and scan window heater. Setting Default Touch screen heater Enabled Scan window heater Enabled Heater trip point 0º C Earlier versions may be 40ºC Heaters Note: Settings have no effect if the touch screen / scan window heaters are not enabled / installed. -
Page 106: Power
Power Start > Settings > Control Panel > Power The MX7 Tecton power mode timers are cumulative. The System Idle timer begins the countdown after the User Idle timer has expired and the Suspend timer begins the count- down after the System Idle timer has expired. -
Page 107: Regional And Language Settings
Regional and Language Settings Start > Settings > Control Panel > Regional Settings Set the appearance of numbers, currency, time and date based on regional and language settings. Set the MX7 Tecton user interface language and the default input language. - Page 108 5 - 54...
-
Page 109: Registry
Registry Start > Settings > Control Panel > Registry Choose a software reload scheme. Load User Defaults When clicked, a standard load file dialog is opened, to allow the user to pick a Registry Save (.RSG) file. The applet then copies the specified User registry file to the Active registry. The user is asked to verify a reboot, and then the applet does a warmboot to activate the new registry. -
Page 110: Remove Programs
In some OS versions, this panel is replaced by the Installed Programs panel. The Installed Programs panel does not allow any user interaction. Tap to select a program and tap Remove. Follow the prompts on the screen to uninstall MX7 Tecton user-installed only pro- grams. The change takes effect immediately. -
Page 111: Stylus
Stylus Start > Settings > Control Panel > Stylus Use this control panel option to set stylus double-tap sensitivity properties and calibrate the MX7 Tecton touch panel when needed. Double Tap Follow the instructions on the screen and tap the OK button to save any double tap changes. -
Page 112: System
System Start > Settings > Control Panel > System Use these MX7 Tecton panels to: • Review System and MX7 Tecton data and revision levels. • Adjust Storage and Program memory settings. • Assign a device name and device descriptor. -
Page 113: Device Name
The device name and description can be changed by the user. Enter the name and description using either the keypad or the Input Panel and tap OK to save the changes. This information is used to identify the MX7 Tecton to other com- puters and devices. -
Page 114: Volume And Sounds
You can also select / deselect sounds for key clicks and screen taps and whether each is loud or soft. As the volume scrollbar is moved between Loud and Soft, the MX7 Tecton emits a tone each time the volume increases or decreases. -
Page 115: Wi-Fi
These are unprotected WAV files and can be replaced by a WAV file of the user’s choice. By default a good scan sound on the MX7 Tecton is a single beep, and a bad scan sound is a double beep. -
Page 116: Using Activesync
“ActiveSync” with “Windows Mobile Device Center”. Using Microsoft ActiveSync, you can synchronize information on your host computer with the MX7 Tecton and vice versa. Synchronization compares the data on your mobile device with your host computer and updates both with the most recent data. -
Page 117: Initial Setup
Ensure the check box for “Enable direct connection to the desktop computer” is checked. Tap OK to return to the PC Con- nection panel. Connect the USB cable to the PC (the host) and the MX7 Tecton (the client) as detailed below. ActiveSync will start auto- matically when the USB cable is connected. -
Page 118: Mx7 Tecton With A Disabled Touch Screen
One or more control lines are not connected. This is usually a cable problem, but on a laptop or other device, it may indicate a bad serial port. If the MX7 Tecton is connected to a PC by a cable, disconnect the cable from the MX7 Tecton and reconnect it again. Check that the correct connection is selected. -
Page 119: Configuring The Mx7 Tecton With Hsm Connect (Or Lxeconnect)
Try the connection again, with a known good cable. Configuring the MX7 Tecton with HSM Connect (or LXEConnect) HSM Connect (or LXEConnect) allows a user to view the MX7 Tecton screen remotely from a PC using an ActiveSync connec- tion. - Page 120 6. Click the OK button to dismiss the About CERDisp dialog box on the MX7 Tecton desktop by clicking the OK button in the HSM Connect window on the PC desktop. The dialog box automatically times out and disappears after approximately 20 seconds.
-
Page 121: Chapter 6 - Applock (Application Locking)
• A default input method (Input Panel, Transcriber, or custom input method) is assigned. • The touch panel must be enabled. Refer to the MX7 Tecton Options control panel Touch Screen Disable setting. If the Touch Screen Disable option is dimmed, the touch panel cannot be toggled on or off by the user. -
Page 122: End User Mode
• Create/change the keystroke sequence to activate administrator access. • Create/change the password for administrator access. • Assign the name of the application, or applications, to lock. • Select the command line of the application to lock. In addition to these configuration options, the administrator can view and manage the status logs of AppLock sessions. Administrator default values for this device are: •... -
Page 123: Passwords
Passwords A password must be configured. If the password is not configured, a new device switches into Administration mode without prompting for a password. In addition to the Administrator hotkey press, a mode switch occurs if inaccurate information has been configured or if mandatory information is missing in the configuration. There are several situations that display a password prompt after a password has been configured. -
Page 124: Hotkey (Activation Hotkey)
Hotkey (Activation hotkey) If the MX7 Tecton has been configured to use AppLock to allow the user to switch between applications, the default user Activation key is Ctrl+Spc. The key sequence switches the focus between one application and another. Data entry affects the application running in the foreground only. -
Page 125: Application Configuration
Use the Application tab options to select the applications to launch when the device boots up in End user Mode. If no application is specified when the Administrator Panel is closed, the MX7 Tecton reboots into Administrator mode. If a password has been set, but an application has not been specified, the user will be prompted for the password before enter- ing administration mode. - Page 126 Setting Function Launch Button See following section titled Launch Button (page 6-7). Global Key Default is Ctrl+Spc. Select the Global Key key sequence the end user is to press when switching between applications. The Global Key default key sequence must be defined by the AppLock Ad- ministrator.
-
Page 127: Launch Button
Launch Button When clicked, displays the Launch options panel for the Filename selected on the Administration panel. Note: Launch order is determined by the Order specified in the Application panel. The Order value does not have to be sequential. Auto At Boot Default is Enabled. - Page 128 Auto Re-Launch Default is Enabled. When enabled for a specific application. automatically re-launches it (subject to the specified Auto Re-Launch Delay in seconds) after it terminates. This option allows the Administrator to disable the re-launch operation. AppLock cannot prevent all applications from closing. When an application that AppLock cannot prevent from clos- ing terminates, perhaps because of an error condition, AppLock re-launches the application when this option is enabled.
-
Page 129: Security
Security Setting an Activation Hotkey Specify the hotkey sequence that triggers AppLock to switch between administrator and user modes and the password required to enter Administrator mode. The default hotkey sequence is Shift+Ctrl+A. A 2nd key keypress is an invalid keypress for a hotkey sequence. Move the cursor to the Hot Key text box. -
Page 130: Options
Options AppLock uses 3 timeout values when locking applications: Setting Explanation Launch The time to wait for an application to initially launch before timing out. Default value is 60000 milliseconds (60 timeout seconds). Replace The time to wait for an application to replace the current window with another one before timing out. Default timeout value is 20000 milliseconds (20 seconds). -
Page 131: Status
Status Use the Status panel to view the log of previous AppLock operations and to configure which messages are to be recorded during AppLock operation. Status information is stored in a specific location on the storage device and in a specific logfile specified by the Administra- tor. -
Page 132: Applock Help
Solution: When the Administrator is selecting a hotkey sequence to use when switching user modes, they are not allowed to enter key combinations that are reserved by installed software applications. Honeywell has validated RFTerm key combinations ONLY. When RFTerm is installed on the mobile device and an RFTerm restricted key sequence is specified as a hotkey sequence by the Administrator, the following error message is displayed in a message box: Selected hotkey is not allowed. -
Page 133: Applock Error Messages
AppLock Error Messages Any messages whose first word is an ‘ing’ word is output prior to the action described in the message. For example, “Switching to admin-hotkey press” is logged after the administrator has pressed the hotkey but prior to starting the switch process. For all operations that can result in an error, an Error level message is displayed when a failure occurs. - Page 134 Message Explanation and/or corrective action Level Could not create event The keyboard filter uses this event at the Administrator Control panel. The LOG_ERROR EVT_HOTKEYCHG event could not be created. Could not hook key- If the keyboard cannot be controlled, AppLock cannot process the hotkey. This LOG_ERROR board failure prevents a mode switch into user mode.
- Page 135 Message Explanation and/or corrective action Level Encrypt hash data fail- Unable to encrypt password. LOG_ERROR Encrypt hash data Encrypt password process successful. LOG_EX from pwd OK Encrypt length failure Unable to encrypt password. LOG_ERROR Encrypt out of memory Unable to encrypt password. LOG_ERROR for key Encrypted data OK...
- Page 136 Message Explanation and/or corrective action Level Exit ToAdmin Exiting the function that handles the mode switch into admin mode. LOG_PROCESSING Exit ToUser Exiting the user mode switch function. LOG_PROCESSING Exit ToUser-Registry The AppName value does not exist in the registry so user mode cannot be en- LOG_PROCESSING read failure tered.
- Page 137 Message Explanation and/or corrective action Level Opened status file The status information is being saved to a file and the file has been opened suc- LOG_EX cessfully. Out of memory for en- Not enough memory to encrypt the password. LOG_ERROR crypted pwd pRealTaskbarWnd- The taskbar control has already been installed.
- Page 138 Message Explanation and/or corrective action Level Switching to admin- See the explanation of the “Registry read failure” above. AppLock is switching LOG_PROCESSING registry read failure into Admin mode. If a password has been configured, the prompt will be dis- played and will not be dismissed until a valid password is entered. Switching to Taskbar- In administration mode, the taskbar is visible and enabled.
-
Page 139: Chapter 7 - Bluetooth Configuration
• It is not necessary to disconnect a paired scanner and printer before a different scanner or printer is paired with the MX7 Tecton. • The target Bluetooth device should be as close as possible (up to 32.8 ft/10 meters Line of Sight) to the MX7 Tecton during the pairing process. -
Page 140: Subsequent Use
LED on the device, or a dialog box is placed on the MX7 Tecton display. 11. Whenever the MX7 Tecton is turned On, all previously paired, live, Bluetooth devices in the vicinity are paired, one at a time, with the MX7 Tecton. -
Page 141: Bluetooth Devices
When tapped, the Bluetooth client discovers and displays all Bluetooth devices in the vicinity. Bluetooth managed devices should be as close as possible in direct line of sight, with the MX7 Tecton during the Discover process. At the end of the Discover process, and when Filtered Mode is disabled/unchecked, serial Bluetooth devices as well as Bluetooth scanners and printers are displayed in the Device table. - Page 142 Device List is displayed. Note: When an active paired device enters Suspend Mode, is turned Off or leaves the MX7 Tecton Bluetooth scanning range, the Bluetooth connection between the paired device and the MX7 Tecton is lost. There may be audible or visual signals as paired devices disconnect from the MX7 Tecton.
-
Page 143: Bluetooth Device Menu
An icon with a white background indicates the device is connected to the MX7 Tecton and the device's Bluetooth con- nection is active. Double-tap a device in the list to open the device properties menu. The target device does not need to be active. -
Page 144: Settings
Bluetooth Properties Data on the Bluetooth Properties panel cannot be changed by the user. The data displayed is the result of the device Query performed during the Discovery process. The Status dialog box reflects the current state of the highlighted device. Settings Note: These options can still be checked or unchecked whether Bluetooth connection is enabled or disabled. -
Page 145: Options
This option is Enabled (checked) by default. to pair A dialog box appears on the MX7 Tecton screen notifying the user a Bluetooth device requests to pair with the MX7 Tecton. The requesting Bluetooth device does not need to have been Discovered by the MX7 Tecton before the pairing request is received. -
Page 146: Reconnect
Reconnect Note: These options can still be checked or unchecked whether Bluetooth connection is enabled or disabled. Options Option Function Report when connection This option is Enabled (checked) by default. lost There may be an audio or visual signal when a connection between a paired, active device is lost. -
Page 147: About
Setup the Bluetooth module to establish how the user is notified by easy pairing and auto-reconnect events. AppLock, if installed, does not stop the end-user from using the Bluetooth application, nor does it stop other Bluetooth-enabled devices from pairing with the MX7 Tecton while AppLock is in control. 7 - 9... -
Page 148: Bluetooth Indicators
Bluetooth scanner. • Open the Bluetooth control panel or tap the Bluetooth icon. Locate the bar code label, similar to the one shown above, attached to the MX7 Tecton. The label is the Bluetooth address identifier for the MX7 Tecton. -
Page 149: Mx7 Tecton With Label
The devices are paired. The Bluetooth mobile bar code reader responds with a series of beeps and an LED flashes. Note: After scanning the MX7 Tecton Bluetooth label, if there is no beep and no LED flash from the Bluetooth mobile device, the devices are currently paired. -
Page 150: Bluetooth Reader Beep And Led Indications
Bluetooth Printer Setup The Bluetooth managed printer should be as close as possible, in direct line of sight, with the MX7 Tecton during the pairing pro- cess. 1. Open the Bluetooth control panel on the MX7 Tecton. -
Page 151: Chapter 8 - Data Collection Wedge
Note: Identify the Scan Engine: Open the Data Collection application panel on the MX7 Tecton. Tap the About tab. The type of integrated scan engine is shown in the Scanner segment. The integrated scan engine activates when the Scan button on the front of the MX7 Tecton is depressed or when the trigger on an installed trigger handle is depressed. -
Page 152: Data Processing Overview
Data Processing Overview Bar code data processing involves several steps. Some steps may be skipped during the processing depending on user selec- tions on the Symbology Settings panels. The steps are presented below in the order they are performed on the scanned data. 1. -
Page 153: Main
The Data Collection Wedge supports up to three concurrent data collection devices. For example, the internal scanner could be used to collect data at the same time a Bluetooth scanner is paired and/or a serial device is attached to COM1. The MX7 Tecton must be in a desktop cradle to use a tethered scanner. -
Page 154: Continuous Scan Mode
Continuous Mode is On. Continuous scan mode is only available if the MX7 Tecton is equipped with a Symbol or a Honeywell scanner. Continuous scan mode draws power from the main battery every time a scan read/decode sequence is performed. -
Page 155: Notification
If these values are changed, the default values are restored after a cold boot or after re-imaging the OS. COM1 does not support 5V switchable power on Pin 9 for tethered scanners. Notification Use this panel to toggle internal scanner sounds on and off. Internal scanner sound, by default, is enabled. Setting Default Enable Internal Scanner Sound... -
Page 156: Data Options
• Replacing control characters • Adding a prefix and a suffix For MX7 Tecton with Symbol or Honeywell engine: Data Collection Wedge can only enable or disable the processing of a bar code inside the Wedge software. Enabling or dis- abling a specific bar code symbology at the scanner/imager is done manually using the configuration bar codes in the Integrated Scanner Programming Guide. -
Page 157: Enable Code Id
Panel for a Hand Held Products scan engine Panel for any other type of scan engine The HHP Properties button is only present if the MX7 Tecton is equipped with a Hand Held Products (HHP) imager. 1. Choose an option in the Enable Code ID drop-down box: •... -
Page 158: Symbology Settings
• The external scanner operation cannot be controlled by the MX7 Tecton scanner driver; therefore, a ‘good’ beep may be sounded from the external scanner even if a bar code from an external scanner is rejected because of the configuration specified. - Page 159 Symbology is selected from the Symbology drop down list. Panel for HHP scan engine Panel for Honeywell scan engine Clear Button This button will erase any programmed overrides, returning to the default settings for the selected symbology.
- Page 160 When All is selected in the Symbology field and the settings are changed, the settings in this dialog become the defaults, used unless overwritten by the settings for individual symbologies. This is also true for Custom IDs, where the code IDs to be stripped are specified by the user. Note: In Custom mode on the Data Options tab, any Code IDs not specified by the user will not be stripped, because they will not be recognized as Code IDs.
- Page 161 Leading This strips the number of characters specified from the beginning of the collected data (not including Code ID). The data is stripped unconditionally. This action is disabled by default. Trailing This strips the number of characters specified from the end of the collected data (not including Code ID). The data is stripped unconditionally.
-
Page 162: Match List Rules
Remove The Clear All button changes to a Remove button when an item in the Custom IDs list is selected. Tap the desired line item and then tap the Remove button to delete it. Line items are Removed one at a time. Con- tents of the text box fields are cleared at the same time. - Page 163 HHP IDs (Hand Held Products) or Honeywell IDs. AIM Symbologies Note: When the integrated scan engine is a Honeywell or Symbol scan engine, AIM IDs apply, but Advanced properties do not and the Advanced button is not available. Symbol Engine...
- Page 164 HHP Symbologies Advanced properties are available when an integrated Hand Held Products imager is installed in the MX7 Tecton. Advanced properties are applicable regardless of the ID type selected (AIM or HHP). HHP = Hand Held Products. Not all HHP symbologies have Advanced options. Symbologies with Advanced options are documented on the follow- ing pages.
- Page 165 Codabar - Advanced Properties Check Character Required – When enabled, the check character is required. Default is disabled. Transmit – When enabled, the check character is transmitted. Default is disabled. Start / Stop Character Transmit – When enabled, the start / stop characters are transmitted. Default is disabled. Code11 - Advanced Properties Check Digits Required –...
- Page 166 Code39 - Advanced Properties Check Character Required – When enabled, the check character is required. Default is disabled. Transmit – When enabled, the check character is transmitted. Default is disabled. Transmit Start / Stop Character – When enabled, the start / stop characters are transmitted. Default is disabled. Full ASCII –...
- Page 167 EAN8 - Advanced Properties Transmit Check Character – When enabled, transmit the check character. Default is enabled. Addenda Read 2-Digit – When enabled, transmit the 2 digit addenda. Default is disabled. Read 5-Digit – When enable, transmit the 5 digit addenda. Default is disabled. Required –...
- Page 168 EAN13 - Advanced Properties Transmit Check Character – When enabled, transmit the check character. Default is disabled. Addenda Read 2-Digit – When enabled, transmit the 2 digit addenda. Default is disabled. Read 5-Digit – When enable, transmit the 5 digit addenda. Default is disabled. Required –...
- Page 169 Interleaved 2 of 5 - Advanced Properties Check Character Required – When enabled, the check character is required. Default is disabled. Transmit – When enabled, the check character is transmitted. Default is disabled. 8 - 19...
- Page 170 Mesa - Advanced Properties UPCA – When enabled, decode UPCA Mesa. Default is disabled. EAN13 – When enabled, decode EAN 13 Mesa. Default is disabled. Code39 – When enabled, decode Code 39 Mesa. Default is disabled. Code128 – When enabled, decode Code 128 Mesa. Default is disabled. Interleaved 2 of 5 –...
- Page 171 MSI - Advanced Properties Transmit Check Character – When enabled, transmit the check character. Default is enabled. 8 - 21...
- Page 172 OCR Properties - Advanced Font – Font selection. Default is disabled. • A = OCR A • B = OCR B • Money = OCR Money • MICR = Magnetic Ink Character Recognition Direction – Decoder reads OCR fonts in any direction, but setting direction parameter correctly can increase decoding speed.
- Page 173 3. To read either a string of 6 alphabetic letters OR a string of 8 numeric digits, use this template: lllllltdddddddd Note the use of the “t” to separate the first template from the second. 4. To read multiple rows of OCR data as shown below: 123456 ABCDEF Either of the following templates could be used:...
- Page 174 Planet - Advanced Properties Transmit Check Character – When enabled, transmit the check character. Default is enabled. Posicode - Advanced Properties Limited Labels – Select the type of Posicode Limited labels: • None • A – Posicode Limited A • B – Posicode Limited B 8 - 24...
- Page 175 Telepen - Advanced Properties Original Output – When enabled, output is Original Telepen. When disabled, output is AIM. Default is enabled. UPCA- Advanced Properties Transmit Check Character – When enabled, transmit the check character. Default is enabled Transmit Number System Digit – When enabled, transmit the number system digit. Default is enabled. Addenda Read 2-Digit –...
- Page 176 UPCE0- Advanced Properties Note: The UPCE0 and UPCE1 parameters are always set to match each other. Therefore if a change is made to a parameter to either the EPCE0 or UPCE1 Advanced Properties that same change is automatically made to the Advanced Properties for the other symbology. Note: UPCE0 and UPCE1 are enabled as the same symbology at the scanner.
- Page 177 UPCE1- Advanced Properties Note: The UPCE0 and UPCE1 parameters are always set to match each other. Therefore if a change is made to a parameter to either the EPCE0 or UPCE1 Advanced Properties that same change is automatically made to the Advanced Properties for the other symbology. Note: UPCE0 and UPCE1 are enabled as the same symbology at the scanner.
- Page 178 HHP Properties When the MX7 Tecton is equipped with a Hand Held Products imager, this option is used to configure imager scanning parameters. Option Action Centering The centering feature is used to allow the user to accurately scan a selected bar code among a group of bar codes that are located closely together.
- Page 179 Ctrl Char Mapping The Ctrl Char Mapping button on the Data Options tab activates a dialog to define the operations the Data Collection Wedge performs on control characters (values less than 0x20) embedded in bar codes. Control characters can be replaced with user-defined text which can include hat encoded or hex encoded values.
-
Page 180: Custom Identifiers
value 0x0d received in any scanned bar code (or defined in the prefix or suffix) will be replaced with the value 0x0a. The Wedge then sends Ctrl+J to the receiving application, rather than Ctrl+M. List Box The list box shows all user-defined control characters and their assigned replacements. All replacements are enclosed in single quotes to delimit white space that has been assigned. - Page 181 ID Code text box ID Code defines the data at the beginning of a bar code that acts as an identifier (the actual Code ID). Both Name and ID Code must be specified in order to add a custom Code ID to the Custom IDs list. Custom ID Buttons Entering data into both the Name and ID Code fields enables the Add button.
-
Page 182: Control Code Replacement Examples
Control Code Replacement Examples Example Configuration Example Translation Control Translated data data configuration Character Ignore(drop) The control character is discarded ESCape ‘Ignore (drop)’ 0x1B in the bar code is from the bar code data, prefix and discarded. suffix Printable text Text is substituted for Control Char- Start of TeXt ‘STX’... - Page 183 EAN-13 ]E01234 ccc]E0yyy I2/5 ]I04444567890987654321 < rejected > (too long) I2/5 ]I04444567890123 ddd7890zzz I2/5 ]I0444 dddzzz I2/5 ]I022245622 ddd45zzz Code-93 ]G0123456 < rejected > (disabled) Code-93 ]G0444444 < rejected > (disabled) Code-39 ]A01234567890 aaa4567890www Code-39 full ASCII ]A41231234567890 aaa1234567890www Code-39 <...
-
Page 184: Length Based Bar Code Stripping
Length Based Bar Code Stripping Use this procedure to create symbology rules for two bar codes with the same symbology but with different discrete lengths. This procedure is not applicable for bar codes with variable lengths (falling between a maximum value and a mini- mum value). - Page 185 5. Tap the Barcode Data button. 6. Tap the Add button. 7. Add the data for the match codes. 8. Refer to the previous section Bar Code Data Match List (page 8-11) for instruction. 9. Scan a bar code and examine the result. 8 - 35...
-
Page 186: Processing
Processing The Processing tab contains a user configurable key delay that applies to scanned bar codes as they are input when Remote Desktop is the application with the input focus. Setting Default Enable buffered key output Enabled Same buffer limit (characters) Delay between buffers 75 ms Note: Settings on this panel have no effect when RFTerm is the application with the input focus. -
Page 187: About
About The About tab lists the version of the Data Collection Wedge (DCWedge) software and the type of laser scan (or imager) engine installed in the MX7 Tecton Valid scanner / imager types: • HHP – Hand Held Products 5300 2D Imager •... -
Page 188: Hat Encoding
Hat Encoding Hat Encoded Characters Hex 00 through AD 8 - 38... - Page 189 Hat Encoded Characters Hex AE through FF 8 - 39...
- Page 190 8 - 40...
-
Page 191: Chapter 9 - Enhanced Launch Utility
Enhanced Launch Utility Introduction The launch utility has two functions: • Process registry based Launch items • Process script based Launch items The registry based Launch items are processed before the script based Launch items. Registry Based Launch Items Registry based Launch items (documented here) are processed before the Script Based Launch items, see Script Based Launch Items (page 9-4). - Page 192 • The Order field is used to force a sequence of events; Order=0 is first, and Order=99 is last. Two items which have the same order are installed in the same pass, but not in a predictable sequence. • The Delay field is used to add a delay after the item is loaded, before the next is loaded. The delay is given in seconds, and defaults to 0 if not specified.
-
Page 193: Launch Startup Options
Launch Startup Options The Launch utility uses registry entries to enable or disable startup options. These flags are located in the registry key: HKEY_LOCAL_MACHINE\Software\LXE\Launch These can be configured using RegEdit. The options are as follows: Ship Value Description Default Default LaunchPSM Execute the Persist keys JumpStart... -
Page 194: Script Based Launch Items
Script Based Launch Items Note: Script Based Launch items (documented here) are processed after Registry Based Launch items, see Registry Based Launch Items (page 9-1). The Enhanced (script based) portion of the Launch utility provides several features: • Launch .CAB file •... -
Page 195: Comments
Parameters are separated by a single comma. If a parameter requires a comma within it, the whole parameter must be enclosed in quote marks ("). Extra spaces are ignored between the comma and the next parameter. For Example To delete a file called Ive, got, commas, in, my, name.txt, use the command delete,"Ive, got, commas, in, my, name.txt". -
Page 196: Commands Supported By Launch
Commands Supported by Launch ElseIfFile IfFile Mkdir Warmboot Copy EndIf IfTerm Rmdir Delete EndIfFile Launch SetRegData DelRegData DelRegKey EndIfTerm LaunchCmd SetRegKey ElseIf FCopy Message Shortcut The commands supported by Launch are detailed below. Square brackets indicate that a parameter is optional. Characters in italics represent a variable, and not a literal. - Page 197 DelRegKey Deletes a specified registry subkey. Description Delregkey,key,subkey Syntax key: The abbreviated major registry key where you want to delete the subkey. Can be one of: Parameter • cr or hkcr (HKEY_CLASSES_ROOT) • cu or hkcu (HKEY_CURRENT_USER) • lm or hklm (HKEY_LOCAL_MACHINE). The case of key does not matter.
- Page 198 EndIf Description Ends conditional command block begun with the previous IF command. EndIf Syntax None Parameter IfFile (page 9-9). Example Notes Results are unpredictable if not paired properly with If... command. EndIfFile Description Ends conditional command block begun with the previous IF command. EndIfFile Syntax None...
- Page 199 IfFile Begins the conditional execution of a block of commands only if the specified file exists. Description IfFile,file Syntax file: The path and filename to determine if the commands should be executed Parameter IfFile,\System\MyData.dat Example any number of commands, executed if file exists ElseIfFile any number of commands, executed if file does not exist EndIfFile...
- Page 200 LaunchCmd Runs a program with arguments. Description Launchcmd,program,arguments,wait-code Syntax program: The full path and filename of the program to be run. Parameters arguments: The command line arguments for program. wait-code: Tells Launch how to behave when the program is running. w(ait) causes Launch to stop processing the script until the program has finished executing.
- Page 201 Rmdir Removes a directory. Description Rmdir,dir Syntax dir: The full path and name of the directory to be removed. Parameters rmdir,\Program Files\MyApp Example A directory cannot be removed if it contains files or subdirectories. Notes SetRegData Adds or updates a data field in the registry. Description Setregdata,key,subkey,type,field,data[,data2][,data3]...
- Page 202 SetRegKey Adds a sub key to the registry. Description Setregkey,key,subkey Syntax key: The abbreviated major registry key where you want to create the subkey. Can be one of: Parameters • cr or hkcr (HKEY_CLASSES_ROOT) • cu or hkcu (HKEY_CURRENT_USER) • lm or hklm (HKEY_LOCAL_MACHINE). The case of key doesn’t matter.
-
Page 203: Launch Error Messages
Launch Error Messages Launch displays a message if it encounters an error during the processing of a script. It is possible to get cascading error mes- sages, as Launch does not stop processing the script if it encounters an error. An example of this would be a failure creating a directory causing the failure of all files copied to that directory. -
Page 204: Example Script File
Error Message Given by Description Registry Value Delete Failed error- DelRegData There was a problem deleting the registry data. Most likely a bad sub- code key. Registry Value Set Failed error- SetRegData There was a problem setting the registry data. Most likely a bad subkey. code Shortcut Creation Failed error- Shortcut... -
Page 205: Chapter 10 - Enabler Installation And Configuration
• If the file RMU.CE.CAB file is not present, it looks for the file in the \System\RMU folder. • If present, the Enabler copies the file to the \System folder and installs it. At this point, the OS will automatically install the RMU (Remote Management Utility) after the MX7 Tecton reboots. 10 - 1... -
Page 206: Enabler Uninstall Process
The Enabler running on the MX7 Tecton will attempt to access COM1, COM2, and COM3. “Agent not found” will be reported if the Mobile Device Server is not located or a serial port is not present or available (COM port settings can be verified using bar code wedge panels on the MX7 Tecton). -
Page 207: Preparing A Device For Remote Management
To configure the Avalanche Enabler management of the network and wireless settings: 1. Open the Enabler Settings Panels by tapping the Enabler icon on the desktop. 2. Select File > Settings. 3. Select the Adapters tab. 4. Choose settings for the Use Manual Settings parameter. 5. -
Page 208: User Interface
Standard Avalanche Enabler parameters that are not supported may be missing or dimmed (visible but unable to be edited) on the tabbed panels or screen displays. Enabler Configuration Depending on the version of the Enabler running on the MX7 Tecton, the desktop Enabler icon may look like one of the fol- lowing: Enabler Settings Icon The Enabler user interface application is launched by tapping either the Enabler Settings icon on the desktop or Taskbar or by selecting Avalanche Enabler from the Programs menu. -
Page 209: File Menu Options
Wavelink Avalanche Mobility Center User Guide for details. Settings The Settings option under the File menu allows the MX7 Tecton user to access the control panel to locally configure the Enabler settings. The Enabler control panel is, by default, password protected. -
Page 210: Avalanche Update Using File > Settings
Avalanche Update using File > Settings Use these menu options to setup the Avalanche Enabler on the MX7 Tecton. Change settings and save the changes (reboot) before connecting to the network. Alternatively, the Mobile Device Server can be disabled until needed (refer to the Wavelink Avalanche Mobility Center User’s Guide for details). - Page 211 Function Avalanche Server Address Enter the IP Address or host name of the Mobile Device Server assigned to the MX7 Tecton. Check Serial Connection Indicates whether the Enabler should first check for serial port connection to the Mobile Device Server before checking for a wireless connection to the Mobile De- vice Server.
- Page 212 Execution Note the dimmed options on this MX7 Tecton panel. This menu option is designed to manage downloaded applications for automatic execution upon startup. Setting Function Auto-Execute Selection An application that has been installed with the Avalanche Management system can be run automatically following each boot.
- Page 213 1) for upgrade availability and version information. Setting Function Sync Clock Reset the time on the MX7 Tecton based on the time on the Mobile Device Server host PC. Contact On Startup – Connect to the Mobile Device Server when the Enabler is accessed.
- Page 214 Data The Data tab controls when data is transferred between the MX7 Tecton and the Mobile Device Server. Setting Function Transfer Data When Device is Idle When enabled, periodic updates from the Mobile Device Server are post- poned until the MX7 Tecton has been idle for the specified period of time. The default is disabled.
- Page 215 Function Startup Behavior of the Enabler when the MX7 Tecton boots up. The default is Monitor for Updates. • Do not Monitor - When the device boots, do not launch the Enabler application and do not attempt to connect to the Mobile Device Server.
- Page 216 Activity Log Setting Function Log Level Use this option to control the level of detail recorded in the log file. The default is No Activity Log. • No Activity Log - No log file is written. • Critical - Only critical errors written to the log files. •...
- Page 217 For best results, use eXpress Config and eXpress Scan for this function. eXpress Scan is included with the updated MX7 Tecton enablers. Scan Config functionality is a standard option of the Wavelink Avalanche MC system but is not currently supported on the MX7 Tecton.
- Page 218 Display The user interface for the Enabler can be configured to dynamically change based on the status of the MX7 Tecton connection with the Mobile Device Server. Setting Function At startup Default is Half Screen. Options are Half screen, Hidden or Full screen.
- Page 219 (page 6-1) is resident on each mobile device. Configure shortcuts to other applications on the MX7 Tecton. Shortcuts are viewed and activated in the Programs panel. This limits the user’s access to certain applications when the Enabler is controlling the mobile device display.
- Page 220 SaaS Use to configure the Enabler to connect with Avalanche on Demand. This is a Software-as-a-Service version of Ava- lanche. Using either of the SaaS configuration options below assumes the user has registered with Wavelink. Setting Function Disable SaaS No SaaS connection is used. Scan Configure SaaS Scan bar codes printed from within the Avalanche Console to configure the Enabler for the SaaS connection.
- Page 221 Adapters Note: Review the MX7 Tecton network settings configuration utilities and the default values before setting All Adapters to Enable in the Adapters applet. Setting Function Manage Network Settings When enabled, the Enabler will control the network settings. This parameter cannot be configured from the Avalanche Mobility Center Console and is enabled by default.
- Page 222 Manual Settings Properties Do not enable “Manage Wireless Settings” for Summit Client devices. Note: When you download a profile that is configured to manage network and wireless settings, the Enabler will not apply the manage network and wireless settings to the adapter unless the global Manage wireless settings and Manage network settings options are enabled on the Adapters panel.
- Page 223 It also searches for new adapters and may cause a slight delay to refresh the contents of the drop-down menu. Link speed indicates the speed at which the signal is being sent from the adapter to the MX7 Tecton. Speed is depen- dent on signal strength.
- Page 224 Depending on the behavior chosen for the Shutdown setting the following screen may be displayed: Note: The icon on the screen above may differ based on the version of the Enabler installed on the MX7 Tecton. Change the option if desired. Tap the X button to cancel Exit. Tap the OK button to exit the Avalanche applet.
-
Page 225: Using Remote Management
Using eXpress Scan eXpress Scan Desktop Icon If the MX7 Tecton has an eXpress Scan icon on the desktop, eXpress Scan may be used for the initial configuration of the device. If the eXpress Scan icon is not present on the desktop, install the Enabler. If the icon is still not present, Enabler must be updated. -
Page 226: Process Complete
After the last bar code is scanned, the settings are automatically applied. Once configured, the MX7 Tecton is warmbooted. After it reconnects to the wireless network and the Mobile Device Server, any software updates and additional configuration data are downloaded. -
Page 227: Chapter 11 - Wireless Network Configuration
(page 11-28) Important Notes It is important that all dates are correct on the MX7 Tecton and host computers when using any type of certificate. Cer- tificates are date sensitive and when the date is not correct authentication will fail. -
Page 228: Summit Tray Icon
Summit Tray Icon The Summit tray icon provides access to the SCU and is a visual indicator of radio status. The Summit tray icon is displayed when: • The Summit radio is installed and active • The Windows Zero Config utility is not active •... -
Page 229: Wireless Zero Config Utility And The Summit Radio
Wireless Zero Config Utility and the Summit Radio The WZC utility has an icon in the toolbar that looks like networked computers with a red X through them, indicating that Wireless Zero Config application is enabled but the connection is inactive at this time (the device is not connected to a net- work). - Page 230 • Driver version • Radio Type (ABG is an 802.11 a/b/g radio). • Regulatory Domain is preset to either Worldwide or a location specific domain (FCC, ETSI, KCC or TELEC). • Copyright Information can be accessed by tapping the About SCU button •...
- Page 231 Enter the Admin password (the default password is SUMMIT and is case sensitive) and tap OK. If the password is incorrect, an error message is displayed. The Administrator default password can be changed on the Global (page 11-11). The end-user can: •...
-
Page 232: Profile
Profile Note: Tap the Commit button to save changes before leaving this panel or the SCU. If the panel is exited before tapping the Commit button, changes are not saved! Setting Default Profile Default SSID Blank Client Name Blank Power Save Fast Tx Power Maximum... - Page 233 Buttons New Button Creates a new profile with the default settings (see Profile Parameters) and prompts for a unique name. If the name is not unique, an error message is displayed and the new profile is not created. Rename Button Assigns a new, unique name.
- Page 234 Note: It is important the Radio Mode parameter correspond to the AP to which the device is to connect. For example, if this parameter is set to G rates only, the MX7 Tecton may only connect to APs set for G rates and not those set for B and G rates.
-
Page 235: Status
Status This screen provides information on the radio: • The profile in use. • The status of the radio card (down, associated, authenticated, etc.) • Client information including device name, IP address and MAC address. • Information about the Access Point (AP) maintaining the connection to the network including AP name, IP address and MAC address. -
Page 236: Diags
Diags The Diags screen can be used for troubleshooting network traffic and radio connectivity issues. • (Re)connect – Use this button to apply (or reapply) the current profile and attempt to associate or authenticate to the wireless LAN. All activity is logged in the Diagnostic Output box on the lower part of the screen. •... -
Page 237: Global
Global The parameters on this panel can only be changed when an Admin is logged in with a password. The current values for the parameters can be viewed by the general user without requiring a password. Note: Tap the Commit button to save changes. If the panel is exited before tapping the Commit button, changes are not saved! Setting Default... - Page 238 Custom Parameter Option The parameter Custom option is not supported. The parameter value is displayed as “Custom” when the operating sys- tem registry has been edited to set the Summit parameter to a value that is not available from the parameter’s drop down list.
- Page 239 Parameter Default Function Ad Hoc Channel Use this parameter when the Radio Mode profile parameter is set to Ad Hoc. Specifies the channel to be used for an Ad Hoc connection to another client de- vice. If a channel is selected that is not supported by the by the radio, the default value is used.
- Page 240 Parameter Default Function The LED on the wireless card is not visible to the user when the wireless card is installed in a sealed mobile device. Options are: On, Off. This parameter cannot be changed. Tray Icon Determines if the Summit icon is displayed in the System tray. Options are: On, Off Hide Password When On, the Summit Config Utility masks passwords (characters on the...
-
Page 241: Sign-On Vs. Stored Credentials
Sign-On vs. Stored Credentials When using wireless security that requires a user name and password to be entered, the Summit Client Utility offers the follow- ing choices: • The Username and Password may be entered on the Credentials screen. If this method is selected, anyone using the device can access the network. - Page 242 10. Verify the device is authenticated by reviewing the Status tab. When the device is property configured, the Status (page 11-9) indicates the device is Authenticated and the method used. 11. The sign-on screen is displayed after a reboot. Note: See Configuring Profiles (page 11-19) for more details.
-
Page 243: Windows Certificate Store Vs. Certs Path
Windows Certificate Store vs. Certs Path Note: It is important that all dates are correct on the MX7 Tecton and host computers when using any type of certificate. Certificates are date sensitive and if the date is not correct authentication will fail. - Page 244 6. Uncheck the Use full trusted store check box. 7. Select the desired certificate and tap the Select button to return the selected certificate to the CA Cert textbox. 8. Tap OK to exit the Credentials screen and then Commit to save the profile changes. 11 - 18...
-
Page 245: Configuring Profiles
Configuring Profiles Use the instructions in this section to complete the entries on the Profile tab according to the type of wireless security used by your network. The instructions that follow are the minimum required to successfully connect to a network. Your system may require more parameters than are listed in these instructions.See your system administrator for complete information about your network and its wireless security requirements. -
Page 246: Wep
To connect using WEP, make sure the following profile options are used. 1. Enter the SSID of the Access Point assigned to this profile. 2. Set EAP Type to None. 3. Set Encryption to WEP or Manual WEP (depending on SCU version). 4. -
Page 247: Leap
LEAP To use LEAP (without WPA), make sure the following profile options are used. 1. Enter the SSID of the Access Point assigned to this profile. 2. Set EAP Type to LEAP. 3. Set Encryption to WEP EAP or Auto WEP (depending on SCU version). 4. -
Page 248: Peap/Mschap
PEAP/MSCHAP Note: The date must be properly set on the device to authenticate a certificate. To use PEAP/MSCHAP, make sure the following profile options are used. 1. Enter the SSID of the Access Point assigned to this profile. 2. Set EAP Type to PEAP-MSCHAP. 3. - Page 249 10. Enter the password. 11. Leave the CA Certificate File Name blank for now. 12. Tap OK then tap Commit. Ensure the correct Active profile is selected on the Main Tab. 13. See Windows Certificate Store vs. Certs Path (page 11-17) for more information on certificate storage. 14.
-
Page 250: Peap/Gtc
PEAP/GTC Note: The date must be properly set on the device to authenticate a certificate. To use PEAP/GTC, make sure the following profile options are used. 1. Enter the SSID of the Access Point assigned to this profile. 2. Set EAP Type to PEAP-GTC. 3. - Page 251 11. Leave the CA Certificate File Name blank for now. 12. Tap OK then tap Commit. Ensure the correct Active Profile is selected on the Main Tab. 13. See Windows Certificate Store vs. Certs Path (page 11-17) for more information on certificate storage. 14.
-
Page 252: Wpa/Leap
WPA/LEAP To use WPA/LEAP, make sure the following profile options are used. 1. Enter the SSID of the Access Point assigned to this profile. 2. Set EAP Type to LEAP. 3. Set Encryption to WPA TKIP. 4. Set Auth Type as follows: •... - Page 253 10. Tap OK then tap the Commit button. 11. Ensure the correct Active Profile is selected on the Main Tab and perform a Suspend/Resume. The SCU Main tab shows the device is associated after the radio connects to the network. 11 - 27...
-
Page 254: Eap-Fast
RADIUS server. The RADIUS server must have auto provisioning enabled to send the PAC provisioning credentials to the MX7 Tecton. For automatic PAC provisioning, once a username/password is authenticated, the PAC information is stored on the MX7 Tecton. - Page 255 8. To use Stored Credentials, tap on the Credentials button. No entries are necessary for Sign-On Credentials with automatic PAC provisioning as the user will be prompted for the Username and Password when connecting to the network. 9. To use Sign-On credentials: •...
-
Page 256: Eap-Tls
EAP-TLS Note: The date must be properly set on the device to authenticate a certificate. To use EAP-TLS, make sure the following profile options are used. 1. Enter the SSID of the Access Point assigned to this profile. 2. Set EAP Type to EAP-TLS. 3. - Page 257 After using the selected option (Windows certificate store or Certs Path), tap OK then tap Commit. The MX7 Tecton should be authenticating the server certificate and using EAP-TLS for the user authentication. Ensure the correct Active Profile is selected on the Main Tab and perform a Suspend/Resume. The SCU Main tab shows the device is associated after the radio connects to the network.
-
Page 258: Wpa Psk
WPA PSK To connect using WPA/PSK, make sure the following profile options are used: 1. Enter the SSID of the Access Point assigned to this profile. 2. Set EAP Type to None. 3. Set Encryption to WPA PSK or WPA2 PSK. 4. -
Page 259: Certificates
Generating a User Certificate (page 11-37) and download the User Certificate and Private Key file to a PC. 2. Connect the MX7 Tecton to the desktop PC using ActiveSync and copy the certificate and private key file to the MX7 Tecton \System folder. - Page 260 3. Tap the Download a CA certificate, certificate chain or CRL link. 4. Make sure the correct root CA certificate is selected in the list box. 11 - 34...
- Page 261 5. Tap the DER button. 6. To download the CA certificate, tap on the Download CA certificate link. 7. Tap the Save button and save the certificate. Make sure to keep track of the name and location of the certificate. 11 - 35...
-
Page 262: Installing A Root Ca Certificate
8. Install the certificate on the MX7 Tecton. Installing a Root CA Certificate Note: This section is only if the Windows certificate store is used. If the certificate store is not used, copy the certificate to the \System folder or other path specified in the Summit Certs global parameter. -
Page 263: Generating A User Certificate
The easiest way to get the user certificate is to use a browser on a PC to navigate to the Certificate Authority. 1. To request the user certificate, open a browser to http://<CA IP address>/certsrv. 2. Sign into the CA with the username and password of the person who will be logging into the MX7 Tecton. 11 - 37... - Page 264 3. This process saves a user certificate and a separate private key file. Windows CE equipped devices such as the MX7 Tecton require the private key to be saved as a separate file rather than including the private key in the user certificate. 4.
- Page 265 5. Tap on the advanced certificate request link. 6. Tap on the Create and submit a request to this CA link. 11 - 39...
- Page 266 7. For the Certificate Template, select User. 8. Tap the Mark keys as exportable and the Export keys to file checkboxes. 9. Type the full path on the local PC where the private key is to be copied. Also specify the private key filename. 11 - 40...
- Page 267 10. Be sure to note the name used for the private key file, for example USER.PVK. The certificate file created later in this process must be given the same name, for example, USER.CER. 11. DO NOT check to use strong private key protection. 12.
- Page 268 15. Tap the Download certificate link. 16. Tap Save to download and store the user certificate to the PC. Make sure to keep track of the name and location of the certificate. The private key file is also downloaded and saved during this process. Note: Be sure use the same name for the certificate file as was used for the private key file.
-
Page 269: Installing A User Certificate
Installing a User Certificate 1. Copy the certificate and private key files to the MX7 Tecton. 2. Import the certificate by navigating to Start > Control Panel > Certificates. 3. Select My Certificates from the pull down list. 4. Tap the Import button. - Page 270 6. Using the explorer buttons, browse to the location where you copied the certificate, select the certificate desired and tap 7. The certificate is now shown in the list. 8. With the certificate you just imported highlighted, tap View. 9. From the Field pull down menu, select Private Key. 11 - 44...
- Page 271 • If the private key is present, the process is complete. • If the private key is not present, import the private key. 10. To import the private key, tap OK to return to the Certificates screen. 11. Tap import. 12.
-
Page 272: Verify Installation
Verify Installation Tap on View to see the certificate details again. The private key should now say present. If it does not, there is a problem. Possible items to check: Note: Make sure the certificate was generated with a separate private key file, as shown earlier in this section. If the certificate was not generated with a separate private key file, generate a new certificate and follow the import process again. -
Page 273: Chapter 12 - Keymaps
55 key Alphanumeric Keymap - Primary Delete • The following keymap is used on an MX7 Tecton that is NOT running a Terminal Emulator. Terminal emulators use a separate keymap. • When using a sequence of keys that includes a sticky key, press the sticky key first, release it, then press the rest of the key sequence. - Page 274 To get this Key / Function Press these Keys in this Order Back Tab Orange Up Arrow Up Arrow Down Arrow Down Arrow Right Arrow Right Arrow Left Arrow Left Arrow Insert Blue I (letter i) Insert Orange Delete Home Shft Down Arrow Shft...
- Page 275 To get this Key / Function Press these Keys in this Order Shft Shft Shft Shft Shft Shft Shft Shft Shft Shft Shft Shft Shft Shft Shft Shft Shft Shft Shft 12 - 3...
- Page 276 To get this Key / Function Press these Keys in this Order Shft Shft Shft Shft Shft Shft Shft . (period) Orange . (period Orange < Blue Blue Blue > Blue Blue Blue Blue Blue Blue Blue * (asterisk) Orange I (letter i) * (asterisk) Shft...
- Page 277 To get this Key / Function Press these Keys in this Order " Orange Orange Shft Orange Shft Orange Shft Orange Shft € Blue Orange Shft Orange Shft & Orange & Shft Orange Shft Orange Shft 0 (zero) 12 - 5...
-
Page 278: 55 Key 5250 Alphanumeric Keymap - Primary Delete
55 Key 5250 Alphanumeric KeyMap - Primary Delete • The following keymap is used on an MX7 Tecton that is running a 5250 Terminal Emulator. • When using a sequence of keys that includes a sticky key, press the sticky key first, release it, then press the rest of the key sequence. - Page 279 To get this 5250 Key / Function Press these Keys in this Order Space Enter Enter Scan Scan CapsLock (Toggle) Blue Back Space Orange Back Tab Orange Up Arrow Up Arrow Down Arrow Down Arrow Right Arrow Right Arrow Left Arrow Left Arrow Insert Blue...
- Page 280 To get this 5250 Key / Function Press these Keys in this Order Shft Orange Shft Shft Shft Shft Shft Shft Shft Shft Shft Shft Shft Shft Shft Shft 12 - 8...
- Page 281 To get this 5250 Key / Function Press these Keys in this Order Shft Shft Shft Shft Shft Shft Shft Shft Shft Shft Shft Shft . (period) Orange . (period Orange < Blue Blue Blue > Blue Blue Blue Blue Blue Blue Blue...
- Page 282 To get this 5250 Key / Function Press these Keys in this Order , (comma) Orange ' (apostrophe) Orange ~ (tilde) Orange Orange Orange " Orange Orange Shft Orange Shft Orange Shft Orange Shft € Blue Orange Shft Orange Shft &...
-
Page 283: 55 Key Alphanumeric Keymap - Primary Backspace
55 key Alphanumeric Keymap - Primary Backspace Note: This keypad features a dedicated backspace key. • The following keymap is used on an MX7 Tecton that is NOT running a Terminal Emulator. Terminal emulators use a separate keymap. • When using a sequence of keys that includes a sticky key, press the sticky key first, release it, then press the rest of the key sequence. - Page 284 To get this Key / Function Press these Keys in this Order Insert Orange Delete Orange Home Shft Down Arrow Shft Up Arrow Page Up Orange Up Arrow Page Down Orange Down Arrow Orange Orange Orange Orange Orange Blue Blue Blue Blue Blue...
- Page 285 To get this Key / Function Press these Keys in this Order Shft Shft Shft Shft Shft Shft Shft Shft Shft Shft Shft Shft Shft Shft Shft Shft Shft Shft Shft Shft Shft Shft Shft Shft Shft Shft 12 - 13...
- Page 286 To get this Key / Function Press these Keys in this Order . (period) Orange Bksp . (period Orange < Blue Blue Blue > Blue Blue Blue Blue Blue Blue Blue Bksp * (asterisk) Orange I (letter i) * (asterisk) Shft : (colon) Orange...
- Page 287 To get this Key / Function Press these Keys in this Order Orange Shft € Blue Orange Shft Orange Shft & Orange & Shft Orange Shft Orange Shft 0 (zero) 12 - 15...
-
Page 288: 32 Key Numeric-Alpha Keymap
32 key Numeric-Alpha Keymap • The following keymap is used on an MX7 Tecton that is NOT running a Terminal Emulator. Terminal emulators use a separate keymap. • When using a sequence of keys that require an alpha key, first press the Alph key. Use the Shft sticky key or the Caps key sequence (Blue+Tab) for upper case alphabetic characters. - Page 289 To get this Key / Function Press these Keys in this Order Back Space Orange Back Tab Orange Up Arrow Up Arrow Down Arrow Down Arrow Right Arrow Blue Up Arrow Left Arrow Blue Down Arrow Insert Orange Ctrl Delete Home Shft Down Arrow...
- Page 290 To get this Key / Function Press these Keys in this Order Alpha Alpha Alpha Alpha Alpha Alpha Alpha Alpha Alpha Alpha Alpha Alpha Alpha Alpha Alpha 7777 Alpha Alpha Alpha Alpha Alpha Alpha Alpha 9999 Shft Alpha Shft Alpha Shft Alpha Shft...
- Page 291 To get this Key / Function Press these Keys in this Order Shft Alpha Shft Alpha Shft Alpha Shft Alpha Shft Alpha Shft Alpha Shft Alpha 9999 . (period) Orange < Blue Blue Orange Blue Orange > Blue Orange Diamond#2 Blue Blue Blue...
- Page 292 To get this Key / Function Press these Keys in this Order Orange " Blue Alph Orange Diamond#3 Shft Orange Shft Orange Shft Orange Shft Shft Blue Ctrl Shft & Shft Blue Diamond#2 Shft Blue Diamond#3 Shft 0 (zero) 12 - 20...
-
Page 293: Chapter 13 - Battery Charger
This device cannot charge/recharge coin cell batteries sealed inside the mobile device, if any. This chapter is intended to familiarize the user with the safety and operating instructions necessary to use the MX7 Tecton Bat- tery Charger (Model MX7390CHARGER, MX7391CHARGER) to charge rechargeable lithium-ion battery packs (MX7A380BATT, MX7A381BATT, MX7392BATT, MX7393BATT, MX7A396BATT) . -
Page 294: Cautions And Warnings
• Do not store the Li-Ion battery pack in direct sunlight or anywhere the battery pack cannot cool down. • If the Li-Ion battery pack is hot after removal from the MX7 Tecton, allow it to cool at room temperature or in a cool air stream before placing it in the charger. -
Page 295: Front View
• Ne laissez pas la batterie Li-ion en plein soleil ou à un endroit où elle ne peut pas se refroidir. • Si la batterie Li-ion est chaude après l’avoir retiré du MX7 Tecton, laissez-la refroidir à température ambiante ou dans un courant d’air frais avant de la placer dans le chargeur. -
Page 296: Top View
Top View 1. Battery Charging Pocket 2. Retaining Clip 3. Battery Charging Contacts 13 - 4... -
Page 297: Installation
Installation Assemble the Power Supply Assemble the AC adapter for the MX7 Tecton Battery Charger before connecting it to the charger. The AC power supply for the battery charger is shipped with the battery charger. Contact Technical Assistance (page 16-1) if there is no AC cable. -
Page 298: Mounting
Mounting The battery charger should be located in an area where it: • Is well ventilated. • Is not in high traffic areas. • Locates or orients the AC cord so that it will not be stepped on, tripped over or subjected to damage or stress. •... -
Page 299: Charging Batteries
Charging Batteries MX7392BATT / MX7393BATT / MX7396BATTERY MX7A380BATT / MX7A381BATT New batteries should be charged fully before first use. The life and capacity of a Lithium Ion battery pack can vary significantly depending on the discharge current and the environment in which it is used. When a battery is placed in a charging pocket, the battery charger begins charging the battery. -
Page 300: Battery Charger Help
NO LIGHT - on any charge pocket No light on a charge pocket means there is no battery pack installed, • or the battery pack in the pocket is not fully inserted, • or a defective or damaged battery pack is installed, •... -
Page 301: Charger Cleaning, Storage And Service
Problem Cause Solution LED is flashing RED at any The battery pack voltage has not Contact Technical Assistance (page 16-1) for battery pocket. reached 6.0V within 30 minutes and pack replacement options. the charger has timed out. Solid YELLOW / AMBER LED The battery pack is too hot or too Remove battery pack from the charging pocket and allow when battery pack is inserted... -
Page 302: Battery Cleaning, Storage And Service
Battery Cleaning, Storage and Service Cleaning The battery pack should not require cleaning unless it has become heavily soiled. Old or damaged batteries should be dis- posed of promptly and properly. The best way to dispose of used batteries is to recycle them. Battery recycling facilities recover the nickel, lithium or lead from old batteries to manufacture new batteries. -
Page 303: Chapter 14 - Cradles
Bluetooth device connection and use, while the MX7 Tecton is docked, are managed by the MX7 Tecton Bluetooth program, not the cradle. The MX7 Tecton can be either On, Off or in Suspend Mode while in the cradle. Special purpose and power cables are available from Honeywell. -
Page 304: Tethered Scanners And The Mx7 Tecton Cradles
Use a clean soft cloth to wipe any dirt, moisture or grease from the MX7 Tecton, charging contacts or the cradle. Do not use any liquid to clean the cradle, battery pack, MX7 Tecton, or charging terminals (pins). Spray or dampen the cleaning cloth with liquids/sprays. -
Page 305: Using A Desktop Cradle
The MX7 Tecton main battery recharging is managed by the Power Management settings in the MX7 Tecton. Refer to the Power control panel on the MX7 Tecton. The spare battery in the spare battery well re-charges with or without an MX7 Tecton in the dock. The spare battery is fully charged in approximately four hours. -
Page 306: Front View
Front View 1. Charging Pocket Adapter Cup 2. MX7 Tecton Docked LED 3. Serial Interface Connector 4. Spare Battery LED 5. I/O Connector 6. Table Mounting Hole Guides 14 - 4... -
Page 307: Back View
Back View 1. Charging Pocket Adapter Cup 2. Cradle Connector 3. Spare Battery Charging Bay 4. Power Connector 14 - 5... -
Page 308: Top View
2. Table Mounting Hole Guides 3. Back Bolts, washers, screws, screwdriver or wrench needed when attaching the MX7 Tecton desktop cradle to a protected flat surface are not supplied by Honeywell. Periodically check the table mounting hardware and re-tighten if necessary. Table mounting hardware can be finger- tightened. -
Page 309: Installing And Removing The Docking Bay Adapter Cup
Installing The adapter cup is installed facing in one direction. 1. Put the adapter cup in the MX7 Tecton docking bay, aligning the screw hole in the adapter cup with the screw hole in the MX7 Tecton docking bay. 2. Using a torquing screwdriver, insert the screw in the adapter cup screw hole, and torque the screw to 6 in/lbs +/- .5 in/lbs. -
Page 310: Assemble/Attach The Ac Power Adapter
Assemble/Attach the AC Power Adapter Note: Connect the cable to the cradle first, then to an AC source. The external Power Supply for the cradle is shipped with the cradle. Contact Technical Assistance (page 16-1) if there is no AC cable. The cradle Power connector is located on the back of the cradle. -
Page 311: Connecting Input/Output Cables To The Desktop Cradle
PC, a printer or another serial device. The I/O connector cable is connected to the port (male) labeled MX7 Tecton I/O Port on the right front of the desktop cradle. Periodically test the connections for stability and re-tighten if necessary. -
Page 312: Docking And Undocking The Mx7 Tecton
(page 14-7). When the MX7 Tecton is in Suspend Mode it wakes up when it is docked in a powered cradle. There is no change in mode state settings or behavior when the MX7 Tecton is docked in a cradle without a power source. -
Page 313: Inserting / Removing A Spare Battery From The Desktop Cradle
Serial port and drawing power from the cradle, is used. The spare battery well is molded in the shape of the MX7 Tecton main battery. The spare battery can be inserted in the battery well in only one direction. -
Page 314: Desktop Cradle Help
Desktop Cradle Help The following is intended as an aid in determining whether the MX7 Tecton battery pack or the cradle battery charger may be malfunctioning. Problem Cause Solution Battery pack does not fit Different manufacturer's battery pack, Check if the battery pack is part number in battery well. - Page 315 Check the docking bay is clear of foreign objects cradle but Docked LED Power supply not connected. and reseat the MX7 Tecton fully into the docking does not light up. bay. Check that power is applied to the Power Jack at the rear of the MX7 Tecton Desktop Cradle.
-
Page 316: Using A Passive Vehicle Cradle
The passive vehicle cradle is lined with strips of hook-and-loop fabric to ensure a snug fit between the MX7 Tecton and the inside of the cradle. The cradle can secure the MX7 Tecton with or without a trigger or handstrap. The MX7 Tecton passive vehicle cradle does not have power, MX7 Tecton serial or input/output connectors. -
Page 317: Components
U-Bracket Footprint The image below is not to scale. RAM Assembly Components Mount the cradle U-bracket to the upper RAM ball assembly with the bolts, washers and nuts supplied by Honeywell. • Qty 4 – Hex Cap 1/4-20 x 3/4 bolts •... -
Page 318: Installing The Cradle U-Bracket
RAM Assembly Footprint Installing the Cradle U-Bracket Note: Honeywell does not supply the bolts or washers needed when mounting the cradle assembly to the vehicle chassis. Use bolts with a maximum 10/32” (0.3125) diameter. 1. Attach the U-Bracket to the vehicle, making sure it does not impede safe operation of the vehicle. -
Page 319: Installing The Ram Bracket
Installing the RAM Bracket 1. MX7 Tecton 2. Angle Adjust Knobs 3. Passive Cradle 4. U-Bracket 5. Mounting Hex Bolt 6. Upper RAM Ball Assembly 7. Arm 8. Thumbscrew 9. Lower RAM Ball Assembly 1. Attach the lower RAM ball assembly to the vehicle, making sure it does not impede safe operation of the vehicle. -
Page 320: Using A Powered Vehicle Cradle
Communications cables for the MX7 Tecton are available separately. Quick Start The following list outlines, in a general way, the process to follow when preparing the MX7 Tecton powered vehicle mounted cradle for use. Refer to the following sections for more details. -
Page 321: Components
Before installation begins, verify you have the applicable vehicle mounting bracket assembly components necessary for your mount type. Front View 1. Retainer 2. Retainer Springs 3. Handle Opening 4. Vehicle Cradle Adapter Cup 5. Charging Pocket 6. MX7 Tecton Docked LED 14 - 19... - Page 322 Back View 1. Retainer 2. Retainer Springs 3. Handle Opening 4. RAM Bracket Mounting Locations 5. Strain Relief Cable Clamps 6. Serial Interface Port 7. Power Connector 8. MX7 Tecton I/O Port 14 - 20...
-
Page 323: Installing Or Removing Vehicle Cradle Adapter Cup And Top Adapter
Install or remove the adapter on a clean, well-lit stable surface. The vehicle cradle is shipped with the cradle Adapter Cup and Retainer Insert pre-installed. The MX7 Tecton cradle charging pocket, without a cradle adapter cup and top adapter, is designed for an MX7 Tecton with a rubber boot (MX7490BOOT or MX7491BOOT) enclosing/protecting the MX7 Tecton. -
Page 324: Installing The Adapter
Installing the Adapter Charging Pocket Adapter Cup The adapter cup is installed facing in one direction. 1. Slip the adapter cup into the cradle charging pocket, aligning the screw hole in the adapter cup with the screw hole in the charging bay. 2. -
Page 325: Removing The Adapter Assembly
1. Lay the flat side of the Retainer Insert against the underside of the Retainer cap, show below. 2. Slide the Retainer Insert back tab into the slot at the back of the Retainer. 3. Fasten the Retainer Insert to the Retainer cap using screws and the pre-drilled holes in the angled tabs (one on each side). -
Page 326: Ram Bracket Mounting
RAM Bracket Mounting RAM Bracket Assembly mounting holes are on the back of the cradle. The mounting screws fit in Pim nuts and are automatically secured. The number of RAM balls attached to the back of the vehicle mount cradle are dependent upon the desired RAM mount configuration. - Page 327 Periodically test the mounting device and re-tighten bolts, RAM balls and/or squeeze arm adjustment knob as needed. RAM Circular Base Footprint Bolts, washers and nuts for mounting the RAM ball to the vehicle are supplied by Honeywell: • Qty 4 – Hex Cap 1/4-20 x 3/4 bolts •...
-
Page 328: Dc/Dc Power Supply Installation, Screws On Top Of Lid
Lid (page 14-29) for installation instruction. Connecting Electrical Cables to Power Sources The DC to DC power supply is used to provide vehicle power to the MX7 Tecton when placed in a DC powered vehicle cradle. Specifications for Electrical Supply Input Voltage Always observe input voltage range specified on the DC to DC power supply. - Page 329 Wiring Schematic Connecting Vehicle Electrical Supply 1. The vehicle cradle must be empty. 2. Begin by connecting the power cable to the vehicle cradle. Work from this connection with the last connection being to the vehicle’s power source. 3. Route the cable from the cradle to the DC to DC power supply. 4.
- Page 330 9. Wire colors depend on the type of device attached. Please refer to the Wiring Schematic for wire colors. 10. Use the looms and wire ties to secure all wiring as shown above, then reattach the lid. 11. Connect the DC to DC power supply to the vehicle’s electrical system as directed below:. For battery powered vehicles: Caution: + is connected to battery positive.
-
Page 331: Dc/Dc Power Supply Installation, Screws On Side Of Lid
DC/DC Power Supply Installation, Screws on Side of Lid For use with • 9000311PWRSPLY – Power Supply, 9-60VDC, 60W • 9000313PWRSPLY – Power Supply, 50-150VDC, 60W: Shown With Lid Attached Shown With Lid Removed • Lid is secured with screws on the side of lid. •... -
Page 332: Wiring Schematic
Wiring Schematic Connecting to Vehicle Power The vehicle cradle must be empty. The last connection must be to the vehicle power source. 1. Connect the power cable to the vehicle cradle. 2. Route the cable from the cradle to the DC/DC power supply. 3. - Page 333 8. Route the wiring from the DC/DC power supply to the vehicle’s electrical system. Do not connect to vehicle power at this time. 9. Strip the wire ends and connect to the input side of the DC/DC power supply. 10. Use looms and wire ties to secure all wiring as shown. 11.
-
Page 334: Vehicle 12V Bare Wire Adapter
Codes” for additional wire color-coding specifics. Connecting Vehicle 12 VDC Supply 1. The power cable must be UNPLUGGED from the MX7 Tecton vehicle cradle. 2. While observing the fuse requirements specified above, connect the power cable as close as possible to the actual battery terminals of the vehicle. - Page 335 The serial cable can originate with a tethered scanner, a PC, a printer or another serial device. The I/O connector cable is connected to the port (male) labeled MX7 Tecton I/O Port on the back of the vehicle cradle. Periodically test the connections for stability and re-tighten if necessary.
-
Page 336: Vehicle Cradle Led
It means …. MX7 Tecton is docked. Cradle does not have power. MX7 Tecton is not docked. Cradle may have power. Check the power connector at the back of the cradle. MX7 Tecton is docked and external power is connected. -
Page 337: Docking The Mx7 Tecton In A Powered Vehicle Cradle
Handle Opening first or damage to the scanner aperture may occur. 1. The MX7 Tecton is inserted into the cradle by pressing the base of the MX7 Tecton down into the cradle pocket until the connector at the base of the MX7 Tecton clicks into place with the charging connector at the bottom of the docking well. -
Page 338: Removing The Mx7 Tecton From A Powered Vehicle Cradle
Removing the MX7 Tecton from a Powered Vehicle Cradle 1. Push the top of the Retainer up and back until the MX7 Tecton is released from the Retainer latches and the charging pocket swings forward. 2. Pull the MX7 Tecton up and out of the vehicle cradle pocket, disconnecting the MX7 Tecton from the charge/ communication port at the base of the docking bay. -
Page 339: Chapter 15 - Technical Specifications
Standard: Li-Ion battery pack 7.4V 2200mAh.In-Unit and External Re-Chargeable Cold Storage: Li-Ion battery pack 7.4V 1250mAh.In-Unit and External Re-Chargeable Backup Power 2.5V Super-capacitor (Super-cap). No backup “battery” is used. MX7 Tecton Dimensions and Weight Dimension Length 8.8” | 22.3 cm Width at Display 3.4”... -
Page 340: Mx7 Tecton Environmental Specifications
64 mW (18dBm) Channels FCC: 1-11, 36, 40 ,44, 48, 149, 153, 157, 161 ETSI: 1-13, 36, 40, 44 ,48 Operating Temperature Same as MX7 Tecton Operating Temperature. Storage Temperature Same as MX7 Tecton Storage Temperature. Connectivity TCP/IP, Ethernet, ODI... -
Page 341: Desktop Cradle
RI or Power +5 VDC sourced by the Cradle Note: Pin 9 of this port is connected to +5 VDC and only approved Honeywell cables are to be used for communication between the cradle and external devices. 15 - 3... -
Page 342: Vehicle Mounted Cradle
RI or Power +5 VDC sourced by the Cradle Note: Pin 9 of this port is connected to +5 VDC and only approved Honeywell cables are to be used for communication between the cradle and external devices. 15 - 4... -
Page 343: Power Connector Port
The Power connector is located on the back of the vehicle cradle. Battery Charger Li-Ion 7.4V 2.2Ah battery with a 500 charge/discharge life cycle. Battery: MX7 Tecton Electrical Note: Battery packs may leak up to 1mA current through the battery contacts when left in a non-powered battery charger charging pocket. - Page 344 15 - 6...
-
Page 345: Chapter 16 - Customer Support
Limited Warranty Honeywell International Inc. (“HII”) warrants its products to be free from defects in materials and workmanship and to conform to HII’s published specifications applicable to the products purchased at the time of shipment. This warranty does not cover any HII product which is (i) improperly installed or used;... - Page 346 The duration of the limited warranty for the MX7 Tecton Battery Charger is 1 year. The duration of the limited warranty for the MX7 Tecton 2200mAh Li-Ion and 1250mAh Li-Ion Battery is 6 months. The duration of the limited warranty for the MX7 Tecton AC power supply and cables is 1 year.
- Page 347 Back Cvr - 1...
- Page 348 Honeywell International Inc. 9680 Old Bailes Road Fort Mill, SC 29707 www.honeywellaidc.com ™ TECTON-CE-UG Rev C 10/16...
Need help?
Do you have a question about the MX7 TECTON and is the answer not in the manual?
Questions and answers