
Related Manuals for Riva RC3402HD-6211IR


Summary of Contents for Riva RC3402HD-6211IR
-
Page 1: Installation Guide
RC3402HD-6211IR Installation Guide www.rivatech.de Specification subject to change without notice... - Page 2 www.rivatech.de Specification subject to change without notice...
-
Page 3: Precaution
Precaution Please read this manual carefully before installing the unit. Never disassemble the camera. Unauthorized disassembly may cause equipment failure or damage to the unit. Please do not install the camera in a place exposed to direct sunlight. -
Page 4: Table Of Contents
Table of Contents Precaution .................. 3 1. FEATURES ................5 2. PACKAGE CONTENTS ..............7 3. PART NAMES ................8 4. INSTALLATION ................. 9 4.1. Installing the camera ..............9 4.2. Adjusting angle of the camera ............12 4.3. Setting the Image Attribute ............13 5. -
Page 5: Features
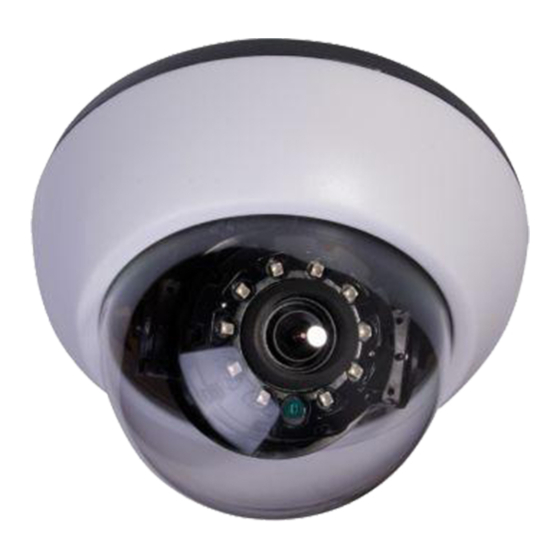
HD Series RC3402HD-6211IR Installation Guide 1. FEATURES Camera Full HD Indoor IR Dome IP Camera SONY EXMOR 1/2.9” 1080p CMOS Image Sensor True Day / Night Embedded IR Illuminator with Smart IR Control Video ... - Page 6 HD Series RC3402HD-6211IR Installation Guide Please note: When using integrated LED illumination as major light source during night time, unwanted VCA alarm events through flying insect’s activity are possible. 09-2013-B www.rivatech.de...
-
Page 7: Package Contents
HD Series RC3402HD-6211IR Installation Guide 2. PACKAGE CONTENTS Please unpack the package carefully and handle the equipment with care. The package contains: 구성 Camera DC Power Adaptor 구성 Universal Plugs Screws and anchor blocks Quick Installation Guide Camera Opener 구성... -
Page 8: Part Names
HD Series RC3402HD-6211IR Installation Guide FUNCTION 3. PART NAMES ⑤ ③ ⑥ ③ ② ④ * Models herein and their appearance are subject to change without any prior notice. 1 Reset button Use the button to restart the device or to reset it to Factory Default. -
Page 9: Installation
HD Series RC3402HD-6211IR Installation Guide 4. INSTALLATION 4.1. Installing the camera 1) Place the installation template (outline shown on the next page) included in the package on the desired installation surface. 2) Drill holes in correct positions based on the template paper, and insert anchor blocks into the holes. - Page 10 HD Series RC3402HD-6211IR Installation Guide How to close the dome cover When placing the dome cover, look for carved trapezoid mark on both dome cover and main body. Both trapezoids should be aligned DIMENSION together when placing the cover like the image below.
-
Page 11: Installation Template
HD Series RC3402HD-6211IR Installation Guide Installation Template (Unit: mm) Installation template’s image size scale in this installation guide is not 1:1. Caution The correct-size template design paper can be found inside the package separately. 09-2013-B www.rivatech.de... -
Page 12: Adjusting Angle Of The Camera
HD Series RC3402HD-6211IR Installation Guide 4.2. Adjusting angle of the camera 1) Adjust the lens to the desired position by manually moving the camera gimbal and the horizontal platform in the following directions. 위치고정 ② 좌 ① To adjust lens position, rotate the camera gimbal. -
Page 13: Setting The Image Attribute
Video Appearance menu in Setup > Video & Audio > Camera. The following features can be adjusted: Brightness, Contrast, Saturation, Sharpness and Orientation For more detailed information, refer to the provided “RIVA Web Interface Manual Full HD Line”. All Manual’s and Installation Guides can downloaded from www.rivatech.de homepage. -
Page 14: Connections
HD Series RC3402HD-6211IR Installation Guide FUNCTION 5. CONNECTIONS ① ③ ② LAN Connection This is a RJ45 LAN connector for 10/100 Base-T Ethernet. Use the Ethernet cable (RJ45) to connect the device to a hub or a router in the network. When the LAN cable is connected, the orange LED light will become solid and green LED will blink every 250 millisecond. - Page 15 HD Series RC3402HD-6211IR Installation Guide Power Connection The camera can be powered from either 12VDC or PoE. If the camera is powered via PoE, refer to Appendix (B). Power over Ethernet for more details. To operate your camera using 12VDC, make sure the polarity is correct before connecting the power cable.
-
Page 16: Configuration
HD Series RC3402HD-6211IR Installation Guide 6. CONFIGURATION 6.1. Set up network environment The default IP address of the device is 192.168.XXX.XXX. Users can identify the IP address of the device from converting the MAC address’s hexadecimal numbers, which is attached to the device. Be sure that the device and PC are on a same area network before running the installation. -
Page 17: Custom Ip Environment
HD Series RC3402HD-6211IR Installation Guide 6.1.2. Custom IP Environment IPAdminTool is a management tool, which automatically scans all of the network products for users to perform administrative tasks, which includes network configurations, firmware update, device reboot, and device organizations. IPAdminTool and the manual can download from www.rivatech.de... - Page 18 HD Series RC3402HD-6211IR Installation Guide 09-2013-B www.rivatech.de...
-
Page 19: View Video On Web Page
HD Series RC3402HD-6211IR Installation Guide 6.2. View video on web page Type the proper IP address to view the live streaming images through a web browser. The default username and password is root / pass. 6.2.1. ActiveX Installation 1. When the browser asks to install the AxUMF software, click Install to proceed. -
Page 20: View Video Using Ipadmin Tool
HD Series RC3402HD-6211IR Installation Guide 6.2.2. View video using IPAdmin tool IPAdminTool and the manual can download from www.rivatech.de homepage. IPAdminTool automatically searches all activated network encoders and IP cameras and shows the product name, IP address, MAC address and etc. -
Page 21: Reboot
HD Series RC3402HD-6211IR Installation Guide 6.3. Reboot Perform the following procedures to reset your device: 1. Press the Reset button, and hold for 2 seconds while the device is in use. 2. Wait for the system to reboot. Please do not hold for more than 2 seconds. Otherwise, the camera may be switched to its Factory Default settings. - Page 22 HD Series RC3402HD-6211IR Installation Guide Normally, the cause of ‘safe mode’ is classified into two types. * When the power supply is unplugged in the middle of system booting. * When the firmware files required for system booting are damaged.
- Page 23 HD Series RC3402HD-6211IR Installation Guide More Information To learn more about using other features of your devices, refer to the manuals as “RIVA Web Interface Manual Full HD Series” or “VCAsys Manual Full HD Series”, which is available on www.rivatech.de homepage.
-
Page 24: Appendix (A): Specifications
HD Series RC3402HD-6211IR Installation Guide APPENDIX (A): SPECIFICATIONS Summary Camera Module Image Sensor SONY EXMOR 1/2.9” 1080p CMOS Effective 1920x1080 CMOS Pixels Scanning Progressive scanning system Resolution 1920 x 1080 ELECTRIC Min. Color: 1.0 lux Illumination BW: 0 lux (IR LED ON) - Page 25 HD Series RC3402HD-6211IR Installation Guide 1 Micro SD/SDHC slot SD Slot ※ Micro SD Card is not included (Recommend Class 6 and higher for HD recordings) * If VCA is activated, frame rate is limit to max15fps@1080p. Limitation based on V.1.6.0...
-
Page 26: Electrical Characteristics
HD Series RC3402HD-6211IR Installation Guide Electrical Characteristics Power Source DC 12V / PoE Power Consumption 5.6W @ DC 12V Video Output 1 Vp-p, 75Ω, Composite Audio Input Audio Output Environment Condition Operating Range Operating Temperature 0°C ~ 40°C (32°F ~ 104°F) -
Page 27: Appendix (B): Power Over Ethernet
HD Series RC3402HD-6211IR Installation Guide APPENDIX (B): POWER OVER ETHERNET The Power over Ethernet (PoE) is designed to extract power from a conventional twisted pair Category 5 Ethernet cable, conforming to the IEEE 802.3af Power- over-Ethernet (PoE) standard. IEEE 802.3af allows for two power options for Category 5 cables. - Page 28 HD Series RC3402HD-6211IR Installation Guide Disconnecting PSE or PoE does not reboot the device as long as a power adaptor is connected. Note 09-2013-B www.rivatech.de...
-
Page 29: Appendix (C): Dimensions
HD Series RC3402HD-6211IR Installation Guide APPENDIX (C): DIMENSIONS (Unit: mm) 09-2013-B www.rivatech.de... -
Page 30: Appendix (D): Hexadecimal-Decimal Conversion Table
HD Series RC3402HD-6211IR Installation Guide APPENDIX (D): HEXADECIMAL- DECIMAL CONVERSION TABLE Refer to the following table when converting the MAC address of the device to the IP address. Hex Dec 09-2013-B www.rivatech.de... - Page 31 HD Series RC3402HD-6211IR Installation Guide 09-2013-B www.rivatech.de...
-
Page 32: Revision History
HD Series RC3402HD-6211IR Installation Guide REVISION HISTORY MAN# DATE(M/D/Y Comments 09-2013- 09/05/201 First release version 09-2013-B www.rivatech.de...
Need help?
Do you have a question about the RC3402HD-6211IR and is the answer not in the manual?
Questions and answers