Table of Contents
Advertisement
Quick Links
Jointer Manual
LAGUNA TOOLS
2072 Alton Parkway
Irvine, California 92606
Ph: 800.234.1976
www.lagunatools.com
© 2017, Laguna Tools, Inc. LAGUNA® and the LAGUNA Logo® are the registered trademarks of Laguna Tools, Inc. All rights reserved.
Model Numbers: MJO6405-0800
MJO6012-0800-3phCSA
MJO6012-0800-1phCSA
Advertisement
Table of Contents

Subscribe to Our Youtube Channel
Related Manuals for Laguna Tools MJO6405-0800


Summary of Contents for Laguna Tools MJO6405-0800
- Page 1 Jointer Manual LAGUNA TOOLS Model Numbers: MJO6405-0800 2072 Alton Parkway MJO6012-0800-3phCSA Irvine, California 92606 Ph: 800.234.1976 MJO6012-0800-1phCSA www.lagunatools.com © 2017, Laguna Tools, Inc. LAGUNA® and the LAGUNA Logo® are the registered trademarks of Laguna Tools, Inc. All rights reserved.
-
Page 3: Table Of Contents
Table of contents Page number Safety Rules Warranty Noise emission Specification sheet Receiving your jointer Introduction to your jointer What you receive with jointer Parts of the jointer Where to locate your jointer Unpacking and assembling your jointer Assembly and set up ??? Running &... -
Page 4: Safety Rules
Safety Rules As with all machinery there are certain hazards involved with the operation and use of your machine. Using it with caution will considerably lessen the possibility of personal injury. However, if normal safety precautions are overlooked or ignored, personal injury to the operator may result. If you have any questions relating to the installation and operation, do not use the equipment until you have contacted your supplying distributor. -
Page 5: Warranty
Machines sold through dealers must be registered with Laguna Tools within 30 days of purchase to be covered by this warranty. Laguna Tools guarantees all new machines and accessories sold to be free of manufacturers’... -
Page 6: Noise Emission
For example, adjacent machines may impact the level of ambient noise. It is also possible that exposure level limits will vary from country to country. Specification. Machine MJO6405-0800 MJO6012-0800- MJO6012-0800- 3phCSA 1phCSA... -
Page 7: Introduction To Your Jointer
All damage must be noted on the delivery documents and signed by you, and the delivery driver. You must then contact the seller, [Laguna Tools, Inc.] within 24 hours. Introduction to jointer The jointer is designed to give you years of safe service. Read this owner’s manual in its entirety before assembly or use. - Page 8 4. Supporting the work Only make cuts if the work piece is stable and never attempt to cut unstable planks, or injury may occur. 6. Cutting depth Never exceed the maximum cutting depth as stated in the specification for your machine.
-
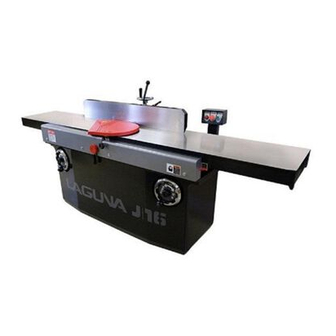
Page 9: Parts Of The Jointer
What you will receive with the jointer Spare teeth screws Spare cutter teeth Tools Cutter teeth screw driver Fence assembly Parts of the jointer Out feed Table The function of the out feed table is to support the job once it has been machined by the cutter head. - Page 10 Fence The fence is used to keep the job square to the cutter head and is also used to produce angle cuts on the edges of panels. The fence can be adjusted from 90 to 45 degrees. Cutter head Guard The guard is there to protect you.
-
Page 11: Unpacking And Assembling Your Jointer
Unpacking and assembling your jointer To unpack your machine, you will need tin snips, knife and a wrench. Note: The jointer, fence and control console are heavy, and if you have any doubt about the described procedure, Packaged jointer seek professional assistance. - Page 12 Control cables Control cables Control console Control console with the fixing screws wrapping removed Control console 7. Lift the control console so that it lines up with the fixing screws. While you are lifting it into place, feed the cables through into the body of the jointer. Prior to attaching the control console check that neither of the cables are under the mounting flange.
- Page 13 11. Remove the side fixing screws from the jointer. 12. Loosen two casting mounting screws to loosen one of the black clamp blocks. It is not important which side you choose. By loosening the clamping block it will be a lot easier to attach the fence.
-
Page 14: Running & Adjusting The Jointer
Running and adjusting the jointer Cleaning the jointer The machine is shipped with non painted surfaces protected from rust by a film of grease. The grease must be removed with WD40 or similar as grease attracts saw dust and dirt. The surfaces should then be coated with a Teflon lubricant or similar. Teflon tends to dry and will not attract saw dust and dirt. - Page 15 6. Push the stop lever [direction either left or right]. The machine should slow down and stop. Adjustments: Note: The machine has had all its functions calibrated at the factory but during shipping some movement may have taken place. This is unavoidable and it is therefore recommended that the following checks are made prior to starting production.
- Page 16 2. Lift the tooth and rotate to the new cutting face. Note: Take special care to clean the tooth and its matching surface. Any dirt or sawdust that is trapped under the tooth will cause it to be at a different height to the other teeth, and will degrade the surface finish when you start machining.
-
Page 17: Maintenance
The stops come pre-set, but should adjustment be required, see the guide lines below. Adjusting the 45 degree stop 1. Adjust the fence to 45 degrees using a set square, and lock in position. 2. Adjust the stop screw so that it touches the back of the fence and lock in position with the lock nut. - Page 18 Hand wheel Each hand wheel is lubricated via an oil cup located just behind the hand wheel body on the axle collar. Remove the hand wheel lock knob and slide the hand wheel off the axle. This will reveal the oil cup. Apply a small amount of light machine oil. Table lifting mechanism The table lifting mechanism screw and gear for each hand wheel can be accessed by removing the left and right rear base housing.
-
Page 19: Troubleshooting And Fault Finding
adjusted slippage may happen and this will cause early belt failure. There should be a 3/16” deflection when the belt is pressed with moderate finger pressure. 7. Refit the side cover before running the machine. Troubleshooting and fault finding Problem Cause Corrective action Motor will not start... - Page 20 adjust. tight. spindles. Excessive snipe 1. Out feed table is too 1. Re-set out feed table (gouge in the end low. with cutter head. of the board that is uneven with the rest of the cut). 2. Operator pushing 2. Eliminate downward down on trailing end of pressure on trailing end job.
- Page 21 2. Too fine a cut. 2. Increase the depth of cut. Chip marks, random 1. Chips not removed 1. Use a dust collection pattern. from cutter head. system. Or a stronger dust collection system Board edge is concave 1. Job not held with even 1.
-
Page 22: Electrical Drawings
Electrical drawings Exploded view drawings... - Page 33 Laguna Tools is not responsible for errors or omissions. Specifications subject to change. Machines may be shown with optional accessories. © 2017, Laguna Tools, Inc. LAGUNA® and the LAGUNA Logo® are the registered trademarks of Laguna Tools, Inc. All rights reserved.
Need help?
Do you have a question about the MJO6405-0800 and is the answer not in the manual?
Questions and answers