Fronius Selectiva 2040 2kW Operating Instructions Manual
Battery charging system
Hide thumbs
Also See for Selectiva 2040 2kW:
- Service manual (64 pages) ,
- Operating instructions manual (60 pages)
Table of Contents

Related Manuals for Fronius Selectiva 2040 2kW


Summary of Contents for Fronius Selectiva 2040 2kW
- Page 1 Perfect Charging / Perfect Welding / Solar Energy Operating Instructions Selectiva 2040 2kW Selectiva 2050 2kW Battery charging system Selectiva 2060 2kW Selectiva 2070 2kW Selectiva 4020 2kW Selectiva 4035 2kW 42,0426,0226,EN 001-19092016...
- Page 3 Please also note the safety rules to ensure greater safety when using the product. Careful handling of the product will repay you with years of safe and reliable operation. These are essential prerequisites for excellent results. The latest version of the operating instructions can be found on the Fronius website www.fronius.com. Explanation of DANGER! Indicates immediate and real danger.
-
Page 5: Table Of Contents
Contents Safety rules ..............................General ..............................Proper use ............................Environmental conditions........................Mains connection ..........................Dangers from mains current and charging current ................Dangers from acid, gases and vapours ....................General information regarding the handling of batteries............... Protecting yourself and others ......................Safety measures in normal operation .................... -
Page 7: Safety Rules
Safety rules General The device is manufactured using state-of-the-art technology and according to recognised safety standards. If used incorrectly or misused, however, it can cause: injury or death to the operator or a third party, damage to the device and other material assets belonging to the operat- ing company, inefficient operation of the device. -
Page 8: Mains Connection
Mains connection Devices with a higher rating may affect the energy quality of the mains due to their current consumption. This may affect a number of types of device in terms of: connection restrictions criteria with regard to the maximum permissible mains impedance criteria with regard to the minimum short-circuit power requirement at the interface with the public grid see Technical Data... -
Page 9: General Information Regarding The Handling Of Batteries
Battery acid must not get into the eyes, onto the skin or clothes. Wear pro- tective goggles and suitable protective clothing. Rinse any acid splashes thoroughly with clean water, and seek medical advice if necessary. General informa- Protect batteries from dirt and mechanical damage. tion regarding the Store charged batteries in a cool place. -
Page 10: Emc Device Classifications
EMC Device Clas- Devices in emission class A: sifications Are only designed for use in industrial settings Can cause line-bound and radiated interference in other areas Devices in emission class B: Satisfy the emissions criteria for residential and industrial areas. This is also true for residential areas in which the energy is sup- plied from the public low-voltage mains. -
Page 11: Safety Inspection
Safety inspection The manufacturer recommends that a safety inspection of the device is per- formed at least once every 12 months. A safety inspection should be carried out by a qualified electrician after any changes are made after any additional parts are installed, or after any conversions after repair, care and maintenance has been carried out at least every twelve months. -
Page 12: General Information
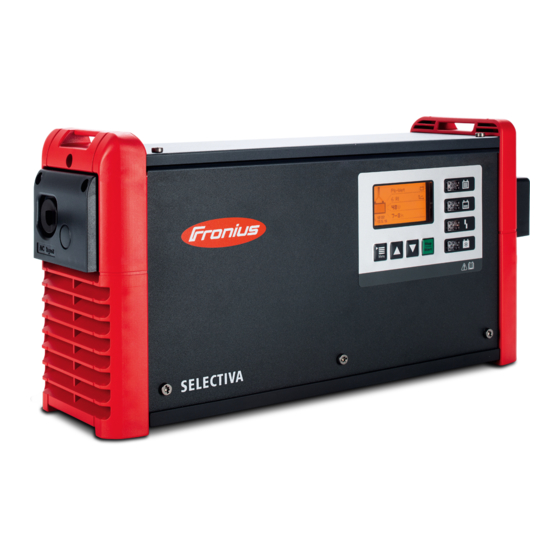
General information Device concept The single-phase Selectiva battery charging systems for 24 V and 48 V batteries are fitted with intelligent charging technology. The successful Active Inverter Technology with the revolutionary Ri charging process adapts itself to the requirements of the battery and only charges the battery with the current that it actually needs. -
Page 13: Mains Connection
Always stop charging before you disconnect the charging cable! An electric shock can be fatal. The housing must never be opened by anyone other than a Fronius-trained service technician. The device must be disconnect- ed from the mains before starting any work with the housing open. A suitable measuring instrument must be used to ensure that electrically charged compo- nents (e.g. -
Page 14: Warning Notices Inside The Device
WARNING! An electric shock can be fatal. The housing must never be opened inside the device by anyone other than a Fronius-trained service technician. The device must be disconnected from the mains before starting any work with the housing open. A suitable measuring instrument must be used to ensure that electrically charged components (e.g. - Page 15 The device must only be operated in a hori- zontal position. The air surrounding the charger must be kept free from battery acid vapour as far as pos- sible. You should therefore avoid setting up the charger directly above the battery being charged.
-
Page 16: Wall And Floor Bracket
Wall and floor WARNING! Work that is carried out incorrectly and falling chargers can cause se- bracket rious injury and damage. This installation must only be carried out by trained and qualified personnel. Take note of the safety rules in the charger operating instruc- tions. - Page 17 2 kW mm (in.) 341 (13.43) 110 (4.33) 38 (1.5) 123,5 (4.86) 91,5 (3.6) 182 (7.17) 220 (8.66) 123 (4.84) 11 (.43) 266 (10.47) 8.5 (.33)
-
Page 18: Control Elements And Connections
Control elements and connections General NOTE! As a result of firmware updates, you may find that there are functions available on your device that are not described in these operating instructions or vice versa. Certain illustrations may also differ slightly from the actual controls on your device. - Page 19 Function Control panel Optional LED strip lights up in different colours depen- ding on the state of charge, as exp- lained in the "Control panel" section The option connector is located behind the cover on the front of the device, upon which the charging leads can be found.
-
Page 20: Control Panel
The cover (1) for the USB port can be secu- red with a screw. TX25 Control panel Function Display Displays the current charging parameters Displays settings "Menu" key Selects the desired menu Selects the appropriate symbol to return to the previous display Up/down keys Select the desired menu item Set the desired value... - Page 21 Stop/Start key For interrupting and resuming the charging process Confirms a menu item or setting "Battery cooled down" indicator (blue) Indicates that a battery has cooled down and is ready for use On steady: After charging has finished, the set cooling time or optionally the bat- tery temperature has been reached.
-
Page 22: Charging The Battery
Charging the battery Charging WARNING! Risk of serious injury or damage from escaping battery acid or explo- sion if faulty batteries are charged. Before charging, ensure that the battery to be charged is fully functional. WARNING! Risk of serious injury and damage from incorrect charging settings or a defective battery. -
Page 23: Interrupting Charging
The battery symbol indicates the current state of charge. The greater the number of bars that are displayed, the further advanced the charging process is. As soon as the battery is fully charged, a minute counter will appear (see figure on right). This counts the minutes since the end of charging;... -
Page 24: Stopping Charging
As long as a battery is connected to the charger, only the charging process can be inter- rupted and resumed using the "Stop/Start" key. Display modes can be changed using the "Menu" key as described in the "Display" section, but this is only possible when there is no battery connected to the charger. -
Page 25: Display
Display Overview of The device has the following modes: modes Standard mode In standard mode the display shows the charging parameters Statistics mode Visualises the frequency of the device operating modes and shows the total number of charging actions. Also shows an overview of the total and average Ah produced and energy consumed per charge History mode Provides information about the parameters for all the stored charging processes... -
Page 26: Menu Selection
Menu selection Change from standard mode to the menu selection as follows: Press and hold the "Menu" key for approx. 5 seconds Change from all other modes to the menu selection as follows: Press the "Menu" key briefly To select the desired mode: Use the "Up/Down"... -
Page 27: Configuration Mode
Use the "Up/Down" keys to scroll between the pages for each stored charging process Text content of the display window: Start date of charge, e.g. Thursday 19/06/14 Start time of charge, e.g. 19:29 or charging period, e.g. 8 h 28 min Voltage at charge start, e.g. - Page 28 Time interval for the parameter recorded on the USB flash drive (s) "Reset Factory Settings": resets settings to those when the charger left the factory or optionally to Fronius defaults includes a double-check ("OK?") that requires the operator to reconfirm that this...
- Page 29 You will be prompted to enter a code: The code required is "1511", and is entered as follows: Using the "Up/Down" keys, enter the first digit of the code Press the "Menu" key to move to the next digit of the code Continue to follow the procedure described above until the com- plete code has been entered Use the "Stop/Start"...
- Page 30 The procedure for navigating the configuration menu and its submenus is as follows: Use the "Up/Down" keys to select the desired menu item Use the "Stop/Start" key to confirm the menu item, and reconfirm any double-check prompt (e.g. "OK?") Use the "Up/Down" keys as necessary to choose an item e.g. "Off/ On"...
-
Page 31: Settings
The choice of settings for the "Charging settings" menu item will now be displayed: the display may vary depending on the selection made. If the "Pb-Wet" type of battery has been selected in combination with the "RI" characteristic ("Curve") as in the example here, then the title "Ah"... - Page 32 OFF: There is no equalising charge. Delay: If the battery remains connected to the charger for the duration of the "equalize charge delay", then a special type of charging takes place. This prevents acid stratification. Weekday: Specify the weekday on which the equalising charge is to take place. Delay: charge start delay: Delay time (minutes) of actual start of charging relative to the moment when charge start...
- Page 33 Symbol for characteristic 1: Time window in which charging is to be started using characteristic 1 (e.g. 0:00-6:00) Stop: Time window in which charging must not take place (e.g. 06:00-20:00) Symbol for characteristic 2: Time window in which charging is to be started using characteristic 2 (e.g.
- Page 34 When the calendar function is active, a ca- lendar symbol (shown here with the number "4") appears on the display. Special Charges: Selecting "Special Charges" allows one or more of the alternative charging types to be performed temporarily: ON: Function activated OFF: Function deactivated The "repeat"...
-
Page 35: Additional Functions
When opportunity charging is "ON" and a battery is connected, the following appears: Figure on left: indication when RI characteristic is selected Figure on right: indication for standard characteristics To start opportunity charging: Use the "Up" key to select the runner symbol (1) Figure on left: "Runner symbol"... -
Page 36: General Options
In conjunction with the "Temperature-controlled charging" option, a temperature value can be set here. The blue "battery cooled down" indicator will light up to signal a sufficiently- cooled battery once the temperature drops below this value. External start/stop: The following settings are available when external start/stop is selected: Start: normal ON: Charging starts when an external switch is closed and a battery is detected... -
Page 37: Reset Settings
Reset Factory Settings: Resets to factory settings Reset Default Settings: Resets settings to Fronius defaults USB mode In USB mode, the display shows whether or not a USB flash drive is connected. The USB flash drive must conform to the... - Page 38 The logged data is saved in the same way as for the "Download" function, but is saved not in the I-SPoT VIEWER format, but as ".csv" files (Automatic folder structure for the ".csv" files: * Fronius\<device serial number>\Charges\<yyyymmdd>\<hhmmss.csv> Save events Events are saved to the USB flash drive.
-
Page 39: Status Codes
Load configuration Loads onto the device one of the suitable device configurations stored on the USB flash drive, provided the configuration files are present. Load dealer text A text file can be loaded from the USB flash drive that is displayed as soon as the de- vice enters an error state. - Page 40 Status codes in the event of a battery fault Number Cause (27) Battery is connected with reverse polarity Status codes in the event of a charging fault Number Cause (31) Timeout in I1 phase (32) Timeout in U1 phase (34) Ah limit exceed (35) Timeout in I2 phase...
- Page 41 Status codes in the event of a fault in the secondary circuit Number Cause (570) Secondary relay cannot be switched (571) ADC/SPI error Status codes in the event of a fault in the controller Number Cause (540) CFM missing/faulty (541) No secondary communication (542) Secondary initialisation failed...
-
Page 42: Options
Options Safety In order to connect optional components it may be necessary to open the housing. The fol- lowing warning notices must be obeyed: WARNING! An electric shock can be fatal. The housing must never be opened by anyone other than a service technician trained by the manufacturer. The de- vice must be disconnected from the mains before starting any work with the hous- ing open. -
Page 43: Wall And Floor Bracket
341 mm (13.43 in.) 116 mm (4.57 in.) Weekly Weight of the air filter: 2 kW 0.05 kg (1 lb) Wall and floor The robust wall and floor bracket with integrated cable holder ensures safe installation at bracket the place of use. Detailed information and diagrams can be found in under "Wall and floor bracket"... -
Page 44: Technical Data
Max. AC Max. AC Nominal Max. charg- Weight data current power voltage ing current Selectiva 2040 2kW 8 A 1550 W 24 V 40 A 5.8 kg (12.79 lb.) Selectiva 2050 2kW 9.9 A 1930 W 24 V 50 A 6.1 kg... - Page 46 Fronius Worldwide - www.fronius.com/addresses Fronius International GmbH Froniusplatz 1 A-4600 Wels E-Mail: perfect.charging@fronius.com http://www.fronius.com Under http://www.fronius.com/addresses you will find all addresses of our sales branches and partner firms!
Need help?
Do you have a question about the Selectiva 2040 2kW and is the answer not in the manual?
Questions and answers