Fronius Selectiva 4120 Operating Instructions Manual
Hide thumbs
Also See for Selectiva 4120:
- Operating instructions manual (68 pages) ,
- Service manual (174 pages) ,
- A s s e m b l y, maintenance and operating instructions (72 pages)
Table of Contents
Advertisement
Quick Links
Advertisement
Table of Contents

Related Manuals for Fronius Selectiva 4120


Summary of Contents for Fronius Selectiva 4120
- Page 1 Operating Instructions 8 kW 220 V Selectiva 4120 / 4140 / 4160 8 kW 400 V Selectiva 2100 / 2120 / 2140 2160 / 2180 / 2200 4060 / 4075 / 4090 4120 / 4140 / 4160 8040 / 8060 / 8075 8090 16 kW 400 V Selectiva...
-
Page 3: Table Of Contents
Contents Safety rules General Intended use Environmental conditions Mains connection Dangers due to grid and charging current Danger due to acid, gases and vapours General information on working with batteries Personal protection and protection of others Safety measures in normal operation EMC Device Classifications EMC measures Data protection... - Page 4 Electrolyte circulation (not available with Selectiva 3x220 16 kW variants) External start/stop Charging lights Temperature-controlled charging CAN card Relay board Aquamatic control Charging Charge 50% Charge 80% Charging not complete Charge finish Main charge finished Common error message Common error + warning Signal lamp Immobiliser device Battery cooled down...
-
Page 5: Safety Rules
Safety rules General The device has been manufactured in line with the state of the art and according to recognized safety standards. If used incorrectly or misused, however, it can cause: Serious or fatal injury to the operator or third parties Damage to the device and other material assets belonging to the operating company Inefficient operation of the device... -
Page 6: Mains Connection
Mains connec- Devices with a higher rating may affect the energy quality of the mains due to tion their current consumption. This may affect a number device types in terms of: Connection restrictions Criteria with regard to the maximum permissible mains impedance Criteria with regard to the minimum short-circuit power requirement at the interface with the public grid see "Technical data"... -
Page 7: General Information On Working With Batteries
splashed acid immediately and thoroughly with clean water, and consult a physi- cian if necessary. General informa- Protect batteries from dirt and mechanical damage. tion on working Store charged batteries in cool rooms. The lowest self discharge occurs at with batteries approx. -
Page 8: Emc Measures
EMC device classification as per the rating plate or technical data. EMC measures In certain cases, even though a device complies with the standard limit values for emissions, it may affect the application area for which it was designed (e.g. when there is sensitive equipment at the same location, or if the site where the device is installed is close to either radio or television receivers). -
Page 9: Markings On The Device
Markings on the Devices with the CE marking satisfy the essential requirements of the applicable device guidelines. Devices displaying the EAC mark of conformity satisfy the requirements of the relevant standards in Russia, Belarus, Kazakhstan, Armenia and Kyrgyzstan. Disposal Waste electrical and electronic equipment must be collected separately and re- cycled in an environmentally responsible manner in accordance with the EU Dir- ective and national law. -
Page 10: General Information
General information Explanation of DANGER! safety notices Indicates immediate danger. ▶ If not avoided, death or serious injury will result. WARNING! Indicates a potentially hazardous situation. ▶ If not avoided, death or serious injury may result. CAUTION! Indicates a situation where damage or injury could occur. ▶... -
Page 11: Mains Connection
Mains connec- WARNING! tion Danger from electrical current. This may result in serious injuries or death. ▶ Before starting work, switch off all devices and components involved, and disconnect them from the grid. ▶ Secure all devices and components involved so they cannot be switched back ▶... - Page 12 Interrompere sempre la carica prima di scollegare il cavo di carica! Gas esplosivi. Evitare fiamme libere e scintille. Predisporre una ventilazione adeguata durante la carica! 42,0409,0419 Selectiva xxxx Part No.: 4,010,xxx www.fronius.com Ser.No.: xxxxxxxx xxxxxxxx 3~ NPE xxxV 50/60Hz AC nom. DC nom.
-
Page 13: Warning Notices Inside The Device
Warning notices WARNING! inside the device Danger from electric current. This can result in serious injury or death. ▶ The housing must never be opened by anyone other than a service technician trained by the manufacturer. ▶ Before starting work, switch off all the devices and components involved and disconnect them from the grid. -
Page 14: Setup Regulations
Setup regula- WARNING! tions Danger from devices falling or toppling over. May result in serious injuries or death. ▶ Set up all system components in a stable position. When using a floor brack- et or wall bracket, always ensure that all fastening elements are firmly seated. -
Page 15: Wall Bracket
Danger from machines falling or toppling over. This may result in serious injury and damage to property. ▶ Ensure that all screw connections are secure. ▶ Only use with a Fronius Selectiva 8/16 kW charger. ▶ Ensure the device is level when mounting. - Page 16 8 kW (400 V) mm (in.) 193 (7.6) 633 (24.92) 180 (7.09) (.51) 595,5 (23.44) 179 (7.05)
- Page 17 8 kW 220 V mm (in.) 267 (10.51) 647 (25.47) 247 (9.72) (.79) 241 (9.49) 585 (23.03) 16 kW 400 V mm (in.) 267 (10.51) 647 (25.47) 247 (9.72) (.79) 241 (9.49) 585 (23.03)
- Page 18 mm (in.) 500 (19.69) 492 (19.37) 450 (17.72) 400 (15.75) 300 (11.81) 200 (7.87) (.33) 20 (.79) 7 (.28) (.24) (.79) 342 (13.46) (.24) 418 (16.46) 494 (19.45) Drilling template Weight of wall bracket: 8 kW 400 V: 1.8 kg (3.97 lb.) 8 kW 220 V: 3.15 kg (6.49 lb.) 16 kW 400 V: 3.15 kg (6.49 lb.)
-
Page 19: Correct Installation Of The Mains/Charging Cables
Correct installa- WARNING! tion of the mains/charging Danger due to charging cables lying around. cables This can result in severe personal injury and damage to property. Personnel can get caught or trip on unplugged, loose cables. ▶ Lay charging cables so that no one can trip over them or get caught on them. CAUTION! Danger due to overheating as a result of incorrectly laid mains/charging cables. -
Page 20: Control Elements And Connections
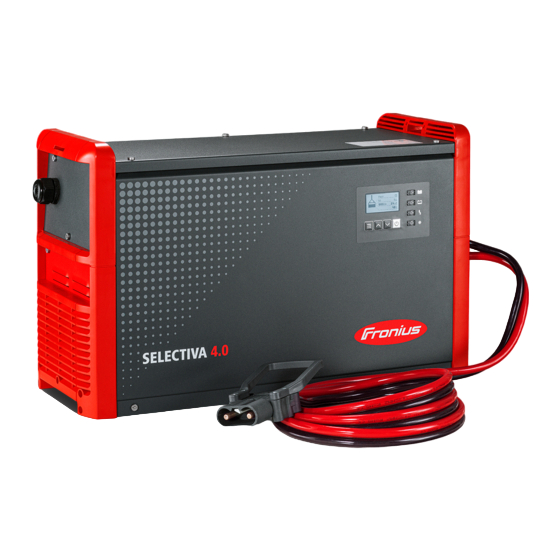
Control elements and connections Controls and connections Function (10) USB port (12) The USB port allows a USB flash drive to be used to update the device and also to log the charging parameters while char- ging is in progress. The maxim- um supply current is 0.5 A. -
Page 21: Control Panel
Mains cable (10) Optional LED strip. Lights up in different colours depending on the state of charge, as ex- plained in the "Control panel" section. (11) Control panel (12) CAN connection area The connection area can only be accessed by removing the connection plate on the front of the device. - Page 22 "Battery cooled down" indicator (blue) Indicates that a battery has cooled down and is ready for use On steady: After charging has finished, the set cooling time or optionally the battery temperature has been reached. Flashes every second: The water refill indicator has also tripped. More information can be found under "Additional functions"...
-
Page 23: Charging The Battery
Charging the battery Charging WARNING! Danger due to escaping battery acid or explosion if faulty batteries are charged. This may result in serious injury and damage to property. ▶ Before charging, ensure that the battery to be charged is fully functional. WARNING! Danger due to faulty charging settings or a defective battery. -
Page 24: Interrupting Charging
The battery symbol indicates the current state of charge. The greater the number of bars that are displayed, the further advanced the charging process is. As soon as the battery is fully charged, a minute counter will appear (see figure on right). This counts the minutes since the end of charging;... -
Page 25: Stopping Charging
The "Charge" indicator (yellow) flashes To resume the charging process: Press the "Stop/Start" key again As long as a battery is connected to the charger, only the charging process can be interrupted and resumed using the "Stop/Start" key. Display modes can be changed using the "Menu"... - Page 26 For an optimal battery life, only dis- connect the battery from the bat- tery charger when the blue "Battery cooled down" indicator is showing in addition to the green indicator, in ac- cordance with the explanation below. If several battery chargers are in use, first disconnect the battery which has been fully charged for the longest (the coolest).
-
Page 27: Display
Display Overview of dis- Function play modes Standard mode In standard mode the display shows the charging parameters. Statistics mode Visualises the frequency of the device operating modes and shows the total number of charging actions. Also shows an overview of the total and average Ah produced and energy consumed per charge. -
Page 28: Menu Selection
Menu selection Change from standard mode to the menu selection as follows: Press and hold the "Menu" key for approx. 5 seconds. Change from all other modes to the menu selection as follows: Briefly press the "Menu" key. To select the desired mode: Use the "Up/Down"... - Page 29 Use the "Up/Down" keys to switch between the pages for each stored char- ging process. Contents of the display window Charge start date, e.g.: Thursday, 19/06/14. Charge start time, e.g.: 19:29 or charging time, e.g.: 8 h 28 min. Voltage at charge start, e.g.: 45.9 V. Voltage after 5 minutes, e.g.: 47.9 V.
- Page 30 Key symbol with a cross Charging was stopped without using the "Pause/Start" key. Charging details Displays certain battery data at the beginning and end of the charging process: Number of cells Characteristic Type of battery Configuration Configuration mode provides the following setting options: mode "Charging settings": settings for the battery Type of battery, e.g.
-
Page 31: Configuration Mode
“Reset Settings” Includes a double-check prompt ("OK?") that requires the operator to recon- firm that this step is intended. First the screen will appear in its initial format, showing the date, time and software version. The "Up/Down" keys can be used to retrieve the following information: Serial number of the charger plus serial number and version of the con- figuration memory. - Page 32 When you select a menu item you may be presented with a prompt to read the Operating Instructions. Confirm this prompt by pressing the "Pause/ Start" key again. The procedure for navigating the configuration menu and its submenus is as fol- lows: Use the "Up/Down"...
-
Page 33: Overview Of Charging Settings
Use the "Up/Down" keys to select the desired parameter (e.g. "Cells"). Use the "Pause/Start" key to confirm the parameter. Use the "Up/Down" keys to set the desired value (e.g. "24" for the number of battery cells). Use the "Pause/Start" key to confirm what you have entered. If one or more relevant settings are changed for the charging process in configur- ation mode, you will once again be prompted to confirm acceptance of the changed settings when exiting configuration mode. -
Page 34: Electrolyte Circulation
Electrolyte cir- "Air Pump" electrolyte circulation (not culation available on the Selectiva 220 V vari- ant): The electrolyte circulation cycle is controlled by the charger's control system. A number of selection options are available for this purpose. The following settings are available for electrolyte circulation: Electrolyte circulation switched off. -
Page 35: Equalising Charge
The following settings are available for temperature-controlled charging: automatic/OFF/required automatic ... Temperature-dependent adjustment of the charging character- istic. OFF ... The measured battery temperature is not taken into account. required ... Charging only starts if the temperature sensor is connected. Error overtemperature ON/OFF ON ... -
Page 36: Delay
Delay If the battery remains connected to the charger for the duration of the equalising charge delay ("equalize charge delay"), a special type of charging takes place. This prevents acid stratification. The parameters for the current (ampere/100 ampere hours), voltage (volt/ cell) and duration of the equalising charge may all be changed. -
Page 37: Calendar
If the "Automatic/continue charging" option is activated, the charging process is automatically continued after a fault in the electrical network as soon as the electrical network is available again. Calendar Calendar The calendar function allows charging to be started automatically according to the following criteria: Time window in which charging may not be started if a battery is connected. - Page 38 NOTE! Ongoing charging operations are unaffected by the set time windows. ▶ If, in the example above, a battery is connected at 05:45, the charge end time is governed according to need and is not interrupted by the end time specified for the set time window (06:00 in the example).
-
Page 39: Special Charges
Special charges Special Charges Selecting "Special Charges" allows one or more of the alternative charging types to be performed temporarily. The "repeat" setting defines how often the alternative charging mode should be performed until the device reverts to the original charging parameters again: Setting range 1 to 99 repetitions Disable Start Button... -
Page 40: Additional Functions
When opportunity charging is "ON" and a battery is connected, the following ap- pears: Display when RI characteristic is selected Display for other characteristics (e.g. IUI) To start opportunity charging: Use the "Up" key to select the runner symbol (1). "Runner symbol"... - Page 41 "External start/stop" The following settings are available for external start/stop: "Button" The function of the "Pause/Start" button can be simulated by means of an external button. Normal Start ON: Charging starts when an external switch is closed and a battery is detected or when the charging plug is connected by closing the auxiliary contacts and a battery is detected.
- Page 42 "Relays" Under Relays, one of the following functionalities can be set for each of the 4 terminals, viewed from left to right: Aquamatic Signal, e.g. for actuating a solenoid valve "Standard" program with settings pre-configured at the factory "User" program with user-defined setting options For more information on Aquamatic, see the "Aquamatic"...
-
Page 43: General Settings
"Refill Indicator" Indicates that it is necessary to refill the battery with distilled water. Detailed information can be found in the "Additional functions" section of the "Display" chapter. "Battery Cold" "External Air Pump" The settings are made as explained in section "-> Settings" for electrolyte cir- culation ("Air Pump"). - Page 44 A list appears with the following selection options: Language Display settings Contrast LED brightness Show Ah at charge end ON/OFF Time and Date daylight saving time / normal time Predefined time zones User-defined time zones Charging cable: Basic length of charging cable (m) Cable cross section: Cross-section of the charging cable (mm²) AC current consumption:...
-
Page 45: Reset Settings
The I-SPoT VIEWER software supports the visualisation and evaluation of data on the USB flash drive. The I-SPoT VIEWER software can be found online at the following address: http://www.fronius.com/i-spot. Only insert the USB flash drive when charging is not in progress or if the charging process has been interrupted. - Page 46 The logged data is saved in the same way as for the "Download" function, but is saved not in the I-SPoT VIEWER format, but as ".csv" files (Automatic folder structure for the ".csv" files: * Fronius\<device serial number>\Charges\<yyyymmdd>\<hhmmss.csv> Save events Events are saved to the USB flash drive.
-
Page 47: Status Codes
Load configuration Loads onto the device one of the suitable device configurations stored on the USB flash drive Load dealer text A text file can be loaded from the USB flash drive that is displayed as soon as the device enters an error state. The text file can, for example, contain the contact details of the dealer. - Page 48 Status codes with an external cause Cause/Remedy (11) Check mains voltage (12) Check grid (phase failure) (13) External temperature sensor defective (14) Electrolyte circulation defective (pressure switch does not switch) (15) No control voltage detected (16) External start/stop is not closed. (17) Open circuit detection triggered several times during a charge (e.g.,: worn charging contacts)
- Page 49 Status codes in the event of a CAN error (battery) Cause/Remedy (51) Battery not responding (52) Battery data cannot be queried (53) Battery voltage not supported (54) Communication error (55) Battery error (56) Battery does not switch on (57) Message time limit exceeded (58) Login failed Status codes in the event of a gateway error...
- Page 50 (214) Too much power dissipation on the DC path (215) TagID level sensor is mounted in the wrong cell or is defective (216) TagID SoftwareCrash Status codes in the event of an error in the primary circuit Cause/Remedy (500) Temperature sensor module 1 (top) defective (501) Temperature sensor module 2 (bottom) defective (502) Temperature sensor PCB defective (503) Primary overtemperature...
- Page 51 (527) Power module overcurrent (primary) (529) No secondary communication (530) No primary communication (531) Secondary EEPROM defective (532) Microcontroller error (537) Voltage measurement faulty (570) Secondary relay cannot be switched (571) ADC/SPI problem Status codes in the event of an error in the control system Cause/Remedy (540) Configuration memory block missing/defective (541) No secondary communication...
-
Page 52: Options
Options Safety The housing has to be partially opened to connect the options. WARNING! Danger of electric shock. This may result in serious injuries or death. ▶ The housing must never be opened by anyone other than a service technician trained by the manufacturer. -
Page 53: External Start/Stop
External start/ The external start/stop option prevents spark formation at the charging plug if it stop is disconnected during charging. Special contacts inside the charging plug re- gister a disconnection. These contacts are leading in comparison to the main contacts. An immediate charging stop is triggered. There is therefore no wear on the main contacts and the level of safety against oxyhydrogen ignition is in- creased. -
Page 54: Temperature-Controlled Charging
Connection Function Colour 12 V power supply Battery is fully charged Green On: battery is being charged Yellow Flashing: charging has been interrupted An error has occurred (common error) The battery has already cooled down and is ready for Blue If the RGB setting (LED strip) is set in the menu, then connection 3 (YELLOW) is not supported. -
Page 55: Relay Board
WARNING! Work that is carried out improperly can cause serious injury or damage. Connection work on the device must only be carried out by qualified specialist technicians. If there are Installation Instructions or User Information for the op- tional component concerned, then all warning notices and instructions therein must be obeyed. -
Page 56: Aquamatic Control
Aquamatic control Charging Charge 50% Charge 80% Charge Finish Main Charge Finished Charge OK Charge Not Complete Signal if the battery is prematurely disconnected from the battery charger Common Error Common Error + Warning Signal Lamp Immobilizer Device Refill Indicator Battery Cooled External Air Pump (Electrolyte Circulation) An explanation of the configuration for the outputs of the relay board can be... -
Page 57: Charge Finish
Charge finish The "Charge finish" option is suitable for actuating a signal lamp for instance. Once the configured charging characteristic is fully completed, the correspond- ing relay picks up automatically. Main charge fin- The "Main charge finished" option is suitable for actuating a signal lamp for in- ished stance. -
Page 58: Floor Bracket
Floor bracket The robust floor bracket ensures safe fitting on site. More information can be found in the corresponding Installation Instructions. LED strip The LED strip acts as a status indicator and lights up in the same colours as the display elements on the control panel. -
Page 59: Technical Data
3~ NPE 220 V/50/60 Hz Mains voltage (-10%/+30%) 3~ PE 220 V/50/60 Hz Optional: 32 A Mains fuse protection Minimum mains lead cross section Selectiva 4120 4 mm² (0.0062 in.²) Selectiva 4140/4160 6 mm² (0.0093 in.²) Duty cycle 100% EMC device class Standby usage 6.9 W... - Page 60 Device-specific data Max. char- Max. AC Max. AC Nominal ging cur- Device current power voltage rent 4120 3x220 28.5 A 9070 W 48 V 120 A 16 kW mOhm 4140 3x220 29.6 A 9390 W 48 V 140 A 16 kW mOhm 4160 3x220 29.9 A...
-
Page 61: Selectiva 8 Kw 400 V
Selectiva 8 kW WARNING! 400 V An electric shock due to a fault current can be fatal. Nothing other than a type B residual current circuit breaker should ever be used for connecting the device to the mains. 3~ NPE 400 V / 50/60 Hz Mains voltage (-10%/+30%) 3~ PE 400 V/50/60 Hz Optional:... - Page 62 A high ambient temperature may result in power degradation (derating). Device-specific data Max. AC cur- Max. AC Nominal Max. char- Device rent power voltage ging current 2100 8 kW 6.7 A 3860 W 24 V 100 A 2120 8 kW 7.8 A 4590 W 24 V...
-
Page 63: Selectiva 16 Kw 400 V
Selectiva 16 kW WARNING! 400 V Danger of electric shock due to a residual current can be fatal. Only use a type B residual current circuit breaker for the mains connection of the device. 3~ NPE 400 V/50/60 Hz Mains voltage (-10%/+30%) 3~ PE 400 V/50/60 Hz Optional: 32 A... - Page 64 Device-specific data Max. char- Max. AC Max. AC Nominal ging cur- Device current power voltage rent 4210 16 kW 27.6 A 15860 W 48 V 210 A 107 mOh 8120 16 kW 23.8 A 14830 W 80 V 120 A mOhm 8140 16 kW 27.5 A...
Need help?
Do you have a question about the Selectiva 4120 and is the answer not in the manual?
Questions and answers