Fronius Selectiva 2040 Service Manual
Battery charging system
Hide thumbs
Also See for Selectiva 2040:
- Operating instructions manual (68 pages) ,
- Operating instructions manual (28 pages) ,
- User manual
Table of Contents
Advertisement
Quick Links
/ Perfect Charging / Perfect Welding / Solar Energy
Selectiva 2040 2kW
Selectiva 2050 2kW
Selectiva 2060 2kW
Selectiva 2070 2kW
Selectiva 4020 2kW
Selectiva 4035 2kW
42,0426,0264,EN 018-21072020
Fronius prints on elemental chlorine free paper (ECF) sourced from certified sustainable forests (FSC).
Service manual
Battery charging system
Advertisement
Table of Contents

Related Manuals for Fronius Selectiva 2040


Summary of Contents for Fronius Selectiva 2040
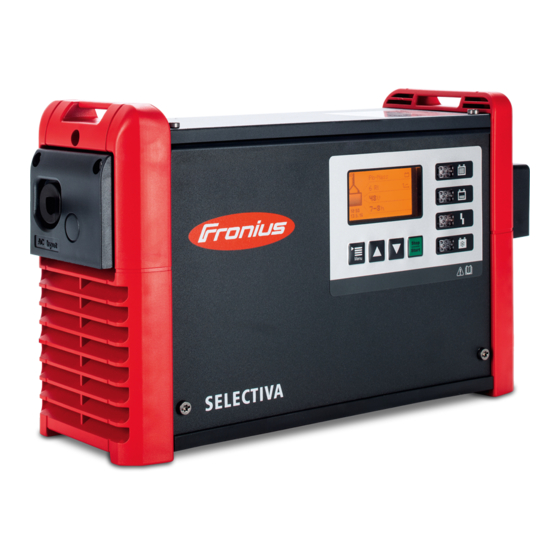
- Page 1 / Perfect Charging / Perfect Welding / Solar Energy Service manual Selectiva 2040 2kW Selectiva 2050 2kW Battery charging system Selectiva 2060 2kW Selectiva 2070 2kW Selectiva 4020 2kW Selectiva 4035 2kW 42,0426,0264,EN 018-21072020 Fronius prints on elemental chlorine free paper (ECF) sourced from certified sustainable forests (FSC).
-
Page 3: Table Of Contents
Area of application of these instructions General Safety Explanation of safety notices Warning notices on the device Warning notices inside the device National Fronius Technical Support (TSN) Ordering spare parts Protective measures against ESD Tools and measuring devices Tools required Measuring and testing equipment... - Page 4 Rating plate and warning stickers Electrical tests Ground conductor resistance Insulation resistance Ground conductor current Contact current Function tests General Function test in the service menu Other function tests in the Service menu Mains power on/off equipment Indicators and control elements Documentation Documentation...
-
Page 5: General Information
General information... -
Page 7: Foreword And Safety Instructions
Foreword and safety instructions Area of applica- These Service Instructions apply to the following products: tion of these instructions 2 kW 2.0 Selectiva 2040 (4,010,460) Selectiva 2050 (4,010,461) Selectiva 2060 (4,010,462) Selectiva 2070 (4,010,463) Selectiva 4020 (4,010,470) Selectiva 4035 (4,010,471) 2 kW 2.0 Banner... -
Page 8: Explanation Of Safety Notices
¡Mantener una ventilación adecuada durante la carga! Interrompere sempre la carica prima di scollegare il cavo di carica! Gas esplosivi. Evitare fiamme libere e scintille. Predisporre una ventilazione adeguata durante la carica! 42,0409,0419 Selectiva xxxx www.fronius.com Part No.: 4,010,xxx Ser. No.: xxxxxxxx xxxxxxxx 1~ NPE 230V 50/60Hz AC nom. -
Page 9: Warning Notices Inside The Device
Temperature 2 Battery CR2032 controlled charging controlled charging National Fronius Please contact your national Fronius Technical Support (TSN) team with any fault ana- Technical Sup- lysis queries. port (TSN) Ordering spare For information on spare parts, refer to the Online spare parts catalogue (OETK) at: parts https://spareparts.fronius.com... -
Page 10: Protective Measures Against Esd
Protective meas- When performing servicing work, there is a risk of electronic components being damaged ures against ESD by electrical discharge. Always observe the necessary protective measures when hand- ling electronic components. For more detailed information, see the remainder of these Service Instructions. -
Page 11: Tools And Measuring Devices
Tools and measuring devices Tools required Torx screwdriver, TX20 Torx screwdriver, TX25 Slotted screwdriver, 3 mm Slotted screwdriver, 6.5 mm Cross-head screwdriver PH2 Socket wrench Socket wrench insert, 13 mm Flat spanner, 13 mm Diagonal cutting pliers Needle-nosed pliers Torque screwdriver with bit insert, 1 - 6 Nm Torque ratchet, 1 - 20 Nm Measuring and Digital multimeter... -
Page 13: Replacing Components
Replacing components... -
Page 15: General
General Safety DANGER! Risk of death due to contact with live components when the device is open. An electric shock will cause serious injury or death. ▶ Before opening, switch off the device properly. ▶ Unplug the device from the mains. ▶... -
Page 16: Esd Guidelines
ESD guidelines NOTE! Observe ESD guidelines when handling electronic components and PC boards. This primarily applies to ESD-compatible Packaging Work surfaces Floors Seating Earthing facilities Ease of handling No guarantee or warranty claims can be made in respect of any improperly handled elec- tronic component or PC board. -
Page 17: Opening The Device
Opening the device Opening the 2 kW If present, the LED diffuser strip must be device removed. Remove the LED diffuser strip. Undo the 2 M4x10 TX20 screws on the device frame. Undo the four M4x10 TX20 screws. Remove the housing cover. - Page 18 Bend the grounding lug upwards. Disconnect the display. If present, remove the LED strip. Undo the two M4x10 TX20 screws. Pull the front panel of the housing upwards and remove it. Remove the insulating foil.
-
Page 19: Replacing The Display Pc Board
Replacing the display PC board Remove the dis- Open the device (see chapter Open- play PC board ing the device). Open the insulating foil. Undo the three 4x9 TX20 tapping screws. Take the display PC board out of the display spacer frame. -
Page 20: Installing The Display Pc Board
Installing the dis- Remove the protective film from the play PC board display PC board. Place the new display PC board on the display spacer frame. Fit the display PC board with three 4X9 tapping screws. Tightening torque = 1.5 Nm Close the insulating foil. - Page 21 Fit the front panel of the housing (see chapter Closing the device)
-
Page 22: Replacing The Mains Cable
Replacing the mains cable Removing the 2 Remove the two 4x20 TX20 screws. Remove the AC connection plate. mains cable Disconnect the mains cable from the power module. After releasing the locking hooks on the strain-relief device, route the mains cable fully through the opening. -
Page 23: Install The 2 Kw Mains Cable
Unlock the strain-relief device with a slotted screwdriver by pressing on the sides. Open the strain-relief device. Remove the mains cable. Install the 2 kW Insert the mains cable into the strain- mains cable relief device. Close the strain-relief device by press- ing firmly. - Page 24 Connect the mains cable to the power module with the correct polarity. Fit the AC connection plate and secure with two 4x20 TX20 screws. Tightening torque = 1.5 Nm...
-
Page 25: Replacing The Charging Lead
Replacing the charging lead Removing the Remove the two 4x20 TX20 screws. charging lead Remove the DC connection plate. Remove the 4x20 TX20 screw and remove the strain-relief device. Undo the two size 13 M8 hexagon nuts and remove the charging leads. Installing the Item Description... - Page 26 ATTENTION! ? Fit the strain-relief device bracket so that the labelling of the cable cross- section used faces the lead. Place the strain-relief device bracket and secure with a 4x20 TX20 screw. Tightening torque = 1.5 Nm Tighten the two size 13 M8 nuts. Tightening torque = 15 Nm...
- Page 27 Fit the DC connection plate and secure with two 4x20 TX20 screws. Tightening torque = 1.5 Nm...
-
Page 28: Replacing The Fan
Replacing the fan Removing the fan Remove the M4x10 TX20 screw on the device frame AC side. Undo the 5x10 TX25 screw on the underside of the device frame. Press the locking hooks together. Use a slotted screwdriver to detach the device frame from the device. - Page 29 Disconnect the mains cable (see chapter Replacing the mains cable). Disconnect the fan cable from the power module. Push the locking hook upwards. Remove the fan with the fan holder. Push the two fan holder locking hooks up or down. Pull out the fan.
-
Page 30: Installing The Fan
Installing the fan NOTE! Risk of property damage due to fan fail- ure. ▶ Push the fan on the housing into the fan holder. Clip the fan into the fan holder. Use the arrows to check if the fan is installed correctly. - Page 31 Connect the fan cable to the power module. Connect the mains cable to the power module with the correct polarity (see chapter Replacing the mains cable). Place the device frame on the locking hooks and press firmly. Tighten the 5x10 TX25 screw. Tightening torque = 3 Nm...
- Page 32 Fit the M4x10 TX20 screw on the device frame AC side. Tightening torque = 2.5 Nm...
-
Page 33: Changing The Internal Battery
Changing the internal battery Removing the 2 Remove the housing cover (see chapter Opening the 2 kW device). battery Release the battery lock. Remove the battery. Installing the 2 NOTE! battery Risk of damage to the device due to incorrectly connected battery. ▶... - Page 34 Fit the housing cover (see chapter Closing the 2 kW device).
-
Page 35: Replacing The Power Module
Replacing the power module Removing the Remove the housing (see chapter power module Opening the device) Remove the mains cable and the device frame (see chapter Replacing the mains cable) Remove the fan including the fan holder (see chapter Replacing the fan) Remove the two M5x10 TX25 screws for the charging leads. -
Page 36: Installing The Power Module
Installing the NOTE! power module Possible damage to the device due to defective soldering points. ▶ When removing or inserting the power module, only grasp the heat sink to move it. Insert the power module, observing the guides in the base plate and the heat sink. - Page 37 To do this, proceed as follows: Open the "Service" menu Enter the code 7109. Confirm the variant. Connect a USB flash drive with the latest software. If a suitable file has been found on the USB flash drive, the "Update" menu item appears.
-
Page 38: Enter Serial Numbers
Enter serial num- Press the "Menu" button to select the con- bers figuration mode. Open the configuration menu by pressing the "Pause/Start" key. Enter the code 7109. The "Service" menu item then appears in the submenu. In the service menu, enter the serial num- ber with the associated checksum (check- sum and serial number can be seen on the rating plate) and confirm with "Save". - Page 39 If the serial number matches the check- sum, the Service menu is displayed. The Service menu comprises two sub- menus: "Device Tests" function tests "Option Tests" option tests ATTENTION! ? The "Device tests" function tests menu item must be used to reset error "551 - Hardware change detected".
-
Page 40: Closing The Device
Closing the device Closing the 2 kW Fit the insulating foil. device Fit the front panel of the housing from above. Fit two M4x10 TX20 screws. Tightening torque 2.5 Nm If present, fit the LED strip. Bend the grounding lug into position. Connect the display. - Page 41 Place the housing cover and 4 fit four M4x10 TX20 screws. Tightening torque = 2.5 Nm Fit the device frames with two M4x10 TX20 screws. Tightening torque = 2.5 Nm If present, push in the LED diffuser strip.
-
Page 43: Safety Inspections
Safety Inspections... -
Page 45: Safety Inspections
Please also be aware of the requirements and standards relevant to your country, as the measured values or steps taken during the tests may vary. Should there be no relevant requirements and standards in your country, Fronius recom- mends that this test should still be carried out. - Page 46 Insulation resistance The measuring voltage value shown on the measuring device must be at least the same as the rated voltage to earth of the device to be tested, however it must be no less than 500 V DC voltage. The measuring current must be at least 1 mA (this corresponds to a load resistance of 0.5 MW).
-
Page 47: Visual Inspections
Visual inspections General The following must be visually inspected without any further dismantling of the device. Obvious defects in any safety-related device components are unacceptable. Defects that could pose a risk during the visual inspection must also be recorded. Any defects that could cause other hazards must be repaired immediately or restrictions placed on the further use of the system until repairs have been effected. -
Page 48: Electrical Tests
Electrical tests Ground con- The device to be tested must be safely isolated from the AC mains supply. The ductor resistance mains lead (L1, N, PE) must not be connected. Follow the safety rules. The device to be tested must be safely isolated from the battery. The charging leads must not be connected. -
Page 49: Insulation Resistance
Insulation resist- WARNING! ance An electric shock can be fatal! Some of the insulation resistance measurements are taken under high voltage. The process must be fully understood before starting the test. Observe the following safety precautions: ▶ Only perform the measurement if a ground conductor resistance test has been car- ried out successfully ▶... -
Page 50: Ground Conductor Current
DC +/- DC +/- DC +/- Example: measuring the insulation resistance 1 Measuring device 2 Battery charging system 9 Measuring line WARNING! An electric shock can be fatal! Capacitors can charge during the insulation resist- ance measurement. After carrying out the insulation resistance measurement, check that all tested potentials are de-energised before continuing with the safety inspection. - Page 51 live conductors in the immediate vicinity, or that there are no other consumers depending on the same circuit. Direct method - Ground conductor current measured using ammeter on the ground con- ductor 1 Measuring device 2 Battery charging system 8 Isolated setup of test piece Example: measuring ground conductor current 9 Measuring line through ground conductor directly on the battery...
-
Page 52: Contact Current
Contact current The following points must be observed during the contact current measurement: Do not perform the measurement until the ground conductor current measurement has been carried out successfully The device must be in charge mode The measurement is taken between a grounded point and the conductive part that can be touched and that is not connected to the ground conductor. -
Page 53: Function Tests
Function tests General In the event a repair is needed, the Service menu is required to: Recover the serial number Perform function tests Acknowledge status code 551 (which is shown after a power module replacement) If a Z power module is installed, a hard- ware change is detected and the error "551 - hardware change detected"... - Page 54 The "Service" menu item consists of two additional options: Device tests Options tests The "Device Tests" menu item contains three tests: "Fan Test" "Current Test" (charging current measurement) "Voltage Test" (output voltage meas- urement)
- Page 55 Fan test To start the fan test, set the "Fan" menu item to "ON". The fan power (Ifan) and fan supply voltage (Uprim) are displayed for checking. The test duration is 20 seconds. A tick appears next to the menu item once the test has been completed.
-
Page 56: Other Function Tests In The Service Menu
Measuring the output voltage Preparations: Eliminate the short circuit in the char- ging leads.. Operate the device in open circuit. Prepare the output voltage measure- ment. Voltage Test "ON" To start measuring the output voltage, set the "Voltage Test" menu item to "ON". The output voltage (Voltage) is dis- played for checking. -
Page 57: Mains Power On/Off Equipment
Mains power Evidence of proper operation must be provided by measurement or visual inspection. on/off equipment AC and DC disconnection inspection (performed under no load) AC disconnection ® battery charging system must switch off DC disconnection ® battery charging system must stop charging Switch on AC and DC The correct operation of the indicators and controls must be checked. -
Page 58: Documentation
If an individual test cannot be performed, the resulting decision must be justified and documented by the examiner Any device that fails a test must be clearly marked as unsafe and the operator informed. The device may no longer be used. The "Safety inspection" test record is available on the Fronius Partnerweb. - Page 60 FRONIUS INTERNATIONAL GMBH Froniusstraße 1 A-4643 Pettenbach AUSTRIA contact@fronius.com www.fronius.com Under www.fronius.com/contact you will find the addresses of all Fronius Sales & Service Partners and locations.
Need help?
Do you have a question about the Selectiva 2040 and is the answer not in the manual?
Questions and answers