Xerox 7220 User Manual
Color multifunction printer
Hide thumbs
Also See for 7220:
- User manual (302 pages) ,
- Information (61 pages) ,
- White paper (29 pages)

Related Manuals for Xerox 7220


Summary of Contents for Xerox 7220
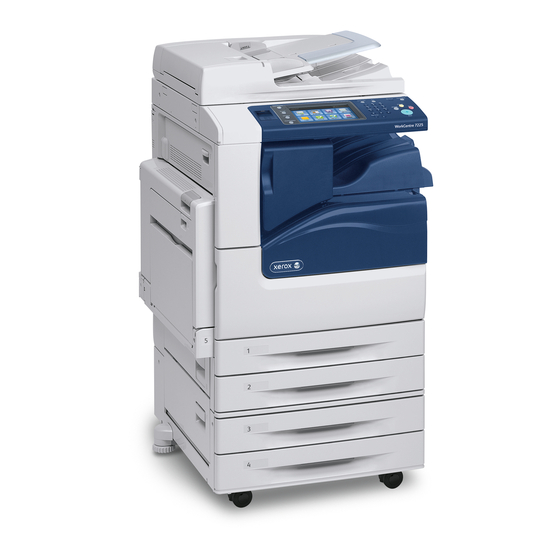
- Page 1 ® ® Xerox WorkCentre 7220/7220i/7225/7225i Color Multifunction Printer ® ® 2016 Xerox ConnectKey Technology User Guide...
- Page 2 © 2016 Xerox Corporation. All rights reserved. Unpublished rights reserved under the copyright laws of the United States. Contents of this publication may not be reproduced in any form without permission of Xerox Corporation. Copyright protection claimed includes all forms of matters of copyrightable materials and information now allowed by statutory or judicial law or hereinafter granted, including without limitation, material generated from the software programs which are displayed on the screen such as styles, templates, icons, screen displays, looks, and so on.
-
Page 3: Table Of Contents
Internet Services ......................32 Finding the IP Address of the Printer ......................33 Automatic Data Collection ..........................33 Billing and Usage Information ........................33 Xerox ConnectKey Apps ............................. 34 More Information ................................. 35 Welcome Center ..............................36 Installation and Setup ®... - Page 4 Glossy Cardstock ..............................68 Transparencies ............................... 69 Printing Printing Overview ................................72 Selecting Printing Options ............................73 Print Driver Help ..............................73 Windows Printing Options ..........................74 Macintosh Printing Options ..........................76 ® ® Xerox WorkCentre 7220/7220i/7225/7225i Color Multifunction Printer User Guide...
- Page 5 Output Format Settings ............................ 113 ID Card Copying ..............................121 Advanced Copying .............................. 125 Scanning Basic Scanning ................................128 Document Feeder ............................... 129 Document Glass ................................130 Scanning to a Folder ..............................131 ® ® Xerox WorkCentre 7220/7220i/7225/7225i Color Multifunction Printer User Guide...
- Page 6 Adding an Individual Entry to the Device Address Book ..............186 Editing an Individual Address Book Entry ....................187 Editing or Deleting Favorites in the Device Address Book ..............187 ® ® Xerox WorkCentre 7220/7220i/7225/7225i Color Multifunction Printer User Guide...
- Page 7 Jams ....................................228 Clearing Paper Jams ............................229 Clearing Jams in the Office Finisher LX ...................... 242 Minimizing Paper Jams ............................. 243 Troubleshooting Paper Jams .......................... 245 Clearing Staple Jams ............................248 ® ® Xerox WorkCentre 7220/7220i/7225/7225i Color Multifunction Printer User Guide...
- Page 8 United States FCC Regulations ........................284 Canada ..................................284 European Union Radio Interference ......................285 European Union Lot 4 Imaging Equipment Agreement Environmental Information ....285 Germany ................................. 287 Turkey RoHS Regulation ........................... 287 ® ® Xerox WorkCentre 7220/7220i/7225/7225i Color Multifunction Printer User Guide...
- Page 9 European Union ................................300 Domestic/Household Environment ......................300 Professional/Business Environment ......................300 Collection and Disposal of Equipment and Batteries ................301 Battery Symbol Note ............................301 Battery Removal ..............................301 Other Countries................................302 ® ® Xerox WorkCentre 7220/7220i/7225/7225i Color Multifunction Printer User Guide...
-
Page 11: Safety
• Environmental, Health, and Safety Contact Information ................19 Your printer and the recommended supplies have been designed and tested to meet strict safety requirements. Attention to the following information ensures the continued safe operation of your Xerox printer. ®... -
Page 12: Notices And Safety
® The safety and environment testing and performance of this product have been verified using Xerox materials only. Note: Unauthorized alterations, which can include the addition of new functions or connection of external devices, can affect the product certification. -
Page 13: Electrical Safety
® The safety and environment testing and performance of this product have been verified using Xerox materials only. Note: Unauthorized alterations, which can include the addition of new functions or connection of external devices, can affect the product certification. -
Page 14: Emergency Turn Off
Emergency Turn Off If any of the following conditions occur, turn off the printer immediately and disconnect the power cord from the electrical outlet. Contact an authorized Xerox service representative to correct the problem if: • The equipment emits unusual odors or makes unusual noises. -
Page 15: Operational Safety
Keep hands, hair, neckties, and so on away from the exit and feed rollers. • Covers, which require tools for removal, protect the hazard areas within the printer. Do not remove the protective covers. ® ® Xerox WorkCentre 7220/7220i/7225/7225i Color Multifunction Printer User Guide... -
Page 16: Printer Supplies
Total Satisfaction Guarantee do not cover damage, malfunction, or degradation of performance caused by use of non-Xerox supplies, or the use of Xerox supplies not specified for this printer. The Total Satisfaction Guarantee is available in the United States and Canada. Coverage could vary outside these areas. -
Page 17: Maintenance Safety
• Do not use aerosol cleaners. Clean with a dry lint-free cloth only. • Do not burn any consumables or routine maintenance items. For information on Xerox supplies recycling programs, go to www.xerox.com/gwa. ® ® Xerox... -
Page 18: Printer Symbols
Do not burn the item. Do not lift here. Hot surface. Wait the indicated time before handling. This item can be recycled. For details, see Recycling and Disposal on page 297. ® ® Xerox WorkCentre 7220/7220i/7225/7225i Color Multifunction Printer User Guide... -
Page 19: Environmental, Health, And Safety Contact Information
Safety Environmental, Health, and Safety Contact Information For more information on Environment, Health, and Safety in relation to this Xerox product and supplies, contact the following customer help lines: United States: 1-800 828-6571 Canada: 1-800 828-6571 Europe: +44 1707 353 434 For product safety information in the United States, go to www.xerox.com/environment. -
Page 21: Features
This chapter includes: • Parts of the Printer ................................22 • Information Pages ................................29 • Administration Features ..............................30 • Xerox ConnectKey Apps ..............................34 • More Information ................................35 ® ® Xerox WorkCentre 7220/7220i/7225/7225i Color Multifunction Printer User Guide... -
Page 22: Parts Of The Printer
Document Feeder ................................25 • Control Panel ..................................25 • Integrated Office Finisher ............................27 • Office Finisher LX ................................27 • Wireless Network Adapter ............................28 Left Front View ® ® Xerox WorkCentre 7220/7220i/7225/7225i Color Multifunction Printer User Guide... -
Page 23: Right Rear View
3. USB Ports, Type A 10. Door A 4. Controller LED 11. Door D 5. Ethernet Connection 12. Door B 6. Data Port, Service 13. Door C 7. Feature Card Slot 14. Leveler Foot ® ® Xerox WorkCentre 7220/7220i/7225/7225i Color Multifunction Printer User Guide... -
Page 24: Telephone And Fax Connection
Features Telephone and Fax Connection 1. Line 1 2. Line 2 Internal Components ® ® Xerox WorkCentre 7220/7220i/7225/7225i Color Multifunction Printer User Guide... -
Page 25: Document Feeder
Provides access to information pages. • Prompts you to load paper, replace supplies, and clear jams. • Displays errors and warnings. • Connects to a USB Flash drive for scan and print access. ® ® Xerox WorkCentre 7220/7220i/7225/7225i Color Multifunction Printer User Guide... - Page 26 16. Machine Status displays the status of the printer on the touch screen. 17. USB Port provides USB Flash drive connection for storage use in Scan to USB and Print from USB functions. ® ® Xerox WorkCentre 7220/7220i/7225/7225i Color Multifunction Printer User Guide...
-
Page 27: Integrated Office Finisher
Features Integrated Office Finisher Staple Cartridge Center Tray Finisher Front Door Integrated Office Finisher Finisher Top Cover Office Finisher LX ® ® Xerox WorkCentre 7220/7220i/7225/7225i Color Multifunction Printer User Guide... -
Page 28: Wireless Network Adapter
WEP, WPA, WPA2, and 802.1X standard port-based network access control. ® The wireless network adapter allows multiple users on a wireless LAN to print to and scan from Xerox printers. The wireless network adapter also supports printers that include network scan and fax features. -
Page 29: Information Pages
Touch Print. ® ® Note: Information pages can also be printed from Xerox CentreWare Internet Services. Printing the Configuration Report At the printer control panel, press the Machine Status button. On the Machine Information tab, touch Information Pages > Configuration Report > Print. -
Page 30: Administration Features
If the administrator configures local or network authentication, you identify yourself by typing your user ® ® name and password at the control panel or in Xerox CentreWare Internet Services. If the administrator configures card reader authentication, you identify yourself by swiping a magnetic or proximity card at the control panel and typing a passcode. - Page 31 The administrator can also generate reports listing usage data for individual users and groups. For details, see the System Administrator Guide at www.xerox.com/office/WC7220_WC7225docs. Logging In Logging in is the process by which you identify yourself to the printer for authentication.
-
Page 32: Xerox ® Centreware ® Internet Services
Services or at the control panel. Most printer models have a default configuration that restricts access to ® ® some settings. Access is restricted for settings on the Properties tab in Xerox CentreWare Internet Services, and settings on the Tools tab on the control panel touch screen. -
Page 33: Finding The Ip Address Of The Printer
Xerox cannot read, view, or download the content of your documents residing on or passing through your printer or any of your information management systems. -
Page 34: Xerox Connectkey Apps
ConnectKey Apps available for use with your ConnectKey device. ConnectKey Apps extend the capabilities of your ConnectKey devices. Xerox QR Code: You can use this App to link your mobile applications with ConnectKey devices. You • ® can also use the QR Code App to access information about related Xerox Mobile Apps. -
Page 35: More Information
Third party and open source software To locate third party and open source software disclosure notices and terms and conditions, go to the product page at: • www.xerox.com/office/WC7220_WC7225support • www.xerox.com/office/WC7220i_WC7225i_support ® ® Xerox WorkCentre 7220/7220i/7225/7225i Color Multifunction Printer User Guide... -
Page 36: Welcome Center
The name and location of your company. Locating the Serial Number To contact Xerox for assistance, you need the printer serial number. The serial number is behind door A, toward the rear of the printer on a metal plate. To view the serial number at the printer control panel, press the Machine Status button, then touch the Machine Information tab. -
Page 37: Installation And Setup
Installation and Setup Overview ..........................38 • Modifying General Settings ............................42 • Installing the Software ..............................44 See also: Installation Guide packaged with your printer. System Administrator Guide at www.xerox.com/office/WC7220_WC7225docs. ® ® Xerox WorkCentre 7220/7220i/7225/7225i Color Multifunction Printer User Guide... -
Page 38: Installation And Setup Overview
Routers, network hubs, network switches, modems, Ethernet cables, and USB cables are not included with your printer and must be purchased separately. Xerox recommends an Ethernet ® connection because it is typically faster than a USB connection, and it provides access to Xerox ® CentreWare Internet Services. -
Page 39: Turning The Printer On And Off
Do not plug or unplug the power cord while the power switch is in the On position. To turn on the printer: Open the front door. Turn on the main power switch. ® ® Xerox WorkCentre 7220/7220i/7225/7225i Color Multifunction Printer User Guide... -
Page 40: Initial Printer Setup
IP address for the Ethernet network connection. If the printer has not been previously turned on and configured, see the System Administrator Guide at www.xerox.com/office/WC7220_WC7225docs. ® ® Xerox WorkCentre 7220/7220i/7225/7225i Color Multifunction Printer User Guide... -
Page 41: Usb Cover
USB port, the port is still active. For details on enabling or disabling USB ports, see the System Administrator Guide at www.xerox.com/office/WC7220_WC7225docs. You can find the USB cover and installation instructions in the compartment inside of tray 1. -
Page 42: Modifying General Settings
Scheduled Settings. • Touch a day of the week in the list. • To allow the printer to wake when it senses activity on that day, touch Activity. ® ® Xerox WorkCentre 7220/7220i/7225/7225i Color Multifunction Printer User Guide... -
Page 43: Setting The Date And Time At The Control Panel
Note: The date and time are set automatically through Network Time Protocol (NTP). To modify ® ® these settings, go to the Properties tab in Xerox CentreWare Internet Services and change the Date and Time Setup to Manual (NTP Disabled). -
Page 44: Installing The Software
Installing Drivers and Utilities for Windows ® ® To access all the features of your printer, install the Xerox print driver and the Xerox scan driver. To install the print and scan driver software: Insert the Software and Documentation disc into the appropriate drive on your computer. The installer starts automatically. -
Page 45: Installing Drivers And Utilities For Macintosh Os X Version 10.5 And Later
Installing Drivers and Utilities for Macintosh OS X Version 10.5 and Later ® ® To access all the features of your printer, install the Xerox print driver and the Xerox scan driver. To install the print and scan driver software: Insert the Software and Documentation disc into the appropriate drive on your computer. -
Page 46: Installing Drivers And Utilities For Unix And Linux
Services for UNIX Systems is a two part installation process. It requires the installation of a ® ® Xerox Services for UNIX Systems code package and a printer support package. The Xerox Services for UNIX Systems code package must be installed before installing the printer support package. Note: To install the UNIX print drivers on your computer, you require root or superuser privileges. -
Page 47: Other Drivers
To begin downloading, click the Start button. ® Repeat steps a and b, then click the printer package for use with the Xerox Services for UNIX Systems package that you selected earlier. The second part of the driver package is ready for download. -
Page 49: Paper And Media
Paper and Media This chapter includes: • Supported Paper ................................50 • Loading Paper ................................... 54 • Printing on Special Paper .............................. 62 ® ® Xerox WorkCentre 7220/7220i/7225/7225i Color Multifunction Printer User Guide... -
Page 50: Supported Paper
Your printer is designed to use various paper and other media types. To ensure the best print quality and to avoid jams, follow the guidelines in this section. For best results, use Xerox paper and media recommended for your printer. Recommended Media A list of paper and media recommended for your printer is available at: •... -
Page 51: Paper That Can Damage Your Printer
Warranty, Service Agreement, or Xerox Total Satisfaction Guarantee does ® not cover damage caused by using unsupported paper or special media. The Xerox Total Satisfaction Guarantee is available in the United States and Canada. Coverage could vary outside these areas. Contact your Xerox representative for details. -
Page 52: Supported Paper Types And Weights For 1-Sided Printing
Monarch envelope (98 x 190 mm, 3.9 x 7.5 in.) DL envelope (110 x 220 mm, 4.33 x 8.66 in.) No. 10 envelope (241 x 105 mm, 4.1 x 9.5 in.) ® ® Xerox WorkCentre 7220/7220i/7225/7225i Color Multifunction Printer User Guide... -
Page 53: Supported Paper Sizes And Weights For Automatic 2-Sided Printing
Width: 140–297 mm (5.5–11.7 in.) Length: 182–432 mm (7.2–17 in.) Tray 5 Width: 89–297 mm (3.5–11.7 in.) Length: 98–432 mm (3.9–17 in.) Envelope Tray Width: 148–241 mm (5.8–9.5 in.) Length: 98–162 mm (3.9–6.4 in.) ® ® Xerox WorkCentre 7220/7220i/7225/7225i Color Multifunction Printer User Guide... -
Page 54: Loading Paper
Remove any paper that is a different size or type. Move the length and width guides out: Pinch the guide lever on each guide. Slide the guides outward until they stop. Release the levers. ® ® Xerox WorkCentre 7220/7220i/7225/7225i Color Multifunction Printer User Guide... - Page 55 Load labels face up with the top edge to the right. Note: Do not load paper above the maximum fill line. Overfilling the tray can cause the printer to jam. ® ® Xerox WorkCentre 7220/7220i/7225/7225i Color Multifunction Printer User Guide...
- Page 56 . Configure the desired tray settings, for details see Note: If this feature does not appear, log in as a system administrator. For details, see Logging In as the System Administrator at the Control Panel on page 32. ® ® Xerox WorkCentre 7220/7220i/7225/7225i Color Multifunction Printer User Guide...
-
Page 57: Loading Paper In Tray 5
Load hole punched paper with the holes to the right. − Load labels face down with the top edge toward the front of the tray. ® ® Xerox WorkCentre 7220/7220i/7225/7225i Color Multifunction Printer User Guide... - Page 58 To confirm the paper size, type, and color when a tray is set to Fully Adjustable, touch Confirm. − To select a new paper size, touch Size. To select a new paper type, touch Type. To select a new paper color, touch Color. When finished, touch Confirm. ® ® Xerox WorkCentre 7220/7220i/7225/7225i Color Multifunction Printer User Guide...
-
Page 59: Setting The Guide Locks In The 500-Sheet Adjustable Trays
Pry up the retainer with your fingertip, pulling the lower edge toward you. To engage the fine-adjustment block, pinch the levers and slide the guide lock to the left as shown. ® ® Xerox WorkCentre 7220/7220i/7225/7225i Color Multifunction Printer User Guide... -
Page 60: Changing Paper Size, Type, And Color
To confirm the paper size, type, and color when a tray is set to Fully Adjustable, touch Confirm. − To select a new paper size, touch Size. To select a new paper type, touch Type. To select a new paper color, touch Color. When finished, touch Confirm. ® ® Xerox WorkCentre 7220/7220i/7225/7225i Color Multifunction Printer User Guide... -
Page 61: Changing Paper Size, Type, And Color
If that tray is empty, the printer uses paper from the Priority 2 tray. Touch OK. Note: To access the Paper Management menu, you can be required to log in as the system administrator. For details, see the System Administrator Guide at www.xerox.com/office/WC7220_WC7225docs. ® ® Xerox WorkCentre 7220/7220i/7225/7225i Color Multifunction Printer User Guide... -
Page 62: Printing On Special Paper
Do not use envelopes with heat activated glue. • Do not use envelopes with press and seal flaps. • Use only paper envelopes. • Do not use envelopes with windows or metal clasps. ® ® Xerox WorkCentre 7220/7220i/7225/7225i Color Multifunction Printer User Guide... - Page 63 Adjust the width guides to fit the envelopes. Set the paper size, type, and color at the control panel. For details, see Changing Paper Size, Type, and Color on page 60. ® ® Xerox WorkCentre 7220/7220i/7225/7225i Color Multifunction Printer User Guide...
-
Page 64: Loading The Envelope Tray
Adjust the paper guides so they rest lightly against the edges of the envelopes. Close the tray. Set the paper size, type, and color at the control panel. For details, see Changing Paper Size, Type, and Color on page 60. ® ® Xerox WorkCentre 7220/7220i/7225/7225i Color Multifunction Printer User Guide... -
Page 65: Labels
Do not use any sheet where labels are missing, curled, or pulled away from the backing sheet. It could damage the printer. Loading Labels in Trays 1–4 Pull out the tray until it stops. ® ® Xerox WorkCentre 7220/7220i/7225/7225i Color Multifunction Printer User Guide... - Page 66 Loading Labels in Tray 5 Open tray 5, then pull out the extension tray for larger sizes. If the extension tray is already opened, remove any paper that is a different size or type. ® ® Xerox WorkCentre 7220/7220i/7225/7225i Color Multifunction Printer User Guide...
- Page 67 Do not load paper above the maximum fill line. Overfilling the tray can cause the printer to jam. • To avoid jams and misfeeds, do not remove paper from its packaging until you are ready to use ® ® Xerox WorkCentre 7220/7220i/7225/7225i Color Multifunction Printer User Guide...
-
Page 68: Glossy Cardstock
Rotate stock frequently. Long periods of storage in extreme conditions can cause glossy cardstock to curl and jam in the printer. • In the print driver software, select the desired glossy cardstock type or select the tray loaded with the desired paper. ® ® Xerox WorkCentre 7220/7220i/7225/7225i Color Multifunction Printer User Guide... -
Page 69: Transparencies
For striped transparencies, load face up with the non-stripe edge leading into the printer. • Do not fan transparencies. • In the print driver software, for the paper type, select Transparency. ® ® Xerox WorkCentre 7220/7220i/7225/7225i Color Multifunction Printer User Guide... -
Page 71: Printing
Selecting Printing Options ............................73 • Managing Jobs .................................. 77 • Printing Features ................................80 • Printing Special Job Types ............................89 • Held Print Jobs ................................... 95 • Print From ................................... 96 ® ® Xerox WorkCentre 7220/7220i/7225/7225i Color Multifunction Printer User Guide... -
Page 72: Printing Overview
Select your printer. ® Access the print driver settings by selecting Properties or Preferences for Windows, or Xerox Features for Macintosh. The title of the button can vary depending on your application. Modify the print driver settings as necessary, then click OK. -
Page 73: Selecting Printing Options
Preferences window. Use the Contents tab to find explanations for each of the fields and areas in Printing Preferences. • Search provides a field where you can enter the topic or function for which you need information. ® ® Xerox WorkCentre 7220/7220i/7225/7225i Color Multifunction Printer User Guide... -
Page 74: Windows Printing Options
Click a tab in the Properties window, then make selections. To save your selections and close the Properties window, click OK. To send the job to the printer, click OK. ® ® Xerox WorkCentre 7220/7220i/7225/7225i Color Multifunction Printer User Guide... -
Page 75: Selecting Finishing Options For Windows
Type a name for the set of printing options, then to save the set of options in the Saved Settings list, click OK. To print using these options, select the name from the list. ® ® Xerox WorkCentre 7220/7220i/7225/7225i Color Multifunction Printer User Guide... -
Page 76: Macintosh Printing Options
Click Print to send the job to the printer. Selecting Finishing Options for Macintosh ® If your printer has a finisher installed, select finishing options in the Xerox Features of the print driver. To select finishing options in the Macintosh print driver: ®... -
Page 77: Managing Jobs
OK. To view completed jobs, touch the Completed Jobs tab. − To refine the list, use the drop-down menu. To see details about a job, touch the job. ® ® Xerox WorkCentre 7220/7220i/7225/7225i Color Multifunction Printer User Guide... -
Page 78: Managing Secure And Held Print Jobs
Examples are a job sent from a DOS or UNIX window ® ® using LPR, Port 9100, or from the Jobs tab in Xerox CentreWare Internet Services. To view a list of the unidentified jobs and release them: Touch the Unidentified Print Jobs tab. -
Page 79: Managing Jobs In Xerox ® Centreware ® Internet Services
Internet Services ® ® You can view a list of active jobs and delete print jobs from the Active Jobs list in Xerox CentreWare ® Internet Services. You can also print, copy, move, or delete saved jobs. For details, see the Help in Xerox ®... -
Page 80: Printing Features
2-Sided Page Layout Options You can specify the page layout for 2-sided printing, which determines how the printed pages turn. These settings override the application page orientation settings. ® ® Xerox WorkCentre 7220/7220i/7225/7225i Color Multifunction Printer User Guide... -
Page 81: Selecting Paper Options For Printing
When printing a multiple-page document, you can print more than one page on a single sheet of paper. Print 1, 2, 4, 6, 9, or 16 pages per side by selecting Pages Per Sheet on the Page Layout tab. Page Layout is on the Document Options tab. ® ® Xerox WorkCentre 7220/7220i/7225/7225i Color Multifunction Printer User Guide... -
Page 82: Printing Booklets
72. The Color Correction tab provides standard color modes. Xerox Black and White: This feature converts all color in the document to black and white or shades of gray. For best printing results of mixed text, graphics, and images on a range of supported paper, set the Color Correction to Xerox Automatic Color. -
Page 83: Using Special Pages
No Covers does not print cover pages. No cover pages are added to the document. Front Only prints the first page on paper from the specified tray. • • Back Only prints the back page on paper from the specified tray. ® ® Xerox WorkCentre 7220/7220i/7225/7225i Color Multifunction Printer User Guide... -
Page 84: Printing Insert Pages
2-Sided Print prints the exception pages on both sides of the paper and flips the pages on the − long edge. The job then can be bound on the long edge of the pages. ® ® Xerox WorkCentre 7220/7220i/7225/7225i Color Multifunction Printer User Guide... -
Page 85: Scaling
The Original Document Size is scaled to fit on the selected output paper size shown in the Output Paper Size field. Manually Scale: You can use this option to change the output print size by a specified − percentage. ® ® Xerox WorkCentre 7220/7220i/7225/7225i Color Multifunction Printer User Guide... -
Page 86: Printing Watermarks
Blend: This option combines the watermark with the text and graphics in the document. A blended watermark is translucent, so you can see both the watermark and the document content. ® ® Xerox WorkCentre 7220/7220i/7225/7225i Color Multifunction Printer User Guide... -
Page 87: Printing Mirror Images
Enter the height and width of the new custom size. Click Print Margins, then select the printer from the list. Or set the top, bottom, right, and left margins. To save the settings, click OK. ® ® Xerox WorkCentre 7220/7220i/7225/7225i Color Multifunction Printer User Guide... -
Page 88: Selecting Job Completion Notification For Windows
This feature is available on a computer printing to a network printer. To be notified when your print job completes: In the print driver, click the Advanced tab. Click Notification > Notify for Completed Jobs > Enabled. Click OK. ® ® Xerox WorkCentre 7220/7220i/7225/7225i Color Multifunction Printer User Guide... -
Page 89: Printing Special Job Types
Then you can use the default passcode for all print jobs sent from that computer. If you must use a different passcode, you can override it in the application print driver. ® ® Xerox WorkCentre 7220/7220i/7225/7225i Color Multifunction Printer User Guide... - Page 90 The passcode is associated with your user name. After you set a passcode, it becomes the ® default passcode for any print job that requires a passcode on all Xerox printers. You can reset the passcode at any time from any window that contains the passcode.
-
Page 91: Sample Set
Touch Held Print Jobs or Active Jobs, then select a folder. Touch the corresponding print job in the list. Touch Print. The remainder of the job prints, then the printer deletes the job from the printer hard drive. ® ® Xerox WorkCentre 7220/7220i/7225/7225i Color Multifunction Printer User Guide... -
Page 92: Delay Print
The print driver retains 10 names. When adding an 11th name, the name used least is deleted automatically from the list. To remove names from the list other than the selected name, select Clear List. ® ® Xerox WorkCentre 7220/7220i/7225/7225i Color Multifunction Printer User Guide... - Page 93 Click the arrow to the right of the field, then select a folder name from the list. − Click the arrow to the right of the field, then select Default Public Folder. ® ® Xerox WorkCentre 7220/7220i/7225/7225i Color Multifunction Printer User Guide...
- Page 94 12. To send the job to the printer, in the Print window, select the number of copies to print, then click OK or Print. After the job is saved, you can print it as needed. For details, see Printing from Saved Jobs. ® ® Xerox WorkCentre 7220/7220i/7225/7225i Color Multifunction Printer User Guide...
-
Page 95: Held Print Jobs
To determine why a job was held, touch the job, then touch Details. Do one of the following: To release a held job, touch the job, then touch Print. − − To release all held jobs, touch Print All. ® ® Xerox WorkCentre 7220/7220i/7225/7225i Color Multifunction Printer User Guide... -
Page 96: Print From
• The system administrator must set up this feature before you can use it. For details, see the System Administrator Guide at www.xerox.com/office/WC7220_WC7225docs. To print from a USB Flash drive: Insert your USB Flash drive in the USB port on the printer control panel. The Print from USB window appears. -
Page 97: Printing From Mailbox
CentreWare Internet Services ® ® You can print .pdf, .ps, .pcl, and .xps files directly from Xerox CentreWare Internet Services without having to open another application or the print driver. The files can be stored on a local computer hard drive, mass storage device, or network drive. -
Page 99: Copying
Copying This chapter includes: • Basic Copying .................................. 100 • Selecting Copy Settings ............................... 102 ® ® Xerox WorkCentre 7220/7220i/7225/7225i Color Multifunction Printer User Guide... -
Page 100: Basic Copying
• The document glass accepts paper sizes up to 297 x 432 mm (11.7 x 17 in.). • The document glass automatically detects standard paper sizes. ® ® Xerox WorkCentre 7220/7220i/7225/7225i Color Multifunction Printer User Guide... -
Page 101: Document Feeder
432 mm (11.7 x 17 in.) for 2-sided pages. • The maximum feeder capacity is approximately 110 sheets of 80 g/m² paper. • The document feeder automatically detects standard paper sizes. ® ® Xerox WorkCentre 7220/7220i/7225/7225i Color Multifunction Printer User Guide... -
Page 102: Selecting Copy Settings
Basic Settings .................................. 103 • Image Quality Settings ..............................107 • Layout Settings ................................110 • Output Format Settings ............................... 113 • ID Card Copying ................................121 • Advanced Copying ................................. 125 ® ® Xerox WorkCentre 7220/7220i/7225/7225i Color Multifunction Printer User Guide... -
Page 103: Basic Settings
Auto Detect: The device detects the color content in the original document. If the original is a color document, the printer makes copies in full color. If the original is a black and white document, the printer makes copies in black only. ® ® Xerox WorkCentre 7220/7220i/7225/7225i Color Multifunction Printer User Guide... - Page 104 Plus (+) and Minus (-) buttons. • Preset (Y / X): This option allows you to select from a list of preset values. For additional options, touch More. ® ® Xerox WorkCentre 7220/7220i/7225/7225i Color Multifunction Printer User Guide...
- Page 105 The document feeder automatically copies both sides of the 2-sided original. − A message appears on the control panel when it is time to place the next original on the document glass. ® ® Xerox WorkCentre 7220/7220i/7225/7225i Color Multifunction Printer User Guide...
-
Page 106: Stapling Copies
To change the orientation of the page, touch Original Orientation, then select an option. To change the paper source, touch Paper Supply, then select an option. Touch OK. To enable the hole punch feature, touch Hole Punch, then select an option. Touch OK. ® ® Xerox WorkCentre 7220/7220i/7225/7225i Color Multifunction Printer User Guide... -
Page 107: Image Quality Settings
Touch the Image Quality tab, then touch Image Options. On the Image Options screen, adjust the sliders as needed: Lighten/Darken: Lightens or darkens the image. − − Sharpness: Sharpens or softens the image. Touch OK. ® ® Xerox WorkCentre 7220/7220i/7225/7225i Color Multifunction Printer User Guide... - Page 108 Manual Contrast allows you to adjust the contrast manually. To increase or decrease the contrast, move the Manual Contrast slider up or down. The middle position on the slider, Normal, does not change the contrast. Touch OK. ® ® Xerox WorkCentre 7220/7220i/7225/7225i Color Multifunction Printer User Guide...
-
Page 109: Adjusting The Color Balance
On the Color Balance screen, touch Advanced Color. Touch the color you want to adjust. Move the sliders to adjust the levels for highlights, midtones, and shadows. Repeat the previous two steps for additional colors. Touch OK. ® ® Xerox WorkCentre 7220/7220i/7225/7225i Color Multifunction Printer User Guide... -
Page 110: Layout Settings
Mixed Size Originals: You can scan standard-size originals of varying sizes. Use the diagram on the screen to determine which original sizes can be mixed in the same job. Touch OK. ® ® Xerox WorkCentre 7220/7220i/7225/7225i Color Multifunction Printer User Guide... -
Page 111: Shifting The Image
You can use preset values that were previously saved by the system administrator. Touch Presets in the lower left corner of the screen, and select a preset from the drop-down menu. Touch OK. ® ® Xerox WorkCentre 7220/7220i/7225/7225i Color Multifunction Printer User Guide... - Page 112 On the Invert Image screen, select an option: Mirror Image reflects each image left to right on the page. − − Negative Image reverses the black and white values. Touch OK. ® ® Xerox WorkCentre 7220/7220i/7225/7225i Color Multifunction Printer User Guide...
-
Page 113: Output Format Settings
Touch 2-Sided Originals or 2-Sided, Rotate Side 2. To select a paper tray: Touch Paper Supply. Touch the desired tray. Touch OK. If your printer has a finisher installed, for Fold and Staple, select options. Touch OK. ® ® Xerox WorkCentre 7220/7220i/7225/7225i Color Multifunction Printer User Guide... - Page 114 Touch OK. The options that you select appear on the Special Pages screen. To edit or delete a special page entry, touch the entry in the list, then from the menu, touch the desired action. 10. Touch OK. ® ® Xerox WorkCentre 7220/7220i/7225/7225i Color Multifunction Printer User Guide...
- Page 115 Touch the Output Format tab, then touch Special Pages > Inserts. If Paper Supply is set to Auto Paper Select, the Paper Conflict screen appears. Select the desired paper tray, then touch OK. ® ® Xerox WorkCentre 7220/7220i/7225/7225i Color Multifunction Printer User Guide...
- Page 116 To specify a single page as an exception, enter that page number as the start and end of the range. To specify the paper to use for the exception pages: Touch Paper Supply. Touch the tray that contains paper to use for the exception pages. Touch OK. ® ® Xerox WorkCentre 7220/7220i/7225/7225i Color Multifunction Printer User Guide...
- Page 117 To change the text formatting, touch Format & Style, choose the desired settings, then touch To insert the current date: Touch Date > On. Touch Apply To, then select an option. Under Format, select a format for the date. ® ® Xerox WorkCentre 7220/7220i/7225/7225i Color Multifunction Printer User Guide...
- Page 118 For Transparency Supply, touch the tray that contains the transparencies. If the tray that contains the transparencies does not appear, touch More, touch the desired tray, then touch OK. Touch OK. ® ® Xerox WorkCentre 7220/7220i/7225/7225i Color Multifunction Printer User Guide...
- Page 119 To rotate the paper, select the Rotate Background check box. − Auto Repeat: This option allows the printer to determine the maximum number of images that can fit on the paper size that is currently selected. ® ® Xerox WorkCentre 7220/7220i/7225/7225i Color Multifunction Printer User Guide...
- Page 120 Copying Touch Original Orientation, then from the menu, select the orientation option desired. The sample page shows the image layout. Touch OK. ® ® Xerox WorkCentre 7220/7220i/7225/7225i Color Multifunction Printer User Guide...
-
Page 121: Id Card Copying
Press the green Start button, or touch Scan Front on the touch screen. The document scans and the Scan Back button appears on the touch screen. ® ® Xerox WorkCentre 7220/7220i/7225/7225i Color Multifunction Printer User Guide... - Page 122 To use the alphanumeric keypad to reduce or enlarge the percentage, touch the current value displayed, then type a value. • Preset: This option allows you to select from a list of preset values. For additional options, touch More. ® ® Xerox WorkCentre 7220/7220i/7225/7225i Color Multifunction Printer User Guide...
- Page 123 Press the Services Home button, then touch ID Card Copy. For Front Side Features or Back Side Features, touch Edit. To lighten or darken the image, for Lighten/Darken, adjust the slider up or down. Touch OK. ® ® Xerox WorkCentre 7220/7220i/7225/7225i Color Multifunction Printer User Guide...
- Page 124 To change Background Suppression: Press the Services Home button, then touch ID Card Copy. For Front Side Features or Back Side Features, touch Edit. For Background Suppression, touch Auto Suppression. Touch OK. ® ® Xerox WorkCentre 7220/7220i/7225/7225i Color Multifunction Printer User Guide...
-
Page 125: Advanced Copying
For Quantity for Final Job, to enter the number of copies, use the alphanumeric keypad. In the corner of the Build Job screen, touch Submit Job. To cancel the job, touch Delete All Segments. ® ® Xerox WorkCentre 7220/7220i/7225/7225i Color Multifunction Printer User Guide... -
Page 126: Printing A Sample Copy
Touch the desired saved setting. To delete a saved setting, touch the setting, then touch Delete Settings. Note: Touch Load Settings. The saved settings are loaded for the current copy job. ® ® Xerox WorkCentre 7220/7220i/7225/7225i Color Multifunction Printer User Guide... -
Page 127: Scanning
The system administrator must set up this feature before you can use it. For details, see the System Administrator Guide at www.xerox.com/office/WC7220_WC7225docs. ® ® If the system administrator enables Remote Start in Xerox CentreWare Internet Services, you can scan images directly from the scanner to a PC. Using Microsoft Clip Organizer, you can scan, import, and store images from the printer. -
Page 128: Basic Scanning
The printer must be connected to a network to retrieve a scan file remotely. ® ® • For details, see the Help in Xerox CentreWare Internet Services. • Print, copy, and fax jobs can print while you are scanning original documents or downloading files from the printer hard drive. -
Page 129: Document Feeder
432 mm (11.7 x 17 in.) for 2-sided pages. • The maximum feeder capacity is approximately 110 sheets of 80 g/m² paper. • The document feeder automatically detects standard paper sizes. ® ® Xerox WorkCentre 7220/7220i/7225/7225i Color Multifunction Printer User Guide... -
Page 130: Document Glass
• The document glass accepts paper sizes up to 297 x 432 mm (11.7 x 17 in.). • The document glass automatically detects standard paper sizes. ® ® Xerox WorkCentre 7220/7220i/7225/7225i Color Multifunction Printer User Guide... -
Page 131: Scanning To A Folder
Scanning to a folder is the simplest scanning method. When you scan an image at the printer, the scan ® ® file is stored in a folder on the internal hard drive. You then use Xerox CentreWare Internet Services to retrieve the stored scan file to your computer. -
Page 132: Scanning To A Private Folder
In the Confirm Folder Password field, type the password again. Click Apply. ® ® Your private folder appears in the folder list in Xerox CentreWare Internet Services and on the printer touch screen under Pick a Workflow. The contents are stored on the printer hard drive. -
Page 133: Retrieving Scan Files
Scanning Retrieving Scan Files ® ® To retrieve your scanned images, use Xerox CentreWare Internet Services to copy the scan files from the printer to your computer. To retrieve your scan files: At your computer, open a Web browser, in the address field, type the IP address of the printer, then press Enter or Return. -
Page 134: Scanning To Network File Repositories
The template defines the scan settings as well as the destination of the image. To change any of the scan settings, on the Workflow Scanning screen, select options. For details, see Setting Scan Options on page 137. Press the green Start button. ® ® Xerox WorkCentre 7220/7220i/7225/7225i Color Multifunction Printer User Guide... -
Page 135: Adding A Scan Destination
Use the login name for the computer that holds the destination folder. The login name can include the domain name also, such as domain name\login name. 12. Click Add. The template is stored on the printer hard drive. ® ® Xerox WorkCentre 7220/7220i/7225/7225i Color Multifunction Printer User Guide... -
Page 136: Scanning To Your Home Directory
To change any of the scan settings, on the Workflow Scanning screen, select options. For more options, touch the Advanced Settings tab. For details, see Selecting Advanced Settings. Press the green Start button. ® ® Xerox WorkCentre 7220/7220i/7225/7225i Color Multifunction Printer User Guide... -
Page 137: Setting Scan Options
Upright Images and Sideways Images refer to the direction the originals are loaded in • the document feeder. Portrait Originals and Landscape Originals refer to the images on the originals. • Touch OK. ® ® Xerox WorkCentre 7220/7220i/7225/7225i Color Multifunction Printer User Guide... -
Page 138: Selecting Advanced Settings
Black & White: Scans in black and white only. • • Grayscale: Detects and scans various shades of gray. • Color: Scans in full color. Touch OK. ® ® Xerox WorkCentre 7220/7220i/7225/7225i Color Multifunction Printer User Guide... - Page 139 On the Saturation screen, adjust the sliders to make the image more vivid or more pastel. Touch OK. To set the resolution: Touch Resolution. On the Resolution screen, select a resolution from 72 dpi through 600 dpi. Touch OK. ® ® Xerox WorkCentre 7220/7220i/7225/7225i Color Multifunction Printer User Guide...
-
Page 140: Selecting Layout Adjustments
Touch Blank Page Management. Select an option: • Include Blank Pages: This option includes scanned pages that are blank. • Remove Blank Pages: This option omits scanned pages that are blank. Touch OK. ® ® Xerox WorkCentre 7220/7220i/7225/7225i Color Multifunction Printer User Guide... -
Page 141: Selecting Filing Options
To set the quality and file size: Touch Quality/File Size. To select a setting, use the slider. The settings range from Highest Compression/Smallest File Size to Lowest Compression/Largest File Size. Touch OK. ® ® Xerox WorkCentre 7220/7220i/7225/7225i Color Multifunction Printer User Guide... -
Page 142: Building A Scan Job
Program and scan all segments, then touch Submit Job. The Job Progress screen appears, and the individual segments are scanned as a single job. Note: If necessary, touch Delete > Delete Job to cancel the job. ® ® Xerox WorkCentre 7220/7220i/7225/7225i Color Multifunction Printer User Guide... -
Page 143: Scanning To A Usb Flash Drive
Press the green Start button. The Job Progress screen appears, and the original is scanned. The file is stored on your USB Flash drive. Remove your USB Flash drive from the printer. ® ® Xerox WorkCentre 7220/7220i/7225/7225i Color Multifunction Printer User Guide... -
Page 144: Scanning To An Email Address
Press the Services Home button, then touch Email. Touch Device Address Book. Select the required Email contacts list from the menu. Touch Search, then use the touch screen keyboard to type part of the name. ® ® Xerox WorkCentre 7220/7220i/7225/7225i Color Multifunction Printer User Guide... -
Page 145: Setting Email Options
Under Password Protect, for PDF only, select an option: − No: Disables password protection for the file. Yes: Enables password protection. Touch Enter Password, then to enter a password, use the − touch screen keyboard. ® ® Xerox WorkCentre 7220/7220i/7225/7225i Color Multifunction Printer User Guide... - Page 146 Select the required contacts list from the menu. Touch Search, then use the touch screen keyboard to type part of the name. Touch Search. Select the desired name from the list, then touch Add. Touch OK. ® ® Xerox WorkCentre 7220/7220i/7225/7225i Color Multifunction Printer User Guide...
-
Page 147: Setting Encryption
Encryption helps ensure that email messages cannot be read by anyone other than the intended recipient. Note: The system administrator must set up this feature before you can use it. For details, see the System Administrator Guide at www.xerox.com/office/WC7220_WC7225docs. To set encryption: Touch the Email Options tab. Touch Encryption. -
Page 148: Scanning To A Destination
Options on page 137. To select the action to take if a file already exists: Touch the Filing Options tab. Touch If File Already Exists. Select an option. Touch OK. ® ® Xerox WorkCentre 7220/7220i/7225/7225i Color Multifunction Printer User Guide... - Page 149 Size to Lowest Compression/Largest File Size. Touch OK. Press the green Start button. The Job Progress screen appears, and the original is scanned. The file is stored as a file at the destination. ® ® Xerox WorkCentre 7220/7220i/7225/7225i Color Multifunction Printer User Guide...
-
Page 150: Scanning To A Computer
Scanning Scanning to a Computer ® ® If the system administrator enables Remote Start in Xerox CentreWare Internet Services, you can scan images directly from the scanner to a PC. Using Microsoft Clip Organizer, you can scan, import, and store images from the printer. -
Page 151: Using One-Touch Scanning
Changing the Basic Scan Settings on page 137. Press the green Start button. The Job Progress screen appears, and the original is scanned. The file is stored as a file at the destination. ® ® Xerox WorkCentre 7220/7220i/7225/7225i Color Multifunction Printer User Guide... -
Page 153: Faxing
Sending a LAN Fax ................................ 184 • Using the Address Book ............................... 186 The system administrator must set up this feature before you can use it. For details, see the System Administrator Guide at www.xerox.com/office/WC7220_WC7225docs. ® ® Xerox WorkCentre 7220/7220i/7225/7225i Color Multifunction Printer User Guide... -
Page 154: Configuring The Printer For Faxing
Note: Not all options listed are supported on all printers. Some options apply only to a specific printer model, configuration, operating system, or driver type. For details, see the System Administrator Guide at www.xerox.com/office/WC7220_WC7225docs. ® ® Xerox... -
Page 155: Basic Faxing
• The document glass accepts paper sizes up to 297 x 432 mm (11.7 x 17 in.). • The document glass automatically detects standard paper sizes. ® ® Xerox WorkCentre 7220/7220i/7225/7225i Color Multifunction Printer User Guide... -
Page 156: Document Feeder
432 mm (11.7 x 17 in.) for 2-sided pages. • The maximum feeder capacity is approximately 110 sheets of 80 g/m² paper. • The document feeder automatically detects standard paper sizes. ® ® Xerox WorkCentre 7220/7220i/7225/7225i Color Multifunction Printer User Guide... -
Page 157: Sending An Embedded Fax
To pause the job, press the Stop button. On the touch screen, touch Resume Scanning to continue the job, or Cancel Scanning to cancel the job completely. If you do not make a selection within 60 seconds, the job automatically resumes. ® ® Xerox WorkCentre 7220/7220i/7225/7225i Color Multifunction Printer User Guide... -
Page 158: Basic Fax Settings
Press the Services Home button, then touch Fax. To enter recipient details, touch an option or touch Skip. Touch Original Type. On the Original Type screen, touch the content type of the original document. Touch OK. ® ® Xerox WorkCentre 7220/7220i/7225/7225i Color Multifunction Printer User Guide... - Page 159 Mixed Size Originals: You can scan standard-size originals of varying sizes. Use the diagram on − the screen to determine which original sizes can be mixed in the same job. Touch OK. ® ® Xerox WorkCentre 7220/7220i/7225/7225i Color Multifunction Printer User Guide...
- Page 160 Touch the Image Quality tab, then touch Image Options. On the Image Options screen, adjust the sliders as needed. Lighten/Darken: Lightens or darkens the image. − − Sharpness: Sharpens or softens the image. Touch OK. ® ® Xerox WorkCentre 7220/7220i/7225/7225i Color Multifunction Printer User Guide...
-
Page 161: Selecting Reducing Or Splitting
Left Page Only: Scans the left page of the book. Right Page Only: Scans the right page of the book. − To set the amount to erase, touch the Binding Edge Erase arrows as needed. Touch OK. ® ® Xerox WorkCentre 7220/7220i/7225/7225i Color Multifunction Printer User Guide... -
Page 162: Selecting Fax Options
To enter recipient details, touch an option or touch Skip. Touch the Fax Options tab, then touch Confirmation Report. To generate a report for all fax jobs, touch Print Confirmation. Touch OK. ® ® Xerox WorkCentre 7220/7220i/7225/7225i Color Multifunction Printer User Guide... -
Page 163: Selecting The Starting Rate
To delete an existing comment, touch the comment, then touch X. To confirm the action, touch Delete. • To edit an existing comment, touch the comment, then touch the Edit icon. To change the comment, use the touch screen keyboard, then touch OK. Touch OK. ® ® Xerox WorkCentre 7220/7220i/7225/7225i Color Multifunction Printer User Guide... -
Page 164: Sending Header Text
Storing a Fax in a Local Mailbox The system administrator must create a mailbox before you can use this feature. For details, see the System Administrator Guide at www.xerox.com/office/WC7220_WC7225docs. To store a fax in a local mailbox: Press the Services Home button, then touch Fax. -
Page 165: Printing Local Mailbox Documents
Press the Services Home button, then touch Fax. Touch Mailboxes. Note: If the Fax tab is selected, touch Add Recipients, then touch Mailboxes. Touch Print From Mailbox. Touch Local Mailbox. Touch a mailbox from the list. ® ® Xerox WorkCentre 7220/7220i/7225/7225i Color Multifunction Printer User Guide... -
Page 166: Deleting Local Mailbox Documents
If a passcode is required, touch the Mailbox Passcode field, then to enter the four-digit mailbox passcode, use the keypad. Touch OK. To delete the contents of the mailbox after the device finishes printing, touch Empty Mailbox. To confirm, touch Empty Mailbox. ® ® Xerox WorkCentre 7220/7220i/7225/7225i Color Multifunction Printer User Guide... - Page 167 The printer can poll more than one remote device at a time. To print faxes stored for polling: Press the Services Home button, then touch Fax. Touch Polling. Note: If the Fax tab is selected, touch Add Recipients, then touch Polling. ® ® Xerox WorkCentre 7220/7220i/7225/7225i Color Multifunction Printer User Guide...
- Page 168 Touch an option. Touch Empty Fax Polling. To confirm, touch Empty Fax Polling again. Touch OK. Building a Fax Job For details, see Building a Fax Job on page 183. ® ® Xerox WorkCentre 7220/7220i/7225/7225i Color Multifunction Printer User Guide...
-
Page 169: Sending A Server Fax
Select more options as needed. For details, see Selecting Server Fax Options on page 172. Press the green Start button. The printer scans the pages and transmits the document when all pages have been scanned. ® ® Xerox WorkCentre 7220/7220i/7225/7225i Color Multifunction Printer User Guide... -
Page 170: Basic Server Fax Settings
Upright Images and Sideways Images refer to the direction the originals are loaded in the − document feeder. Note: If you use the document glass, place the original in the same orientation face down as it was face up. Touch OK. ® ® Xerox WorkCentre 7220/7220i/7225/7225i Color Multifunction Printer User Guide... - Page 171 Mixed Size Originals: You can scan standard-size originals of varying sizes. Use the diagram on − the screen to determine which original sizes can be mixed in the same job. Touch OK. ® ® Xerox WorkCentre 7220/7220i/7225/7225i Color Multifunction Printer User Guide...
-
Page 172: Selecting Server Fax Options
Press the Services Home button, then touch Server Fax. To enter recipient details, touch an option or touch Skip. Touch the Image Quality tab, then touch Image Enhancement. For Background Suppression, touch Auto Suppression. Touch OK. ® ® Xerox WorkCentre 7220/7220i/7225/7225i Color Multifunction Printer User Guide... - Page 173 Touch the Minute field, then touch the arrows to set a number. If your printer is set to display the 12-hour clock, touch AM or PM. − Touch OK. The fax is scanned and saved, then sent at the specified time. ® ® Xerox WorkCentre 7220/7220i/7225/7225i Color Multifunction Printer User Guide...
- Page 174 Faxing Building a Fax Job For details, see Building a Fax Job on page 183. ® ® Xerox WorkCentre 7220/7220i/7225/7225i Color Multifunction Printer User Guide...
-
Page 175: Sending An Internet Fax
Press the green Start button. 10. The printer scans the pages, then after all pages are scanned, it sends the document as an email attachment in .pdf or .tif file format. ® ® Xerox WorkCentre 7220/7220i/7225/7225i Color Multifunction Printer User Guide... -
Page 176: Basic Internet Fax Settings
Upright Images and Sideways Images refer to the direction the originals are loaded in the − document feeder. Note: If you use the document glass, place the original in the same orientation face down as it was face up. Touch OK. ® ® Xerox WorkCentre 7220/7220i/7225/7225i Color Multifunction Printer User Guide... - Page 177 PDF: This option produces a Portable Document Format (.pdf). PDF Archival: This option produces a Portable Document Format (.pdf) with embedded fonts. − − TIFF: This option produces a Tagged Image File Format (.tif) Touch OK. ® ® Xerox WorkCentre 7220/7220i/7225/7225i Color Multifunction Printer User Guide...
-
Page 178: Selecting Internet Fax Options
Black & White: This option scans in black and white only. − − Grayscale: Detects and scans various shades of gray. − Color: Scans in full color. Touch OK. ® ® Xerox WorkCentre 7220/7220i/7225/7225i Color Multifunction Printer User Guide... - Page 179 On the Image Enhancement screen, select an option: Manual Contrast: This option allows you to adjust the contrast manually. − − Auto Contrast: This option enables the printer to set the contrast automatically. Touch OK. ® ® Xerox WorkCentre 7220/7220i/7225/7225i Color Multifunction Printer User Guide...
- Page 180 200 x 100 dpi: This option produces good image quality, and moderate file size. − − 200 dpi: This option produces good image quality, and moderate file size. This setting is the default. ® ® Xerox WorkCentre 7220/7220i/7225/7225i Color Multifunction Printer User Guide...
- Page 181 Touch the Internet Fax Options tab, then touch Quality/File Size. On the Quality/File Size screen, use the slider to select a setting. The settings range from Highest Compression/Smallest File Size to Lowest Compression/Largest File Size. Touch OK. ® ® Xerox WorkCentre 7220/7220i/7225/7225i Color Multifunction Printer User Guide...
- Page 182 To enter recipient details, touch an option or touch Skip. Touch the Internet Fax Options tab, then touch Acknowledgment Report. Touch Print Report. Touch OK. Building a Fax Job For details, see Building a Fax Job on page 183. ® ® Xerox WorkCentre 7220/7220i/7225/7225i Color Multifunction Printer User Guide...
-
Page 183: Building A Fax Job
The Job Progress screen appears, and the individual segments are sent as a single job. On the Job Progress screen, to view a summary of the job, touch Details. If necessary, touch Delete > Delete Job to cancel the job. Note: ® ® Xerox WorkCentre 7220/7220i/7225/7225i Color Multifunction Printer User Guide... -
Page 184: Sending A Lan Fax
Click the folder icon, navigate to the file location, then select the desired picture file. To include the file, click Open. Click OK. In the Cover Sheet Notes window, type notes to appear on the cover sheet. ® ® Xerox WorkCentre 7220/7220i/7225/7225i Color Multifunction Printer User Guide... - Page 185 Credit Card: To use a credit card, debit card, or calling card to charge for faxes, select Credit Card. Type the card number in the field. Click OK. 10. In the Printer Properties window, click OK. 11. In the Print window, click OK or Print. ® ® Xerox WorkCentre 7220/7220i/7225/7225i Color Multifunction Printer User Guide...
-
Page 186: Using The Address Book
At the Additional Contact Information page, touch OK. To mark any entered contact information as a favorite, touch the star icon. To save the contact to the Device Address Book, touch OK. ® ® Xerox WorkCentre 7220/7220i/7225/7225i Color Multifunction Printer User Guide... -
Page 187: Editing An Individual Address Book Entry
To mark any entered contact information as a favorite, touch the star icon. To delete a favorite, to the right of the appropriate field touch the star icon. Touch OK. ® ® Xerox WorkCentre 7220/7220i/7225/7225i Color Multifunction Printer User Guide... -
Page 189: Maintenance
General Precautions ..............................190 • Cleaning the Printer ..............................191 • Routine Maintenance ..............................197 • Billing and Usage Information ..........................216 • Ordering Supplies ................................217 • Moving the Printer ................................. 219 ® ® Xerox WorkCentre 7220/7220i/7225/7225i Color Multifunction Printer User Guide... -
Page 190: General Precautions
Do not touch the electrical contacts or gears. Doing so could damage the printer and cause the print quality to deteriorate. • Ensure any parts removed during cleaning are replaced before you plug in the printer. ® ® Xerox WorkCentre 7220/7220i/7225/7225i Color Multifunction Printer User Guide... -
Page 191: Cleaning The Printer
® Use a lint-free cloth lightly dampened with Xerox Lens/mirror Cleaner or another suitable non-abrasive glass cleaner. Clean the document glass and the CVT glass to its left. -
Page 192: Cleaning The Document Feed Rollers
Regular cleaning keeps the touch screen and control panel free from dust and dirt. To clean the printer exterior: To avoid activating buttons and menus, press the Energy Saver button. ® ® Xerox WorkCentre 7220/7220i/7225/7225i Color Multifunction Printer User Guide... -
Page 193: Cleaning The Printer Interior
To prevent a printer malfunction or damage to the internal hard drive, turn off the secondary power switch. Wait 10 seconds after the touch screen goes dark, then turn off the main power switch. ® ® Xerox WorkCentre 7220/7220i/7225/7225i Color Multifunction Printer User Guide... - Page 194 Turn off the secondary power switch, then wait 10 seconds after the touch screen goes dark before proceeding. Secondary Power Switch Secondary Power Switch with Office Finisher LX Open the front door. Turn off the main power switch. ® ® Xerox WorkCentre 7220/7220i/7225/7225i Color Multifunction Printer User Guide...
- Page 195 Insert the laser window cleaning wand slowly into each slot until it stops, then slide out the tool. Repeat for each laser lens. Store the laser window cleaning wand in the front door. Align the bottom of the waste container with the tabs. ® ® Xerox WorkCentre 7220/7220i/7225/7225i Color Multifunction Printer User Guide...
- Page 196 Rotate the waste container up, toward the printer until it clicks into place. 10. Turn on the main power switch, then close the front door. 11. Turn on the secondary power switch. ® ® Xerox WorkCentre 7220/7220i/7225/7225i Color Multifunction Printer User Guide...
-
Page 197: Routine Maintenance
A message appears on the control panel when a toner cartridge must be replaced. CAUTION: Do not perform this procedure when the printer is copying or printing. Open the front cover of the printer. ® ® Xerox WorkCentre 7220/7220i/7225/7225i Color Multifunction Printer User Guide... - Page 198 Remove the new toner cartridge from the packaging. Tilt the cartridge up and down, then left and right 10 times. Hold the new toner cartridge with the arrow facing up, then push the cartridge in slowly until it stops. ® ® Xerox WorkCentre 7220/7220i/7225/7225i Color Multifunction Printer User Guide...
-
Page 199: Replacing The Waste Toner Container
If you get toner in your eyes, wash it out immediately with cool water and consult a doctor. CAUTION: Do not perform this procedure when the printer is copying or printing. Open the front cover of the printer. ® ® Xerox WorkCentre 7220/7220i/7225/7225i Color Multifunction Printer User Guide... - Page 200 Pull the used waste toner container out slowly while supporting it with your other hand. Place the used waste toner container in the plastic bag, then seal it firmly using the zipper. Place the used waste toner container in the empty box. ® ® Xerox WorkCentre 7220/7220i/7225/7225i Color Multifunction Printer User Guide...
-
Page 201: Replacing The Drum Cartridges
Do not expose the drum cartridge to direct sunlight or strong indoor fluorescent lighting. Do not touch or scratch the surface of the drum. Open the front cover of the printer. ® ® Xerox WorkCentre 7220/7220i/7225/7225i Color Multifunction Printer User Guide... - Page 202 With the guides inserted in the slot, to remove remove the black paper sheet, pull it in the direction shown. Remove the tape from the top of the cartridge shield. Hold the shield, then use the orange handle to push the cartridge into the printer. ® ® Xerox WorkCentre 7220/7220i/7225/7225i Color Multifunction Printer User Guide...
- Page 203 12. To return the belt tension lever to the locked position, turn it to the right. 13. Close the printer front cover. 14. Dispose of the protective shield and tape as normal office waste. ® ® Xerox WorkCentre 7220/7220i/7225/7225i Color Multifunction Printer User Guide...
-
Page 204: Replacing The Transfer Belt Cleaner
Do not perform this procedure when the printer is copying or printing. Open the front cover of the printer. Turn the orange lever to the right to unlock the belt cleaner. Turn the orange knob counterclockwise until it releases. ® ® Xerox WorkCentre 7220/7220i/7225/7225i Color Multifunction Printer User Guide... - Page 205 Place the used transfer belt cleaner in the plastic bag. Remove the protective cover from the new transfer belt cleaner. CAUTION: Do not touch the surface of the transfer belt cleaner. Doing so could deteriorate image quality. ® ® Xerox WorkCentre 7220/7220i/7225/7225i Color Multifunction Printer User Guide...
-
Page 206: Replacing The Second Bias Transfer Roller
Replacing the Second Bias Transfer Roller A message appears on the control panel when the second bias transfer roller must be replaced.Remove paper from the left tray, then fold up the tray. ® ® Xerox WorkCentre 7220/7220i/7225/7225i Color Multifunction Printer User Guide... - Page 207 Do not touch the transfer roller. Touching the roller can reduce image quality. Remove the new transfer roller from the packaging. Retain the packaging. Push the orange lever in the direction shown. ® ® Xerox WorkCentre 7220/7220i/7225/7225i Color Multifunction Printer User Guide...
- Page 208 Do not touch any toner adhering to the transfer roller. Place the used transfer roller in the plastic bag. Place the new transfer roller in the printer as shown. Press down until the transfer roller clicks into place. ® ® Xerox WorkCentre 7220/7220i/7225/7225i Color Multifunction Printer User Guide...
-
Page 209: Resetting Supply Life Counters
You must reset the supply life counters when you replace some supplies. Press the Log In/Out button, enter the system administrator login information, then press Enter. For details, see the System Administrator Guide at www.xerox.com/office/WC7220_WC7225docs. On the control panel, press Machine Status. - Page 210 Insert the front side of the new staple case into the staple cartridge (1), then push the rear side into the cartridge (2). Grip the staple cartridge by the orange handle and insert the cartridge into the stapler until it clicks. ® ® Xerox WorkCentre 7220/7220i/7225/7225i Color Multifunction Printer User Guide...
- Page 211 Push the stapler assembly to the right as shown. Grip the staple cartridge by the orange handle and pull it firmly toward you to remove it. Check inside the finisher for any loose staples and remove them. ® ® Xerox WorkCentre 7220/7220i/7225/7225i Color Multifunction Printer User Guide...
- Page 212 Insert the front side of the new staple pack into the staple cartridge (1), then push the rear side into the cartridge (2). Grip the staple cartridge by the orange handle and insert it into the stapler assembly. Push it in until it clicks. Close the finisher front door. ® ® Xerox WorkCentre 7220/7220i/7225/7225i Color Multifunction Printer User Guide...
- Page 213 If the staple cartridges are not visible, grip the vertical panels at the left and right of the opening and slide them to the center. Hold the tabs on both sides of the staple cartridge and pull the cartridge out of the finisher. ® ® Xerox WorkCentre 7220/7220i/7225/7225i Color Multifunction Printer User Guide...
-
Page 214: Emptying The Hole Punch Waste Container
Emptying the Hole Punch Waste Container in the Office Finisher LX WARNING: Do not perform this procedure while the printer is printing. Lift the finisher transport top cover, then open the front transport cover. ® ® Xerox WorkCentre 7220/7220i/7225/7225i Color Multifunction Printer User Guide... - Page 215 Pull out the hole punch waste container. Empty the container. Insert the container all the way into the finisher. Close the finisher front transport cover, then close the top cover. ® ® Xerox WorkCentre 7220/7220i/7225/7225i Color Multifunction Printer User Guide...
-
Page 216: Billing And Usage Information
Total Impressions: Total number of color impressions plus black impressions. − To view detailed usage information, touch Usage Counters, then select an option. To return to the Services Home menu, press the Services Home button. ® ® Xerox WorkCentre 7220/7220i/7225/7225i Color Multifunction Printer User Guide... -
Page 217: Ordering Supplies
Recycling Supplies ................................218 Locating the Serial Number To contact Xerox for assistance, you need the printer serial number. The serial number is behind door A, toward the rear of the printer on a metal plate. To view the serial number at the printer control panel, press the Machine Status button, then touch the Machine Information tab. -
Page 218: Other Supplies
Total Satisfaction Guarantee do not cover damage, malfunction, or degradation of performance caused by use of non-Xerox supplies, or the use of Xerox supplies not specified for this printer. The Total Satisfaction Guarantee is available in the United States and Canada. Coverage could vary outside these areas. -
Page 219: Moving The Printer
Service Agreement, or Total Satisfaction Guarantee do not cover damage to the printer caused by ® improper moving. The Xerox Total Satisfaction Guarantee is available in the United States and Canada. Coverage could vary outside these areas. Please contact your Xerox representative for details. ® ®... -
Page 221: Troubleshooting
• General Troubleshooting............................. 222 • Jams ....................................228 • Print-Quality Problems ..............................254 • Copy and Scan Problems ............................. 263 • Fax Problems ..................................264 • Getting Help ..................................267 ® ® Xerox WorkCentre 7220/7220i/7225/7225i Color Multifunction Printer User Guide... -
Page 222: General Troubleshooting
Turn on both switches to operate the printer. First turn on the main power switch behind the front cover, then turn on the secondary switch. Power Switches Power Switches with Office Finisher LX ® ® Xerox WorkCentre 7220/7220i/7225/7225i Color Multifunction Printer User Guide... -
Page 223: Restarting The Printer
Use a power source with the specifications listed in the Electrical voltage or frequency that does not match the Specifications. printer specifications. CAUTION: Plug the three-wire cord with grounding prong directly into a grounded AC outlet. ® ® Xerox WorkCentre 7220/7220i/7225/7225i Color Multifunction Printer User Guide... -
Page 224: Printer Resets Or Turns Off Frequently
Unplug the network cable. If the problem is resolved, contact your network administrator to reconfigure your network installation. A system error occurred. Contact your Xerox representative with the error code and message. Check the control panel fault history. For details, see Viewing Fault and Alert Messages on the Control Panel on page 268. -
Page 225: Document Fails To Print
If the page prints, you could have a network or printer installation issue. For help, contact the system administrator. For details, see Document Prints from Wrong Tray on page 226. Application and print driver have conflicting tray selections. ® ® Xerox WorkCentre 7220/7220i/7225/7225i Color Multifunction Printer User Guide... -
Page 226: Document Prints From Wrong Tray
Date and Time Are Incorrect Probable Causes Solutions ® The Date and Time Setup is set to Manual To change the Date and Time to Automatic, enable NTP in Xerox ® Internet Services. For details, see the System (NTP Disabled). CentreWare Administrator Guide at www.xerox.com/office/WC7220_WC7225docs. -
Page 227: Scanner Errors
Probable Causes Solutions Scanner is not communicating. Turn off the printer, and check the scanner cable. Wait two minutes and turn the printer on again. ® If the problem is not resolved, contact your Xerox service representative. ® ® Xerox... -
Page 228: Jams
Clearing Jams in the Office Finisher LX ......................... 242 • Minimizing Paper Jams ..............................243 • Troubleshooting Paper Jams ............................. 245 • Clearing Staple Jams ..............................248 • Clearing Hole Punch Jams ............................253 ® ® Xerox WorkCentre 7220/7220i/7225/7225i Color Multifunction Printer User Guide... -
Page 229: Clearing Paper Jams
Green handles and knobs provide access for clearing jams. • To clear jams, watch the video and follow the instructions on the control panel. Clearing Jams at Tray 1 Open door A. Remove the jammed paper. ® ® Xerox WorkCentre 7220/7220i/7225/7225i Color Multifunction Printer User Guide... - Page 230 Verify that the paper is loaded correctly in the tray and that the guides are pressed firmly against the paper. Note: For a Paper Size Jam message, remove the paper to adjust the paper guides. For details, see Paper Misfeeds and Paper Size Jams on page 246. ® ® Xerox WorkCentre 7220/7220i/7225/7225i Color Multifunction Printer User Guide...
-
Page 231: Clearing Jams At Tray 2
Verify the size, type, and color of the paper. Change the selection for any incorrect setting. On the printer touch screen, touch Confirm. Clearing Jams at Tray 2 Open door B. Remove the jammed paper. ® ® Xerox WorkCentre 7220/7220i/7225/7225i Color Multifunction Printer User Guide... - Page 232 Verify that the paper is loaded correctly in the tray and that the guides are pressed firmly against the paper. Note: For a Paper Size Jam message, remove the paper to adjust the paper guides. For details, see Paper Misfeeds and Paper Size Jams on page 246. ® ® Xerox WorkCentre 7220/7220i/7225/7225i Color Multifunction Printer User Guide...
-
Page 233: Clearing Jams At Trays 3-4
Verify the size, type, and color of the paper. Change the selection for any incorrect setting. On the printer touch screen, touch Confirm. Clearing Jams at Trays 3–4 Open door C. Remove the jammed paper. ® ® Xerox WorkCentre 7220/7220i/7225/7225i Color Multifunction Printer User Guide... - Page 234 Verify that the paper is loaded correctly in the tray and that the guides are pressed firmly against the paper. Note: For a Paper Size Jam message, remove the paper to adjust the paper guides. For details, see Paper Misfeeds and Paper Size Jams on page 246. ® ® Xerox WorkCentre 7220/7220i/7225/7225i Color Multifunction Printer User Guide...
-
Page 235: Clearing Jams At Tray 5
Clearing Jams at Tray 5 Remove any paper from tray 5. If you did not find jammed paper, push up the latch on the left side of the printer to open door A. ® ® Xerox WorkCentre 7220/7220i/7225/7225i Color Multifunction Printer User Guide... - Page 236 Do not load paper above the maximum fill line. Overfilling can cause paper jams. Verify the size, type, and color of the paper. Change the selection for any incorrect setting. On the printer touch screen, touch Confirm. ® ® Xerox WorkCentre 7220/7220i/7225/7225i Color Multifunction Printer User Guide...
-
Page 237: Clearing Jams At Door A
Remove the jammed paper. Open the fuser by pulling out the handle labeled A1. WARNING: The area around the fuser can be hot. Use caution to avoid injury. Remove the jammed paper. ® ® Xerox WorkCentre 7220/7220i/7225/7225i Color Multifunction Printer User Guide... -
Page 238: Clearing Jams At Door D
To avoid damage to the printer, verify that the fuser is closed before proceeding. Close door A, then close tray 5. Clearing Jams at Door D Open tray 5. Open door D. ® ® Xerox WorkCentre 7220/7220i/7225/7225i Color Multifunction Printer User Guide... -
Page 239: Clearing Jams In The Document Feeder
Lift the lever and open the top cover of the document feeder as shown. If the original is not caught in the entry to the document feeder, pull it straight out in the direction shown. ® ® Xerox WorkCentre 7220/7220i/7225/7225i Color Multifunction Printer User Guide... - Page 240 Close the inner cover, then close the top cover, pressing it down until it clicks into place. If the original is not visible when the top cover is opened, lift the document cover and remove the original. ® ® Xerox WorkCentre 7220/7220i/7225/7225i Color Multifunction Printer User Guide...
-
Page 241: Clearing Jams In The Integrated Finisher
To remove the paper, pull it in the direction shown. Note: If the paper is torn, remove all torn pieces from the printer. Close the top cover of the Integrated Finisher. ® ® Xerox WorkCentre 7220/7220i/7225/7225i Color Multifunction Printer User Guide... -
Page 242: Clearing Jams In The Office Finisher Lx
Open the top cover by rotating it to the left. Remove the jammed paper. Note: If the paper is torn, remove all torn pieces from the finisher. Close the top cover of the finisher. ® ® Xerox WorkCentre 7220/7220i/7225/7225i Color Multifunction Printer User Guide... -
Page 243: Minimizing Paper Jams
Close the transport cover. Minimizing Paper Jams The printer is designed to function with minimal paper jams using Xerox supported paper. Other paper types can cause jams. If supported paper is jamming frequently in one area, clean that area of the paper path. - Page 244 When printing, select the correct type and size in the print driver. • Store paper in a dry location. • Use only Xerox paper and transparencies designed for the printer. Avoid the following: • Polyester coated paper that is designed specially for inkjet printers.
-
Page 245: Troubleshooting Paper Jams
Remove the paper from the tray, and replace it with new dry paper. Too much static electricity is present. • Try a new ream of paper. • Do not fan transparencies before loading in tray. Use only Xerox approved paper. For details, see Supported Paper Using unsupported paper. page 50. - Page 246 The paper is moist from humidity. Remove the moist paper and replace it with new, dry paper. Using paper of the wrong size, thickness, or Use only Xerox approved paper. For details, see Supported Paper type. page 50.
- Page 247 The paper must be loaded in the correct tray. For details, see Supported Paper on page 50. Tray is loaded with mixed paper. Load the tray with only one type and size of paper. ® ® Xerox WorkCentre 7220/7220i/7225/7225i Color Multifunction Printer User Guide...
-
Page 248: Clearing Staple Jams
Remove the jammed staples (1), then push the clamp in the direction shown until it snaps into the locked position (2). WARNING: The points of the jammed staples are sharp. Remove the jammed staples carefully. ® ® Xerox WorkCentre 7220/7220i/7225/7225i Color Multifunction Printer User Guide... -
Page 249: Xerox ® Workcentre ® 7220/7220I/7225/7225I Color Multifunction Printer
Do not perform this procedure while the printer is printing. Open the finisher front door. Reach into the finisher cabinet and pull the stapler toward you until it stops. Push the stapler assembly to the right as shown. ® ® Xerox WorkCentre 7220/7220i/7225/7225i Color Multifunction Printer User Guide... - Page 250 Remove the jammed staples by pulling them in the direction shown. WARNING: The points of the jammed staples are sharp. Remove the jammed staples carefully. Push the clamp in the direction shown until it snaps into the locked position. ® ® Xerox WorkCentre 7220/7220i/7225/7225i Color Multifunction Printer User Guide...
- Page 251 Open the finisher side cover. If the staple cartridges are not visible, grip the vertical panels at the left and right of the opening and slide them to the center. ® ® Xerox WorkCentre 7220/7220i/7225/7225i Color Multifunction Printer User Guide...
- Page 252 The booklet maker uses two staple cartridges. Booklet stapling requires that both staple cartridges contain staples. Starting at Step 2, repeat the procedure for the other staple cartridge. Close the finisher side cover. ® ® Xerox WorkCentre 7220/7220i/7225/7225i Color Multifunction Printer User Guide...
-
Page 253: Clearing Hole Punch Jams
If the printer stops printing and reports a hole punch jam, empty the hole punch waste container. For details, see Emptying the Hole Punch Waste Container on page 214. After emptying the hole punch waste container, locate and remove any paper jams. ® ® Xerox WorkCentre 7220/7220i/7225/7225i Color Multifunction Printer User Guide... -
Page 254: Print-Quality Problems
The Xerox Warranty, Service Agreement, or Xerox Total Satisfaction Guarantee does not cover damage caused by using unsupported paper or specialty media. The Xerox Total Satisfaction Guarantee is available in the United States and Canada. Coverage could vary outside these areas. - Page 255 Your printer is designed to use various paper and other media types. Follow the guidelines in this section for the best print quality and to avoid jams: • Use only Xerox approved paper. For details, see Supported Paper on page 50.
- Page 256 For instructions on setting the Color Correction, see Using Color Corrections. Follow these guidelines to control the Color Corrections and Color Adjustments: For best results on most paper, ensure that the Color Correction in the print driver is set to Xerox •...
-
Page 257: Troubleshooting Print-Quality Problems
The Xerox Warranty, Service Agreement, or Xerox Total Satisfaction Guarantee does not cover damage caused by using unsupported paper or specialty media. The Xerox Total Satisfaction Guarantee is available in the United States and Canada. Coverage could vary outside these areas. -
Page 258: Isolating The Problem To The Printer Or To The Application
Ensure that the model name in the middle of the driver matches the model name of the printer. • If the names do not match, install the proper print driver for the printer. ® ® Xerox WorkCentre 7220/7220i/7225/7225i Color Multifunction Printer User Guide... -
Page 259: Troubleshooting Print-Quality Problems In The Printer
Set the Print Quality Mode to Standard or Enhanced. − Set the Color Correction to Xerox Automatic Color. If the problem persists, delete then reinstall the print driver. If the problem still persists, ensure that you are not printing through a print server. -
Page 260: Print-Quality Problems And Solutions
2. To identify the part responsible for the repeating spots or lines, follow the instructions on the Repeating Defects page. 3. To correct the problem, replace the printer part identified on the Repeating Defects page. ® ® Xerox WorkCentre 7220/7220i/7225/7225i Color Multifunction Printer User Guide... - Page 261 193. Note: To print procedures on resolving print-quality problems, at the control panel, press Machine Status. Then touch Machine Information > Information Pages > Troubleshooting Print Quality Page > Print. ® ® Xerox WorkCentre 7220/7220i/7225/7225i Color Multifunction Printer User Guide...
- Page 262 Papers from lightest to heaviest are: • For uncoated paper: Plain, Lightweight Cardstock, Cardstock, and Heavyweight Cardstock. • For coated paper: Lightweight Glossy Cardstock, Glossy Cardstock, and Heavyweight Glossy Cardstock. • ® ® Xerox WorkCentre 7220/7220i/7225/7225i Color Multifunction Printer User Guide...
-
Page 263: Copy And Scan Problems
• Copy: Use the Image Quality settings to adjust color balance. • Scan: Confirm the correct Original Type is set. If the problem persists, for online support information, go to www.xerox.com/office/WC7220_WC7225support. ® ® Xerox WorkCentre 7220/7220i/7225/7225i Color Multifunction Printer User Guide... -
Page 264: Fax Problems
The document was loaded incorrectly. • If using the document feeder, place is blank. the original document face up. • If using the document glass, place the original document face down. ® ® Xerox WorkCentre 7220/7220i/7225/7225i Color Multifunction Printer User Guide... -
Page 265: Problems Receiving Faxes
The paper supply in the printer does Confirm the original size of the in size. not match the document size sent. documents, then load the appropriate paper size in the printer. ® ® Xerox WorkCentre 7220/7220i/7225/7225i Color Multifunction Printer User Guide... -
Page 266: Printing Fax Reports
Touch Close. Note: If this feature does not appear, log in as a system administrator. For details, see Logging In as the System Administrator at the Control Panel on page 32. ® ® Xerox WorkCentre 7220/7220i/7225/7225i Color Multifunction Printer User Guide... -
Page 267: Getting Help
Using the Integrated Troubleshooting Tools ...................... 268 • More Information ................................271 Xerox provides several automatic diagnostic utilities to help you maintain productivity and print quality. Control Panel Messages The printer control panel provides information and troubleshooting help. When a fault or alert condition occurs, the control panel displays a message informing you of the problem. -
Page 268: Using The Integrated Troubleshooting Tools
At the printer control panel, press the Machine Status button. On the Machine Information tab, touch Information Pages, then touch the desired information page. Touch Print. ® ® Note: Information pages can also be printed from Xerox CentreWare Internet Services. ® ® Xerox WorkCentre... - Page 269 At the printer control panel, press the Machine Status button. Touch the Tools tab, then touch Device Settings > Configuration/Information Pages. For Print Configuration at Power On, touch No. Touch OK. ® ® Xerox WorkCentre 7220/7220i/7225/7225i Color Multifunction Printer User Guide...
- Page 270 • TCP/IP and HTTP enabled in the printer. • A network-connected computer with a Web browser that supports JavaScript. ® ® For details, see the Help in Xerox CentreWare Internet Services or the System Administrator Guide. ® ® Xerox WorkCentre...
-
Page 271: More Information
Third party and open source software To locate third party and open source software disclosure notices and terms and conditions, go to the product page at: • www.xerox.com/office/WC7220_WC7225support • www.xerox.com/office/WC7220i_WC7225i_support ® ® Xerox WorkCentre 7220/7220i/7225/7225i Color Multifunction Printer User Guide... -
Page 273: Specifications
Printer Configurations and Options ........................274 • Physical Specifications ..............................276 • Environmental Specifications ............................ 278 • Electrical Specifications ............................... 279 • Performance Specifications ............................280 • Environmental, Health, and Safety Contact Information ................281 ® ® Xerox WorkCentre 7220/7220i/7225/7225i Color Multifunction Printer User Guide... -
Page 274: Printer Configurations And Options
Automatic 2-sided printing and copying • Maximum copy and print speeds, for color or black and white: ® ® − Up to 20 pages per minute (ppm) for the Xerox WorkCentre 7220 Multifunction Printer ® ® − Up to 25 pages per minute (ppm) for the Xerox... -
Page 275: Available Configurations
® • Xerox Copier Assistant • Unicode print • LAN fax from desktop • One line and dual line fax kits • Scanning software solutions. For details, go to www.xerox.com/office/software-solutions. ® ® Xerox WorkCentre 7220/7220i/7225/7225i Color Multifunction Printer User Guide... -
Page 276: Physical Specifications
Configuration with Office Finisher LX and Booklet Maker • Width: 1164 mm (45.8 in.) • Depth: 651 mm (25.6 in.) • Height: 1132 mm (44.6 in.) • Weight: 145 Kg (319 lb.) ® ® Xerox WorkCentre 7220/7220i/7225/7225i Color Multifunction Printer User Guide... -
Page 277: Clearance Requirements
Specifications Clearance Requirements Clearance Requirements for Base Configuration Clearance Requirements for Configuration with Office Finisher LX and Booklet Maker ® ® Xerox WorkCentre 7220/7220i/7225/7225i Color Multifunction Printer User Guide... -
Page 278: Environmental Specifications
Optimum print quality: 15–28°C (59–82°F) Relative Humidity • Operating: 15–85% (non-condensing) • Optimum print quality: 20–70% Elevation For optimum performance, use the printer at elevations below 2500 m (8200 ft.). ® ® Xerox WorkCentre 7220/7220i/7225/7225i Color Multifunction Printer User Guide... -
Page 279: Electrical Specifications
® ENERGY STAR settings are preset on Xerox equipment at the factory to switch to Energy Saver Mode after two minutes from the last copy or print. For details, see Setting Energy Saver Mode. -
Page 280: Performance Specifications
Maximum Resolution: 600 x 600 dpi Print Speed Print speeds for continuous printing are up to 20 ppm for the WorkCentre 7220 Multifunction Printer and 25 ppm for the WorkCentre 7225 Multifunction Printer. Print speeds are the same for color or black and white printing. -
Page 281: Environmental, Health, And Safety Contact Information
Specifications Environmental, Health, and Safety Contact Information For more information on Environment, Health, and Safety in relation to this Xerox product and supplies, contact the following customer help lines: United States and Canada: 1-800-ASK-XEROX (1-800-275-9376) Europe: +44 1707 353 434 For product safety information in the United States and Canada, go to www.xerox.com/environment. -
Page 283: Regulatory Information
Regulatory Information This appendix includes: • Basic Regulations ................................284 • Fax Regulations ................................291 • Product Safety Certification ............................295 • Material Safety Data Sheets ............................. 296 ® ® Xerox WorkCentre 7220/7220i/7225/7225i Color Multifunction Printer User Guide... -
Page 284: Basic Regulations
• Consult the dealer or an experienced radio/TV technician for help. Changes or modifications to this equipment not approved by Xerox can void the authority of the user to operate this equipment. Note: To ensure compliance with Part 15 of the FCC rules, use shielded interface cables. -
Page 285: European Union Radio Interference
This printer, if used properly in accordance with the instructions, is not dangerous for the consumer or for the environment. To ensure compliance with European Union regulations, use shielded interface cables. A signed copy of the Declaration of Conformity for this printer can be obtained from Xerox. European Union Lot 4 Imaging Equipment Agreement Environmental Information... - Page 286 Regulatory Information Environmental Benefits of Duplex Printing Most Xerox products have duplex printing, also known as 2-sided printing, capability. This enables you to print on both sides of the paper automatically, and therefore helps to reduce the use of valuable resources by reducing your paper consumption.
-
Page 287: Germany
(2) this device must accept any interference received, including interference that may cause undesired operation. Changes or modifications to this device not specifically approved by the Xerox Corporation may void the user's authority to operate this equipment. ®... -
Page 288: Ozone Release
Ozone is heavier than air and is not produced in amounts large enough to harm anyone. Install the printer in a well-ventilated room. For more information in the United States and Canada, go to www.xerox.com/environment. In other markets, please contact your local Xerox representative or go to www.xerox.com/environment_europe. - Page 289 The preceding list is not all inclusive, and no liability is assumed for its completeness or accuracy. In case of doubt, consult your attorney. For more information about these provisions contact the Copyright Office, Library of Congress, Washington, D.C. 20559. Ask for Circular R21. ® ® Xerox WorkCentre 7220/7220i/7225/7225i Color Multifunction Printer User Guide...
-
Page 290: Other Countries
Postage stamps and other negotiable instruments This list is not inclusive and no liability is assumed for either its completeness or accuracy. In case of doubt, contact your legal counsel. ® ® Xerox WorkCentre 7220/7220i/7225/7225i Color Multifunction Printer User Guide... -
Page 291: Fax Regulations
US:AAAEQ##TXXXX. The digits represented by ## are the REN without a decimal point (for example, 03 is a REN of 0.3). For earlier products, the REN is separately shown on the label. ® ® Xerox WorkCentre 7220/7220i/7225/7225i Color Multifunction Printer User Guide... - Page 292 Ask your local Telephone Company for the modular jack type installed on your line. Connecting this machine to an unauthorized jack can damage telephone company equipment. You, not Xerox, assume all responsibility and/or liability for any damage caused by the connection of this machine to an unauthorized jack.
-
Page 293: Canada
DTMF signaling for more reliable and faster call setup. Modification of this product, connection to external control software, or connection to an external ® control apparatus not authorized by Xerox will invalidate its certification. ®... -
Page 294: New Zealand
For correct operation, total of the RNs of all devices connected to a single line at any time should not exceed five. ® ® Xerox WorkCentre 7220/7220i/7225/7225i Color Multifunction Printer User Guide... -
Page 295: Product Safety Certification
Regulatory Information Product Safety Certification This product is certified by various NRTLs/NCBs to the following safety standards: • UL60950-1/CSA22.2, No. 60950-1 (USA/Canada) • IEC60950-1 (CB Scheme) ® ® Xerox WorkCentre 7220/7220i/7225/7225i Color Multifunction Printer User Guide... -
Page 296: Material Safety Data Sheets
Material Safety Data Sheets For Material Safety Data information regarding your printer, go to: • North America: www.xerox.com/msds • European Union: www.xerox.com/environment_europe For the Customer Support Center phone numbers, go to www.xerox.com/office/worldcontacts. ® ® Xerox WorkCentre 7220/7220i/7225/7225i Color Multifunction Printer User Guide... -
Page 297: Recycling And Disposal
Recycling and Disposal This appendix includes: • All Countries ..................................298 • North America ................................. 299 • European Union ................................300 • Other Countries ................................302 ® ® Xerox WorkCentre 7220/7220i/7225/7225i Color Multifunction Printer User Guide... -
Page 298: All Countries
Recycling and Disposal All Countries If you are managing the disposal of your Xerox product, please note that the printer may contain lead, mercury, perchlorate, and other materials whose disposal may be regulated due to environmental considerations. The presence of these materials is fully consistent with global regulations applicable at the time that the product was placed on the market. -
Page 299: North America
North America Xerox operates an equipment take-back and reuse/recycle program. Contact your Xerox representative (1-800-ASK-XEROX) to determine if this Xerox product is part of the program. For more information about Xerox environmental programs, visit www.xerox.com/environment, or for recycling and disposal information, contact your local authorities. -
Page 300: European Union
In accordance with European legislation, end of life electrical and electronic equipment subject to disposal must be managed within agreed procedures. Prior to disposal, please contact your local reseller or Xerox representative for end of life take-back information. ®... -
Page 301: Collection And Disposal Of Equipment And Batteries
This wheeled bin symbol may be used in combination with a chemical symbol. This establishes compliance with the requirements set out by the Directive. Battery Removal Batteries should only be replaced by a manufacturer-approved service facility. ® ® Xerox WorkCentre 7220/7220i/7225/7225i Color Multifunction Printer User Guide... -
Page 302: Other Countries
Recycling and Disposal Other Countries Please contact your local waste management authority to request disposal guidance. ® ® Xerox WorkCentre 7220/7220i/7225/7225i Color Multifunction Printer User Guide...
Need help?
Do you have a question about the 7220 and is the answer not in the manual?
Questions and answers