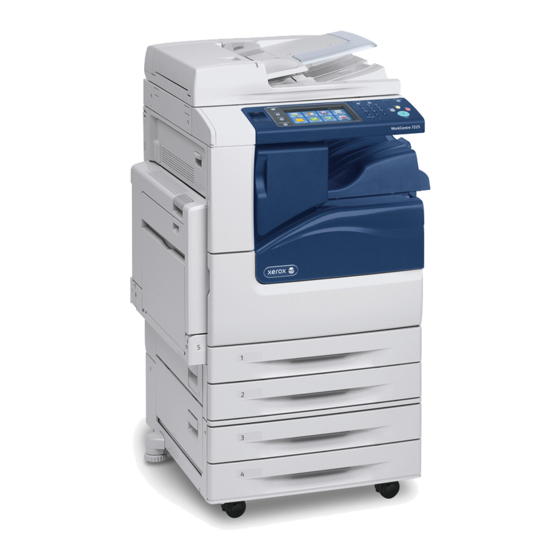
Xerox WorkCentre 7220 Quick Start Manual
Hide thumbs
Also See for WorkCentre 7220:
- User manual (302 pages) ,
- Information (61 pages) ,
- White paper (29 pages)
Advertisement
Support & Drivers
Product Resources
Supplies
Owners
Product Registration
Support Forum
Supplies
MySupport
Security Information
Account Management
Product Support Links
Request Remote Technical
Support
Service Request Status
Xerox Customer Support
Contact Numbers
Update Your Log
Additional Resources
Supplies/Consumables/Parts
Recycling
Xerox Environment, Health &
Safety
Windows and Mac OS X
Compatibility information
Business Development
Tools to grow your digital printing
business and increase profits
ProfitAccelerator™ resources
WorkCentre 7220/7225 Support &
Drivers
Support
Drivers & Downloads
Home › Browse: Maintenance/Consumables, › View Content: How To Load Paper in Trays 1, 2, 3, or 4 ›
Software Version 073.xxx.xxx.xxxxx: Load Paper in Trays 1, 2, 3, or 4
1. Pull out the tray until it stops.
2. Ensure that the guide locks are set in the correct position for the standard or custom size paper you are
loading. For details, see the Setting the Guide Locks in the 500Sheet Adjustable Trays section below.
3. Remove any paper that is a different size or type.
4. Move the length and width guides out:
a. Pinch the guide lever on each guide.
b. Slide the guides outward until they stop.
c. Release the levers.
5. Flex the sheets back and forth and fan them, then align the edges of the stack on a level surface.This
procedure separates any sheets that are stuck together and reduces the possibility of jams.
Documentation
Fast Track to the Expert >
Contact a Technical Expert
for Remote Support
Videos
Contact
Advertisement
Table of Contents

Related Manuals for Xerox WorkCentre 7220


Summary of Contents for Xerox WorkCentre 7220
- Page 1 Videos Contact Home › Browse: Maintenance/Consumables, › View Content: How To Load Paper in Trays 1, 2, 3, or 4 › Product Resources Supplies Software Version 073.xxx.xxx.xxxxx: Load Paper in Trays 1, 2, 3, or 4 Owners Product Registration 1. Pull out the tray until it stops. Support Forum Supplies MySupport Security Information Account Management Product Support Links Request Remote Technical Support Service Request Status Xerox Customer Support Contact Numbers Update Your Log Additional Resources Supplies/Consumables/Parts 2. Ensure that the guide locks are set in the correct position for the standard or custom size paper you are Recycling loading. For details, see the Setting the Guide Locks in the 500Sheet Adjustable Trays section below. Xerox Environment, Health & 3. Remove any paper that is a different size or type. Safety 4. Move the length and width guides out: Windows and Mac OS X Compatibility information a. Pinch the guide lever on each guide. b. Slide the guides outward until they stop. Business Development c. Release the levers. ...
- Page 2 NOTE: To avoid jams and misfeeds, do not remove paper from its packaging until you are ready to use it. 6. Load the paper in the tray. For longedge feed, insert letterhead and preprinted paper facedown with the top edge toward the front. Load hole punched paper with the holes to the left. Load labels faceup with the top edge toward the front of the tray. For shortedge feed, insert letterhead and preprinted paper facedown with the top edge to the left. Load hole punched paper with the holes toward the back. Load labels faceup with the top edge to the right. NOTE: Do not load paper above the maximum fill line. Overfilling the tray can cause the printer to jam. 7. Adjust the length and width guides to fit the paper. 8. Close the tray. 9. Do one of the following: To confirm the paper size, type, and color when a tray is set to Fully Adjustable, select [Confirm]. To select a new paper size, select [Size]. To select a new paper type, select [Type]. To select a new paper color, select [Color]. When finished, select [Confirm]. To change the paper size, type, or color when the tray is set to Dedicated mode: a. Login as the System Administrator. See the Related Content for additional information. b. Press the [Machine Status] button on the Control Panel and then select the [Tools] tab on the Touch Screen. c. Select [Device Settings] and then [Paper Management]. d. Select [Tray Settings] and then select a dedicated tray. e. To modify the tray settings, select [Edit]. f. Select [Size], [Type], or [Color] to change the paper size, paper type, or paper color. g. Select [OK]. Setting the Guide Locks in the 500Sheet Adjustable Trays You can adjust the guides in trays 14 to accommodate standard or custom paper sizes. In the standard position, the guides move into the supported standard paper settings. In the custom position, the guides move in 1 mm increments. To move the guide locks from the standard to the custom paper size position, do the following: 1. Pull out the tray until it stops. ...
- Page 3 NOTE: For best results, remove any paper from the tray, pinch the guide levers, and slide the guides inward. 2. Pry up the retainer with your fingertip, and then remove the retainer. 3. To engage the fineadjustment block, pinch the levers and slide the guide lock to the left. 4. Replace the retainer and snap it into place. ...
- Page 4 5. Load the customsize paper in the tray. The tray guides move in 1 mm increments. Next Steps › Return to Solutions List: How To Load Paper in Trays 1, 2, 3, or 4 › Browse: Maintenance/Consumables, › Start New Search Did this page help? 0 ratings Provide Feedback > Careers Contact Us About Xerox Investors Privacy Legal Privacy Choices Site Map © 2017 Xerox Corporation. All rights reserved. Xerox® and Xerox and Design® are trademarks of Xerox Corporation in the United States and/or other countries.
Need help?
Do you have a question about the WorkCentre 7220 and is the answer not in the manual?
Questions and answers