Table of Contents
Advertisement
Available languages
Available languages
INTRODUCTION
Dear Customer,
We thank you for having purchased our riding mower and hope that it will fully
meet all your expectations.
This manual has been compiled in order that you may get to know your ma-
chine and to be able to use it safely and efficiently. Donʼt forget that the man-
ual forms an integral part of the machine so keep it handy so that it can be
consulted at any time, and pass it on to the purchaser if you resell the ma-
chine.
Your new machine has been designed and made in line with current regu-
lations, and is safe and reliable if used for cutting and collecting grass ob-
serving the indications given in this manual (proper usage). Using the ma-
chine in any other way or ignoring the instructions for safe usage,
maintenance or repair, is considered "incorrect usage" (Chap. 5) which will
invalidate the guarantee, and the manufacturer will decline all responsibility,
placing the blame with the user for damage or injury to himself or others in
such cases.
If you should find any slight differences between the description and your own
machine, bear in mind that, since there are continual improvements to the
product, information contained in this manual may be modified without prior
warning and without the obligation to update it, although the essential safety
and function characteristics will remain unaltered. In case of any doubts, do
not hesitate to contact your Dealer.
After-Sales Service
This manual gives all the necessary instructions for using the machine and
the basic maintenance that may be carried out by the user. For all informa-
tion not contained here, contact your Dealer.
Note your machine
serial number here
HOW TO READ THE MANUAL
This manual describes both mechanically and hydrostatically driven ma-
chines, as well as versions including equipment and accessories that may
not be available in your area.
The symbol
highlights all differences in usage and is followed by the
indication of the type of drive or version to which it refers.
Some paragraphs in the manual contain information of particular importance
and these are highlighted at various levels of emphasis, and signify the fol-
lowing:
or
NOTE
IMPORTANT
information on what has already been said, and are aimed at preventing
damage to the machine or causing damage.
Non-observance will result in the risk of injury to
WARNING!
oneself or others.
Non-observance will result in the risk of serious in-
DANGER!
jury or death to oneself or others.
Honda France Manufacturing S.A.S.
Pôle 45 - Rue des Châtaigniers - 45140 ORMES - FRANCE
All rights reserved
These give details or further
ORIGINAL INSTRUCTION
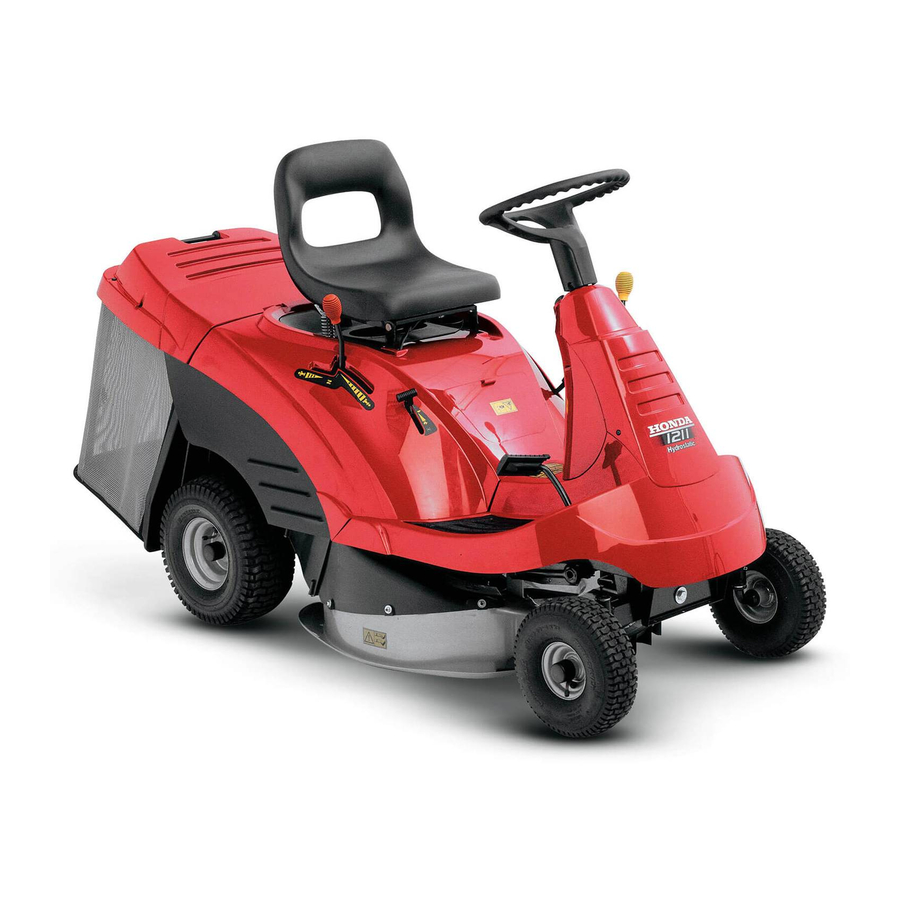
OPERATORʼS MANUAL
Lawn mower
HF1211
TABLE OF CONTENTS
1.
SAFETY .......................................................................... 2
Regulations for using the machine safely
2.
Explanations on how to identify the machine
and its main parts
3.
UNPACKING AND ASSEMBLY ...................................... 4
Explanations on how to remove the packing
and on how to assemble sepa rated parts
4.
COMMANDS AND CONTROL INSTRUMENTS ............. 6
Position and functions of all the controls
5.
HOW TO USE THE MACHINE ....................................... 8
Provides indications for working efficiently and safely
5.1 Directions before starting .......................................... 8
5.2 Starting and moving ................................................. 9
5.3 Grass cutting .......................................................... 10
5.4 Cleaning and storage ............................................. 12
6.
MAINTENANCE ............................................................ 13
All the information for maintaining the machine
in peak efficiency
7.
ENVIRONMENTAL PROTECTION ............................... 19
It gives advice on machine use and respecting
the environment
8.
TROUBLESHOOTING .................................................. 19
A help in quickly resolving any problems
9.
ACCESSORIES ON REQUEST .................................... 20
A description of the accessories available
for particular types of work
10. SPECIFICATIONS ......................................................... 21
A summary of the main specifications
of your machine
MAJORS HONDA DISTRIBUTOR ADDRESSES ........... i
DECLARATION OF CONFORMITY ................................ ii
1 EN
Advertisement
Chapters
Table of Contents

Related Manuals for Honda HF1211


Summary of Contents for Honda HF1211
-
Page 1: Table Of Contents
Non-observance will result in the risk of serious in- DANGER! jury or death to oneself or others. MAJORS HONDA DISTRIBUTOR ADDRESSES ... i DECLARATION OF CONFORMITY ........ ii Honda France Manufacturing S.A.S. Pôle 45 - Rue des Châtaigniers - 45140 ORMES - FRANCE... -
Page 2: Safety
16) The usage of accessories different from those recommended by Honda sponsability. may cause damage to the machine that is not covered by the warranty. -
Page 3: Identification Of The Machine And Parts
SAFETY DECALS 2. IDENTIFICATION OF THE MACHINE AND PARTS Your machine must be used with care. Therefore, decals have been placed on the machine, to remind you pictorially of the main pre- cautions to take during use. These decals are to be considered an IDENTIFICATION OF THE MACHINE integral part of the machine. -
Page 4: Unpacking And Assembly
3. UNPACKING AND ASSEMBLY For storage and transport reasons, some components of the ma- chine are not directly installed in the factory, but have to be assem- bled after their removal from the packing. Final assembly is carried out by following these simple instructions. For transport reasons the machine is supplied IMPORTANT without engine oil or fuel. - Page 5 CONNECTING THE BATTERY Insert this frame into the canvas cover, ensuring that The battery (1) is situated it is correctly positioned in a compartment under along the base perimeter. the steering wheel and is reached by removing the plastic cover (2) held on by Hook all the plastic profiles two screws (3).
-
Page 6: Commands And Control Instruments
COMMANDS AND CONTROL 4. KEY IGNITION SWITCH INSTRUMENTS This key operated control has three positions: «OFF» means everything is switched off «ON» activates all parts «START» engages the starter motor. On being released, the key will automatically return to «ON» from this position. 5. - Page 7 12. Speed change lever 23. Lever to release the hydrostatic drive This lever has se - Position «A» = Drive engaged: for all operating conditions, ven positions for the when moving and during cutting; 5 forward speeds, Position «B» = Drive released: considerably reduces the neutral position the effort required for moving the machine «N», and reverse...
-
Page 8: Directions Before Starting
(cutting and collection of grass). Use Honda 4-stroke, or an equivalent high detergent, premium Using the machine in any other way is considered "improper quality motor oil certified to meet or exceed U.S. automobile manu- use"... -
Page 9: Starting And Moving
The guarantee does not cover damage caused to the fuel system to turn yellow. or engine performance problems resulting from the use of fuel con- taining alcohol. Honda does not give its approval to the use of fu- els containing methyl alcohol since their suitability is not yet proven. -
Page 10: Grass Cutting
5.3 GRASS CUTTING When moving the machine, the blade must be NOTE disengaged and the cutting deck put at its highest position (posi- ENGAGING THE BLADE AND FORWARD MOVEMENT tion «7»). When you have reached the area to be mowed, For mechanical drive models: –... - Page 11 SLOPES EMPTYING THE COLLECTOR CHANNEL Complying with the slo - Cutting very tall or wet grass, particularly at too high a speed, can RIGHT! pe limits already men- cause the collector channel to become blocked. Should this happen, tioned, lawns on a slope it will be necessary to: have to mowed moving –...
-
Page 12: Cleaning And Storage
END OF MOWING Carefully remove any dry grass cuttings WARNING! which may have been accumulated around the engine or si- When you have finished mo - lencer to prevent them from catching fire the next time the wing, disengage the blade machine is used! and ride the machine with the cutting deck in the highest... -
Page 13: Maintenance
For mechanical and may lead to death. drive models: Use only genuine Honda parts or their equiva- IMPORTANT – engage the parking brake; lent. The use of replacement parts which are not of equivalent quality may damage the engine. - Page 14 AIR CLEANER SERVICE 2. Visually inspect the spark plug. Discard it if the insulator is A dirty air cleaner will restrict air flow to the carburetor. To prevent cracked or chipped. Clean the carburetor malfunction, service the air cleaner regularly. Service spark plug with a wire brush if it more frequently when operating the engine in extremely dusty is to be reused.
- Page 15 CHANGING BELTS Do not connect any other device than the “CB01” IMPORTANT charger to this connector. The motion from the engine to the rear axle and from the motor to the blade is obtained by two “V” belts, whose duration largely de- pends on how the machine is used.
- Page 16 spring (4) is 46 - 48 mm inside the washers. When the adjustment All operations on the blade (dismantling, WARNING! has been made, tighten the nut (1). sharpening, balancing, remoun ting and/or replacing) require a certain familiarity and special tools. For safety reasons, go to a specialized cen tre if you do not have the right tools or ex- For hydrostatic drive models: perience.
- Page 17 Having put the machine onto a firm WORK HOURS DATE OR N° OF HOURS and flat surface, engage the parking MACHINE brake, put the cutting deck into posi- 1.1 Check of tight fixing and tion «7», firmly grip the steering wheel sharpness of blade and the seat, and turn the machine 1.2 Blade replacement...
-
Page 18: Environmental Protection
7. ENVIRONMENTAL PROTECTION Environmental protection should be a priority of considerable im- portance when using the machine, for the benefit of both social co- existence and the environment in which we live. – Try not to cause any disturbance to the surrounding area. –... -
Page 19: Troubleshooting
8. TROUBLESHOOTING PROBLEM SITUATION LIKELY CAUSE SOLUTIONS 1. Pilot lamp off Key is in «ON» Electronic card in safety alert, due to: Put the key in the «OFF» position and look for the cause position, engine of the problem: stopped –... -
Page 20: Accessories On Request
PROBLEM SITUATION LIKELY CAUSE SOLUTIONS 8. Uneven cut and Key in «ON», – cutting deck not parallel to the ground – check tyre pressures poor grass collection engine running – re-align the cutting deck to the ground – check that the blade is fitted properly –... -
Page 21: Specifications
10. SPECIFICATIONS MODELS HF1211 HF1211 H Function Cutting of grass Electrical system 12 V 12 V Battery 20 Ah 20 Ah Engine: HONDA type GXV 340 GXV 340 Operating engine speed 3100 r.p.m. 3100 r.p.m Net Engine Power (*) 6.6 kW / 3600 6.6 kW / 3600... - Page 23 Résume les principales caractéristiques de votre machine danger de mort, en cas de non respect des consignes. ADDRESSES DES PRINCIPAUX CONCESSIONAIRES HONDA ............ i Honda France Manufacturing S.A.S. Pôle 45 - Rue des Châtaigniers - 45140 ORMES - FRANCE DÉCLARATION DE CONFORMIT É ........... ii...
-
Page 24: Consignes De Sécurité
La garantie et la responsabilité du constructeur tombent lorsque ceux-ci sont 16) Lʼutilisation dʼaccessoires autres que ceux recommandés par Honda peut oc- altérés ou éliminés. casionner des dommages sur votre tondeuse qui ne seront pas couverts par votre garantie. -
Page 25: Identification De La Machine Et De Ses Pièces
ÉTIQUETTES DE SÉCURITÉ 2. IDENTIFICATION DE LA MACHINE ET DE SES PIÈCES Votre machine doit être utilisée avec prudence. Dans ce but, des étiquettes destinées à vous rappeler les principales précautions dʼutilisation ont été pla- cées sur la machine sous forme de pictogrammes. Ces étiquettes sont considérées comme faisant partie intégrante de la machine. -
Page 26: Déballage Et Montage
3. DÉBALLAGE ET MONTAGE Pour des raisons de stockage et de transport, certains éléments de la ma- chine ne sont pas assemblés directement en usine mais doivent être mon- tés après déballage. Pour leur montage, suivre ces simples consignes: Pour des raisons de transport, la machine est livrée IMPORTANT sans huile moteur et sans essence. - Page 27 CONNEXION BATTERIE Enfiler le châssis ainsi formé dans la housse en toile en La batterie (1) est logée dans veillant à une bonne mise en le compartiment qui se trouve place sur l'embase. sous le volant; pour y accé- der, enlever la couverture en plastique (2) fixée par deux Accrocher tous les profils en vis (3).
-
Page 28: Commandes Et Outils De Contrôle
4. COMMANDES ET OUTILS 4. INTERRUPTEUR À CLÉ DE CONTRÔLE Cette commande à clé compte trois positions: «ARRÊT» correspond à tout éteint; «MARCHE» actionne tous les services; «DÉMARRAGE» met le démarreur en marche; en relâchant la clé à partir de cette position, cette dernière se remet automatiquement sur «MARCHE». - Page 29 12. Levier de changement de vitesse 23. Levier de deblocage de la transmission hydrostatique Ce levier se règle sur Ce levier a deux positions, indiquées par une étiquette: sept positions corres- pondant aux cinq vi- Position «A» = Transmission engagée: pour toutes les conditions tesses avant, au point dʼem ploi, en marche et pendant la coupe de lʼherbe;...
-
Page 30: Mode D'emploi
(tonte et ramassage de l'herbe). Toute autre utilisation est considérée comme un "emploi impropre": Utiliser de lʼhuile Honda 4 temps ou une huile moteur équivalente, haute- dans ce cas, la garantie perd tout effet et le Fabricant décline toute ment détergente et de première qualité, certifiée pour satisfaire ou dépas-... -
Page 31: Mise En Marche Et Déplacement
Éviter de débuter le travail si on a des doutes sur lʼef- élevé que celui que recommande Honda (86). Il existe deux types de mé- ficacités du frein. Si des doutes persistent, contacter votre concessionnaire. -
Page 32: Tonte De La Pelouse
5.3 TONTE DE LA PELOUSE Dans les déplacements, la lame doit être débrayée et REMARQUE le plateau de coupe mis à la hauteur maximum (position «7»). EMBRAYAGE DE LA LAME ET DÉPLACEMENT Une fois sur la pelouse, Dans les modèles à transmission mécanique: –... - Page 33 TERRAINS EN PENTE VIDAGE DE LA GOULOTTE DʼÉJECTION Dans le respect des limites La tonte dʼune pelouse trop haute ou trop mouillée ainsi quʼune vitesse de BON! indiquées, les pelouses en déplacement trop élevée peuvent boucher la goulotte dʼéjection. pente se tondent en mon- tant et en descendant - ja- Dans ce cas: mais transversalement;...
-
Page 34: Nettoyage Et Stockage
FIN DU TRAVAIL Prendre bien soin de retirer les dépôts d'herbe ATTENTION! sèche qui se seraient éventuellement accumulés à proximité du mo- Après la tonte, débrayer la lame teur et du silencieux d'échappement: cela évitera d'éventuels débuts et lever le plateau de coupe au d'incendie à... -
Page 35: Entretien
Dans les modèles conscience et la mort. à transmission mécanique: – enclencher le frein de stationne- N'utiliser que des pièces d'origine Honda ou leur équi- IMPORTANT valent. L'utilisation de pièces de rechange de qualité non équivalente peut ment; entraîner une détérioration du moteur. - Page 36 ENTRETIEN DU FILTRE À AIR 2. Contrôler la bougie dʼallumage à ceil nu. Si son isolant est fêlé ou Si le filtre à air est sale, le passage vers le carburateur sera restreint. Pour écaillé, jeter la bougie. Nettoyer la éviter tout mauvais fonctionnement du carburateur, entretenir régulièrement bougie dʼallumage avec une brosse le filtre à...
- Page 37 REMPLACEMENT DES COURROIES Ne pas brancher d'autre appareil que le “CB01” à le IMPORTANT connecteur. La rotation du moteur à l'axe arrière et du moteur à la lame est transmise par deux courroies trapézoïdales, dont la durée de vie dépendra essen- tiellement du mode dʼutilisation de la machine.
- Page 38 des rondelles. Toutes les opérations concernant la lame (dé- ATTENTION! Une fois le réglage exécuté, bloquer lʼécrou (1). montage, aiguisage, équilibrage, remontage et remplacement) sont des travaux compliqués qui re quièrent une compétence spécifique ainsi que l'utilisation d'outillages spéciaux; pour des raisons de sé- Dans les modèles curité, il est donc toujours conseillé...
- Page 39 Après avoir posé la machine sur une sur- INTERVENTION HEURES EXÉCUTÉE (DATE OU HEURES) face plate et solide, engager le frein de 1. MACHINE stationnement, mettre le plateau de coupe 1.1 Contrôle fixage en position «7», saisir fermement le volant et aiguisage lame et le siège et coucher latéralement la ma- 1.2 Remplacement lame...
-
Page 40: Protection De Lʼenvironnement
7. PROTECTION DE LʼENVIRONNEMENT La protection de lʼenvironnement doit être un aspect important et prioritaire pour lʼemploi de la machine, au profit de la société civile et de lʼenvironne- ment où nous vivons. – Eviter de déranger le voisinage. – Suivre scrupuleusement les normes locales pour l'élimination des dé- chets après la coupe. -
Page 41: Pannes Et Remèdes
8. PANNES ET REMÈDES PROBLÈME CONDITION CAUSE PROBABLE SOLUTIONS 1. Voyant éteint Clé sur «MARCHE» Déclenchement de la carte électronique: Mettre la clé sur «ARRÊT» et chercher les causes de la panne: moteur arrêté – batterie mal connectée – vérifier les connexions –... -
Page 42: Accessoires Optionnels
PROBLÈME CONDITION CAUSE PROBABLE SOLUTIONS 8. Tonte irrégulière et Clé sur «MARCHE» – plateau de coupe non parallèle au terrain – contrôler la pression des pneus ramassage inefficace moteur en route – rétablir le parallélisme du plateau par rapport au terrain –... -
Page 43: Caracteristiques Techniques
10. CARACTERISTIQUES TECHNIQUES MODELES HF1211 HF1211 H Fonction Couper de l'herbe (tondre) Installation électrique 12 V 12 V Batterie 20 Ah 20 Ah Moteur: HONDA type GXV 340 GXV 340 Vitesse dʼutilisation 3100 tours/min 3100 tours/min Puissance nette du moteur (*) - Page 45 Ihrer Maschine zusammen sich selbst oder Dritte schwer zu verletzen, mit Todesgefahr. ADRESSEN DERWICHTIGSTEN HONDA-HAUPTHÄNDLER ............i Honda France Manufacturing S.A.S. KONFORMITÄTSERKLÄRUNG ..........ii Pôle 45 - Rue des Châtaigniers - 45140 ORMES - FRANCE All rights reserved 1 DE...
-
Page 46: Sicherheitsvorschriften
15) Bringen Sie niemals Hände oder Füße in die Nähe von sich drehenden Teilen. Herstellers zur Folge. Halten Sie sich immer entfernt von der Auswurföffnung. 16) Die Verwendung von anderem Zubehör als dem von Honda geratenen kann Schäden an der Maschine verursachen, die nicht von der Garantie gedeckt sind. B) VORBEREITENDE MASSNAHMEN 1) Während des Mähens sind immer festes Schuhwerk und lange Hosen zu tragen. -
Page 47: Kennzeichnung Der Maschine Und Ihrer Bauteile
SICHERHEITSETIKETTEN 2. KENNZEICHNUNG DER MASCHINE UND IHRER BAUTEILE Bitte seien Sie bei der Benutzung Ihrer Maschine vorsichtig. Aus diesem Grund haben wir an der Maschine Etiketten mit Symbolen angebracht, die KENNZEICHNUNG DER MASCHINE Sie auf die wichtigsten Vorsichtsmaßnahmen hinweisen. Diese Etiketten sind als wesentlicher Bestandteil der Maschine anzusehen. -
Page 48: Auspacken Und Zusammenbau
3. AUSPACKEN UND ZUSAMMENBAU Aus Gründen der Lagerung und des Transports werden einige Bauteile der Maschine nicht in der Fabrik eingebaut, sondern müssen nach Entfernung der Verpackung montiert werden. Der Zusammenbau ist nach den folgen- den einfachen Anweisungen durchzuführen. Aus Gründen des Transports wird die Maschine ohne WICHTIG Motoröl und Benzin geliefert. - Page 49 ANSCHLUSS DER BATTERIE Den so geformten Rahmen in den Stoffsack einführen und Die Batterie (1) wird an dem dafür sorgen, dass er genau für sie bestimmten Platz unter entlang dem Umriss des Bo- dem Lenkrad untergebracht. dens positioniert wird. Zugang zur Batterie erhält man durch Ab nehmen des Kunststoffdeckels (2), der mit Mit Hilfe eines Schraubenzie-...
-
Page 50: Bedienteile Und Kontrollinstrumente
4. BEDIENTEILE 4. ZÜNDSCHALTER MIT ZÜNDSCHLÜSSEL UND KONTROLLINSTRUMENTE Der Zündschalter mit Zündschlüssel hat drei Stellungen: «STOPP» bedeutet, dass alles ausgeschaltet ist; «EIN» aktiviert alle Funktionen; «STARTEN» schaltet den Anlasser ein. Beim Loslassen des Zündschlüssels kehrt dieser automatisch in die Position «EIN»... - Page 51 12. Getriebeschalthebel für die Geschwindigkeit 23. Hebel zum entsperren des hydrostatischen antriebs Dieser Hebel hat sie- Dieser Hebel hat zwei Stellungen, die durch ein Schild gekennzeichnet ben Stellungen, fünf sind: für Vorwärtsgänge, eine Stellung für den Position «A» = Antrieb eingelegt: für alle Anwendungsarten, Leerlauf «N»...
-
Page 52: Gebrauchsanweisung
Jede andere Verwendung wird als „unzweckmäßige V erwendung“ der Maschine angesehen und hat den V erfall der Garantie und die Honda-Viertakt-Motoröl oder ein gleichwertiges hochdetergentes, erst- Ablehnung jeder Verantwortung seitens des Herstellers zur Folge. klassiges Motoröl verwenden, das den Anforderungen der Güteklasse SG, Dem Benutzer selbst dadurch entstandene oder Dritten zugefügte... -
Page 53: Anlassen Und Fahren
Wenn Sie alkoholhaltiges Benzin verwenden, muß WICHTIG Sich vergewissern, dass die Bremsleistung der Maschine den Einsatzbe- seine Oktanzahl mindestens der von Honda vorgeschriebenen entspre- dingungen entspricht, und nicht mit der Arbeit beginnen, wenn Zweifel über chen (86). Es gibt zwei Arten von Benzin/Alkohol-Gemischen: das eine die Bremsleistung bestehen. -
Page 54: Gras Mähen
5.3 GRAS MÄHEN Während des Fahrens muss das Messer ausge- ANMERKUNG schaltet und die Schnei deplatte in die oberste Stellung (Position «7») ge- EINSCHALTEN DES MESSERS UND VORSCHUB bracht werden. Wenn der zu mähende Rasen erreicht ist, Bei Modellen mit mechanischem Antrieb: –... - Page 55 HÄNGE ENTLEEREN DES AUSWURFKANALS Mit Rücksicht auf die an- Das Mähen eines sehr hohen und feuchten Rasens kann bei zu hoher Vor- RICHTIG! gezeigten Grenzen der schubgeschwindigkeit eine Verstopfung des Auswurfkanals verursachen. Steigung müssen Rasen mit Hanglage in Richtung In diesem Falle muss man: des Gefälles aufwärts/ab- –...
-
Page 56: Reinigung Und Einlagerung
BEENDIGUNG DER ARBEIT Ablagerungen von trockenem Gras, die sich in ACHTUNG! der Nähe des Motors und des Auspufftopfes bilden können, sorg- Nach dem Mähen das Messer fältig beseitigen, um zu vermeiden, dass bei der W iederaufnahme ausschalten und die Rückfahrt der Arbeit eventuell ein Brand ausgelöst wird! mit der Schneideplatte in der höchst möglichen Stellung zu-... -
Page 57: Wartung
Auspuffgase enthalten giftiges Kohlenmonoxid; Einatmen solcher mechanischem Antrieb: Gase kann Bewußtlosigkeit verursachen und zum Tode führen. – die Feststellbremse anziehen; Nur Original-Honda-Ersatzteile oder gleichwertige WICHTIG Teile verwenden. Bei Verwendung von Ersatzteilen, die nicht den Quali- Bei Modellen mit tätsanforderungen entsprechen, kann der Motor beschädigt werden. - Page 58 REINIGEN DES LUFTFILTERS 2. Die Zündkerze visuell untersuchen. Diese wegwerfen, wenn der lsola- Ein schmutziger Luftfilter behindert den Luftstrom zum Vergaser. Um Ver- tor gebrochen oder abgesplittert ist. gaserstörungen zu vermeiden, den Luftfilter regelmäßig reinigen. Den Fil- Die Zündkerze mit einer Drahtbür- ter häufiger reinigen, wenn der Motor in äußerst staubiger Umgebung be- ste reinigen, wenn sie wiederver- trieben wird.
- Page 59 AUSWECHSELN DER TREIBRIEMEN An diesen Anschluss darf keine andere Vorrichtung als WICHTIG das Batterieladegerät “CB01” angeschlossen werden. Die Übertragung der Antriebskraft vom Motor auf die Hinterachse und vom Motor auf das Messer erfolgt durch zwei Keilriemen, deren Lebensdauer im ELEKTRISCHE ANLAGE wesentlichen von der Art des Einsatzes der Maschine abhängt.
- Page 60 zwischen den Scheiben erhält. Nach der Einstellung die Mutter (1) fest- Alle Arbeiten, die das Messer betreffen (Ausbau, ACHTUNG! ziehen. Schärfen, Auswuchten, Einbau und/oder Auswechseln), sind auf- wändige Arbeiten, die außer der Verwendung spezieller Werkzeuge auch ein bestimmtes Fachkönnen erfordern. Außer Sicherheits- Bei Modellen gründen müssen diese Arbeiten daher immer in einem Fachbetrieb mit hydrostatischem Antrieb:...
- Page 61 Man stellt die Maschine auf eine ebene EINGRIFF STUNDEN AUSSGEFÜHRT (DATUM ODER NACH STUNDEN) und feste Fläche, legt die Feststellbremse 1. MASCHINE ein, bringt die Schneideplatte in die Posi- 1.1 Kontrolle Befestigung tion «7», fasst die Maschine an Lenkrad und Schärfe des Messers und Sitz fest an und legt sie auf die rechte 1.2 Auswechseln des Messers Seite, wobei der Auffangsack (wie ange-...
-
Page 62: Umweltschutz
7. UMWELTSCHUTZ Der Umweltschutz muss ein wesentlicher und vorrangiger Aspekt bei der Verwendung der Maschine sein, was das Zusammenleben und unsere Um- welt unterstützt. – Vermeiden Sie es, ein Störelement Ihrer Nachbarschaft darzustellen. – Halten Sie sich strikt an die örtlichen Vorschriften für die Entsorgung der Schneidreste. -
Page 63: Hilfe Für Die Störungssuche
8. HILFE FÜR DIE STÖRUNGSSUCHE STÖRUNG ZUSTAND MÖGLICHE URSACHE ABHILFE 1. Kontrolllampe Zündschlüssel auf Elektronische Steuerkarte hat Sicherheitsvor- Zündschlüssel auf «STOPP» stellen und Störungsursache suchen: leuchtet nicht auf «EIN» Motor richtung ausgelöst, weil: ausgeschaltet – Batterie schlecht angeschlossen – Anschlüsse prüfen –... -
Page 64: Zubehörteile Auf Anforderung
STÖRUNG ZUSTAND MÖGLICHE URSACHE ABHILFE 8. Unregelmäßiger Zündschlüssel auf – Schneideplatte nicht parallel zum Boden – Reifendruck prüfen Schnitt und «EIN» – Parallelität der Schneideplatte zum Boden wieder herstellen unzureichendes Motor läuft – Prüfen, ob das Messer richtig montiert ist Abräumen –... -
Page 65: Technische Daten
TECHNISCHE DATEN MODELLE HF1211 HF1211 H Funktion Gras schneiden Elektrische Anlage 12 V 12 V Batterie 20 Ah 20 Ah Motor: HONDA type GXV 340 GXV 340 Betriebsdrehzahl 3100 U/min. 3100 U/min. Effektive Motorleistung (*) 6,6 kW / 3600 6,6 kW / 3600... - Page 67 Riassume le principali caratteristiche della vostra macchina ELENCO MAGGIORI DISTRIBUTORI HONDA ....i Honda France Manufacturing S.A.S. Pôle 45 - Rue des Châtaigniers - 45140 ORMES - FRANCE DICHIARAZIONE DI CONFORMITÀ ......ii...
-
Page 68: Norme Di Sicurezza
16) Lʼutilizzo di accessori diversi da quelli raccomandati da Honda può causare danni alla machina che non saranno coperti dalla Garanzia. B) OPERAZIONI PRELIMINARI D) MANUTENZIONE E MAGAZZINAGGIO 1) Durante il taglio, indossare sempre calzature solide e pantaloni lunghi. -
Page 69: Identificazione Della Macchinae Dei Componenti
ETICHETTE DI SICUREZZA 2. IDENTIFICAZIONE DELLA MACCHINA E DEI COMPONENTI La vostra macchina deve essere utilizzata con prudenza. Per ricor- darvelo, sulla macchina sono state poste delle etichette raffiguranti IDENTIFICAZIONE DELLA MACCHINA dei pittogrammi, che richiamiamo le principali precauzioni dʼuso. Queste etichette sono considerate come parte integrante della mac- china. -
Page 70: Sballaggio E Completamento
3. SBALLAGGIO E COMPLETAMENTO Per motivi di magazzinaggio e trasporto, alcuni componenti della macchina non sono assemblati direttamente in fabbrica, ma devono essere montati do po la rimozione dallʼimballo, seguendo le istruzioni seguenti. Per motivi di trasporto, la macchina viene fornita IMPORTANTE priva di olio motore e benzina. - Page 71 COLLEGAMENTO BATTERIA Inserire il telaio così for- mato nellʼinvolucro in tela, La batteria (1) è alloggiata curandone il corretto posi- nellʼapposita sede posta zionamento lungo il peri- sotto il volante ed è ac- metro di base. cessibile togliendo la co- pertura in plastica (2), fis- sata da due viti (3).
-
Page 72: Comandi E Strumenti Di Controllo
COMANDI E STRUMENTI 4. COMMUTATORE A CHIAVE DI CONTROLLO Questo comando a chiave ha tre posizioni: «ARRESTO» corrispondente a tutto spento «MARCIA» attiva tutti i servizi; «AVVIAMENTO» si inserisce il motorino di avviamento; da questa posizione, rilasciando la chiave, questa torna automaticamente in posizione «MARCIA»... - Page 73 12. Leva comando cambio di velocità 23. Leva di sblocco della trasmissione idrostatica Questa leva ha set - Questa leva ha due posizioni, indicate da una targhetta: te posizioni, corri- spondenti alle cin- Posizione «A» = Trasmissione inserita: per tutte le condizioni marce di utilizzo, in marcia e durante il taglio;...
-
Page 74: Norme Dʼuso
è destinata (taglio e raccolta dell'erba). Qualsiasi altro impiego è considerato come “uso improprio” Usare olio Honda a 4 tempi, o uno equivalente di qualità premium, e comporta il decadimento della garanzia e il declino di ogni altamente de tergente, certificato per soddisfare o superare i requi- responsabilità... -
Page 75: Avviamento E Marcia Di Trasferimento
La garanzia non copre i danni causati al circuito del carburante o 5.2 AVVIAMENTO E MARCIA DI TRASFERIMENTO i problemi relativi alle prestazioni del motore che risultino dall'im- piego di benzina contenente alcool. La Honda non può in nessun AVVIAMENTO caso approvare l'impiego di carburanti contenenti alcool metilico la cui adeguatezza non sia ancora stata comprovata. -
Page 76: Taglio Dellʼerba
5.3 TAGLIO DELLʼERBA Durante i trasferimenti, la lama deve essere di- NOTA sinserita e il piatto di taglio portato in posizione di massima altezza INNESTO LAMA ED AVANZAMENTO (posizione «7»). Raggiunto il prato da tagliare, Nei modelli a trasmissione meccanica: –... - Page 77 TERRENI IN PENDENZA SVUOTAMENTO DEL CANALE DʼESPULSIONE Rispettando i limiti indi- Un taglio dʼerba molto alta o bagnata, unito ad una velocità di avan- CORRETTO! cati, i prati in pendenza zamento troppo elevata, può causare lʼintasamento del canale devono essere percorsi dʼespulsione.
-
Page 78: Pulizia E Rimessaggio
FINE LAVORO Rimuovere accuratamente i depositi di erba ATTENZIONE! secca eventualmente accumulatisi in prossimità del motore Terminata la rasatura, disin- e del silenziatore di scarico; ciò per evitare possibili inneschi nestare la lama ed effettuare di incendio alla ripresa del lavoro! il percorso di ritorno con il piatto di taglio in posizione di Prima di provvedere al rimessaggio dellʼunità... -
Page 79: Manutenzione
– inserire il freno di staziona- Usare solo pezzi di ricambio Honda o loro equi- IMPORTANTE valenti. L'uso di pezzi di ricambio non di qualità equivalente può mento;... - Page 80 ASSISTENZA DEL FILTRO DELLʼARIA 2. Controllare visivamente che la candela non sia consumata e Se il filtro dellʼaria è sporco, riduce il flusso di aria che giunge al car- che lʼisolatore non sia scheg- buratore. Per evitare che il carburatore si guasti, assistere regolar- giato o danneggiato, gettandola mente il filtro dellʼaria.
- Page 81 SOSTITUZIONE DELLE CINGHIE A questo connettore non deve essere collegato IMPORTANTE nessun altro dispositivo che non sia il caricabatterie “CB01”. La trasmissione del movimento dal motore allʼasse posteriore e dal motore alla lama è ottenuta per mezzo di due cinghie trapezoidali, la cui durata dipende essenzialmente dal modo in cui la macchina IMPIANTO ELETTRICO viene utilizzata.
- Page 82 molla di 46 - 48 mm, allʼinterno delle rondelle. Tutte le operazioni riguardanti la lama (smon- ATTENZIONE! A regolazione effettuata, bloccare il dado (1). taggio, affilatura, equili-bra tura, rimontaggio e/o sosti tuzione) sono lavori imp- gnativi che richiedono una specifica com- petenza ol tre all'impiego di apposite attrezzature;...
- Page 83 Posta la macchina su una superficie INTERVENTO ESEGUITO (DATA E ORE) piana e solida, inserire il freno di sta- MACCHINA zionamento, portare il piatto di taglio 1.1 Controllo fissaggio in posizione «7», afferrare saldamen- e affilatura lama te il volante e il sedile e coricare late- 1.2 Sostituzione lama ralmente la macchina dal lato destro, facendola appoggiare al sacco di rac-...
-
Page 84: Tutela Ambientale
7. TUTELA AMBIENTALE La tutela dellʼambiente deve essere un aspetto rilevante e priorita- rio nellʼuso della macchina, a beneficio della convivenza civile e del- lʼambiente in cui viviamo. – Evitare di essere un elemento di disturbo nei confronti del vici- nato. -
Page 85: Guida Alla Identificazione Degli Inconvenienti
8. GUIDA ALLA IDENTIFICAZIONE DEGLI INCONVENIENTI INCONVENIENTE CONDIZIONE CAUSA PROBABILE RIMEDIO 1. Spia spenta Chiave su Messa in sicurezza della scheda Mettere la chiave in posizione «ARRESTO» e cercare «MARCIA» elettronica a causa di: le cause del guasto: motore fermo –... -
Page 86: Accessori A Richiesta
INCONVENIENTE CONDIZIONE CAUSA PROBABILE RIMEDIO 8. Taglio irregolare e Chiave su – piatto di taglio non parallelo al terreno – controllare la pressione dei pneumatici raccolta insufficiente «MARCIA» – ripristinare il parallelismo del piatto rispetto al terreno motore in moto –... -
Page 87: Caratteristiche Tecniche
10. CARATTERISTICHE TECNICHE MODELLI HF1211 HF1211 H Funzione Taglio di erba Impianto elettrico 12 V 12 V Batteria 20 Ah 20 Ah Motore: HONDA tipo GXV 340 GXV 340 Velocità dʼesercizio 3100 giri/min 3100 giri/min Potenza effettiva del motore (*) - Page 89 Geeft een overzicht van de belangrijkste eigenschappen van uw machine ADRESSEN VAN HONDA-IMPORTEURS ......... i Honda France Manufacturing S.A.S. Pôle 45 - Rue des Châtaigniers - 45140 ORMES - FRANCE CONFORMITEITSVERKLARING ..........ii...
-
Page 90: Veiligheidsvoorschriften
Blijf altijd uit de buurt van de uitwerpopening. fe van verval van de garantie en de fabrikant kan hier dan niet voor aansprakelijk 16) Het gebruik van andere accessoires dan diegene die door Honda aangeraden gesteld worden. zijn, kan schade aan de machine veroorzaken, die niet door de garantie gedekt zal zijn. -
Page 91: Identificatie Van De Machine En De Componenten
VEILIGHEIDSSTICKERS 2. IDENTIFICATIE VAN DE MACHINE EN DE COMPONENTEN Gebruik uw machine met de nodige voorzichtigheid. Om u tot voorzichtig- heid te manen is uw machine voorzien van een aantal stickers welke u door middel van pictogrammen wijzen op de belangrijkste voorzorgsmaatrege- IDENTIFICATIE VAN DE MACHINE len. -
Page 92: Het Uitpakken En Monteren
3. HET UITPAKKEN EN MONTEREN Om vervoers- en opslagredenen worden sommige onderdelen van de ma- chine niet in de fabriek gemonteerd. Zij dienen na het uitpakken gemonteerd te worden. De voltooing dient uitgevoerd te worden aan de hand van de vol- gende, eenvoudige instrukties. - Page 93 DE ACCU AANSLUITEN Doe het op die manier ge- vormde frame in de zak, waar- De accu (1) bevindt zich onder bij u erop moet letten dat de het stuur en is bereikbaar door onderkant rondom op de juiste het plastic deksel (2), die met plaats zit.
-
Page 94: Bedieningselementen
4. BEDIENINGSELEMENTEN 4. CONTACTSLOT Het contactslot heeft drie verschillende standen: «UIT» stand alles uit; «DRAAIEN» stand alle bedieningselementen worden in werking gesteld; «STARTEN» stand u start de startmotor; vanuit deze stand komt het sleuteltje, zodra u deze loslaat, vanzelf weer in de «DRAAIEN» stand terug. - Page 95 12. Versnellingspook 23. Koppelingshendel van de hydrostatische overbrenging Deze pook heeft zeven Deze hendel heeft twee standen die door een plaatje zijn aangegeven: standen die over een- stemmen met vijf ver- Stand «A» = Aandrijving vergrendeld: voor alle gebruikscondities, tij- snellingen vooruit, de dens het rijden en het maaier;...
-
Page 96: Gebruiksvoorschriften
(het maaien en opvangen van gras). Eender welk ander gebruik wordt als "oneigenlijk gebruik" be- Honda-viertakt-motorolie of een gelijkwaardige, top kwaliteit motorolie met schouwd en brengt verval van, zowel de garantie, als de aanspra- een hoog detergentgehalte gebruiken, dat overeenstemt met de kwali-... -
Page 97: De Machine Starten En Rijden
BELANGRIJK Zorg ervoor dat het remvermogen van de machine aangepast is aan de ge- bruiken in een Honda maaier , moet het octaangetal tenminste even bruiksvoorwaarden, en vat het werk niet aan als u twijfels hebt omtrent de hoog zijn als dat, wat wij voorschrijven (86). Er bestaan twee soorten doeltreffendheid van de rem. -
Page 98: Het Gras Maaien
5.3 HET GRAS MAAIEN Indien u zich met de machine verplaatst moet het OPMERKING mes uitgeschakeld zijn en moet het maaidek in de hoogste stand staan HET MES INSCHAKELEN EN VOORUITRIJDEN (stand «7»). Als u zich op het te maaien gazon bevindt: Bij modellen met mechanische aandrijving: –... - Page 99 een weer in te schakelen om het op te laten houden. HELLENDE TERREINEN SCHOONMAKEN VAN HET WINDKANAAL Houd de aangegeven be- GOED! perkingen in acht en maai Als u hoog en vochtig gras maait met een te hoge snelheid bestaat de kans een hellend gazon altijd dat het windkanaal verstopt raakt.
-
Page 100: De Machine Schoonmaken En Stallen
NA HET MAAIEN Verwijder het droge gras dat zich eventueel in de LET OP! buurt van de motor of van de geluiddemper van het uitwerpmecha- Na het maaien dient u het mes nisme opgehoopt heeft; als u dit niet doet kan er brand ontstaan als uit te schakelen en het maaidek u opnieuw begint te maaien! in de hoogste stand te zetten. -
Page 101: Onderhoud
– zet de machine op de handrem; Allen originele Honda-wisselstukken of gelijkwaardige BELANGRIJK onderdelen gebruiken. Bij het gebruik van wisselstukken, welke niet aan de kwaliteitseisen voldoen, kan de motor beschadigd worden. - Page 102 REINIGEN VAN DE LUCHTFILTER 2. Inspekteer de bougie met het oog. Gooi de bougie weg als de isola- Een vuile luchtfilter belemmert de luchtstroom naar de carburator. Om sto- tiemantel is gebarsten of bescha- ringen van de carburator te vermijden de luchtfilter regelmatig reinigen. De digd.
- Page 103 DE V-SNAREN VERVANGEN Aan deze connector mag geen enkele andere inrich- BELANGRIJK ting worden aangesloten afgezien van de acculader “CB01”. De drijfkracht van de motor naar de achteras en van de motor naar het mes wordt door middel van twee V-snaren verkregen. Hun levensduur hangt af ELEKTRISCHE INSTALLATIE van de manier waarop de machine wordt gebruikt.
- Page 104 van de sluitringen verkregen is. Alle handelingen aan het maaidek (demontage, slijpen, LET OP! Na het bijstellen, dient de moer (1) weer vastgedraaid te worden. in balans brengen, hermontage en/of vervanging) vergen een wel- bepaalde vaardigheid en het gebruik van speciaal gereedschap; uit veiligheidso ver wegingen, dienen deze handelingen bijgevolg uit- Bij modellen met hydrostatische aandrijving: gevoerd te worden in een gespecialiseerd servicecentrum.
- Page 105 Nadat de machine op een vlakke en ste- ONDERHOUD UREN UITVOERING (DATUM OF UREN) vige ondergrond geplaatst is, trekt u de 1. MACHINE handrem aan, brengt u het maaidek in de 1.1 Controle bevestiging «7» stand, pakt u het stuur en de stoel ste- en scherpte mes vig vast en plaatst u de machine op haar 1.2 Vervanging mes...
-
Page 106: Bescherming Van De Omgeving
7. BESCHERMING VAN DE OMGEVING De bescherming van de omgeving moet een belangrijk en prioritair aspect vormen voor het gebruik van de machine, ten gunste van de civiele sa- menleving en de omgeving waarin we leven. – Wees geen storend element. –... -
Page 107: Richtlijn Om Problemen Vast Te Stellen
8. RICHTLIJN OM PROBLEMEN VAST TE STELLEN PROBLEEM TOESTAND MOGELIJKE OORZAAK OPLOSSING 1. Het controlelampje Sleuteltje op Het beveiligingssysteem schakelt zich Draai het sleuteltje op «UIT» en probeer de oorzaak op te sporen: brandt niet «DRAAIEN», in omdat: de motor is uitgeschakeld –... -
Page 108: Op Aanvraag Leverbare Accessoires
PROBLEEM TOESTAND MOGELIJKE OORZAAK OPLOSSING 8. Het maaibeeld is Sleuteltje op – het maaidek is niet evenwijdig met het gazon – controleer de bandenspanning onregelmatig en het «DRAAIEN», – stel het maaidek evenwijdig ten opzichte van het gazon opvangen is niet de motor draait –... -
Page 109: Technische Eigenschappen
10. TECHNISCHE EIGENSCHAPPEN MODELLEN HF1211 HF1211 H Functie Gras maaien Elektrische installatie 12 V 12 V Accu 20 Ah 20 Ah Motor: HONDA type GXV 340 GXV 340 Bedrijfstoerental 3100 olw/min 3100 olw/min Effectief vermogen van de motor (*) 6,6 kW / 3600... - Page 111 Resumen de las principales características de vuestra máquina DIRECCIONES DE LOS PRINCIPALES Honda France Manufacturing S.A.S. CONCESIONARIOS HONDA ............i Pôle 45 - Rue des Châtaigniers - 45140 ORMES - FRANCE DECLARACION DE CONFORMIDAD ........ii...
-
Page 112: Normas De Seguridad
15) No acercar las manos o los pies a las partes rotativas, ni ponerlos debajo de las mismas. Estar lejos de la abertura de salida. 16) El uso de accesorios diferentes de los recomendados por Honda puede provo- B) OPERACIONES PRELIMINARES car daños a la máquina que no estarán cubiertos por la garantía. -
Page 113: Identificacion De La Maquinay De Los Componentes
ETIQUETAS DE SEGURIDAD 2. IDENTIFICACION DE LA MAQUINA Y DE LOS COMPONENTES La máquina debe ser utilizada con prudencia. Para recordárselo, han sido pues tas sobre la máquina etiquetas que representan pictogramas que re- cuerdan las principales precauciones de uso. Estas etiquetas se conside- IDENTIFICACION DE LA MAQUINA ran una parte integrante de la máquina. -
Page 114: Desembalaje Y Montaje
3. DESEMBALAJE Y MONTAJE Por motivos de almacenamiento y transporte, algunos componentes de la máquina no se ensamblan directamente en fábrica, sino que se deben mon- tar después de la remoción del embalaje. El montaje final se debe efectuar siguiendo estas simples instrucciones. Por motivos de transporte, la máquina se entrega sin IMPORTANTE aceite en el motor y sin gasolina. - Page 115 CONEXION DE LA BATERIA Inserir el bastidor así formado en la envoltura de tela, pro- La batería (1) está colocada curando colocarlo correcta- en la sede especial situada mente a lo largo del perímetro debajo del volante y es acce- de base.
-
Page 116: Comandos E Instrumentos De Control
4. COMANDOS E INSTRUMENTOS 4. CONMUTADOR A LLAVE DE CONTROL Este comando a llave tiene tres posiciones: «PARADA» corresponde a todo apagado; «MARCHA» activa todos los servicios; «ARRANQUE» se inserta el motor de arranque; de esta posición, soltando la llave, la misma vuelve automáticamente a la posición «MARCHA». - Page 117 12. Palanca de comando del cambio de velocidad 23. Palanca de desbloqueo de la transmisión hidrostática Esta palanca tiene Esta palanca tiene dos posiciones, indicadas en una etiqueta: sie te posiciones, co- rrespondientes a las Posición «A» = Transmisión inserida: para todas las condiciones de cinco marchas hacia uso, en marcha o durante el corte adelante, a la posición...
-
Page 118: Normas De Uso
Cualquier otra utilización está considerada como “uso impropio” y comporta la anulación de la garantía y la cancelación de toda res- Utilice aceite Honda para motores de 4 tiempos u otro aceite de motor de ponsabilidad del Fabricante, recayendo sobre el usuario todos los alto grado detergente y máxima calidad certificado para que cumpla o... -
Page 119: Arranque Y Marcha De Transferencia
La garantía no cubre los daños causados al circuito de gasolina ni los problemas de rendimiento del motor resultante del empleo de gasolina que contenga alcohol. Honda no aprueba el uso de carburantes que con- 5.2 ARRANQUE Y MARCHA DE TRANSFERENCIA tengan alcohol metílico siempre y cuando su carácter apropiado aún no... -
Page 120: Corte Del Césped
5.3 CORTE DEL CESPED Durante las transferencias, la cuchilla debe estar des- NOTA acoplada y el plato de corte se debe poner en posición de altura máxima ACOPLAMIENTO DE LA CUCHILLA Y AVANCE (posición «7»). Una vez sobre el prado que se debe cortar, En los modelos de transmisión mecánica: –... - Page 121 TERRENOS EN PENDIENTE VACIADO DEL CANAL DE EXPULSIÓN Respetando los límites in- El corte de césped muy alto o mojado, junto a una velocidad de avance de- ¡BIEN! dicados, los prados en masiado elevada, pueda causar el atascamiento del canal de expulsión. pendiente deben ser reco- rridos en el sentido su- En caso de atascamiento es necesario:...
-
Page 122: Limpieza Y Almacenamiento
FINAL DEL TRABAJO Eliminar minuciosamente los depósitos de césped ¡ATENCION! seco eventualmente acumulados en las proximidades del motor y Una vez terminado el corte, des- del silenciador del escape; esto para evitar incendios accidentales acoplar la cuchilla, y efectuar el al reanudar el trabajo! camino de regreso con el plato de corte en la posición de má-... -
Page 123: Mantenimiento
– inserir el freno de estaciona- incluso la muerte. miento; Utilice solamente piezas genuinas Honda o sus equi- IMPORTANTE En los modelos valen tes. La utilización de piezas de recambio que no sean de una cali- de transmisión hidrostática:... - Page 124 MANTENIMIENTO DEL FILTRO DE AIRE Un filtro de aire sucio podría disminuir el flujo de aire hacia el carburador. 2. Inspeccionar visualmente la bujía. Para evitar que el carburador funcione mal, limpie el filtro de aire a menudo. Tirarla si el aislador estuviese ra- Límpielo con más frecuencia cuando el motor funcione en lugares donde jado o astillado.
- Page 125 SUSTITUCIÓN DE LAS CORREAS A este conector no se debe conectar ningún otro dis- IMPORTANTE positivo que no sea el cargador de baterías “CB01”. La transmisión del movimiento del motor al eje posterior y del motor a la cu- chilla se obtiene por medio de dos correas trapezoidales, cuya duración de- pende esencialmente del modo en el cual se utiliza la máquina.
- Page 126 dentro de las arandelas. Todas las operaciones relativas a la cuchilla (des- ¡ATENCION! Después de haber efectuado la regulación, fijar la tuerca (1). montaje, afilado, equilibrado, remontaje y/o sustitución) son traba- jos complicados que requieren una especial competencia y el em- pleo de las herramientas especiales;...
- Page 127 Colocada la máquina sobre una superficie INTERVENCIÓN HORAS EFECTUADO (FECHA U HORAS) plana y sólida, inserir el freno de estacio- 1. MAQUINA namiento, llevar el plato de corte a la po- 1.1 Control fijación y afilado sición «7», coger firmemente el volante y cuchilla el asiento y acostar lateralmente la má- 1.2 Sustitución cuchilla...
-
Page 128: Tutela Del Medio Ambiente
7. TUTELA DEL MEDIO AMBIENTE La protección del ambiente debe ser un aspecto relevante y prioritario en el uso de la máquina, a beneficio de la convivencia civil y del ambiente en el que vivimos. – Evite ser un elemento de disturbio para la vecindad. –... -
Page 129: Guia Para La Identificacion De Los Inconvenientes
8. GUIA PARA LA IDENTIFICACION DE LOS INCONVENIENTES PROBLEMA CONDICION CAUSA PROBABLE SOLUCION 1. Alarma visiva Llave en Colocación en seguridad del circuito impreso a Poner la llave en pos. «PARADA» y buscar las causas de la avería: apagada «MARCHA» causa de: motor apagado –... -
Page 130: Accesorios A Pedido
PROBLEMA CONDICION CAUSA PROBABLE SOLUCION 8. Corte irregular Llave en – plato de corte no paralelo al te rreno – controlar la presión de los neumáticos y recolección «MARCHA» motor – restablecer el paralelismo del plato de corte respecto al terreno insuficiente en movimiento –... -
Page 131: Caracteristicas Tecnicas
10. CARACTERISTICAS TECNICAS MODELOS HF1211 HF1211 H Función Cortar el césped Instalación eléctrica 12 V 12 V Batería 20 Ah 20 Ah Motor: HONDA tipo GXV 340 GXV 340 Régimen del trabajo 3100 rev/min 3100 rev/min Potencia efectiva del motor (*) -
Page 133: Direcciones De Los Principales Concesionarios Honda
Major Honda distributor addresses Adresses des principaux concessionnaires Honda Adressen derwichtigsten Honda-Haupthändler Elenco dei maggiori distributori Honda in Europa Adressen van Honda-importeurs Direcciones de los principales concesionarios Honda AUSTRIA FRANCE NORWAY SPAIN & LAS PALMAS PROVINCE Honda Motor Europe (North) -
Page 134: Declaracion De Conformidad
Déclaration CE de conformité EC - 1) Le soussigné, Mr Takayoshi Fukai, représentant du constructeur, déclare par la présente que la machine décrite ci-dessous est conforme aux dispositions de la Directive Machine. Cette machine répond également aux dispositions de : - Directive relative aux émissions sonores dans l'environnement des matériels destinés à... - Page 135 Puterea sonora masurata: - b) Puterea sonora garantata: - c) Parametrii de zgomot putere instalata neta - d) Procedura de evaluare a conformitatii: - e) Organismul notificat Honda France Manufacturing S.A.S. 4) Producator: 5) Reprezentantul Autorizat in masura sa intocmeasca documentatia tehnica: Pôle 45 - Rue des Chataîgniers...