Table of Contents
Advertisement
Available languages
Available languages
Quick Links
Mod.
1093
DS1093-024
DVR 4 CANALI VIDEO/AUDIO H.264 CIF/4CIF Sch. 1093/064S
DVR 8 CANALI VIDEO H.264 CIF/2CIF Sch. 1093/065S
DVR 16 CANALI VIDEO/AUDIO H.264 CIF/2CIF Sch. 1093/066S
4 CHANNEL VIDEO/AUDIO DVR H.264 CIF/4CIF Ref. 1093/064S
8 VIDEO CHANNEL DVR H.264 CIF/2CIF Ref. 1093/065S
16 CHANNEL VIDEO/AUDIO DVR H.264 CIF/2CIF Ref. 1093/066S
DVR 4 VIDEO/AUDIO-LOOPING-KANÄLE H.264 CIF/4CIF Typ 1093/064S
DVR 8 VIDEO-KANÄLE H.264 CIF/2CIF Typ 1093/065S
DVR 16 VIDEO/AUDIO-LOOPING KANÄLE H.264 CIF/2CIF Typ 1093/066S
DVR 4 CANALES DE VÍDEO/AUDIO H.264 CIF/4CIF Ref. 1093/064S
DVR 8 CANALES DE VÍDEO H.264 CIF/2CIF Ref. 1093/065S
DVR 16 CANALES DE VÍDEO/AUDIO H.264 CIF/2CIF Ref. 1093/066S
GUIDA RAPIDA
QUICK GUIDE
SCHNELLANLEITUNG
GUÍA RÁPIDA
Advertisement
Chapters
Table of Contents

Related Manuals for urmet domus DRV-065S-066S


Summary of Contents for urmet domus DRV-065S-066S
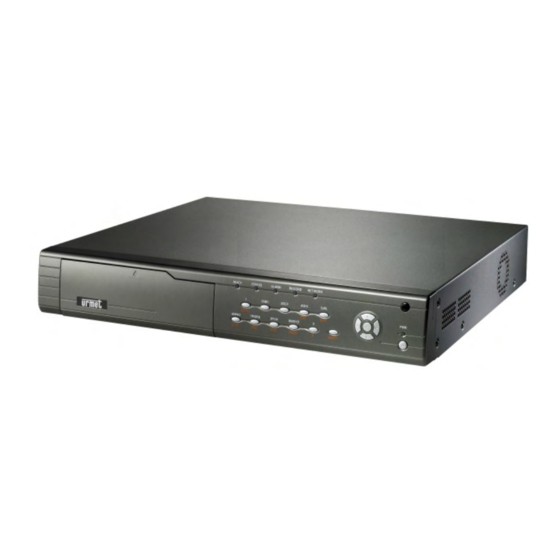
- Page 1 Mod. 1093 DS1093-024 DVR 4 CANALI VIDEO/AUDIO H.264 CIF/4CIF Sch. 1093/064S DVR 8 CANALI VIDEO H.264 CIF/2CIF Sch. 1093/065S DVR 16 CANALI VIDEO/AUDIO H.264 CIF/2CIF Sch. 1093/066S 4 CHANNEL VIDEO/AUDIO DVR H.264 CIF/4CIF Ref. 1093/064S 8 VIDEO CHANNEL DVR H.264 CIF/2CIF Ref. 1093/065S 16 CHANNEL VIDEO/AUDIO DVR H.264 CIF/2CIF Ref.
-
Page 2: Table Of Contents
ITALIANO INDICE Impostazioni generali..........................4 Accensione ..........................4 1.1.1 Accensione dal pannello posteriore ........................4 1.1.2 Accensione dal pannello frontale ........................4 Spegnimento ..........................4 1.2.1 Spegnimento diretto ............................4 1.2.2 Spegnimento dal menu principale ........................4 Abilitazione telecomando ......................5 Visualizzazioni a monitor ...................... - Page 3 3.2.2 Tipo (ricerca per evento)..........................18 3.2.3 Tempo (ricerca per data e ora) ........................18 3.2.4 Scheda nr................................ 18 3.2.5 Ricerca ................................18 Riproduzione di una registrazione..................19 3.3.1 Play ................................. 19 Utilizzo dell’interfaccia Internet Explorer..................... 20 Requisiti minimi per l’installazione del software ..............20 Configurazione di protezione e sicurezza ................
-
Page 4: Impostazioni Generali
Il presente documento vuole essere una semplice guida rapida che Le permetterà un veloce accesso alle principali funzionalità dei modelli di Video Registratore Digitale URMET Domus S.p.A. Sch.1093/064S, 1093/065S e 1093/066S. Per maggiori approfondimenti, fare riferimento al manuale istruzioni presente sul CD a corredo del prodotto. -
Page 5: Abilitazione Telecomando
ABILITAZIONE TELECOMANDO Per poter comandare il dispositivo mediante il telecomando fornito in dotazione occorre procedere alla sua abilitazione. Procedura di abilitazione Premere il tasto “DEV” sul telecomando ¾ Immettere l’indirizzo di default per controllare il DVR mediante il telecomando: premere “01” sul telecomando ¾... -
Page 6: Menu Di Programmazione
MENU DI PROGRAMMAZIONE La tabella sottostante mostra la struttura del menù le impostazioni e i parametri. MENU IMPOSTAZ. PARAMETRI MENU MENU IMPOSTAZ. PARAMETRI MENU Lingua ID Dispositivo Richiedi password Telecamera Salva schermo Nome - posizione Video Colori Base Base Adatta Monitor OSD - posizione Schermo Luminosità... -
Page 7: Configurazione Del Dvr
CONFIGURAZIONE DEL DVR Per accedere al menù di configurazione premere il tasto “MENU” sul pannello frontale del DVR. Comparirà la videata come mostrato nella figura seguente. Figura 2: menù principale In questa videata è distinguibile una piccola finestra rettangolare denominata “Active Frame”. Questa può essere spostata da una icona all’altra utilizzando i tasti freccia “... -
Page 8: Impostazioni Base Menu Schermo
2.1.1 IMPOSTAZIONI BASE MENU SCHERMO 2.1.1.1 Lingua In questa voce di menù è possibile selezionare la lingua utilizzando i tasti “ ”. 2.1.1.2 ID dispositivo In questa voce di menù è possibile assegnare un indirizzo al DVR per poterlo controllare con il telecomando. Nel caso in cui ci siano più... -
Page 9: Adatta A Monitor
2.1.1.6 Adatta a monitor Tale funzione permette di adattare la visualizzazione dell’uscita video del DVR allo schermo che si sta utilizzando. Infatti abilitando la funzione “adatta a monitor” il DVR provvede a commutare automaticamente la risoluzione da 704x576 a 640x576 nel caso di sistemi video PAL e da 704x480 a 640x480 per sistemi video NTSC. -
Page 10: Menu Registrazione
MENU REGISTRAZIONE Descrizione ¾ Accedere a questo menù per variare le impostazioni di registrazione e di configurazione di ciascun segnale video. Posizionare “l’Active Frame” sull’icona “REGISTRAZIONE”, quindi premere il tasto “ENTER”. Comparirà la videata come mostrato nella figura seguente. Figura 6: menù configurazione canale registrazione Tale videata fa riferimento alle impostazioni base del menù. -
Page 11: Risoluzione
2.2.1.6 Risoluzione In questa voce di menù è possibile impostare il tipo di risoluzione che si desidera impiegare per la registrazione sulla telecamera sezionata. In generale i dispositivi Urmet serie DVR DVS sono in grado di supportare, a seconda del modello, le seguenti risoluzioni in registrazione: “DCIF”, “4CIF”, “2CIF”, ”CIF”, e “QCIF”. -
Page 12: Programmare
2.2.1.10 Programmare Selezionando la voce “Programmare” e premendo il tasto “ENTER” si accede al menù di programmazione mostrato qui sotto. Figura 7: menù di programmazione registrazione La voce evidenziata rappresenta la voce selezionata. Utilizzando i tasti freccia “ ” è possibile spostare il cursore sulle varie voci del menù. Una volta posizionato il cursore sulla voce desiderata, per modificarla premere il tasto “ENTER”... -
Page 13: Pre Rec
Motion e allarme In questa modalità la registrazione viene avviata non appena il sensore va in allarme e il motion rileva dei movimenti. Manuale In questa modalità la registrazione viene avviata manualmente mediante la pressione sul tasto “REC”. Per arrestare la registrazione premere nuovamente il tasto “REC”. 2.2.1.11 Pre REC In caso di evento dato da motion o allarme esterno, la registrazione conterrà... -
Page 14: Impostazioni Base Menu Rete
2.3.1 IMPOSTAZIONI BASE MENU RETE 2.3.1.1 In questa voce di menù è possibile impostare l’indirizzo IP del DVR. Premere il tasto “EDIT” e mediante i tasti numerici 0y9 immettere l’indirizzo IP. Utilizzare i tasti “ ” per spostare il cursore. Premere “EDIT”... -
Page 15: Menu Utenti
MENU UTENTI Descrizione ¾ Accedere a questo menù per modificare la password di default, aggiungere (l’amministratore può creare fino ad un massimo di 15 utenti) o rimuovere nuovi utenti definendo i relativi diritti. Posizionare “l’Active Frame” sull’icona “Utenti”, quindi premere il tasto “ENTER”. -
Page 16: Modifica Password
2.4.1 MODIFICA PASSWORD Utilizzare i tasti “ ” per spostare “l’active frame” sulla casella “Password”, premere il tasto “Edit” ed inserire la nuova password. La password è una combinazione di massimo 16 numeri. Per la digitazione della sequenza di numeri che compongono la password utilizzare i tasti numerici posti sul pannello frontale del dispositivo (premere il tasto “Edit”... -
Page 17: Canali
eNOTA BENE In caso di interruzione dell’energia elettrica il dispositivo riprenderà in automatico le registrazioni, una volta ripristinata la stessa, solo ed esclusivamente nel caso si tratti di registrazioni programmate nel menù “Registrazione”. Le registrazioni avviate quindi manualmente non verranno ripristinate contemporaneamente al ritorno dell’energia elettrica. -
Page 18: Ricerca Delle Registrazioni
RICERCA DELLE REGISTRAZIONI Dalla modalità “LIVE” premere il tasto “PLAY” posto sul pannello frontale del dispositivo. Comparirà la videata come mostrato nella figura seguente. Figura 12: menù di riproduzione La voce evidenziata rappres enta la voce selezionata. Utilizzando i tasti freccia “ ”... -
Page 19: Riproduzione Di Una Registrazione
RIPRODUZIONE DI UNA REGISTRAZIONE Dopo aver impostato i parametri di ricerca (tipo di evento, data/ora) ed avviato la ricerca mediante il tasto “CERCA”, selezionare il file, dalla lista box, che si desidera riprodurre e premere il tasto “ENTER” per avviare la riproduzione. Collegando il mouse USB al DVR, nella parte inferiore dello schermo sarà... -
Page 20: Utilizzo Dell'interfaccia Internet Explorer
¾ verranno di seguito identificati con il termine dispositivo. I dispositivi URMET Domus sono dotati di Web Client per consentire la connessione automatica via internet mediante Pc remoto. eNOTA BENE Qualunque operazione effettuata in locale sul dispositivo (tramite il pannello frontale del DVR – telecomando - mouse) potrebbe causare un rallentamento delle prestazioni del software. - Page 21 Cliccare sulla voce “Siti…”. ¾ Apparirà la seguente videata. ¾ Aggiungere l’indirizzo IP del dispositivo (visualizzabile premendo il tasto “F2” sul pannello frontale del ¾ dispositivo) nel campo “Aggiungi il sito web all’area”. Cliccare sulla voce “Aggiungi”. ¾ Apparirà la seguente videata di conferma. ¾...
-
Page 22: Avvio
AVVIO Al lancio della connessione viene visualizzata la seguente finestra di login per l’autenticazione degli utenti abilitati all’utilizzo. Le impostazioni di default prevedono: Nome utente o admin ¾ password 12345 ¾ Figura 13: finestra di login Se il nome utente e la password sono corretti si accederà alla schermata principale dell’interfaccia web, in caso contrario apparirà il seguente messaggio di errore: Figura 14: messaggio di errore eNOTA BENE... -
Page 23: Area Informazioni
DESCRIZIONE Area informazioni Interfaccia di visualizzazione sullo stato del DVR e dei canali disponibili Griglia di visualizzazione Modalità di visualizzazione Tasti funzione Interfaccia impostazioni di visualizzazione di ciascun canale video Interfaccia comandi PTZ Barra tasti di gestione / configurazione 4.4.1 AREA INFORMAZIONI In tale sezione vengono riportate le seguenti informazioni: Grado di utilizzo della CPU (valore espresso in %) -
Page 24: Griglia Di Visualizzazione
4.4.4 GRIGLIA DI VISUALIZZAZIONE A seconda della modalità di visualizzazione prescelta (mediante i relativi tasti) verrà visualizzata la corrispettiva griglia. Il riquadro rosso (selezionabile con un click mediante il tasto sinistro del mouse) indica la posizione sulla quale verrà visualizzato il flusso video relativo al canale prescelto. -
Page 25: Interfaccia Comandi Ptz
4.4.7 INTERFACCIA COMANDI PTZ ICONA DESCRIZIONE Consentono il posizionamento della Dome collegata. Il tasto centrale “ non è abilitato. Tasti non abilitati Consente di richiamare un preset precedentemente memorizzato. Inserire il numero del preset che si desidera richiamare, quindi cliccare sul pulsante Consente la regolazione del livello di zoom della Dome collegata. -
Page 26: Caratteristiche (Formato Pal)
CARATTERISTICHE (FORMATO PAL) Specifiche Voce 1093/064S 1093/065S 1093/066S Tipologia di prodotto Videoregistratore digitale triplex con Network Algoritmo di H.264 compressione video PAL (compatibile con telecamere bianco/nero) Standard video H 15625 Hz / V 50 Hz Risoluzione anteprima 704 x 576 immagine Risoluzione di “4CIF”, “DCIF”, “2CIF”, ”CIF”... -
Page 27: Evoluzioni Future
EVOLUZIONI FUTURE La URMET Domus SpA, nell’ottica di un costante miglioramento della propria gamma, al fine di rispondere a tutte le esigenze di un settore sempre più dinamico ed esigente, ha creato tale sezione complementare alla guida rapida, per presentarLe in anteprima gli aggiornamenti più... - Page 28 ENGLISH TABLE OF CONTENTS General settings ............................. 30 Switch-on..........................30 1.1.1 Switch-on from rear panel..........................30 1.1.2 Switch-on from front panel ..........................30 Switch-off..........................30 1.2.1 Direct switch-off............................... 30 1.2.2 Switch-off from main menu ..........................30 Remote control enable ......................31 Messages on the monitor .......................
- Page 29 3.1.5 Stop all ................................43 Recording search ........................44 3.2.1 Channel................................44 3.2.2 T Rec type(search by event)........................... 44 3.2.3 Time (search by date and time) ........................44 3.2.4 Card No................................44 3.2.5 Search................................44 Playing a recording......................... 45 3.3.1 Play .................................
-
Page 30: General Settings
Thank you for having purchased this Urmet product. This document is just a quick user manual allowing you to install the Digital Video Recorders Urmet Domus S.p.A. models 1093/064S, 1093/065S and 1093/066S and to start using their main functions in a short time. -
Page 31: Remote Control Enable
REMOTE CONTROL ENABLE The remote control must be enabled to control the device. Enabling procedure ¾ Press “DEV” on the remote control. ¾ Enter the default address for controlling the DVR using the remote control: press “01” on the remote control. ¾... -
Page 32: Programming Menu
PROGRAMMING MENU Menu structures, settings and parameters are shown in the following table. MENU SETTING PARAMETER MENU MENU SETTING PARAMETER MENU Language Device ID Require password Select camera Screen saver Name - position Video standard Color Basic Basic Enable scaler Date OSD - position Display Camera... -
Page 33: Dvr Configuration
DVR CONFIGURATION Press “MENU” on the front panel of the DVR to access the configuration menu. The following login window shown in the following figure will appear. Figure 19: main menu This page is characterised by a small rectangular window called “Active Frame”. Use the arrow buttons “ ”... -
Page 34: Disp Ay Menu Basic Settings
2.1.1 DISPLAY MENU BASIC SETTINGS 2.1.1.1 Language Use “ ” to select the language in this menu. 2.1.1.2 Device ID This option can be used to assign an address to the DVR for controlling it with a remote control. Define a different address for each device if several DVRs are installed, otherwise the remote control will control all DVRs with the same address at the same time. -
Page 35: Brightness
2.1.1.7 Brightness This option can be used to vary the OSD menu brightness. Use “ ” to select. 2.1.1.8 Menu trasparency This option can be used to vary the OSD menu transparency level. ” to select. Possible selections: “1:1”, “3:1”, “1:3”and “No Trans”. Use “... -
Page 36: Recording Menu
RECORDING MENU Description ¾ This menu is used to edit the recording and configuration settings of each video signal. Position the “Active Frame” on the “RECORDING” icon and press “ENTER”. The following window will appear: Figure 23: recording menu The selected item is highlighted. Press arrows “... -
Page 37: Resolution
2.2.1.7 Resolution This menu option is used to set the resolution type to be reached for recording on the selected camera. In general, Urmet DVR DVS devices are capable of supporting, according to the model, the following recording resolutions: DCIF”, “4CIF”, “2CIF”, ”CIF”, and “QCIF”. -
Page 38: Schedule
2.2.1.11 Schedule Select “Schedule” and press “ENTER” to access the programming menu shown below. Figure 24: recording programming menu The selected item is highlighted. Press arrows “ ” to point the cursor to the various menu items. Point the cursor to the required item and press “ENTER” to edit it. Use buttons “ ”... -
Page 39: Pre Rec
2.2.1.12 Pre REC The recording will contain the video feed prior to the alarm for the set time in the event of a motion detection or external alarm event. Possible options are: “Nr.”, “5s”, “10”, “15s”, “20”, “25”, “30” and ”Max”. Use “... -
Page 40: Port
eIMPORTANT NOTE It is advisable to assign a static IP address to the device. 2.3.1.2 Port This menu option is used to set the port number used for image transmission. The entered number must be higher than 2000. The default setting is 8000. Press “EDIT”... -
Page 41: User Menu
USER MENU Description ¾ Access this menu to edit the default password, add (the administrator can create up to 15 users) or remove new users and define the respective rights. Position the “Active Frame” on the “User” icon and press “ENTER”. The following window will appear: Figure 26: user menu The selected item is highlighted. -
Page 42: Password Change
2.4.1 PASSWORD CHANGE Use “ ” to shift the “active frame” onto the “Password” box, press “Edit” and enter a new password. The password is a maximum 16 number combination. To enter the sequence of numbers in a password, use the number keys on the front of the panel (press “Edit”... -
Page 43: Chan
3.1.1 CHAN This item (not selectable) lists all the channels of the device. 3.1.2 STATUS This item (not selectable) shows the status of each video channel by means of a series of LEDs. The following modes can be displayed: the channel is not active ¾... -
Page 44: Recording Search
RECORDING SEARCH Press “PLAY” on the front panel of the device in LIVE mode. A password must be entered by default. The following window will appear. Figure 29: playback menu The selected item is highlighted. Press arrows “ ” to point the cursor to the various menu items. Press “ESC”. -
Page 45: Playing A Recording
PLAYING A RECORDING After setting the search parameters (event type, date and time) and having start the search by pressing “SEARCH”, select the file to be played from the list box and press “ENTER” to start playback. Connecting the USB mouse :to DVR, the following interface will appear in the lower half of the screen: Audio on/off Mark beginning and end of part of recording to be copied Hide play bar (right-click and select “display”... -
Page 46: Using The Internet Explorer Interface
USING THE INTERNET EXPLORER INTERFACE The URMET Domus DVR DVS is provided with a Web Client for automatically connecting to a remote PC on the internet. eIMPORTANT NOTE Any operation performed locally on the DVR (via the front panel of the DVR or remote control) may slow the software performance down. - Page 47 Click on “Sites…” ¾ The following screen will appear. ¾ Add the IP address of the device (to display the address, press “F2” on the front panel of the device) in the “Add ¾ this website to the zone” field. Click on “Add”.
-
Page 48: How To Switch The Device On
HOW TO SWITCH THE DEVICE ON The following login window will appear for authenticating authorised users when the connection is established. The default settings are: User admin ¾ Password 12345 ¾ Figure 30: login window The home page of the web interface may be accessed if the user name and password are correct. Otherwise, the following error message will appear. -
Page 49: Home Page And Description Of The Interface
HOME PAGE AND DESCRIPTION OF THE INTERFACE The following home page will appear after logging in successfully. Figure 32: web interface home page DESCRIPTION Information area Interface for displaying DVR status and available channels Viewing grid Viewing mode Function buttons View setting interface for each video channel PTZ interface Management/configuration button bar... -
Page 50: Dvr And Connected Channels Status Interface
4.4.2 DVR AND CONNECTED CHANNELS STATUS INTERFACE This section contains the following information: name of the connected device ¾ name of the available video channels ¾ status of the available video channels (connected – not connected) ¾ ICON DESCRIPTION video channel available but not connected video channel available and connected 4.4.3 VIEW BUTTONS... -
Page 51: Function Buttons
4.4.5 FUNCTION BUTTONS ICON DESCRIPTION Starts/stops live LIVE connection to all available DVR channels at the same time according to the chosen viewing mode. The “Main Stream” will be used by all channels for connection. This allows to acquire a snapshot of the selected LIVE video channel (red box). The acquired image may be saved by default in the C:\picture\ folder in bitmap format. -
Page 52: Management/Configuration Buttons
4.4.8 MANAGEMENT/CONFIGURATION BUTTONS ICON DESCRIPTION This is used to disconnect the web interface. This is used to access the LIVE interface This is used to access the playback interface. This used to access the system configuration menu. This is used to access the DVR recorded events interface. 4.4.8.1 Logout Click on... -
Page 53: Specifications (Pal Format)
SPECIFICATIONS (PAL FORMAT) Specifications Item 1093/064S 1093/065S 1093/066S Product type Triplex digital video recorder with network Compression algorithm H.264 PAL (compatible with black and white cameras) Video standard H 15625 Hz / V 50 Hz Image preview 704 x 576 resolution “4CIF”, ”DCIF”, “2CIF”, ”CIF”... -
Page 54: Future Evolutions
FUTURE EVOLUTIONS In the perspective of continuous improvement of the URMET Domus SpA product range and to better respond to the multifarious needs of an increasingly dynamic and demanding sector, we have created this complementary quick guide to offer you a preview of the most important updates. - Page 55 DEUTSCH INHALTSVERZEICHNIS ALLGEMEINE EINSTELLUNGEN ......................57 EINSCHALTEN ........................57 1.1.1 EINSCHALTEN ÜBER DIE RÜCKWAND ..................... 57 1.1.2 EINSCHALTEN ÜBER DIE FRONTTAFEL....................57 AUSSCHALTEN ........................57 1.2.1 DIREKTES AUSSCHALTEN ......................... 57 1.2.2 AUSSCHALTEN ÜBER DAS HAUPTMENÜ....................57 AKTIVIERUNG DER FERNBEDIENUNG ................58 ANZEIGEN AUF DEM MONITOR..................
- Page 56 3.2.4 Karten-Nr............................... 71 3.2.5 Suchen................................71 WIEDERGABE EINER AUFZEICHNUNG ................72 3.3.1 Wiedergabe..............................72 VERWENDUNG DER SCHNITTSTELLE INTERNET-EXPLORER............73 MINDESTVORAUSSETZUNGEN FÜR DIE INSTALLATION DER SOFTWARE ....73 KONFIGURATION FÜR SCHUTZ UND SICHERHEIT............73 START ............................ 75 HAUPTFENSTER UND BESCHREIBUNG DER SCHNITTSTELLE........76 4.4.1 Informationsbereich ............................
-
Page 57: Allgemeine Einstellungen
ALLGEMEINE EINSTELLUNGEN Sehr geehrter Kunde, vielen Dank f r den kauf dieses Urmet Produkts. Dieses Dokument ist eine Kurzanleitung, die eine schnelle Installation und Inbetriebnahme der Digitalen Video Recorder (DVR)Modelle DVR 1093/064S, DVR 1093/065S und DVR 1093/066S erlaubt. Sie beschreibt die Nutzung der Hauptfunktionen. Weiterführende, detaillierte Informationen über die Geräte entnehmen Sie bitte der vollständigen Installations- und Bedienungsanleitung auf der beiliegenden CD-ROM. -
Page 58: Aktivierung Der Fernbedienung
AKTIVIERUNG DER FERNBEDIENUNG Um das Gerät über die in der Lieferung enthaltene Fernbedienung steuern zu können, muss diese aktiviert werden. Aktivierungsvorgang Die Taste “DEV” auf der Fernsteuerung drücken ¾ Die Standardadresse zum Bedienen des DVR über die Fernbedienung eingeben: drücken Sie “01” auf der ¾... -
Page 59: Programmiermenü
PROGRAMMIERMENÜ Die unten stehende Tabelle zeigt den Aufbau des Menüs, die Einstellungen und die Parameter. MENÜ EINSTELL. MENÜPARAMETER MENÜ EINSTELL. PARAMETER MENU Sprache Geräte ID Benötige Passwort Auswahl Kamera Bildschirmschoner Name - Position Video Standard Grund- Grund- Farbe Teilung Ein funktion funktion Datum OSD - Position... -
Page 60: Konfiguration Des Dvr
KONFIGURATION DES DVR Um Zugriff auf das Konfigurationsmenü zu erhalten, die Taste “MENU” auf der Fronttafel des DVR betätigen. Es erscheint die Login-Ansicht wie in der folgenden Abbildung dargestellt. Abb. 36: Hauptmenü In dieser Ansicht ist ein kleines rechteckiges Fenster mit dem Namen “Active Frame” erkennbar. Dieses kann von einem Symbol zum anderen verschoben werden, indem die Pfeiltasten “... -
Page 61: Gr Ndeinstellungen Des Menüs Display
2.1.1 GRUNDEINSTELLUNGEN DES MENÜS DISPLAY 2.1.1.1 Sprache Unter diesem Menüpunkt kann die Sprache ausgewählt werden, indem die Tasten “ ” verwendet werden. 2.1.1.2 GERÄTE ID Unter diesem Menüpunkt kann dem DVR eine Adresse zugewiesen werden, um ihn über die Fernbedienung steuern zu können. Sollten mehrere DVR vorhanden sein, muss für jedes Gerät eine andere Adresse definiert werden, andernfalls steuert die Fernsteuerung gleichzeitig alle DVR mit derselben Adresse. -
Page 62: Teilung Ein
2.1.1.6 Teilung Ein Diese Funktion erlaubt die Anpassung des Videoausgangssignals des DVR an den jeweils angeschlossenen Monitor der genutzt wird. Bei Aktivierung der Funktion schaltet der DVR automatisch die Auflösung von 704x576 auf 640x576 für PAL Video Systeme und von 704x480 auf 640x480 für NTSC Video Systeme um. Diese Funktion ist hilfreich bei Nutzung einiger traditionellen Röhrenmonitore (CRT). -
Page 63: Menü Aufnahme
MENÜ AUFNAHME Beschreibung ¾ Begeben Sie sich in dieses Menü um die Einstellungen der Aufzeichnung und der Konfiguration jedes Videosignals zu ändern. Den “Active Frame“ auf dem Symbol “AUFNAHME” positionieren und dann die Taste “ENTER” drücken. Es erscheint die Ansicht, die die folgende Abbildung zeigt. Abb. -
Page 64: Stream Typ
2.2.1.5 Stream Typ Unter diesem Menüpunkt kann die Aufzeichnung nur der Bilder oder beides Bilder und Ton gewählt werden. Mögliche Optionen: “Video” oder ”Audio&Video”. Verwenden Sie die Tasten “ ” zur Auswahl des Stream Typs. eBEACHTEN Für den DVR DVS Typ 1093/065S, ist nur die Option “Video” verfügbar. ¾... -
Page 65: Aufnahme Ein
eBEACHTEN Für den einzugebenden Wert beziehen Sie sich auf den Absatz “Frame rate”. 2.2.1.9 Aufnahme Ein Unter diesem Menüpunkt kann die Aufzeichnung für die ausgewählte Kamera aktiviert oder deaktiviert werden. Für den Vorgang der Aktivier ung das jeweilige Kontrollfeld unter Verwendung der Tasten “ ”... -
Page 66: Zeit Prerec
eBEACHTEN Durch Auswahl des Aufzeichnungsmodus “dauernd” nimmt, sollte eine Unterbrechung des Aufzeichnungsvorgangs aufgrund Stromausfalls oder im Anschluss an ein Ausschalten eintreten, das Gerät die Aufzeichnung automatisch wieder auf, sobald die Netzspannung wieder anliegt und das Gerät wieder eingeschaltet wird. Bewegung In diesem Modus wird die Aufzeichnung gestartet, sobald Bewegungen erfasst werden. -
Page 67: Grundeinstellungen Des Menüs Netzwerk
Diese dschirmansicht bezieht sich auf die Grundeinstellungen d es Menüs. Erweiterte Einstellungen” auswählen und die Taste “ENTER” drücken, um Zugriff auf die erweiterten Den Menüpunkt “ Einstellungen zu erhalten. Das markierte Stichwort wurde ausgewählt. Durch Verwendung der Pfeiltasten “ ”kann der Cursor auf den verschiedenen Menüpunkten verschoben werden. it den Pfeiltasten “... -
Page 68: Menü Benutzer
Passwort ¾ Überprüfen ¾ Benutzername Unter diesem Menüpunkt kann der Name des Benutzers für den Berechtigungsvorgang eingegeben werden. Der Benutzername kann aus höchstens 32 Zeichen bestehen. Passwort Unter diesem Menüpunkt kann das Kennwort für den Berechtigungsvorgang PPPoE einggeben werden. Das Kennwort kann aus höchstens 14 Zeichen bestehen. Überprüfen Unter diesem Menüpunkt muss das Kennwort für den Berechtigungsvorgang PPPoE erneut eingegeben werden. -
Page 69: Passwortänderung
2.4.1 PASSWORTÄNDERUNG Verwenden Sie die Tasten “ ”, um den “Active frame” auf “Paswt” zu verschieben, die Taste “Edit” drücken und das neue Kennwort eingeben. Das Kennwort ist eine Kombination aus höchstens 16 Zahlen. Zur Eingabe der Sequenz der Zahlen, die das Kennwort bilden, die numerischen Tasten auf der Fronttafel des Geräts verwenden (die Taste “Edit”... -
Page 70: Kanäle
CHTEN eBEA Im Fall eines Stromausfalls nimmt das Gerät die Aufzeichnungen nu r dann automatisch wieder auf, sobald die Stromzufuh r wi r geg eben ist, wenn es sich um im Menü “A ufnahme” programmierte Aufzeichnungen handelt. Die manuell gestarteten Aufzeichnungen werden daher nicht gleichzeitig mit der Rüc kkehr der Stromversorgung w ieder... -
Page 71: Suche Der Aufzeichnungen
SUCHE DER AUFZEICHNUNGEN Aus dem Modus „LIVE“ die Taste “PLAY” auf der Fronttafel des Geräts betätigen. Nach der Eingabe erscheint die in der folgenden Abbildung gezeigte Ansicht. Abb. 46: Wiedergabemenü Das markierte Stichwort wurde ausgewählt. Durch Verwendung der Pfeiltasten “ ”... -
Page 72: Wiedergabe Einer Aufzeichnung
WIEDERGABE EINER AUFZEICHNUNG Nachdem die Suchparameter eingegeben wurden (Ereignistyp, Datum/Uhrzeit) und die Suche über die Taste “Suchen” gestartet wurde, die Datei aus der Boxliste auswählen, die wiedergegeben werden soll und die Taste “ENTER” betätigen, um die Wiedergabe zu starten. Anschluss der USB-Maus an den DVR, folgende Befehlsschnittstelle ist unteren Abschnitt des Bildschirms erkennbar: Audio Ein/Aus Markierung für Anfang und Ende der Aufzeichnung die kopiert werden soll... -
Page 73: Verwendung Der Schnittstelle Internet-Explorer
VERWENDUNG DER SCHNITTSTELLE INTERNET-EXPLORER Das Gerät DVR DVS URMET Domus ist mit Web Client ausgestattet, um die automatische Verbindung über Internet mittels Fern- PC zu ermöglichen. eBEACHTEN Jeder lokal auf dem DVR ausgeführte Vorgang (über die Fronttafel des DVR – Fernbedienung - Maus) könnte zu einer Verlangsamung der Leistungen der Software führen. - Page 74 Anklicken des Feldes “Sites” ¾ Es erscheint folgende Ansicht. ¾ Es erscheint die folgende Ansicht. Die IP-Adresse des Geräts (kann durch Betätigen der Taste “F2” auf der ¾ Fronttafel des Geräts eingeblendet werden) im Feld “Diese Website zur Zone…….” hinzufügen. Anklicken von “Hinzufügen”.
-
Page 75: Start
START Beim Start der Verbindung wird das folgende Login-Fenster für die Authentifizierung der für die Benutzung der Software aktivierten Benutzer eingeblendet. Die werkseitigen Einstellungen sehen vor: Benutzername admin ¾ Passwort 12345 ¾ Abb. 47: Login-Fenster Sind der Benutzername und das Kennwort korrekt, erhalten Sie Zugriff auf die Hauptansicht der Web-Schnittstelle, andernfalls erscheint die folgende Fehlermeldung: Abb. -
Page 76: Hauptfenster Und Beschreibung Der Schnittstelle
HAUPTFENSTER UND BESCHREIBUNG DER SCHNITTSTELLE War der Login-Vorgang erfolgreich, erscheint das folgende Hauptfenster: Abb. 49: Hauptansicht der Web-Schnittstelle BESCHREIBUNG Informationsbereich Schnittstelle der Anzeige hinsichtlich des Status des DVR und der verfügbaren Kanäle Anzeigeraster Anzeigemodus Funktionstasten Schnittstelle der Einstellungen der Anzeige jedes Videokanals Schnittstelle der PTZ-Steuerungen Steuer-/Konfigurationstastenleiste 4.4.1... -
Page 77: Schnittstelle Des Status Des Dvr Und Der Angeschlossenenen Kanäle
4.4.2 SCHNITTSTELLE DES STATUS DES DVR UND DER ANGESCHLOSSENENEN KANÄLE In diesem Abschnitt werden die folgenden Informationen erteilt: Name des Geräts, mit dem die Verbindung besteht ¾ Name der verfügbaren Videokanäle ¾ Status der verfügbaren Videokanäle (angeschlossen – nicht angeschlossen) ¾... -
Page 78: Funktionstasten
4.4.5 FUNKTIONSTASTEN SYMBOL BESCHREIBUNG S tartet / stoppt gleichzeitig die Verbindung LIVE auf allen verfügbaren Kanälen des DVR auf Basis des ausgewählten Anzeigemodus. Der “Main Stream” wird bei der Verbindung für alle Kanäle genutzt. Gestattet die unm ittelbare Erfassung des ausgewählten Videokanals LIVE (rotes Quadrat). -
Page 79: Schnittstelle Der Ptz-Steuerungen
4.4.7 SCHNITTSTELLE DER PTZ-STEUERUNGEN SYMBOL BESCHREIBUNG Gestattet die Positionierung der angeschlossenen Dome. Die mittlere Taste “ ist nicht aktiviert. Tasten nicht aktiviert Gestattet das Aufrufen eines zuvor gespeicherten Presets. Die Nummer des aufzurufenden Presets eingeben und dann auf die Taste klicken. -
Page 80: Eigenschaften (Format Pal)
EIGENSCHAFTEN (FORMAT PAL) Technische Daten Menüpunkt 1093/064S 1093/065S 1093/066S Produkttypologie Digitaler Triplex-Videorecorder mit Netzwerk Komprimierungsalgorithmus H.264 Video PAL (kompatibel mit Schwarz-Weiß-Kameras) Video-Standard H 15625 Hz / V 50 Hz Auflösung Bild-Vorschau 704 x 576 “4CIF”, “DCIF”, “2CIF”, Aufzeichnungsauflösung “2CIF”, ”CIF” oder “QCIF” “2CIF”, ”CIF”... -
Page 81: Zukünftige Entwicklungen
176x144 ZUKÜNFTIGE ENTWICKLUNGEN Die URMET Domus SpA hat in Hinblick auf eine kontinuierliche Verbesserung ihres Produktangebots und um den Ansprüchen eines immer dynamischeren und anspruchsvolleren Sektor zu genügen, diesen ergänzenden Abschnitt zur Schnellanleitung verfasst, um Ihnen im Voraus die wichtigsten Aktualisierungen zu präsentieren. Zu diesem Zweck behalten wir uns das Recht auf Verbesserungen ästhetischen/leistungsbezogenen Charakters an den Produkten vor. - Page 82 ESPAÑOL ÍNDICE Configuración general ........................... 84 Encendido..........................84 1.1.1 Encendido desde el panel posterior ....................... 84 1.1.2 Encendido desde el panel frontal ........................84 Apagado ..........................84 1.2.1 Apagado directo .............................. 84 1.2.2 Apagado desde el menú principal ........................84 Activación del mando a distancia ...................
- Page 83 3.2.2 Tipo de grabación (búsqueda por evento)...................... 98 3.2.3 Hora (búsqueda por fecha y hora) ........................98 3.2.4 Card No................................98 3.2.5 BÚsqueda ............................... 98 Reproducir una grabación ...................... 99 3.3.1 Reproducir............................... 99 Uso de la interfaz de Internet Explorer....................100 Requisitos mínimos para la instalación de software ............
-
Page 84: Configuración General
Le agradecemos que haya comprado este producto. En esta guía de referencia rápida se describe cómo instalar los modelos de grabador de vídeo digital Urmet Domus S.p.A. Ref. 1093/064S, 1093/065S y 1093/066S para comenzar a utilizar las funciones básicas de manera inmediata. -
Page 85: Activación Del Mando A Distancia
ACTIVACIÓN DEL MANDO A DISTANCIA Para controlar el equipo con el mando a distancia suministrado, es necesario activarlo. Para activar el mando a distancia: Pulse la tecla “DEV” en el mando a distancia. ¾ Introduzca la dirección predeterminada para controlar el DVR con el mando a distancia: pulse “01” en el mando a ¾... -
Page 86: Menú De Programación
MENÚ DE PROGRAMACIÓN En la tabla siguiente se indican las estructuras de los menús junto con la configuración y los parámetros correspondientes. MENÚ CONFIG. PARÁMETRO MENÚ CONFIG. PARÁMETRO Idioma Nr. unidad Contraseña Selecc. cámara Salvapantallas Nombre - posición Vídeo estándar Color Básica Adapt. -
Page 87: Configuración Del Dvr
CONFIGURACIÓN DEL DVR Para acceder al menú de configuración pulse la tecla “MENU” en el panel frontal del DVR. Aparecerá la pantalla de la figura siguiente: Figura 53: menú principal En esta pantalla aparece un pequeño marco rectangular sobre la opción activa denominado “marco activo”. Para desplazar el marco de un icono a otro, utilice las teclas de dirección “... -
Page 88: Configuración Básica Del Menú Sistema
2.1.1 CONFIGURACIÓN BÁSICA DEL MENÚ SISTEMA 2.1.1.1 Idioma Seleccione el idioma deseado mediante las teclas de dirección “ ”. 2.1.1.2 Nr. unidad Esta opción permite asignar una dirección al DVR para poder controlarlo por medio del mando a distancia. Si se han instalado varios DVR, introduzca una dirección diferente para cada equipo ya que, de lo contrario, el mando a distancia controlará... -
Page 89: Adapt. Pantalla
2.1.1.6 Adapt. pantalla Esta función permite adaptar la visualización de la salida de vídeo del DVR a la pantalla que se está utilizando. Además, al habilitar esta función, el DVR cambia automáticamente la resolución de 704x576 a 640x576 para los sistemas de vídeo PAL y de 704x480 a 640x480 para los sistemas de vídeo NTSC. -
Page 90: Menú Grabación
MENÚ GRABACIÓN Descripción ¾ Este menú permite modificar los ajustes de grabación y configuración de cada señal de vídeo. Desplace el “marco activo” hasta el icono “Grabación” y luego pulse la tecla “ENTER”. Aparecerá la siguiente pantalla: Figura 57: menú Grabación La opción que aparece resaltada es la opción seleccionada. -
Page 91: Resolución
eNOTA El modelo DVR DVS Ref. 1093/065S solo tiene la opción “Vídeo”. ¾ Los modelos DVR DVS Ref.1093/064S, 1093/066S disponen de las opciones “Vídeo” y “Audio & Vídeo”. ¾ En el modelo DVR DVS Ref.1093/066S (16ch), los 4 canales de audio disponibles se asocian automáticamente a los ¾... -
Page 92: Programación Horaria
2.2.1.10 Programación horaria Seleccione la opción “P. horaria” y pulse la tecla “ENTER” para acceder al siguiente menú de programación: Figura 58: menú de programación de la grabación La opción que aparece resaltada es la opción seleccionada. Utilice las teclas de dirección “ ”... -
Page 93: Pre Grab
Mov & Alarma En este modo, la grabación se inicia en cuanto el sensor detecta una alarma y un movimiento. Comando En este modo, la grabación se inicia al pulsar el botón “REC”. Para detener la grabación, pulse de nuevo la tecla “REC”. 2.2.1.11 Pre Grab Si se detecta movimiento o se dispara una alarma externa, en la grabación también se incluirán las imágenes anteriores a la... -
Page 94: Configuración Básica Del Menú Red
2.3.1 CONFIGURACIÓN BÁSICA DEL MENÚ RED 2.3.1.1 Esta opción permite configurar la dirección IP del DVR. Pulse la tecla “EDIT” y utilice las teclas numéricas 0 a 9 para introducir la dirección IP. Utilice las teclas “ ” para desplazar el cursor. -
Page 95: Menú Usuario
MENÚ USUARIO Descripción ¾ Este menú permite modificar la contraseña predeterminada, añadir (el administrador puede crear un máximo de 15 usuarios) o eliminar usuarios y definir los derechos correspondientes. Desplace el “marco activo” hasta el icono “Usuario” y luego pulse la tecla “ENTER”. -
Page 96: Modificar La Contraseña
2.4.1 MODIFICAR LA CONTRASEÑA Utilice las teclas “ ” para desplazar el “marco activo” hasta el cuadro “Contraseña”, pulse “EDIT” e introduzca la nueva contraseña. La contraseña es una combinación de 16 números como máximo. Para introducir la secuencia de números de una contraseña, utilice las teclas numéricas del panel frontal (pulse la tecla “EDIT”... -
Page 97: Funciones Del Dvr
FUNCIONES DEL DVR GRABACIÓN MANUAL En el modo “LIVE” pulse la tecla “REC” en el panel frontal del equipo. Aparecerá la pantalla de la figura siguiente: Figura 62: menú grabación del equipo Ref.1093/066S La opción que aparece resaltada es la opción seleccionada. Utilice las teclas de dirección “... -
Page 98: Búsqueda De Las Grabaciones
BÚSQUEDA DE LAS GRABACIONES En el modo “LIVE” pulse la tecla “PLAY” en el panel frontal del equipo. Se le pedirá que introduzca una contraseña. Aparecerá la siguiente pantalla: Figura 63: menú de reproducción La opción que aparece resaltada es la opción seleccionada. Utilice las teclas de dirección “... -
Page 99: Reproducir Una Grabación
REPRODUCIR UNA GRABACIÓN Una vez configurados los parámetros de búsqueda (tipo de evento, fecha y hora) y después de iniciar la búsqueda pulsando “BÚSQUEDA”, seleccione en el cuadro de lista el archivo que desea reproducir y pulse “ENTER” para iniciar la reproducción. Si conecta un ratón USB al DVR, aparecerá... -
Page 100: Uso De La Interfaz De Internet Explorer
USO DE LA INTERFAZ DE INTERNET EXPLORER El equipo URMET Domus DVR DVS está provisto de un cliente Web que permite conectarse automáticamente a un PC remoto por internet. eNOTA Las operaciones realizadas localmente en el DVR (mediante el panel frontal del DVR, el mando a distancia o el ratón) pueden ralentizar el rendimiento del software. - Page 101 Haga clic en “Sitios…” ¾ Aparecerá la siguiente pantalla: ¾ Agregue la dirección IP del equipo (para ver la dirección, pulse “F2” en el panel frontal del equipo) en el campo ¾ “Agregar este sitio Web a la zona”. Haga clic en “Agregar”. ¾...
-
Page 102: Cómo Encender El Equipo
CÓMO ENCENDER EL EQUIPO Una vez establecida la conexión, aparecerá la siguiente pantalla de login para autenticar los usuarios autorizados. La configuración predeterminada es: Nombre de usuario admin ¾ Contraseña 12345 ¾ Figura 64: pantalla de login Se podrá acceder a la página de inicio de la interfaz web si el nombre de usuario y la contraseña son correctos. De lo contrario, aparecerá... -
Page 103: Página De Inicio Y Descripción De La Interfaz
PÁGINA DE INICIO Y DESCRIPCIÓN DE LA INTERFAZ Después de iniciar sesión correctamente, aparecerá la siguiente página de inicio. Figura 66: página de inicio de la interfaz web DESCRIPCIÓN Área de información Interfaz para visualizar el estado del grabador de vídeo digital y los canales disponibles Cuadro de visualización Modo de visualización Botones de función... -
Page 104: Interfaz De Estado De Los Canales Conectados Y Del Dvr
4.4.2 INTERFAZ DE ESTADO DE LOS CANALES CONECTADOS Y DEL DVR Esta sección contiene la siguiente información: nombre del equipo conectado ¾ nombre de los canales de vídeo disponibles ¾ estado de los canales de vídeo disponibles (conectado, o no conectado) ¾... -
Page 105: Botones De Función
4.4.5 BOTONES DE FUNCIÓN ICONO DESCRIPCIÓN Inicia/detiene simultáneamente una conexión LIVE en todos los canales del grabador de vídeo digital, de acuerdo con el modo de visualización seleccionado. Para la conexión, se utilizará en todos los canales el vídeo primario, denominado “Main Stream”. Permite adquirir una imagen instantánea del canal de vídeo LIVE seleccionado (cuadro rojo). -
Page 106: Botones De Gestión Y Configuración
4.4.8 BOTONES DE GESTIÓN Y CONFIGURACIÓN ICONO DESCRIPCIÓN Se utiliza para desconectar la interfaz web. Se utiliza para acceder a la interfaz LIVE. Se utiliza para acceder a la interfaz de reproducción. Se utiliza para acceder al menú de configuración del sistema. Se utiliza para acceder a la interfaz de eventos grabados en el DVR. -
Page 107: Especificaciones (Formato Pal)
ESPECIFICACIONES (FORMATO PAL) Especificaciones Opción 1093/064S 1093/065S 1093/066S Tipo de producto Grabador de vídeo digital tríplex con conexión a red Algoritmo de H.264 compresión de vídeo PAL (compatible con cámaras en blanco y negro) Estándar de vídeo (H) 15.625 Hz / (V) 50 Hz Resolución de la vista 704 x 576 previa de la imagen... -
Page 108: Futuros Desarrollos
FUTUROS DESARROLLOS En el afán de mejora constante de la gama de productos de URMET Domus SpA y con objeto de satisfacer las diversas necesidades de un sector cada vez más dinámico y exigente, hemos creado esta sección complementaria de la guía de consulta rápida para ofrecer en primicia a nuestros clientes las actualizaciones más relevantes.
Need help?
Do you have a question about the DRV-065S-066S and is the answer not in the manual?
Questions and answers