
Subscribe to Our Youtube Channel
Related Manuals for urmet domus 1098


Summary of Contents for urmet domus 1098
- Page 1 Mod. 1098 DS1098-028A NVR H.265 WITH HDMI NVR 4K H.265 SERIES PRO 8 Channels Ref. 1098/318P 8 Channels Ref. 1098/318 16 Channels Ref. 1098/316 16 Channels with PoE Ref. 1098/316P 32 Channels Ref. 1098/332 USER MANUAL...
-
Page 2: Table Of Contents
Description of the parts .............................9 Front panel ..........................9 Front panel NVR Ref. 1098/318 ........................9 Front panel NVR Ref. 1098/316 and Ref. 1098/316P ................... 9 Front panel NVR Ref. 1098/318P ........................9 Front panel NVR Ref. 1098/332 ........................9 Rear panel ..........................10 Rear panel NVR Ref. - Page 3 2.5.9.7 Sound Detection ............................61 2.5.9.8 Occlusion Detection ..........................62 2.5.9.9 Schedule ..............................63 2.5.9.10 Intelligent Analysis Log ..........................63 Record Settings ........................64 Encode ................................ 64 2.6.1.1 Mainstream / Substream / Mobile Stream ....................64 Record ................................ 65 2.6.2.1 Record ..............................
-
Page 4: General Information
NVR Specifications Ref. 1098/318-1098/316-1098/332 (Pal format) ..........172 NVR Specifications Ref. 1098/318P-1098/316P (Pal format) ............173 Maximum recording time with 2000GB Hard Disk ................175 Ref. 1098/318 - 1098/316 - 1098/318P - 1098/316P - 1098/332 ......... 175 Recording alarm setting ........................181 Troubleshooting ........................... 181 Maintenance ............................ -
Page 5: Product Description
This quick start guide was written to help you set up the NVR Series PRO URMET S.p.A, Ref. 1098/318 - Ref. 1098/316 - Ref. 1098/318P - Ref. 1098/316P - Ref. 1098/332 models rapidly and easily. Carefully read this manual which contains information for correct, safe use. -
Page 6: Opening The Package
CONTENTS OF THE PACKAGE • • Power supply unit INPUT ⇒ 100-240 Vac 50/60Hz 1.5 A max OUTPUT 12Vdc 5A for Ref. 1098/318 Ref. 1098/316 Ref. 1098/332 ⇒ 48Vdc 2A for Ref. 1098/318P and Ref. 1098/316P ⇒ Shuko plug • •... -
Page 7: Warnings
WARNINGS POWER Check mains rating before plugging the power unit in. Do not pull the cord to unplug the device. Switch the device off before unplugging power unit. This operation must not be performed when the NVR Boost ... -
Page 8: Image Recording
The digital video recorder Series PRO Ref. 1098/318 - Ref. 1098/318P - Ref. 1098/316 - Ref. 1098/316P - Ref. 1098/332 is a device for CCTV systems. Recording of images is subject to the laws in force in your country. Recording of images protected by copyright is forbidden. -
Page 9: Description Of The Parts
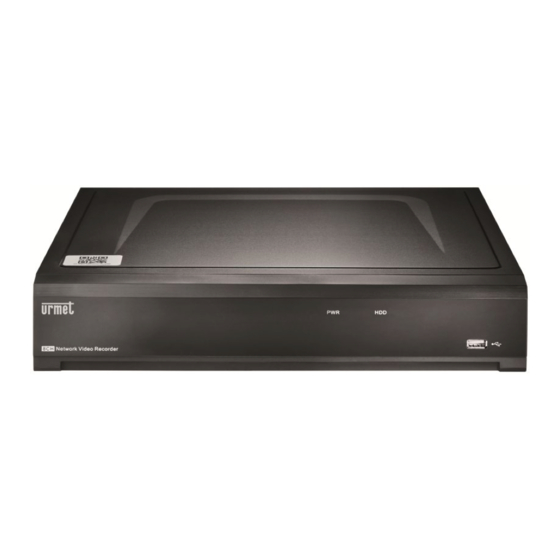
DESCRIPTION OF THE PARTS FRONT PANEL NVR stands for Network Video Recorder Equipment. FRONT PANEL NVR REF. 1098/318 FRONT PANEL NVR REF. 1098/316 AND REF. 1098/316P FRONT PANEL NVR REF. 1098/318P FRONT PANEL NVR REF. 1098/332 DS1098-028A... -
Page 10: Rear Panel
The red LED on fixed means that the hard disk is not indicator working correctly, not formatted or does not contain recorded files. USB port REAR PANEL REAR PANEL NVR REF. 1098/318 AND REF. 1098/316 REAR PANEL NVR REF.1098/318P REAR PANEL NVR REF. 1098/316P DS1098-028A... -
Page 11: Rear Panel Nvr Ref. 1098/332
REAR PANEL NVR REF. 1098/332 Number Physical port Connection method Power switch Power on and off Power connector Power connector Sensor/Alarm Alarm or for alarm device connector USB 2.0 port USB device connector, e.g. USB mouse USB 3.0 port USB 3.0 device connector, for backups and firmware upgrades... -
Page 12: Operation With Mouse
OPERATION WITH MOUSE The mouse can be used to operate the system in addition to the buttons on the front panel and the remote control. TYPE Function In locked menu mode, open the pop-up menu and click on any submenu to open the login window;... -
Page 13: Osd Nvr Menu Settings
OSD NVR MENU SETTINGS After having plugged in the NVR, the system will run the initialisation procedures during which the following image will appear: At the end of the boot-up, the NVR will switch to Live view. FIRST NVR LOGIN For the first time when you run the NVR, you must be required to set your own password immediately in order to protect your privacy. -
Page 14: Live Interface And Pop-Up Menu
Important: for the previous generation IP cameras with H264 CODEC (example models: 1093/139M2, 1093/141M2 ...) and for Wi-Fi cameras (example models: 1099/209, 1099/214, 1099/216 ...) the display is not guaranteed in the Event Preview sidebar of some NVR models (example: 1098/318P). VIDEO LOSS: The IP camera is disconnected. -
Page 15: Taskbar
TASKBAR Click to open the Main Menu. Click to pop up the shutdown options pop-up box. Click to select different layout for live view. Click to select more layouts for live view. Click to start viewing channels in a sequence. Quick playback. -
Page 16: Shutdown / Reboot / Lock Screen Menu
SHUTDOWN / REBOOT / LOCK SCREEN MENU Click on the Shutdown button on the Taskbar and the check the further action you want to move. Click on OK button, system will require to input the Admin password to authenticate. If you select Shutdown option, the system will be turned off. If you select Reboot option, the system will be rebooted. If you select Lock Screen option, the live viewing screen will be disappeared. -
Page 17: Ptz Control
PTZ CONTROL After finishing the PTZ setup, you can use the PTZ function to control your PTZ camera. Left-click on a channel in the Live Viewing screen to open the Camera Quick Toolbar and select the PTZ control icon PTZ control panel will be displayed. Icon Description Channel... -
Page 18: Viewing
As shown in the Live screenshot above, moving the mouse cursor downwards will display a shortcut Fisheye multi-function bar. On the Fisheye multi-function bar, select button to specify the installation type ("Fisheye Mode Select") of the camera: ceiling, horizontal plane, wall, slanted surface. After choosing the installation type, select "Save" to save. 2.2.5.2 Viewing The LIVE view (“Display Mode”) currently shown on the screen can be changed according to the selected installation type:... -
Page 19: Installation On The Ceiling
2.2.5.3 Installation on the ceiling From the multi-function bar displayed at the bottom of the LIVE screen on the local monitor, select the button . At this point, if the fisheye camera is mounted on the ceiling, select the button in the fisheye camera installation menu, shown in the figure below, and save the settings. - Page 20 3D cylinder, as shown in the figure: 180° Panorama view, as shown in the figure: 360° Panorama view, as shown in the figure: 4PTZ, as shown in the figure DS1098-028A...
- Page 21 Fisheye + 3PTZ (Fisheye view, the different coloured areas represent different PTZ viewing angles, select the corresponding PTZ line range, drag to change the viewing angle as shown in the figure): Fisheye + 8PTZ (Fisheye view, the different coloured areas represent different PTZ viewing angles, select the corresponding PTZ line range, drag to change the viewing angle as shown in the figure): DS1098-028A...
- Page 22 360° Panorama view + 3PTZ (Panorama view, the different coloured areas represent different PTZ viewing angles, select the corresponding PTZ line range, drag to change the viewing angle as shown in the picture): 360° Panorama view + 8PTZ (Panorama view, the different coloured areas represent different PTZ viewing angles, select the corresponding PTZ line range, drag to change the viewing angle as shown in the picture): DS1098-028A...
-
Page 23: Installation On A Horizontal Surface
2.2.5.4 Installation on a horizontal surface From the multi-function bar displayed at the bottom of the LIVE screen on the local monitor, select the button . At this point, if the fisheye camera is mounted on a horizontal surface/tabletop, select the button in the Fisheye camera installation menu, shown in the figure below, and save the settings. - Page 24 3D Cylinder view, as shown in the figure: 180° Panorama view, as shown in the figure: 360° Panorama view, as shown in the figure: DS1098-028A...
- Page 25 4PTZ, as shown in the figure: Fisheye + 3PTZ (Fisheye view, the different coloured areas represent different PTZ viewing angles, select the corresponding PTZ line range, drag to change the viewing angle as shown in the figure): DS1098-028A...
- Page 26 Fisheye + 8PTZ (Fisheye view, the different coloured areas represent different PTZ viewing angles, select the corresponding PTZ line range, drag to change the viewing angle as shown in the figure): 360° Panorama view + 3PTZ (Panorama view, the different coloured areas represent a different PTZ viewing angle, select the corresponding PTZ line range, drag to change the viewing angle as shown in the picture): DS1098-028A...
-
Page 27: Wall-Mounted
360° Panorama view + 8PTZ (Panorama view, the different coloured areas represent a different PTZ viewing angle, select the corresponding PTZ line range, drag to change the viewing angle as shown in the picture): 2.2.5.5 Wall-mounted From the multi-function bar displayed at the bottom of the LIVE screen on the local monitor, select the button . - Page 28 VR view, double right-click to start navigation. Normal Panorama view, as shown in the figure: 4PTZ Fisheye + 3PTZ (Fisheye view, the different coloured areas represent different PTZ viewing angles, select the corresponding PTZ line range, drag to change the viewing angle as shown in the figure): DS1098-028A...
- Page 29 Fisheye + 8PTZ (Fisheye view, the different coloured areas represent different PTZ viewing angles, select the corresponding PTZ line range, drag to change the viewing angle as shown in the figure): Panorama view + 3PTZ (Panorama view, the different coloured areas represent different PTZ viewing angles, select the corresponding PTZ line range, drag to change the viewing angle as shown in the picture): DS1098-028A...
- Page 30 Panorama view + 8PTZ (Panorama view, the different coloured areas represent different PTZ viewing angles, select the corresponding PTZ line range, drag to change the viewing angle as shown in the picture): DS1098-028A...
-
Page 31: Installation On Slanted Surface
2.2.5.6 Installation on slanted surface From the multi-function bar displayed at the bottom of the LIVE screen on the local monitor, select the button . At this point, if the fisheye camera is mounted on a slanted surface, select the button in the fisheye camera installation menu, shown in the figure below, and save the settings. - Page 32 Normal Panorama view, as shown in the figure: Fisheye + 3PTZ (Fisheye view, the different coloured areas represent different PTZ viewing angles, select the corresponding PTZ line range, drag to change the viewing angle as shown in the figure): DS1098-028A...
- Page 33 Fisheye + 8PTZ (Fisheye view, the different coloured areas represent different PTZ viewing angles, select the corresponding PTZ line range, drag to change the viewing angle as shown in the figure): 4PTZ and Panorama view + 3PTZ (Panorama view, the different coloured areas represent different PTZ viewing angles, select the corresponding PTZ line range, drag to change the viewing angle as shown in the picture): DS1098-028A...
-
Page 34: Cruise Set
Panorama view + 8PTZ (Panorama view, the different coloured areas represent different PTZ viewing angles, select the corresponding PTZ line range, drag to change the viewing angle as shown in the picture): CRUISE SET Open Auto Cruise function on PTZ setting menu if you want to setup cruise function (system default: off), and set up Cruise channel, Cur point and total quantity and stop time etc. -
Page 35: Tag Setup
TAG SETUP Move mouse to any a live channel, then right-click to view tools bar. The Add Customized Tag icon is Click on to view then click on . Set the Tag once, the Tag can record one minute, this is the default setting. Tag name may be edited, for example: Warning: User can select [General], [Sub-periods] and [Smart] options on the [Search] page and set the Tag event record. -
Page 36: To Search For A Tag Record Event
TO SEARCH FOR A TAG RECORD EVENT Click on Start Menu Setup Search Tag on the Tag event search page, then set Start Time, End Time, and Channel. Click on to view the list of event tags. Playback: Click on to play the Tag recording event. -
Page 37: Main Menu Guide
MAIN MENU GUIDE After finishing system initialisation, right-click on main interface mode to enter into Pop-up Menu which will appear in the lower part of the screen. The NVR functions are organized by type following the order shown in the following diagram: IP Channels Protocol Manage Channel... - Page 38 Motion Alarm Setting IO Alarm Settings Alarm Configuration Intelligent PTZ Linkage Exception (Events) Sound Detection Alarm Schedule Occlusion Detection Face Detection Human & Vehicle Setup Detection Schedule Model Configuration Recognition Database Management Face Recognition lA Configuration Alarm Human & Vehicle Detection Face Recognition lA Configuration...
- Page 39 General Settings PPPOE Network Settings SNMP Port Configuration DDNS Email Configuration Network Configuration Email Email Schedule FTP Schedule IP Filter IP Filter DS1098-028A...
- Page 40 Disk Manage Disk S.M.A.R.T. Cloud Device AF Controls General Settings Date and Time General Settings Output Configuration Multi-Users Settings Load Default Maintenance Settings Upgrade Parameter Management Auto Reboot System Upgrade IP Camera Maintain Load Default Reboot IPC Information Channel Information Information Record Info Network State...
-
Page 41: Main Menu
MAIN MENU All the NVR functions can be accessed from the Main Menu. If you have not logged in (main menu locked mode), you will need to enter Username and Password as shown in the following figure: For System Login press Unlock button. Press the Forgot Password: button, the system will send an email to the configured address with a code useful to access the system if the password is forgotten. -
Page 42: Ip Channels
2.5.1.1 IP Channels The IP cameras are configured by selecting IP Channels on the side menu. Click on [Search] to search IP cameras from local network. Press [Add All] to quickly add IP cameras present in the NVR LAN (the IP address is assigned automatically is this case). - Page 43 IP Address/Domain: IP address or domain name of the IP camera. • Alias: IP camera name. • Position: Position in which to display the camera name on the screen. • Port: Port of the IP camera. • Protocol: Select the protocol of the IP camera from the drop-down menu. •...
-
Page 44: Protocol Manage
In the drop-down menus: Switch Mode • Manual Mode: In this mode, the user can delete or add the network IPC. Auto Mode: In this mode, the channel automatically connects to the IPC on all POE interfaces of the NVR. ... -
Page 45: Poe Power
POE Power 2.5.1.3 Power over Ethernet or POE is the mode for powering electronic equipment through the network wire. The POE Power section deals with the management of camera power through Ethernet ports. Function not yet active; this function will be implemented for future use. DS1098-028A... -
Page 46: Live
LIVE This page of the Display menu can be used to configure the parameters related to the <Live> screen of the NVR. As shown in the following figures, the available options may be different if an IP camera (figure on the right) is being configured. Channel: This displays the channel name. -
Page 47: Image Control
IMAGE CONTROL This item of the Display menu can be used to access the page for adjusting the IP camera image quality parameters. The following figure shows a typical example and the meaning of the available options is described in the following list. NOTE: The available options may differ according to the IP camera model. -
Page 48: Ptz
This menu can be used to configure the PTZ (Pan-Tilt-Zoom) settings for the dome camera 2.5.4.1 PTZ To control PTZ cameras, click on PTZ (which stands for Pan Tilt and Zoom) to open the page shown in the following figure. On each channel, you can set the communication protocol, the speed and other information, as shown below: Channel: Channel name •... -
Page 49: Video Cover Settings (Privacy Zone)
VIDEO COVER SETTINGS (PRIVACY ZONE) This menu allows you to create privacy zones if you want to partially cover some certain part of the image. You can create up to four privacy zones in any size and location on the camera image. Enable the Privacy Zone, and select how many zones you need. -
Page 50: Pir
Select PIR in the side menu to open a page where to define the methods and actions to be taken in case of motion alarm detection. Click on PIR button, then click Setup to configure the motion detection PIR function: Show the IP channel :... -
Page 51: Deterrence
You can set an area for motion detection PIR function by clicking on: To configure PIR Alarm, see "Section 2.7.2- PIR Notification” DETERRENCE The deterrence function can be used to configure some actions to deter and report abnormal behaviour detected by the camera. This option is currently not active. -
Page 52: Pid (Perimeter Intrusion Detection)
2.5.9.1 PID (Perimeter Intrusion Detection) This function detects people, vehicle or other objects which enter and loiter in a predefined virtual area and some certain actions can be taken when the alarm is triggered. Channel: Select the channel you want to configure •... -
Page 53: Lcd (Line Crossing Detection)
Hold the left mouse button pressed to move the position of the area or drag the corners to resize the area. To remove one of the areas from the camera picture, click on the red box in the area and then click on the Remove button. - Page 54 Select one of the Rule Number. It is the number of LCD lines. Up to four lines can be drawn. To enable the detection in Rule Switch. Select a Rule Type: AB: The NVR will only detect the action from side A to side B. ...
-
Page 55: Sod (Stationary Object Detection)
2.5.9.3 SOD (Stationary Object Detection) This function detects the objects left over or lost in the predefined area such as luggage, bags, hazardous materials, etc., and a series of actions can be taken when the alarm is triggered. Channel: This can be used to select the channel to be configured. •... - Page 56 Select a Rule Type. • Legacy: The NVR only selects the abandoned objects. Lost: The NVR detects only lost objects. Legacy & Lost: The NVR detects abandoned and lost objects. Click on four points in the camera picture to draw a virtual area. The sharp of the area should be a convex polygon. •...
-
Page 57: Pd (Pedestrian Detection)
2.5.9.4 PD (Pedestrian Detection) This function detects people moving in a predefined area and a series of actions can be taken when the alarm is triggered. Channel: To select the channel you want to configure. • Switch: To enable or disable the PD function. •... -
Page 58: Fd (Face Detection)
Select one of the Rule Number. It is the number of PD area. Up to four areas can be set for the PD function. • To enable the detection in Rule Switch. • Select a Rule Type, only Normal available for this detection. •... - Page 59 Selecting Setup Channel: Select the channel you want to configure • IVA Lines: This can be used to enable or exclude IVA lines. • Area: Draw a virtual area in the camera image. • Select one of the Rule Number. It is the number of FD area. It is possible to set •...
-
Page 60: Cc (Cross-Counting)
2.5.9.6 CC (Cross-Counting) The Cross-Counting function counts the times for moving objects or people across the virtual lines. Channel: This can be used to select the channel to be configured. • Switch: This can be used enable or exclude CC lines. •... -
Page 61: Sound Detection
Warning: The lines must not be too close to the edges of the camera picture to avoid any failure to trigger an alarm when the target cross through it. The lines must be in the area that detected object can be reach. ... -
Page 62: Occlusion Detection
Channel: This can be used to select the channel to be configured. • Switch: This function can be used to detect the Sound Detection function. • Rise: This function can be used to enable or disable the Sound Detection Rise function. •... -
Page 63: Schedule
2.5.9.9 Schedule The program must be configured to activate the intelligent function. The program will be active 24 hours a day, 7 days a week. To set the program, select a channel and drag the cursor to mark the time slots. The blue blocks in the time slots will be active for intelligent detection. -
Page 64: Record Settings
RECORD SETTINGS This subsection describes the configuration of the recording options made available by the NVR: Encode Record Capture ENCODE This menu can be used to configure the quality of video recording or network transmission images. As a rule, Mainstream defines the recording video quality which will be saved on the HDD, while Substream defines the video quality which is being viewed via remote access (e.g. -
Page 65: Record
RECORD This subsection describes the configuration of the recording options made available by the NVR. 2.6.2.1 Record This menu can be opened by clicking on "Record" and used to set the NVR recording parameters: Record Switch: Check to enable recording on this channel. •... -
Page 66: Record Schedule
2.6.2.2 Record Schedule This menu can be used to set the NVR video recording program and define the recording mode for each channel. It can be used to define a daily and hourly schedule in normal (continuous) recording mode, motion recording, I/O alarm recording and PIR recording (if supported by NVR). -
Page 67: Capture
CAPTURE This subsection of the Parameters menu can be used to configure the parameters dedicated to the acquisition of images in alarm conditions and to the programming of the time slots during which the function must be active. 2.6.3.1 Capture The Capture item is used to configure the parameters for recording images in an alarm condition;... -
Page 68: Alarm Configuration
ALARM CONFIGURATION This section is dedicated to the set notifications for different alarm events (Motion, PIR, IO Alarm, Intelligent Analysis, PTZ Linkage, Exception, Alarm Schedule) used by the HVR for recording and notifying alarms. The submenu is: 1. Motion Alarm Settings 2. -
Page 69: Pir Notification
Motion Detection Area: The whole screen is marked for motion detection (red blocks) as default. If you want to disable the motion detection on a certain area, click on the grid cursor and then drag the mouse to highlight the scope to deselect the area into transparent blocks. - Page 70 Show the IP channel • : :configure monitor area for PIR • You can set an area for motion detection PIR function by clicking on: • Copy: This can be used to copy current channel parameters to any other channel or to all channels. •...
-
Page 71: Io Alarm Settings
IO ALARM SETTINGS Read the description under the following figures for this menu page: At this point, the alarms can be set according to the different states. Here is a brief description: • Alarm In: This is used to select the required alarm number. Alarm Type: This is used to select three options, i.e. -
Page 72: Intelligent Analysis Notification
INTELLIGENT ANALYSIS NOTIFICATION Notifications can be set for each intelligent analysis event (PID, LCD, SOD, PD, FD, CC, Sound Detection, Occlusion Detection). Here is a brief description: Channel: This can be used to select the channel with which the intelligent detection function is associated. •... -
Page 73: Ptz Linkage
Show Message: This can be used to show the icon on the screen when an intelligent alarm is detected. For icon • types, see “2.2 - Live interface and pop-up menu” Send Email: This can be used to send alarm images to a specific email address (for more information, see "2.9.3 •... -
Page 74: Exception
EXCEPTION This menu can be used to set the event type (e.g. full HDD, disk error, video loss) for which you want to be alerted about by the NVR. Here is a brief description: Event Type: Select the event type from the following options: •... -
Page 75: Setup
This section can be used to set up intelligent analysis, i.e. systems which generate descriptions of what is happening in the video stream. The submenu is: Setup Recognition Alarm Statistics SETUP 2.8.1.1 Face Detection This function detects the faces of moving people appear in a predefined area. Select Switch ON and then Apply to enable face recognition. -
Page 76: Human & Vehicle Detection
Pitch Range: This can be used to set the range 0~180, the default value is 30. Yaw Range: This can be used to set the range 0~180, the default value is 45. Picture Quality: This can be used to set the range 0~100, the default value is 100. ... - Page 77 Channel: This can be used to select the channel to be configured. • • Level: Level (Low/Middle/High - Low/Middle/High). Scene: Shot type (Indoor/Outdoor). • Select Switch ON and then Apply to enable facial recognition, also define the level (Low/Middle/High) and the shot type (Indoor/Outdoor).
-
Page 78: Schedule
2.8.1.3 Schedule This function makes it possible to program face and vehicle detection for each individual channel. If you want to use the same program for other channels, use the Copy function. Use the Default function to restore the initial configurations. Click on Save to save the settings. RECOGNITION 2.8.2.1 Model Configuration This section describes the features of the devices which are performing the intelligent analysis and can be used to enable... -
Page 79: Database Management
2.8.2.2 Database Management This section describes how to configure the parameters for face recognition. Import Database: This makes it possible to import the database, click the external storage device or USB disk, select the • database file * .db then click OK. DS1098-028A... - Page 80 Backup Database: This can be used to backup the database to a *.db file in the External Storage Device or USB Disk. • Group Name: This can be used to program the Allow List/Block List/Stranger lists. Click on the group name to change •...
- Page 81 Import: Click on Import to access the setup page. You can select Local Storage Device or External Storage Device. • Click on Local Storage Device to select a face image from the HDD then select OK: DS1098-028A...
- Page 82 Or click on External Storage Device: DS1098-028A...
-
Page 83: Alarm
Export: To export an image click on External Storage Device, select a face image from the HDD and then click on OK: • Add Group: Click on and then select OK. • Enable: The default setting is enable. If a group is not used it can be disabled. •... - Page 84 If Advance is selected, it is possible to Enable/Disable alarms for each individual channel. Similarity: The default set threshold value is 70%. You can change this value. • Alarm: Click on Alarm to configure the parameters of the alarms for each group. •...
-
Page 85: Human & Vehicle Detection
2.8.3.2 Human & Vehicle Detection Click on Alarm to define the parameters for the alarms for human recognition and vehicle detection: Channel: Select the channel you want to configure • Buzzer: This can be used to disable or to active the buzzer to emit an alarm tone in 10, 20, 40 or 60 seconds when •... -
Page 86: Statistics
Latch Time: This can be used to configure the alarm time in case of detection; possible values are 10 s, 20 s, 40 • s, 60 s. Record Channel: Select the channel(s) you want to record when a detection is triggered. •... -
Page 87: Human & Vehicle Detection
2.8.4.2 Human & Vehicle Detection Statistics for human recognition and vehicle detection are implemented, this function is implemented for future use. Select Intelligent and then select Channels then select Day/Week/Month/Quarter/Year : Click here to show the calendar, you can select the desired date. DS1098-028A... -
Page 88: Network Configuration
NETWORK CONFIGURATION The Network section of the Parameters menu can be used to access all the NVR settings for accessing the Internet and the local area network (LAN), the email notification functions, the use of a DDNS (Dynamic DNS) etc. The submenu is: General Settings DDNS... -
Page 89: General Settings
2.9.1.1 General Settings This menu makes it possible to configure your WLAN network settings. Check the DHCP box if you connect to a router to use DHCP. The router will automatically assign all network parameters for the NVR. The parameters are as follows unless the network address is set manually: IP Address: The IP address identifies the NVR on the network. -
Page 90: Pppoe
2.9.1.2 PPPoE This is an advanced protocol which allows the NVR to connect to the network more directly, via a DSL modem. Check the "Enable PPPOE" box, then enter the username and password for the PPPoE. Click on Apply; the system will reboot to activate the PPPoE setting. 2.9.1.3 SNMP (For future use) SNMP: Simple Network Manage Protocol, open source. -
Page 91: Port Configuration
2.9.1.4 Port Configuration Web Port: This is the port that will be used to connect remotely to the NVR (i.e., via the Web Client). If the default • port 80 is already used by other applications, you must change it. Client Port: This is the port that the NVR will use to send information. -
Page 92: Ddns Set
DDNS SET DDNS (or Dynamic DNS - see glossary for more information) is a service used to record a domain name and floating IP address with the DDNS server for the domain name to be routed towards the IP address even if it is modified in an dynamic IP system. -
Page 93: Email
Now, save the changes by clicking on [Save] and wait for the device to restart to make the changes effective. A DDNS account can be requested free of charge from the websites www.3322.org, www.changeip.com or www.no-ip.com or a DDNS account can be requested for a charge on the website www.dyndns.org. You can register on the DDNS Service website to obtain a domain name, a user name and a password. -
Page 94: Email Schedule
Email: This can be used to enable or disable the configuration of the email parameters. • Encryption: This is used to specify whether communication with the email server is encrypted or not; the use of a • safety transfer protocol with data encryption makes it possible to encode the communicated information (including your email) to prevent monitoring of transmitted data or the password to hackers. -
Page 95: Ftp
NOTE: The green bar refers to the motion alarm time slots, the red bar to the system event time slots. The last available item in the Network section concerns the configuration parameters to access a FTP server on which to load the images and the recordings acquired following an alarm detected by the NVR. -
Page 96: Ftp Schedule
2.9.4.2 FTP Schedule This configuration page can be used, as seen in the other cases, to select on which times and days of the week the NVR must send the images/video to the FTP in case of a given event. •... -
Page 97: Ip Filter
IP FILTER 2.9.5.1 IP Filter You can configure IP FILTER for the NVR from the Start Menu Setup Network IP FILTER Enable: Check Enable to configure the Whitelist and Blacklist. • Enable Whitelists: The Whitelist is enabled by default; first check Enable, then set Start Address and End •... - Page 98 : You can set Single Add, and then click on . The Edit Address list is shown below. Edit: Click on to change Start Address and End Address; you can set one or more addresses for Single Add. • Delete: Click on .
-
Page 99: Device
2.10 DEVICE This section can be used to access the configuration and control functions of the devices and services available on the NVR. Click on "Device" (HDD) at the top to open the following subsections: Disk Cloud AF Controls ... - Page 100 Disk Type: This indicates the disk type. Possible values are: RW (Read Write), RE (Redundant), RD (Read Only) • Status: This is only available if the HDD was formatted. • Total/Free Space - Free space available on the installed hard disk/Total hard disk space. •...
-
Page 101: Self-Monitoring, Analysis And Reporting Technology) Information
2.10.1.2 S.M.A.R.T. (Self-Monitoring, Analysis and Reporting Technology) information This function can be used to display technical information about the hard disk installed inside the NVR. You can also run a test (three types are available) to evaluate and detect possible disk errors. It can be used to control the S.M.A.R.T. -
Page 102: Cloud
CLOUD The NVR can transfer the images and videos, captured by the cameras in case of alarm, to a Cloud storage service via Dropbox and Google Drive, a free service which allows you to easily store and share snapshots and have them always at hand when you need them. -
Page 103: System
To disable this function, select "OFF" (password protection will be temporarily excluded). • Mode: this parameter is present only on NVR 1098/318P model. AI mode allows you to use advanced video analytics features such as Face Recognition. Fisheye mode allows you to use the dewarping features of fisheye cameras (the AI menu is automatically disabled). -
Page 104: Date And Time
2.11.1.2 Date and Time Date and Time: The date and time can be set. Date: Click on the calendar icon to edit the date. • • Time: Click on the dialog box to change the time. Date Format: Select your preferred date format. •... -
Page 105: Output Configuration
• LIVE-OUT can be used to configure the main output parameters. SPOT OUT: This option can be used to configure the spot output parameters (not available for Ref. 1098/318P). LIVE-OUT Select LIVE-OUT from the Video Output drop-down menu. SEQ Mode: Select the video channels to be viewed when the NVR is in sequence mode. - Page 106 Click once or hold down the left mouse button on the arrow to adjust the size and position; alternatively, slide the mouse wheel to adjust them. Right-click to exit and click on Apply to save the changes. Cursor Hidden Delay: Click on the drop-down menu to select the time after which the NVR will hide the mouse •...
-
Page 107: Multi-User Settings
MULTI-USER SETTINGS This menu can be used to configure user name, password and user permissions. The system supports the following account types: ADMIN - System Administrator: The administrator has complete control of the system and can change • administrator and user(s) passwords and enable/exclude password protection. USER - Normal user: users can only access the live view, search, playback, etc. - Page 108 Select one of the currently disabled user accounts and click on the User Edit icon • Select Enable from the drop-down menu next to User Enable. • Click on the field next to User Name to change the account username. •...
-
Page 109: Maintenance Settings
MAINTENANCE SETTINGS In this section, you can search and view the system log, load the default settings, update the system, export/import system parameters and manage the automatic system reboot. 2.11.3.1 Log The log systemic contains important system events, such as motion alarms and system signals. You can easily create a backup file of the log system for a certain period of time by loading it onto a USB flash drive. -
Page 110: Load Default
2.11.3.2 Load Default Restore the NVR to factory settings. You can select to reset all settings at once or only the specific menu settings. Restoring the default settings will not erase the recordings and snapshots saved on your hard disk. Select all items to reset or check Select All to select all items. -
Page 111: Parameter Management
2.11.3.4 Parameter Management You can export land main menu settings on a USB flash drive, burn to a CD or import a configuration file exported from a USB flash drive to the NVR. Save Settings: Click to save the current NVR system settings to the USB flash drive. For authentication, you will •... -
Page 112: Ip Camera Maintain
IP CAMERA MAINTAIN This menu can be used to update the IP camera firmware and restore its default settings. 2.11.4.1 Upgrade Select the IP camera the firmware of which you want to update. • Click on the Select File button to select the file to be loaded on the USB flash drive, then click on OK. •... -
Page 113: Reboot Ipc
2.11.4.3 Reboot IPC This function allows you to reboot the IP camera. Select the IP camera to reboot and click on ; a message will prompt you to enter your password. • Enter the password and click on the “Authenticate” button to reboot the IPC. •... -
Page 114: Information
INFORMATION This menu can be used to view system information, channel information, logging information and network status. 2.11.5.1 Information This menu can be used to view system information, such as device ID, device model name, IP address, MAC address, firmware version and more. If the NVR supports P2P function, the P2P ID and QR code will appear on the information page. -
Page 115: Record Info
2.11.5.3 Record Info This can be used to view the recording information for each connected camera, such as bitrate, flow type, recording resolution and frame rate (Fps). 2.11.5.4 Network State This can be used to view the network information. DS1098-028A... -
Page 116: Playback & Backup
2.12 PLAYBACK & BACKUP The Search function can be used to search and play back previously recorded videos and snapshots stored on the NVR hard disk. You can select to play back videos that match the recording program, manual recordings or motion events only. The Backup function allows you to save important events (both video and snapshots) to a USB flash drive. -
Page 117: Search & Play Video In General
Snapshot: Capture a snapshot image on the USB flash drive. If video playback is in split-screen mode, move the mouse cursor to the channel to be captured, then click on the icon to save the snapshot. Default Tag/ Add Customized Tag: for more details, see the section "Errore. L'origine riferimento non è stata trovata. -
Page 118: Video Clip Backup
2.12.2.1 Video Clip Backup Insert the USB flash drive or USB DVD Writer USB drive into the NVR. Start playback of a video recording. Click on the icon Check the channel(s) you want to back up video clips. Move the mouse cursor to the timeline at the start point of the video clip. Hold down the left mouse button and drag the cursor over the timeline to the end point of the video clip. -
Page 119: Event Search, Playback & Backup
EVENT SEARCH, PLAYBACK & BACKUP The event search can be used to view a list of video recordings, with the channel, start/end time and type of recording appropriately summarized. You can also quickly save events to a USB flash drive. Search, playback and backup of events: Select the date and time to search. -
Page 120: Event Playback Control
Detailed view: This can be used to view the details of the events. In the latter mode, you can block video events so that they are not overwritten on the hard disk. Click on the icon to block events or on the to unblock them. -
Page 121: Sub-Periods Playback
SUB-PERIODS PLAYBACK Sub-period playback allows you to play back multiple normal and motion event recordings from a single channel simultaneously. With normal and event recordings, the video is split evenly, depending on the split-screen mode selected. For example, if the video lasts one hour and split-screens x 4 mode has been selected, each split-screen will play for 15 minutes. -
Page 122: Smart
SMART Sub-period playback allows you to play back multiple normal and motion event recordings from a single channel simultaneously. With normal and event recordings, the video is split evenly, depending on the split-screen mode selected. For example, if the video lasts one hour and split-screens x 4 mode has been selected, each split-screen will play for 15 minutes. -
Page 123: Fisheye Camera Management For Playback
FISHEYE CAMERA MANAGEMENT FOR PLAYBACK The Fisheye functions can be managed by selecting the button on the Playback control bar, where the available views will appear (see figure below), according to the type of fisheye camera installation selected for LIVE feed. For more details on how to use the different display features by type of installation, see section 2.2.5 - Fisheye camera management in this user manual. -
Page 124: Picture Search & View
PICTURE SEARCH & VIEW This function can be used to search, play back and copy snapshots to a USB flash drive or USB DVD Writer. Search, playback and backup of images: Select the date and time to search. Check the types of images to be searched for or check Search Type to select all of them. Select the channels to search or check Channel to select all channels. -
Page 125: Picture Preview Control
9. Left-click on one of the images to display the respective information at the bottom left. 10. Check the box next to the image number to select the files or check the box next to Select to select all images on the page. 11. -
Page 126: Slice
SLICE This function can be used to search, play back and copy video by choosing the video duration of the day of shooting, time of shooting. 1. Select the channel to search among the active ones, select the Month, Day, Year. 2. - Page 127 1. Select the channel to search among the active ones Select the Alarm Group lists (Group Name) among those defined on the system: Click on and select the Local Storage Device or External Storage Device. Click Local Storage Device to select a face image.
- Page 128 4. Select one of the pictures in area 2 and select the search criteria in area 1 to obtain the videos of people with a face similar to the one set. 5. Tracking the movements of selected persons By selecting the image and the channel you can see on the map the movements and videos related to the selection.
-
Page 129: Video Player To View Backup Videos On Pc
VIDEO PLAYER TO VIEW BACKUP VIDEOS ON PC This section allows you to play the backup files using to a powerful video player included on the CD. PC users must install the software "VideoPlayer_x.x.xx_xx_xx_xx.exe". Minimum system requirements: • Intel Pentium 4 or higher •... - Page 130 1. Play List Add file Delete file Select the playback mode: play a single file and stop playback; play all listed files in sequence; repeat one file; repeat multiple files. Filter by file name 2. Hide/Show Play List Click to open the files or load a folder. 3.
-
Page 131: Remote Access Via Web Client
REMOTE ACCESS VIA WEB CLIENT The Web Client can be used to remotely access the NVR via PC at any time. Before accessing the Web Client, ensure that the NVR Internet settings are configured correctly. BASIC SYSTEM ENVIRONMENT REQUIREMENTS The minimum hardware and OS requirements for the Web Client are as follows. Component Minimum Recommended... - Page 132 After the first login of the NVR from the Web interface, enter your custom Password and confirm. After installing the plug-in, close and launch the browser again, then repeat step 1 to open the login page. Enter your username and password to access the Web Client. Note: For Google Chrome, use version V41 or lower.
-
Page 133: Web Client Manager
3. Click on "Continue" --> "Install". Enter the user name and the password for the Mac. Click on "Install Software" --> "Close" to finish the installation. 4. Close and re-open Safari, then repeat step 1 to open the Web Client login page. WEB CLIENT MANAGER The Web Client supports full control of the NVR with the administrator account. -
Page 134: Live Interface
Enter the correct access credentials if other users were created in the NVR user menu or if the default password was modified. Select [Login] to access the Web interface of the device, as shown in the lower left screen. Note: The default password is empty if the NVR password is not enabled. - Page 135 Information: Hover over it with the cursor to view the system data. Exit. Controls: Click to show or hide controls for Manual Alarm • Face Alarm • Color • PTZ Controls: Click to display or hide PTZ controls for using PTZ cameras. DS1098-028A...
- Page 136 PTZ Interface: Zoom: Click on -/+ to zoom in or out. Focus: Click on -/+ to adjust the focus. AutoFocus: Click on autofocus to focus the camera automatically. Restore: Click on restore to reset the camera. Refresh: Click on refresh to update the camera image. Live display control buttons: To view the Layout page.
-
Page 137: Fisheye Camera Management
FISHEYE CAMERA MANAGEMENT Select the button on the control bar displayed on the bottom of the LIVE view to open the menu on the left side in which you can select the installation of the fisheye camera (ceiling, horizontal surface/tabletop, wall, slanted surface) and the available views according to the type of selected installation. -
Page 138: Playback Control Buttons
Check the channels to search for recordings. Click on Synchronous playback to play all channels simultaneously. Click on Search. The records that match the search criteria will be displayed in the timeline. Click on a section of the video from which to begin playback and click on the play button. -
Page 139: Fisheye Camera Management For Playback
Playback Speed: Click to select the playback speed. Play All Channels: Click to play all channels selected for the search. Only available if Synchronous playback has not been checked. Stop All Channels: Click to stop all channels. Only available if Synchronous playback has not been checked. Open/close the speaker and adjust the sound volume. -
Page 140: Remote Settings
REMOTE SETTINGS Click on the [Configuration] option to access the [Config] interface, shown below, and set the Display configuration and the Record, Alarm, Network, Device and System according to the needs of the moment. DISPLAY CONFIGURATION Open the [Display] option to find the respective sub-options: Live and Privacy zone. IP Channels: This displays the information on additional IPCs. - Page 141 Live: the name, position, channel preview and the respective parameters can be modified. If the Show Time parameter is set to <disable>, the current time of the NVR system will not be shown in Live mode. Image Control (if supported by IP camera model): It is possible to set the parameters of the IP camera.
- Page 142 PTZ: The correct PTZ settings for PTZ control can be configured. Motion Detection: This can be used to configure the sensitivity and set the area. The detailed parameters must be coherent with the local setting of the NVR. DS1098-028A...
- Page 143 PIR Detection: This can be used to configure the sensitivity and set the area for PIR detection. The detailed parameters must be coherent with the local setting of the NVR. Deterrence: The deterrence function (deterrence) can be used to configure some actions to deter and report abnormal behaviour detected by the camera.
- Page 144 Privacy Zone: Up to four privacy zones can be selected for each channel, as shown below. For detailed parameters, see the OSD Menu section of the NVR. To eliminate a privacy zone, select it and then click on the <Clear> button and then on <Save> in the right-hand corner. 10.
- Page 145 Note: The Sound Detection function is not available. This function depends on the camera model and must be supported by the camera in order to be set. DS1098-028A...
-
Page 146: Record
RECORD Click on the <Record> option to access its sub-options: Record parameters, Schedule and Mainstream. 1. Stream setting: This can be used to set the Mainstream, Substream and Mobile Stream parameters as shown in the following figures. The respective parameters must be coherent with the local setting of the NVR. 2. - Page 147 This section can be used to set up intelligent analysis, i.e. systems which generate descriptions of what is happening in the video stream. 1. Setup This section describes the features of the devices which are performing the intelligent analysis and can be used to enable: The detection of faces of people moving within a predefined area.
- Page 148 Programming, face detection and detection of people and vehicles for each individual channel. 2. Recognition This section describes the features of the devices which are performing the intelligent analysis. DS1098-028A...
- Page 149 3. Alarm This section defines the parameters for Alarms for face recognition and in case of vehicle and human recognition. DS1098-028A...
- Page 150 4. Statistics The following functions are implemented in this section: Face recognition statistics Statistics for human recognition and vehicle detection are implemented, this function for future use. DS1098-028A...
-
Page 151: Alarm Set
ALARM SET The notifications can be set (e.g. Buzzer, Latch Time, Post Recording, Send Email, Show Message, Full Screen, FTP Picture/Video Upload, Cloud Picture/Video Upload, Record Channel) for events such as Motion, PIR, IO Alarm, Intelligent Analysis Events, PTZ Linkage, Exception, Alarm Schedule. The detailed parameters must be coherent with the local setting of the NVR. - Page 152 Note: The Sound Detection function is not available. This function depends on the camera model and must be supported by the camera in order to be set. DS1098-028A...
-
Page 153: Network Parameters
NETWORK PARAMETERS Open the <Network> option to access its sub-options: Network, Sub stream, Email and DDNS Configuration. The model supports three types of networks: Static, DHCP and PPPoE. Static: The user can assign the IP and port-forward the NVR according to the various routers. If <UPNP> is set •... - Page 154 SNMP setting (for future use): Port Configuration: This can be used to set the port configuration (e.g. Data Port, HTTP Port). DDNS Setting: After having the DDNS service (see below), it is possible to enable the <DDNS> function in any network type (Static, DHCP and PPPoE).
- Page 155 Email setting: Click on the [Email setting] option to set the alarm email configuration parameters, as shown below. In [Email Schedule], you can schedule E-mail sending: Green indicates Motion; yellow indicates IO Alarm Detection; red indicates Exception; blue indicates Intelligent Video Analysis; purple indicates PIR Detection. FTP function: This function is used together with the alarm function.
- Page 156 HTTPS: This can be used to set the security encryption protocol. IP Filter: This can be used to set the IP Filter function. The detailed parameters must be coherent with the local setting of the NVR. DS1098-028A...
-
Page 157: Device
DEVICE Click on the <Device> option to access its sub-options: HDD and PTZ HDD: This can be used to check HDD status, overwrite time and enable recording on the ESATA interface, as shown below. The detailed parameters must be coherent with the local setting of the NVR. 2. -
Page 158: System
NVR. Important: the Mode parameter is present only on NVR model 1098/318P. AI mode allows you to use advanced video analytics features such as Face Recognition. Fisheye mode allows you to use the dewarping features of fisheye cameras (the AI menu is automatically disabled). - Page 159 3. NVR Maintenance : This can be used to set the Log, Load Default, Firmware Update and Auto Reboot functions of the NVR. The detailed parameters must be coherent with the local setting of the NVR. 4. IP Camera Maintain: This can be used to set the Firmware Update, Load Default and Auto Reboot functions of the IP camera (Firmware update not available for IP camera with ONVIF protocol) The detailed parameters must be coherent with the local setting of the NVR.
-
Page 160: Local Setting
Info/Channel Info: This is used to check the device name, number and type, the MAC address, the software version, the IE version and the hardware version, as shown below. You can also read all channel information: Set Stream, Enable or Disable Status, Motion Supported, etc. LOCAL SETTING Set the download destinations of the recordings and snapshots obtained through the Web Client and select the type of video file. -
Page 161: Mobile Device Software
MOBILE DEVICE SOFTWARE Mobile Software is used for iOS Platform (iPhone, iPad) and Android Platform (Android Smartphone, Tablet). Here follow the Mobile Software Client description. SMARTPHONE DEVICES URMET IUVS PLUS SOFTWARE MOBILE URMET iUVS Plus is a CCTV application for iOS and Android, smartphones, iPads and tablets, compatible with all URMET devices both IPCam (Codec H265) and NVR/NVR (all codecs). -
Page 162: Live
Getting started Download the iUVS App from Apple Store or Google Play Store and install it. Connect your iPhone, iPad, Android mobile phone, Android tablet to the Internet using the 3G network or WIFI. Launch the application to go to the "Live" main menu. To access the Menu select the icon in top left. - Page 163 Select to open list of devices shown below. Then select one of devices to open all channels automatically. Opening a channel Select a device the channel list appears; select a channel, which will be displayed in the main window. Recording streaming You can record a video stream while viewing video in live mode.
- Page 164 PTZ control PTZ is the abbreviation of Pan-Tilt-Zoom and refers to the movement options of the camera. Select to open PTZ mode, the PTZ control buttons will appear on the Live page. Select the arrows to move it to sideways or up and down. Other buttons can be used to control zoom, override, adjust the iris, presettings, etc.
-
Page 165: Playback
5.1.1.2 Playback On the main menu, select “Playback” to see the playback list. After two steps, it will be possible to play a channel of the device remotely. 1. Selecting a channel Select the “Remote Playback” button to open the list of devices shown below. Select one channel of the device from the list. -
Page 166: Record
2. Selecting the date After having selected a channel, all the dates for which are recordings are present will be marked with a dot. Select a date to play the recordings for that day. 5.1.1.3 Record You can record a video stream while viewing video in live mode as shown above. Image 5.1.1.4 Images is the screenshot gallery. -
Page 167: Remote Settings
5.1.1.5 Remote Settings This can be used to enable remote device controls such as Send Email, Enable registration on the device. 5.1.1.6 Alarm This can be used to enable E-mail notification of devices. DS1098-028A... -
Page 168: Device
5.1.1.7 Device Adding and deleting device "Device" can be used to add or delete devices and to edit device properties. Select Menu and "Device" or the icon at the top right of the main menu to open the interface shown below to insert a device manually To add a new device, select "+"... -
Page 169: Help
To insert a device using the automatic network search: Select the device and select "Add Device" NOTE: Set the data port (i.e. 9000) for correct operation of the iUVS mobile software. iUVS mobile software will not work if the port of the mobile device is not set. To delete a device from list, select the name of the device you want to delete and then select the "Delete"... -
Page 170: P2P Function
P2P FUNCTION After having configured NVR and network cameras for remote viewing on iPhone or Android smartphone, download the iUVS URMET App from the respective store. To view on Apple iPad or Android tablet, download the iUVSpad App from Apple Store or the iUVStab app from Play Store, respectively. - Page 171 Fill in the “Password” field by entering the NVR password (default: 00000000), then press ““Save” wait about 10 seconds until the LIVE video automatically loaded. IMPORTANT: In addition to P2P mode, the IP Camera can be viewed remotely on smartphone by using the Urmet DDNS service. Set your opening type and ports on your router to use the function.
-
Page 172: Nvr Specifications Ref. 1098/318-1098/316-1098/332 (Pal Format)
NVR SPECIFICATIONS REF. 1098/318-1098/316-1098/332 (PAL FORMAT) Features Function 1098/318 1098/316 1098/332 Compression formats: Video: H.265 and H.264 / Audio: 8kHz*16bit ADPCM 8-CH IP Video Input / 16-CH IP Video Input / 32-CH IP Video Input / 1 CH Video VGA Output... -
Page 173: Nvr Specifications Ref. 1098/318P-1098/316P (Pal Format)
NVR SPECIFICATIONS REF. 1098/318P-1098/316P (PAL FORMAT) Features Function 1098/318P 1098/316P Compression formats: Video: H.265 and H.264 / Audio: 8kHz*16bit ADPCM 16-CH IP Video Input / Video Inputs/Outputs 1 HDMI (up to 4K), 1 VGA 1 CH Output Video VGA (up to 1080P) - Page 174 IMPORTANT NOTES Product specifications may be subject to change without prior notice. After replacing/adding a HDD, the operations must be performed by qualified personnel or by contacting the closest technical centre. The hard disk may have a maximum capacity of 8TB. Contact the closest technical centre to see the complete list of ...
-
Page 175: Maximum Recording Time With 2000Gb Hard Disk
MAXIMUM RECORDING TIME WITH 2000GB HARD DISK REF. 1098/318 - 1098/316 - 1098/318P - 1098/316P - 1098/332 The following resolution options can be set on the URMET NVR PRO series: “4K”, “5Mpx”, “4Mpx”, “3.5Mpx”, “3Mpx”, “1080P”, “960P/720P” on 1/4/8/16/32 IP channels in H.264 and H.265 •... - Page 176 4 recording channel with 5Mpx resolution (3072x1728, 2592x194 8 recording channel with 5Mpx resolution (3072x1728, 2592x194 and 2160×2160) and 2160×2160) Variables to be set H.264 Codec H.265 Codec Variables to be set H.264 Codec H.265 Codec H.264 H.265 Frame Time Time Time Time...
- Page 177 8192 5120 24-25 16.49 0.69 26.38 1.10 6144 3584 24-30 703.39 29.31 1862.65 50.24 7168 4096 20-23 18.84 0.79 32.97 1.37 5376 3072 20-23 803.88 33.49 1406.78 58.62 6144 3328 16-19 21.98 0.92 40.58 1.69 4608 2560 16-19 937.86 39.08 1688.14 70.34 5120...
- Page 178 8 recording channels with 3Mpx resolution (2048×1520) 16 recording channels with 3Mpx resolution (2048×1520) Variables to be set H.264 Codec H.265 Codec Variables to be set H.264 Codec H.265 Codec H.264 H.265 Frame Time Time Time Time H.264 H.265 Frame Time Time Time...
- Page 179 1 recording channel with 960P (1280×960) and 720P 4 recording channels with 960P (1280×960) and 720P resolution resolution(1280x720) (1280x720) Variables to be set H.264 Codec H.265 Codec Variables to be set H.264 Codec H.265 Codec H.264 H.265 Frame Time Time Time Time H.264...
- Page 180 IP channels with Urmet Cloud protocol 1 recording channel with 720P resolution (1280×720) 4 recording channels with 720P resolution (1280×720) Variables to be set H.264 Codec Variables to be set H.264 Codec Frame Frame Bitrate HD time HD time Bitrate HD time HD time frequency...
-
Page 181: Recording Alarm Setting
RECORDING ALARM SETTING Refer to the following table: “⊥” means “alarm only, no recording”; “AMR” means “alarm recording”; “NLR” means “normal recording”; “NOR” means “no recording”. The respective icon appears once the alarm has tripped; the following indications will appear in presence of multiple alarms. Recording modes Scheduled recording Recording alarm setting... -
Page 182: Maintenance
Q: I cannot access the NVR Client. Why? A: Check that the network connection settings are correct and that the RJ-45 port contact is efficient. Check that the account and the password have been entered correctly. Q: I cannot find any recordings during playback. Why? A: Check that the HDD data line is connected correctly and that the system time is correctly set. -
Page 183: Appendix: Activex Installation
APPENDIX: ACTIVEX INSTALLATION Proceed as shown below to install an ActiveX component. Enable the IE protection configuration as shown below before activating the connection to the PC: Double-click on the icon to open Internet Explorer. Open Internet Explorer by double clicking on the icon. - Page 184 Select the “Trusted Sites” area. Click on “Sites”. The following screen will appear. At this point, add the address of the device (e.g. http://192.168.36.40 or the address of the URMET DDNS portal http://www.urmetddns.com or other URL, such as for example http://urmetvcc.no-ip.org) in the “Add this website to the zone”...
- Page 185 Select “Custom Level” and check that: “Initialize and script ActiveX controls not marked as safe” is set to “Enable” or “Prompt” “Download signed ActiveX controls” is set to “Enable” or “Prompt” Press “OK” repeated to confirm and quit Internet Options mode. Proceed by installing Active X on Internet Explorer.
- Page 186 DS1098-028A...
- Page 187 DS1098-028A...
- Page 188 DS1098-028A Technical area URMET S.P.A. Customer Service +39 10154 TORINO (ITALY) 011.23.39.810 VIA BOLOGNA 188/C http://www.urmet.com Tel. +39 011.24.00.000 (AUTO) e-mail: info@urmet.com +39 011.24.00.300 - 323 MADE IN CHINA DS1098-028A...
Need help?
Do you have a question about the 1098 and is the answer not in the manual?
Questions and answers