JVC VN-X35U Instructions Manual
Megapixel ip camera
Hide thumbs
Also See for VN-X35U:
- Instructions manual (111 pages) ,
- Product specification (9 pages) ,
- Quick start manual (2 pages)
Table of Contents
Advertisement
Quick Links
Advertisement
Table of Contents

Related Manuals for JVC VN-X35U


Summary of Contents for JVC VN-X35U
- Page 1 VN-V25U_26U_EN.book Page 1 Wednesday, September 3, 2008 8:03 PM MEGAPIXEL IP CAMERA VN-X35U INSTRUCTIONS Thank you for purchasing this JVC product. Before operating this unit, please read the instructions carefully to ensure the best possible performance. LST0789-001A...
-
Page 2: Getting Started
If you wish to dispose of this product, please visit our web page Union. www.jvc-europe.com to obtain information about the take-back of the product. [Other Countries outside the European Union] If you wish to dispose of this product, please do so in accordance with applicable national legislation or other rules in your country for the treatment of old electrical and electronic equipment. - Page 3 D’INCENDIE OU D’ELECTROCUTION, NE PAS This manual describes detailed usage of EXPOSERL’APPAREIL A VN-X35U. For basic usage of VN-X35U, please refer L’HUMIDITE OU A LA PLUIE. to AStart-up GuideB. For latest information, please refer to INFORMATION (FOR CANADA) AReadmeB file in the CD-ROM.
- Page 4 VN-V25U_26U_EN.book Page 4 Wednesday, September 3, 2008 8:03 PM Getting Started These are general IMPORTANT SAFEGUARDS and certain items may not apply to all appliances. IMPORTANT SAFEGUARDS 1. Read all of these instructions. 2. Save these instructions for later use. 3.
-
Page 5: Table Of Contents
Patrol Infomation ........85 Network Settings IP Address Settings ........27 Operation Setting the IP address for VN-X35U ..27 Operation of Built-in Viewer ...... 86 IP address setting at the computer ..28 Internet Explorer Setup ......86 Internet Explorer Setting ...... 29 Installing the built-in viewer .... -
Page 6: Main Features
VN-V25U_26U_EN.book Page 6 Wednesday, September 3, 2008 8:03 PM Getting Started Main Features Privacy Mask Feature You can configure the privacy mask setting to hide specific area in shooting area. High Picture Quality The camera unit of this product employs a Motion Detection 1,250,000-pixel CCD (1/3") -
Page 7: Operating Environment
Free hard disk space Content of this manual : 512 MB or more ● All rights reserved by JVC. Unauthorized Display and video card duplication or reprinting of this manual, in whole or in part, is strictly prohibited. -
Page 8: Cautionary Notes
The motion detection feature is not a feature Do not hang on this product, shake it, or hand to prevent theft or fire. JVC shall not be liable objects over it. Applying an excessive load for any damage that occurs. - Page 9 VN-V25U_26U_EN.book Page 9 Wednesday, September 3, 2008 8:03 PM If the power supply voltage is momentarily Others cut off or reduced due to lightning, turning on of the air conditioner’s power, etc., the image The cable stopper of the alarm terminal may may be disrupted or noise interference may come off in some cases.
-
Page 10: Name And Function Of Parts
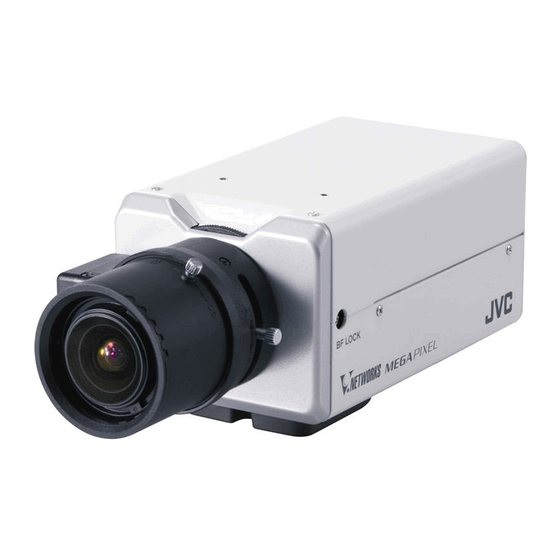
VN-V25U_26U_EN.book Page 10 Wednesday, September 3, 2008 8:03 PM Getting Started Name and Function of Parts Front / Bottom / Side Back Focus Adjustment Ring [MAC address] Indicator This ring is used for adjusting the back focus. The MAC address is a unique physical address of the product. -
Page 11: Side
Press and release the button within two seconds ● Blinks in green color when “Identify Unit” is to restart VN-X35U. It takes about one minute for set to “Blink” (A Page 75). the unit to restart, and the [RESET] button is ●... -
Page 12: Rear
VN-V25U_26U_EN.book Page 12 Wednesday, September 3, 2008 8:03 PM Getting Started Rear AC24V ALARM MONITOR AUDIO 10BASE-T/ SEE INSTRUCTION MANUAL 100BASE-TX CAUTION AC 24V : NEVER USE AT THE SAME TIME DO NOT CONNECT TO THE TELEPHONE NETWORK PUSH [MONITOR OUT] Monitor Video Signal [AC24V] Power Input Terminal Output Terminal (RCA) Use this terminal to connect to an AC 24 V,... -
Page 13: Features
JPEG images that are currently displayed can Using MPEG4 VN-X35U also be captured in the computer’s hard disk. For VN-X35U, you can check the audio of the MAC address built-in microphone using the computer. AOperation of Built-in ViewerB (A Page 86) - Page 14 Getting Started Input audio to computer / output audio Restrictions on Clients from computer VN-X35U enables users to authorize or reject the Connect the mini jack R3.5 stereo cable to the acquisition of images by specific IP address. [AUDIO IN/OUT] terminal.
-
Page 15: Setup Procedures
Step 2 Network settings (A Page 27) Configure the network settings of the computer and this camera. T In a system where multiple units of VN-X35U are used, turn on the power of only one unit to configure the IP address settings using the Internet Explorer. -
Page 16: Connection / Installation
VN-V25U_26U_EN.book Page 16 Wednesday, September 3, 2008 8:03 PM Connection / Installation When using a DC iris lens, pay attention Mounting the Lens to the pin position before connecting the lens cable Note: ● Make use of a megapixel lens. Check the mounting method of the lens to MONITOR OUT OFF NTSC... -
Page 17: Power Connection
VN-V25U_26U_EN.book Page 17 Wednesday, September 3, 2008 8:03 PM Power Connection MONITOR OUT OFF NTSC RESET Electricity can be supplied to this product either by connecting to the AC 24 V power supply or STATUS using the PoE (A Page 18). When power is supplied to this product, the IRIS [STATUS] indicator at the side lights up. -
Page 18: Using The Poe
Connection / Installation Power Connection (continued) LAN Cable Connection ● In a system where multiple units of VN-X35U Connect the camera to a hub or computer using are used, turn on the power of only one unit a LAN cable. -
Page 19: Monitor Signal Output Terminal Connection
VN-V25U_26U_EN.book Page 19 Wednesday, September 3, 2008 8:03 PM Monitor Signal Output Terminal Audio Signal Input/Output Connection Terminal Connection Make use of this terminal for camera angle Connect the mini jack R3.5 stereo cable. adjustment during installation or focus L ch : Speakers with built-in amplifier, etc. adjustment in the Focus Assist mode. -
Page 20: Alarm Input/Output Terminal Connection
VN-V25U_26U_EN.book Page 20 Wednesday, September 3, 2008 8:03 PM Connection / Installation Sensor Example Alarm Input/Output Terminal VN-X35U DC3.3 V INPUT 1 or Connection 2 Terminal Connect the alarm input/output terminals with external devices, such as a sensor or buzzer. -
Page 21: Mounting The Camera
VN-V25U_26U_EN.book Page 21 Wednesday, September 3, 2008 8:03 PM Mounting the camera mounting Mounting the Camera bracket on the top of the camera Use the screw hole on the camera mounting bracket to mount this camera to a fixer or rotating platform. -
Page 22: Mounting To The Housing Using The Inner Tripod Base
VN-V25U_26U_EN.book Page 22 Wednesday, September 3, 2008 8:03 PM Connection / Installation Mounting the Camera Mounting to the Housing (continued) Using the Inner Tripod Base This product comes with an inner tripod base at Warning the bottom surface. You can use the inner tripod base by removing the camera mounting bracket ●... -
Page 23: Back Focus Adjustment
VN-V25U_26U_EN.book Page 23 Wednesday, September 3, 2008 8:03 PM Inner Tripod Base Mounting Screw Fixed focus lens Make use of 1/4-20UNC screw. The length of the Adjust when the lens cannot be brought into mounting screw shall be between 6 mm to 7 mm focus using the focus ring. -
Page 24: Focus Assist Mode
If the entire [MONITOR OUT] Switch bandwidth is used by the multicast stream, control of this camera via the network may fail. ● Data volume to be sent by VN-X35U varies with MONITOR OUT OFF NTSC RESET the settings and number of distributions. - Page 25 VN-X35U. value (8 Mbps) (Example) When VN-X35U sends out 2 audio streams When both JPEG and MPEG4 images are and receives 1 audio stream, data volume will be as distributed simultaneously, distribution up to two follows.
- Page 26 Sending/Receiving audio Network Delay TCP/5510 VSIP When the client acquires JPEG via TCP, VN-X35U will send out data while checking the UDP/5510 VSIP ACK from the client at the same time. For UDP/9541 VSIP discovery networks with considerable delay, data cannot...
-
Page 27: Network Settings
(A) Assigning an IP address from the DHCP server Memo: ● To set a static IP address for VN-X35U, ● VN-X35U is set to ADHCP EnableB (the connect VN-X35U, the switching hub and the DHCP client feature is on) by default. To... -
Page 28: Ip Address Setting At The Computer
IP Address Settings (continued) IP address setting at the computer Set the computer to an IP address that enables communication with VN-X35U. Procedures described in this item are intended for Windows XP users. Click [Start] ● Select in the sequence of [Control Panel]-[Network Connection]-[Local Area]. -
Page 29: Internet Explorer Setting
VN-V25U_26U_EN.book Page 29 Wednesday, September 3, 2008 8:03 PM Internet Explorer Setting Launch the Internet Explorer on the computer When proxy settings are enabled in the Internet Explorer, follow the steps below to disable the proxy of the Internet Explorer ●... -
Page 30: Changing The Ip Address Using The Internet Explorer
VN-V25U_26U_EN.book Page 30 Wednesday, September 3, 2008 8:03 PM Network Settings IP Address Settings (continued) Changing the IP address using the Internet Explorer Launch the Internet Explorer Click [Go]. Enter the following IP address into the address field. http://192.168.0.2 Memo: ●... - Page 31 VN-V25U_26U_EN.book Page 31 Wednesday, September 3, 2008 8:03 PM The integrated viewer of VN-X35U is displayed The operator password entry screen appears Enter operator password (default is AjvcB). Click [OK]. Memo: ● The operator password entry screen does not appear if the password is stored on the computer.Go...
- Page 32 Memo: ● Access from this computer may fail when the IP address of VN-X35U is changed. To enable access to VN-X35U from the same computer, alter the IP address at the computer accordingly.
-
Page 33: Setting Using Internet Explorer
When the IP address of VN-X35U is known unknown When the IP address of VN-X35U is known, it IP address settings cannot be changed by can be changed by accessing the built-in web accessing via a computer when the IP address of page of VN-X35U via the Internet Explorer on VN-X35U is unknown. - Page 34 [Enable]. Enable also [Allow Script-initiated window without size or position constraints.] under [Miscellaneous]. Disable pop-up block Connection of VN-X35U cannot be established when pop-up block in the Internet Explorer is set to AEnableB. Follow the steps below to set the pop-up block to AdisableB.
-
Page 35: Enter User Name And Password
● Do not reset or turn off the power of [Audio] VN-X35U immediately after the settings are [Alarm] changed. Otherwise, changes may not be [Alarm Environment] saved, and VN-X35U may be restored to the [PTZ] factory settings. [Auto Patrol] [Privacy Mask] [Motion detection]... -
Page 36: Setting
VN-V25U_26U_EN.book Page 36 Wednesday, September 3, 2008 8:03 PM Setting Using Internet Explorer Setting How to open the setting page Enter IP address of VN-X35U in the address bar of Internet Explorer(A Page 30) A unified viewer is opened. Click Click [Detalis]. -
Page 37: Basic Setting1
The time transmitted by VN-X35U is recorded in the JPEG header. Discontinuity may occur in the JPEG header's time immediately before and after changing the time. Time Zone For setting the time zone. PC Time Camera Click the [Set] button to set the time of the computer on VN-X35U. - Page 38 VN-V25U_26U_EN.book Page 38 Wednesday, September 3, 2008 8:03 PM Setting Using Internet Explorer Setting (continued) Basic Settings 2 Page for setting fundamental parameters of ACameraB, AJPEGB and AMPEG4B. This page can be used during access using AadminB or AoperatorB. ● Click [Basic Setting2]. ●...
- Page 39 VN-V25U_26U_EN.book Page 39 Wednesday, September 3, 2008 8:03 PM Camera ID Character strings entered here will be written to the JPEG comment segment (item name: camera). Refer to the API Guide on the file formats of JPEG. Monitor Type For selecting the monitor type according to the monitor used to display the video images.
-
Page 40: Basic Settings 2
VN-V25U_26U_EN.book Page 40 Wednesday, September 3, 2008 8:03 PM Setting Using Internet Explorer Setting (continued) Basic Settings 2 (continued) DJPEG Frame Size For specifying the JPEG picture quality (rate control mode) and size (target file size). When AVFSB to AVFS7B is selected, the quantization table during JPEG encoding will be maintained and the file size will increase/decrease according to the input signals. -
Page 41: Camera Page
VN-V25U_26U_EN.book Page 41 Wednesday, September 3, 2008 8:03 PM Camera Page This page is for setting the camera’s parameters. This page can be used during access using AadminB or AoperatorB. ● Click [Advanced Settings] to display setting menu. ● Click [Camera]. ●... - Page 42 VN-V25U_26U_EN.book Page 42 Wednesday, September 3, 2008 8:03 PM Setting Using Internet Explorer Setting (continued) Camera Page (continued) Camera ID Character strings entered here will be written to the JPEG comment segment (item name: camera). Refer to the API Guide on the file formats of JPEG. Monitor Type For selecting the monitor type according to the monitor used to display the video images.
- Page 43 VN-V25U_26U_EN.book Page 43 Wednesday, September 3, 2008 8:03 PM Color Level For adjusting the color level. Larger value : Increases the color level. Smaller value : Decreases the color level. [Setting values: -5 to 0 to 5] For setting the AGC (automatic gain control) level. : Disables the AGC feature : When the amount of light is insufficient High...
- Page 44 VN-V25U_26U_EN.book Page 44 Wednesday, September 3, 2008 8:03 PM Setting Using Internet Explorer Setting (continued) Camera Page (continued) Shutter Speed For setting the shutter speed. Auto :Varies the shutter speed automatically according to the brightness. Auto, Auto(1/15 to 1/100) :Fixed shutter speed. Flickerless :Reduces flickers due to fluorescent lamps.
- Page 45 VN-V25U_26U_EN.book Page 45 Wednesday, September 3, 2008 8:03 PM White Balance For selecting the white balance control feature. White balance can be adjusted for a light source with a color temperature range of 2800K to 9500K. Switches to the Auto-Tracking White Balance (automatic color temperature tracking) mode.
-
Page 46: Encoding Page
● When settings on this page are altered during playback using the built-in viewer, reboot the viewer. ● There is a maximum limit to the bit rate for transmission by VN-X35U. If a bit rate that exceeds the maximum limit is specified, this new setting will not be applied. For details on the maximum transmission limit, refer to the section on ANetwork RequirementsB (A Page 24). - Page 47 VN-V25U_26U_EN.book Page 47 Wednesday, September 3, 2008 8:03 PM Frame Size For selecting the frame size of each JPEG or MPEG4 screen to Quad VGA (1280 960), VGA (640 480) or QVGA (320 240). Select one of the eight different patterns.(A Page 39) JPEG Quality/Size For specifying the JPEG picture quality (rate control mode) and size (target...
-
Page 48: Audio Page
VN-V25U_26U_EN.book Page 48 Wednesday, September 3, 2008 8:03 PM Setting Using Internet Explorer Setting (continued) Audio Page This page is for setting the audio parameters. This page can be used during access using AadminB or AoperatorB ● Click [Advanced Settings] to display setting menu. ●... - Page 49 Press the [Browse] button to show the file selection screen and make a selection from the available audio files. Press the [Play] button to play back an audio file registered on VN-X35U, and send output to the Audio signal output terminal of VN-X35U.
-
Page 50: Alarm Page
VN-V25U_26U_EN.book Page 50 Wednesday, September 3, 2008 8:03 PM Setting Using Internet Explorer Setting (continued) Alarm Page This page is for setting actions when there is an alarm. Up to 5 actions (No. 01 to No. 05) may be set. This page can be used during access using AadminB or AoperatorB. - Page 51 Mail : Sends out e-mail. Specify the recipient’s mail address. The title of the mail will appear as [Alarm from VN-X35U] and the sender as [Camera ID]. Enter the message to send in [Mail Text]. Input up to 127 alphanumeric characters. To attach the latest image to the mail, set [Attach Image] to AOnB.
- Page 52 VN-V25U_26U_EN.book Page 52 Wednesday, September 3, 2008 8:03 PM Setting Using Internet Explorer Setting (continued) Alarm Page (continued)
- Page 53 VN-V25U_26U_EN.book Page 53 Wednesday, September 3, 2008 8:03 PM Max. Interval Enabled when both the first and second triggers are specified. Specify the maximum interval between the first and second triggers. An action will be invoked only if the interval between the first and second triggers is within the maximum interval.
-
Page 54: Alarm Environment Page
VN-V25U_26U_EN.book Page 54 Wednesday, September 3, 2008 8:03 PM Setting Using Internet Explorer Setting (continued) Alarm Environment Page This page is for setting alarm-related environments. This page can be used during access using AadminB or AoperatorB. ● Click [Advanced Settings] to display setting menu. ●... - Page 55 VN-V25U_26U_EN.book Page 55 Wednesday, September 3, 2008 8:03 PM Mail For setting the mail environment when [Mail] is specified as an action on the Alarm page.[SMTP] and [POP] can be used. Configure only the [SMTP] settings under usual circumstances. Enter the camera’s mail address as the recipient’s mail address. Configure the [POP] settings as well if [POP before SMTP] is enabled.
- Page 56 VN-V25U_26U_EN.book Page 56 Wednesday, September 3, 2008 8:03 PM Setting Using Internet Explorer Setting (continued) Alarm Environment Page (continued)
- Page 57 VN-V25U_26U_EN.book Page 57 Wednesday, September 3, 2008 8:03 PM Time Filter: For specifying the periodic FTP transfer action with respect to each day of the week and setting the corresponding time of the day. Applicable day of week : Sunday, Monday, Tuesday, Wednesday, Thursday, Friday, Saturday Alarm action Unmask Span...
-
Page 58: Ptz Page
VN-V25U_26U_EN.book Page 58 Wednesday, September 3, 2008 8:03 PM Setting Using Internet Explorer Setting (continued) PTZ Page Set the movement for Auto Return, Zoom Limit and Preset Position. This page can be used during access using AadminB or AoperatorB.. ● Click [Advanced Settings] to display setting menu. ●... -
Page 59: Auto Patrol Page
VN-V25U_26U_EN.book Page 59 Wednesday, September 3, 2008 8:03 PM Auto Patrol Page Perform Auto Patrol setting to switch image display between multiple positions according to the interval that has been set.Set when viewing registered positions in order. This page can be used during access using AadminB or AoperatorB. ●... - Page 60 VN-V25U_26U_EN.book Page 60 Wednesday, September 3, 2008 8:03 PM Setting Using Internet Explorer Setting (continued) Auto Patrol Page (continued) Click Switches the camera images in sequence from No. 0 to No. 19. Title Shows the title of the position. Position For setting the sequence of position numbers in which the camera moves.
-
Page 61: Privacy Mask Page
Privacy Mask is a feature that enables masking of a portion of the image. VN-X35U enables unlimited privacy masks to be specified in different shapes at your favorite locations. The Privacy Mask masks area by uploading a BMP file painted in red (created separately). The displayed color is determined by the color specified on this page. - Page 62 Press the [Browse...] button to display the file selection screen. Select the BMP file that has been created on this screen. Press the [Upload] button to upload the selected BMP file to VN-X35U. Creating the BMP file 1. Upon installing the camera, use JPEG Viewer to save the JPEG file on the computer.
-
Page 63: Motion Detection Page
VN-V25U_26U_EN.book Page 63 Wednesday, September 3, 2008 8:03 PM Motion Detection Page This page is for setting motion detection. This page can be used during access using AadminB or AoperatorB. ● Click [Advanced Settings] to display setting menu. ● Click [Motion detection]. ●... - Page 64 Our company shall not be liable for any accident or damage that occurs. ● When images on VN-X35U are currently acquired by another client, video images may not appear on the [Motion Detection] page due to the maximum distribution limit of VN-X35U. Stop other clients...
-
Page 65: Network Basic Page
Connect VN-X35U to a network environment with a DHCP server when DHCP is to be enabled. If the DHCP server does not exist when DHCP is set to AEnableB, VN-X35U will start running with the 192.168.0.2 IP address and 255.255.255.0 subnet mask in about 2 minutes after startup. -
Page 66: Network Detailspage
[Setting range: 1280 to 1500] Negotiation For setting the negotiation of the network. When a value other than AAutoB is selected, do not set the network device to be connected to AAutoB. Ensure that it is set to the same value as VN-X35U. -
Page 67: Protocol Page
● After changing, you will need to re-establish the connection if you are using the Internet Explorer. Click HTTP Server You can change the port number for the built-in web server of VN-X35U. (1 to 65535: The default port number setting is 80.) Port The JPEG and MPEG4 HTTP port number for the web server will also be changed. -
Page 68: Streaming Page
VN-V25U_26U_EN.book Page 68 Wednesday, September 3, 2008 8:03 PM Setting Using Internet Explorer Setting (continued) Streaming Page This page is for setting manual multicast transmission. This page can be used during access using AadminB or AoperatorB. ● Click [Advanced Settings] to display setting menu. ●... - Page 69 Multiple multicast streams cannot be received on a single computer when there are duplicate port numbers. Memo: ● When the power of VN-X35U shuts down accidentally during multicast transmission, multicast transmission will restart automatically after VN-X35U is rebooted.
-
Page 70: Access Restrictions Page
VN-V25U_26U_EN.book Page 70 Wednesday, September 3, 2008 8:03 PM Setting Using Internet Explorer Setting (continued) Access Restrictions Page This page is for setting client restrictions. This page can be used during access using AadminB. ● Click [Advanced Settings] to display setting menu. ●... - Page 71 ● Note that when AallowB is selected and all IP address fields are left blank, JPEG/MPEG4 acquisition by all IP addresses will be denied. Restrictions are not imposed on access to the Web Settings page. Additionally, VN-X35U will also deny access when instructions for transmission to the specified IP address are sent via API. Memo: ●...
-
Page 72: Time Page
The clock time can be changed by entering an appropriate value. (Second value cannot be specified.) In addition, time will be recorded in the JPEG headers distributed by VN-X35U. Discontinuity may occur in the JPEG header’s time immediately before and after changing the time. Time Zone For setting the time zone. -
Page 73: Password Page
VN-X35U is case sensitive. New Password Enter again to confirm the new password. Again Note: ● Be sure to handle the password carefully in case you forget it. ● In the event that you forget the password, please consult JVC’s servicing center. -
Page 74: Maintenance Page
Update Upgrades the firmware version of VN-X35U and reboots the unit. The settings of VN-X35U will be saved. Copy the new firmware file to the computer on which Internet Explorer is used, and specify this file using the [Browse...] button. Press the [Update] button to start the update. JPEG/ MPEG4 transmission and all others services that are running will be discontinued. -
Page 75: Led State Page
VN-V25U_26U_EN.book Page 75 Wednesday, September 3, 2008 8:03 PM LED State Page This page is for setting the method for lighting the [STATUS] indicator at the side of VN-X35U. This page can be used during access using AadminB or AoperatorB. -
Page 76: List Of Factory Settings Of Each Page
List of Factory Settings of Each Page Mike GainMENU OFF 32 dB Camera Page(A Page 41) Mike Power Supply Item Factory Settings Audio File 1 — Camera ID VN-X35U Audio File 2 — Monitor Type Custom Audio File 3 — Black Level Audio File 4 —... - Page 77 VN-V25U_26U_EN.book Page 77 Wednesday, September 3, 2008 8:03 PM Auto Patrol Page(A Page 59) Alarm Environment Page(A Page 54) Factory Settings Item Factory Settings Position 0 to 19 SMTP Server 0.0.0.0 Port Number Stay Time Skip Send Mail Address — Moving speed Moment POP before SMTP...
- Page 78 New Password Blank HTTP Server Port Default passwords VISIP Protocol are: AadminB : jvc VISIP Server Port 5510 AoperatorB : jvc AMX Device Discovery Protocol AuserB : jvc Streaming Page(A Page 68) LED Settings Page(A Page 75) Item Factory Settings Item...
-
Page 79: Miscellaneous Page
This page can be used during access using AadminB, AoperatorB and AuserB. ● Click [Advanced Settings] to display setting menu. ● Click [Miscellaneous]. Click Open Source Press the [Show] button to display information of the software used by VN-X35U. Software... -
Page 80: Operation Page
● Click [Advanced Settings] to display setting menu. ● Click [operation]. Click Total Sending Displays the total TCP/UDP bit rate sent by VN-X35U as well as the individual bit rates. Bitrate Destination Displays the destination that VN-X35U is sending data to. -
Page 81: Settings Page
VN-V25U_26U_EN.book Page 81 Wednesday, September 3, 2008 8:03 PM Settings Page Display the version information and current settings of VN-X35U. This page can be used during access using AadminB or AoperatorB. ● Click [Advanced Settings] to display setting menu. ● Click [Settings]. - Page 82 VN-V25U_26U_EN.book Page 82 Wednesday, September 3, 2008 8:03 PM Setting Using Internet Explorer Setting (continued) Settings Page (continued)
- Page 83 VN-V25U_26U_EN.book Page 83 Wednesday, September 3, 2008 8:03 PM...
-
Page 84: Position List
VN-V25U_26U_EN.book Page 84 Wednesday, September 3, 2008 8:03 PM Setting Using Internet Explorer Setting (continued) Position List The Position List displays information on the preset positions. This page can be used during access using AadminB or AoperatorB. ● Click [Advanced Settings] to display setting menu. ●... -
Page 85: Patrol Infomation
VN-V25U_26U_EN.book Page 85 Wednesday, September 3, 2008 8:03 PM Patrol Infomation Patrol Information displays the Auto Patrol information and settings. This page can be used during access using AadminB or AoperatorB. ● Click [Advanced Settings] to display setting menu. ● Click [Patrol Infomation]. Click... -
Page 86: Operation
Operation Operation of Built-in Viewer VN-X35U comes equipped with an integrated viewer. You can start up the integrated viewer by entering the IP address in the Internet Explorer. The integrated viewer enables you to performing monitoring using JPEG or MPEG4 images, audio transmission, and PTZ operations. - Page 87 ● Click [Trusted sites] under [Tool]-[Internet Options]-[Security]. Upon doing so, the [Sites…] button directly below becomes active. Click this button and deselect the check in the displayed window. Next, add the IP address of VN-X35U. If the setting is factory default, add the following web site to the zone.
-
Page 88: Installing The Built-In Viewer
VN-V25U_26U_EN.book Page 88 Wednesday, September 3, 2008 8:03 PM Operation Operation of Built-in Viewer (continued) Installing the built-in viewer Enter IP address of camera in the address bar ofInternet Explorer Enter the following IP address into the address field. Click [Go] http://192.168.0.2... - Page 89 VN-V25U_26U_EN.book Page 89 Wednesday, September 3, 2008 8:03 PM Enter the user name and password Enter the user name. This is set to AadminB by default. VN-V25 Enter the password. This is set to AjvcB by default. Click [OK]. The viewer is installed and launched...
-
Page 90: Screen Configurationr
● In the case of AWindows VistaB, images are stored under [Documents]. Memo: ● The folder name can be changed.(A Page 99) Note: ● The time indicated is the computer's clock time,not the clock ATimeB of VN-X35U. ● Motion images cannot be captured. ● MPEG4 images cannot be captured. - Page 91 Speech Starts sending audio sound to VN-X35U from the client PC. Only one stream of audio sound can be sent for one unit of VN-X35U You cannot send audio sound from a client PC when transmission of audio sound from a different client PC is in progress.
-
Page 92: Image Quality Setting
VN-V25U_26U_EN.book Page 92 Wednesday, September 3, 2008 8:03 PM Operation Operation of Built-in Viewer (continued) Image quality setting Below are procedures for configuring the Image settings. ● When a different menu is currently being displayed, click [Control] to switch the viewer. ●... - Page 93 VN-V25U_26U_EN.book Page 93 Wednesday, September 3, 2008 8:03 PM White Balance For selecting the white balance control feature. Mode :Switches to the Auto-Tracking White Balance (automatic color temperature tracking) mode. Adjusts the white balance automatically according to the color temperature of the light. :Switches to the Auto-White Balance Control mode.
-
Page 94: Ptz Setting
VN-V25U_26U_EN.book Page 94 Wednesday, September 3, 2008 8:03 PM Operation Operation of Built-in Viewer (continued) PTZ setting This page describes procedures for setting the preset positions. ● When a different viewer is currently being displayed, click [Control] to switch the viewer. ●... - Page 95 VN-V25U_26U_EN.book Page 95 Wednesday, September 3, 2008 8:03 PM Preset Position For setting the preset positions. Position For selecting a APositionB. [Set values :HOME , 1 - 19] Title Displays the current title. Enter accordingly if you want to register or change a title. (You can enter up to 32 alphanumeric or 16 Japanese characters.
-
Page 96: Ptz Control
VN-V25U_26U_EN.book Page 96 Wednesday, September 3, 2008 8:03 PM Operation Operation of Built-in Viewer (continued) PTZ Control Use this item to operate the PTZ feature. Settings can be configured on the PTZ Settings Page 94) ● When a different menu is currently being displayed, click [Control] to switch the viewer. ●... - Page 97 VN-V25U_26U_EN.book Page 97 Wednesday, September 3, 2008 8:03 PM [Start] :Starts the Auto Patrol operation. UNCTION [Stop] :Stops the Auto Patrol operation that is currently running. Preset For selecting a Preset Position, or move to the selected Position if Position that Position has already been registered.
-
Page 98: Jpeg Viewer Settings
Camera ID Select AOnB to display [Camera ID]. [Camera ID] can be specified on the[Basic Setting2] or [Camera] page of VN-X35U. (A Page 42) Position Title Selecting AOnB displays the position title. Disp MD When AOnB is selected, the frame of the video image display area where motion is detected turns red. - Page 99 Stream Settings For specifying settings for receiving JPEG stream. Stream For selecting the protocol when the viewer acquires data from VN-X35U. When AHTTPB is selected, lost packets are recovered via resending. VN-X35U may be monitored using multiple viewers when AMulticastB is selected.
-
Page 100: Mpeg4 Viewer Settings
● Click the menu bar on the left side of the screen to open the respective setting screens. Memo: ● To make use of the built-in MPEG4 Viewer of VN-X35U, you will need to install the ffdshow open source codec. You can obtain ffdshow through the Internet. - Page 101 Stream Settings For specifying settings for receiving MPEG4 stream. Stream For selecting the protocol when the viewer acquires data from VN-X35U. When AHTTPB is selected, lost packets are recovered via resending. VN-X35U may be monitored using multiple viewers when AMulticastB is selected.
-
Page 102: Audio Monitor Settings
VN-V25U_26U_EN.book Page 102 Wednesday, September 3, 2008 8:03 PM Operation Operation of Built-in Viewer (continued) Audio Monitor Settings This page describes procedures for configuring the settings to send/receive audio sound using the JPEG and MPEG4 Viewers. ● When a different menu is currently being displayed, click [Viewer Setup] to switch the viewer. - Page 103 Common For specifying the HTTP port settings HTTP Port For changing the port number during access to VN-X35U from the client PC via HTTP. The default port number is 80. Specify the same value as the parameter that is set on the Protocol.
-
Page 104: Operator Password
VN-V25U_26U_EN.book Page 104 Wednesday, September 3, 2008 8:03 PM Operation Operation of Built-in Viewer (continued) Operator Password Follow the procedures below to configure the operator password required for sending/receiving audio sound or PTZ operation. ● When a different menu is currently being displayed, click [Viewer Setup] to switch the viewer. ●... -
Page 105: Exiting The Viewer
● During the next startup of the built-in viewer, launch the Internet Explorer and enter the URL of the built-in viewer in the address field. For example, if the IP address of VN-X35U is 192.168.0.2, enter as follows: http://192.168.0.2/cgi-bin/x35viewing.cgi?x35ptz.viewer.html Memo: ●... -
Page 106: Others
TCP images cannot be The maximum number of images that can be sent by played back VN-X35U via TCP is 20, and up to 20 built-in viewers can be connected to each VN-X35U unit. Make use of multicast for monitoring when the number of areas exceeds the above number. - Page 107 A Page 11 Images are not distributed to the network the side of VN-X35U is set to ANTSCB or APALB. If either of the above is selected, change the [MONITOR OUT] switch setting to AOFFB. After changing the switch settings, press the [RESET]...
- Page 108 [Countermeasure] To make use of the built-in MPEG4 Viewer of VN-X35U, install “ffdshow” that is open source codec. You can download “ffdshow” from the Internet. ● Set the [MONITOR OUT] switch to ANTSCB or...
-
Page 109: Specifications
VN-V25U_26U_EN.book Page 109 Wednesday, September 3, 2008 8:03 PM Others Network interface Specifications :RJ-45 100BASE-TX/10BASE-T/ FULL/HALF/Auto negotiation Camera Unit supported Pick-up element :1/3-inch progressive scan LAN Specifications Effective pixels :Approx. 1,250,000 pixels Compliant with IEEE802.3, IEEE802.3u and 1296(H) 966 (V) IEEE802.3af Lens Mount :C/CS mount... -
Page 110: Dimension
VN-V25U_26U_EN.book Page 110 Wednesday, September 3, 2008 8:03 PM Others Dimension [Unit: mm (inch)] 126 (5) U1-32 65 (2-9/16) 115 (4-9/16) MAC address 42 (1-5/8) 1/4 – 20UNC 66 (2-5/8) 30 (1-3/16) T Specifications and appearance of this product are subject to changes for improvement without prior notice. - Page 111 VN-V25U_26U_EN.book Page 111 Wednesday, September 3, 2008 8:03 PM LST0789-001A © 2008 Victor Company of Japan, Limited...
Need help?
Do you have a question about the VN-X35U and is the answer not in the manual?
Questions and answers