Advertisement
Table of Contents
- 1 Table of Contents
- 2 Important Safety Instructions
- 3 General Description
- 4 Hardware Installation
- 5 Initial Configuration
- 6 Web Browser Operation
- 7 Web Setup
- 8 Command Line Interface
- 9 Dxp Protocol
- 10 Firmware Upgrades
- 11 Troubleshooting
- 12 Specifications
- 13 Technical Support and Warranty
- Download this manual
See also:
Manual
Congratulations on purchasing the best network
controlled power switch available. The iBoot-G2
provides you the ability to reboot crashed
devices with the click of a mouse. Be sure to
read up on all the features of the iBoot-G2
Including:
•
Web Based setup and control
•
Telnet setup and control
•
Event Scheduling for real-time power
control.
•
AutoPing: Automatic monitoring and action
for failed equipment.
•
Management Utility: Easy Setup,
Firmware upgrades and Reset to Factory
Default
•
Easy Software Integration: Use the DxP
Protocol to build your own custom
applications
.
2.
Important Safety Instructions............
3.
General Description........................
4.
Hardware Installation......................
5.
Initial Configuration........................
6.
Web Browser Operation..................
7.
Web Setup................................... 10
1. Table of Contents
8.
Command Line Interface................. 14
2
9.
DxP Protocol................................
3
10.
Firmware Upgrades.......................
4
11.
Troubleshooting............................
5
12.
Specifications...............................
8
13.
Technical Support and Warranty...... 21
Web Enabled
Power Switch
V110120E
18
18
19
20
Advertisement
Table of Contents

Related Manuals for Dataprobe iBoot-G2


Summary of Contents for Dataprobe iBoot-G2
-
Page 1: Table Of Contents
Congratulations on purchasing the best network controlled power switch available. The iBoot-G2 provides you the ability to reboot crashed devices with the click of a mouse. Be sure to read up on all the features of the iBoot-G2 Including: • Web Based setup and control •... -
Page 2: Important Safety Instructions
15. Do not use the telephone to report a gas leak in the vicinity of the leak. 16. Do not exceed the maximum output rating of the auxiliary power receptacle. Save These Instructions V110120E iBoot-G2 Page 2... -
Page 3: General Description
3. General Description The iBoot-G2 is a network attached, IP addressed, web controlled AC power switch. Anyone with a web browser can access iBoot-G2 to perform power On, Off or Power Cycle (Reboot or Power Burst). iBoot- G2 uses two levels of password for security. -
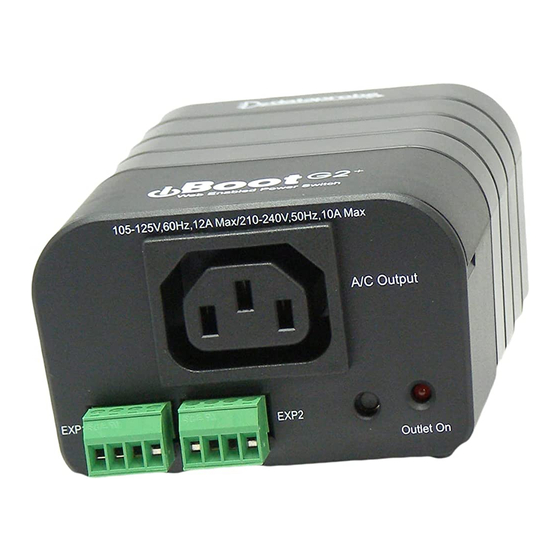
Page 4: Hardware Installation
Connect 10/100 Ethernet marked A/C Output. An IEC 320 to North American (NEMA 5-15) power cord is included for connecting the iBoot-G2 outlet to the device to be controlled. If a cord with a different terminating receptacle is required, be sure it is properly rated and meets all the required local electrical standards. - Page 5 4.3. Mounting Options iBoot-G2+ is suitable for desktop or shelf mounting. mounting kit for wall and DIN rail mounting is available. Order part: 1920034 Mounting Kit for iBoot-G2+ G2 Series Remove all cables from the unit prior to installing or removing any mounting hardware.
-
Page 6: Initial Configuration
The DMU can also be used to return an iBoot-G2 to its Factory Default condition. This can be used to recover an iBoot-G2 with a lost password. Highlight an iBoot-G2 from the display and select Set | Factory Defaults. - Page 7 A DHCP server will automatically assign an IP address (dynamic address) as well as Subnet Mask and Gateway to the iBoot. If you reboot the iBoot-G2 with the IP Mode set for DHCP, the DHCP server will be able to assign an IP address. Once an IP address is assigned, you must check the DHCP server or use the iBoot-G2 Setup Utility to see what address is assigned to the iBoot.
-
Page 8: Web Browser Operation
Enter Username and Password Open your browser and enter the IP address of iBoot-G2 into the address bar. If you have changed the IP address by any of the methods described, enter that address, otherwise, use the default IP address 192.168.1.254 Enter the username and password as prompted. - Page 9 As the iBoot-G2 allows only one Web user logged in at any time, use caution when disabling the timeout feature, as it is possible to lock out other users by forgetting to logout. Closing the browser will not log the user out and will lock out web access.
-
Page 10: Web Setup
Telnet Port: This setting is used to allow access to the iBoot-G2 via telnet by ports other than standard 23. DxP Port: This setting is used to allow access to the iBoot-G2 via Dataprobe Exchange Protocol (DxP) via ports other than standard 9100. - Page 11 Ideal for: Kiosks & Servers Use Auto-Ping as service monitor: iBoot-G2 is installed with the device to be rebooted, but pings a remote host to test the communication channel.
- Page 12 With AutoPing operational, the main iBoot-G2 page will display the current status of this feature. The status will be OK to indicate that iBoot-G2 is receiving responses to the ping, or that the fail counter has not yet been exceeded.
- Page 13 Note: All of the Schedule Settings require a reboot of the iBoot-G2, after clicking Save. A Reboot button will appear at the bottom of the page. The new settings will not take effect until the unit is rebooted.
-
Page 14: Command Line Interface
8. Command Line Interface The iBoot-G2 Command Line Interface (CLI) provides a text based method for communicating with the iBoot. The syntax of the CLI uses a basic Set (change a variable) and Get (retrieve a variable). The CLI is accessed through the Telnet protocol and requires a Telnet client program. - Page 15 This command sets the ip address setting mode. Static mode locks the address as set, dhcp mode allows DHCP server to assign address. set ipaddress <dotted This command is used to set the iBoot-G2’s ip address. 192.168.1.254 decimal> set subnet <dotted decimal>...
- Page 16 | or> relationship And or Or. set autoping action <none | on- This command is used to set the action that the iBoot-G2 will None latch | on-follow | off-latch | off- perform when the autoping triggers. follow | cycle | cycle-once>...
- Page 17 Reboot Required> This is the prompt that will be displayed whenever there have been changes made that require a reboot. This prompt will remain the active prompt until the iBoot-G2 has been rebooted. V110120E iBoot-G2 Page 17...
-
Page 18: Dxp Protocol
1) Insure that the Upgrade Enable checkbox is checked in the Network Setup web page of the iBoot-G2 2) Run the Device Management Utility, available at the link above. If the iBoot-G2 you would like to upgrade is not visible in the list box, either Select Device | Discover from the menu to locate iBoot-G2 units on the local network, or Select Device | Add from the menu to add the IP address of the iBoot-G2. -
Page 19: Troubleshooting
Troubleshooting The iBoot-G2 has a recessed pushbutton switch in the event the unit is not performing as expected. Use the pushbutton as follows: Action Result Momentary Soft Reset. Will not change outlet status. 5 Seconds push Reset to Factory Defaults. Hold the button in until the Outlet LED is blinking, then release. -
Page 20: Specifications
IP Addressed, DHCP assigned or Static Internal HTTP Web Server Forms Processing Browser required Telnet Server User Settings Record your Setup here for reference Location: HTTP Port: MAC Address: Auto-Ping Address: IP Address: Auto-Ping Port: Subnet Mask: Heartbeat Port: Gateway: V110120E iBoot-G2 Page 20... -
Page 21: Technical Support And Warranty
Technical Support and Warranty Dataprobe Technical Support is available 8:30AM to 5:30PM ET to assist you in the installation and operation of this product. To obtain Technical Support call 201- 934-5111, or Email us at tech@dataprobe.com. Please have the following information available when you call: •...
Need help?
Do you have a question about the iBoot-G2 and is the answer not in the manual?
Questions and answers