Table of Contents
Advertisement
Quick Links
Advertisement
Table of Contents
Troubleshooting

Subscribe to Our Youtube Channel
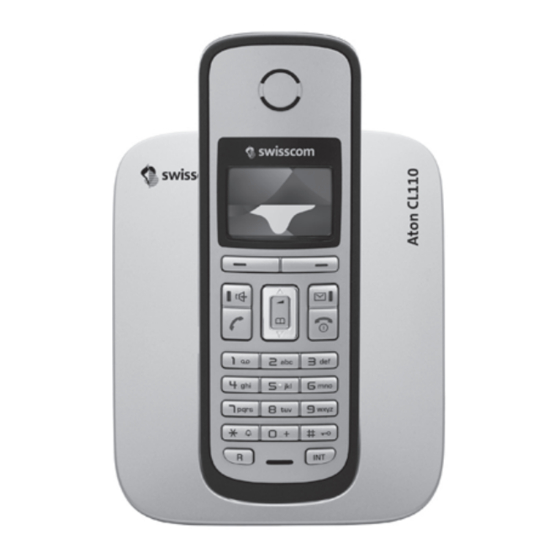
Related Manuals for Swisscom Aton CL110


Summary of Contents for Swisscom Aton CL110
- Page 1 Aton CL110/CLT110 Bedienungsanleitung Mode d’emploi Istruzioni per l’uso...
-
Page 2: The Handset At A Glance
The handset at a glance The handset at a glance 1 Display in idle status (example) 2 Charge status of the ¢ batteries( page 13) ¢ 3 Display keys ( page 19) ¢ 4 Message key ( page 29) Access to calls and message lists; Flashes: new message or new call 5 End call key, On/Off key End call, cancel function, go back one menu... -
Page 3: The Base Station At A Glance
If the LED flashes although the answer machine is switched off, it means that there is still at least one new message that has not been played back yet. Aton CL110 base station 1 Registration/paging key: Press briefly: Search for handsets (paging), ¢... -
Page 4: Table Of Contents
"Swisscom Hotline" ........ - Page 5 Contents SMS (text messages) ........32 Writing/sending an SMS .
- Page 6 Contents Connecting the phone to a PABX ......51 Dialling modes and recall ........51 Setting pauses .
-
Page 7: Safety Precautions
Safety precautions Safety precautions Warning Read the safety precautions and the user guide before use. Explain their contents and the potential hazards associated with using the telephone to your children. Only use the mains adapter supplied, as indicated on the underside of the base station or charging cradle. - Page 8 Safety precautions Information about disposal Batteries should not be disposed of in general household waste. Observe the local waste disposal regulations, details of which can be obtained from your local authority or the dealer you purchased the product from. At the end of its service life, this product must not be disposed of with normal household waste, but must be handed in at the place of purchase or at a collec- tion point for recycling electrical and electronic devices in accordance with the ordinance governing the return, acceptance and disposal of electrical and elec-...
-
Page 9: Environmental Benefits Of The Aton Cl110/Clt110
Power consumption in standby mode is approx. 1.3 watt. Minimal radiation The Aton CL110/CLT110 with its preset Eco Mode plus switches off all radiation when in idle status. During a call, the handset reduces the transmission power according to the distance from the base station. -
Page 10: First Steps
First steps First steps Check the package contents one Aton CL110/CLT110 base station, one mains adapter, one handset, one phone cord, two batteries, one battery cover, one belt clip, one user guide, one headset, Environment card (Swisscom). -
Page 11: Setting Up The Base Station And Charging Cradle (If Included)
First steps If you have purchased a model with multiple handsets the package should contain two batter- ies, a battery cover, a belt clip and a charging cradle with mains adapter for each additional handset. Setting up the base station and charging cradle (if included) The base station and charging cradle are designed for use in enclosed dry rooms with a temperature range of +5 °C to +45 °C. -
Page 12: Connecting The Base Station
First steps Connecting the base station ¤ First connect the mains adapter 1. ¤ Then connect the telephone jack and insert the cables into the cableducts. Please note: The mains adapter must always be con- nected, as the phone will not operate with- out mains connection. -
Page 13: Setting Up The Handset For Use
First steps Setting up the handset for use The display is protected by a plastic film. Please remove the protective film! Inserting the batteries and closing the battery cover Warning ¢ Use only the rechargeable batteries ( page 54). Never use a conventional (non-rechargeable) battery or other battery types as this could result in sig- nificant health risks and personal injury. - Page 14 First steps Attaching the belt clip The handset has notches on each side to accommodate the belt clip. ¤ Press the belt clip onto the back of the handset so that the notches on the belt clip click into position. Placing the handset in the base station and registering Before you can use the phone, you must first register the handset to the base station.
- Page 15 First steps Please note Each key press interrupts the automatic registration. If automatic registration does not work, the handset will have to be ¢ registered manually ( page 45). To charge the batteries, leave the handset in the charging cradle. Please note Only place the handset in the base station or charging cradle that is intended for it.
- Page 16 First steps Setting the date and time Set the date and time so that the correct date and time can be assigned to incoming calls, and so that the alarm can be used. Hotline Menu ¤ Press the key below on the §Menu§...
- Page 17 First steps ¤ The active line is marked [...]. Enter Date: Enter day, month and year as an 8-digit number via the handset, e.g. Q [01.10.2008] Q2QQN for 01/10/08. Ç If you want to correct an entry, press the top or bottom of the control key to toggle between fields.
-
Page 18: Connecting The Headset
First steps Display in idle status Once the phone is registered and the time Ð set, the idle display is shown as in this exam- ple. If the answer machine is activated, the answer machine icon × will also be dis- 01.10.08 07:15 played in the header. -
Page 19: What Would You Like To Do Next
Use the following guide to quickly locate the most important subjects. If you are unfamiliar with menu-driven devices such as other Swisscom tele- phones you should first read the section entitled "Using the phone"... -
Page 20: Using The Phone
Using the phone Using the phone Control key In the following description the side of the control key you need to press for each operation is indicated accordingly, e.g. t for "press the top of the control key". The control key has a number of different functions: When the handset is in idle status Open the directory. -
Page 21: Keys On The Keypad
Enter digits or letters. "Swisscom Hotline" Press the display key. §§§§Hotline§§§§ Select Hotline. You will be directly connected to the Swisscom Voice Portal. The access number is pre-programmed as 0848 849 850 and cannot be chan- ged. Please note :... -
Page 22: Activating/Deactivating The Handset
Using the phone Submenus The functions in the submenus are displayed as lists. To access a function: ¤ Scroll to the function with the control key q and press §OK§ ¤ ¢ Enter the corresponding digit combination ( page 23). Briefly press the end call key a once to return to the previous menu level/ cancel the operation. -
Page 23: Illustration Of Operating Steps In The User Guide
Using the phone Illustration of operating steps in the user guide The operating steps are shown in abbreviated form. Example: The illustration: ‰ ¢ ¢ ¢ = on) Settings Handset Auto Answer §Menu§ means: Hotline Menu ¤ Press the display key §Menu§... -
Page 24: Menu Tree
Menu tree Menu tree Instead of scrolling to locate a menu function, you can select a function more quickly by opening the menu and keying in a digit combination (or shortcut). M 2 2 for "Set ringer tone volume". Example: §Menu§... - Page 25 Menu tree Settings ¢ 7-1 Date/Time page 15 ¢ 7-2 Audio Settings 7-2-1 Call Volume page 48 ¢ 7-2-2 Ringer Volume page 48 ¢ 7-2-3 Ringer Melody page 48 ¢ 7-2-4 Advisory Tones page 49 ¢ 7-2-5 Battery Low page 49 ¢...
-
Page 26: Making Calls
Line Identification. three ways: by ringing, by a display on the screen and by the flashing handsfree key d. Note In the Swisscom network, CLIP is trans- You can answer the call by: ¤ Pressing the talk key c. mitted automatically. -
Page 27: Handsfree Talking
Making calls Handsfree talking Muting In handsfree mode, instead of holding the You can deactivate the microphone in handset to your ear you can put it down, your handset during an external call. for example on the table in front of you. Press the display key to mute §Mute§... -
Page 28: Using The Directory And Lists
Using the directory and lists Using the directory and lists Storing a number in the directory ¢ ¢ New Entry §Menu§ The options are: Enter the number and press Directory §OK§ Last number redial list Enter the name and press §OK§... - Page 29 Using the directory and lists Using other functions Enter the internal number of the receiving handset and Press the display key. §Menu§ press §OK§ The following functions can be selected with q: Successful transmission is acknowledged with the message . You can Entry copied.
-
Page 30: Last Number Redial List
Using the directory and lists The message key f will flash as soon as Last number redial list a new entry is received in a list (switches off when the key is pressed). The message The last number redial list contains the ten You have new messages appears in the dis- numbers last dialled with the handset... - Page 31 Using the directory and lists The calls list is displayed as follows: List entry Example of a list entry: Calls List: New Call 01/02 Ç 02+03 1234567890 Ç 01.10.08 12:14 Menu 1 Number of new entries 2 Number of old, read entries Status of entry Setting the call history type ¢...
-
Page 32: Making Cost-Effective Calls
Making cost-effective calls Making cost-effective calls Displaying the call duration The duration of a call is displayed during the conversation, until about three seconds after the call has ended if you do not replace the handset in the base station or charging cradle. -
Page 33: Sms (Text Messages)
Please note: ¢ page 49). When supplied, the access number If your phone is connected to a PABX, (062 210 00 0*) for the Swisscom SMS centre is pre-programmed. please read page 35. Preconditions: Writing/sending an SMS Calling Line Identification is enabled for ¢... -
Page 34: Receiving An Sms
SMS (text messages) Draft message list Deleting draft message list ¤ Open the draft message list. You can save an SMS in the draft message ¢ Delete List §Menu§ list, and edit and send it later. Select and press §OK§ Saving an SMS in the draft message list Press the display key to con- §OK§... - Page 35 SMS (text messages) An entry in the list is displayed as in the Adding the number of the message sender following example: to the directory ¤ Open the incoming message list. 01/02 Select SMS. ¢ 1234567890 Copy to Directory §Menu§ ¤...
-
Page 36: Setting Sms Centres
Calling Line Identification is for- When supplied, the access number warded to the extension of the PABX (062 210 00 0*) for the Swisscom SMS centre (CLIP). The CLIP evaluation of the is pre-programmed. phone number for the SMS centre takes place in your Aton. -
Page 37: Sms Troubleshooting
SMS (text messages) SMS troubleshooting The SMS is played back. 1. The "display call number" service is not acti- Error codes when sending vated. ¥ Ask your service provider to enable this feature (there is a charge for this). E0 Calling Line Identification permanently withheld (CLIR) or Calling Line Identifica- 2. -
Page 38: Operating The Answer Machine Of The Aton Clt110 Base Station
Operating the answer machine of the Aton CLT110 base station Operating the answer Recording your own announcement ¢ ¢ Voice Mail Announcements machine of the §Menu§ ¢ Record Announcement Aton CLT110 base station Press the display key to start §OK§ the recording. - Page 39 Operating the answer machine of the Aton CLT110 base station s or 3 Deleting announcements ¢ ¢ Skip to the next message. Voice Mail Announcements § § Menu ¢ Press twice to skip to the next Delete Announcement but one message. Press the display key to §OK§...
-
Page 40: Activating/Deactivating Call Screening
Operating the answer machine of the Aton CLT110 base station Activating/deactivating call Setting the recording time screening You can set the maximum recording time of a message. During recording of a message you can Note screen calls via the loudspeaker of the The options are: Minute, Minutes,... -
Page 41: Operating When On The Move (Remote Operation)
Operating the answer machine of the Aton CLT110 base station Operating when on the move Activating the answer machine ¤ (remote operation) Phone home and let the phone ring until you hear: "Please enter PIN". You can check and activate your answer Enter system PIN. -
Page 42: Using The Network Mailbox (Combox)
With fast access, you can dial the network mailbox or the integrated answer machine (Aton CLT110 only) directly. Aton CL110: Fast access is set for the net- work mailbox. You only need to enter the number of the network mailbox. -
Page 43: Viewing The Network Mailbox Report
Using the network mailbox (Combox) Viewing the network mailbox report When a message is recorded, you receive a call from the network mailbox. If you have requested Calling Line Identification, the network mailbox number will be dis- played. If you take the call, the new mes- sages are played back. -
Page 44: Minimal Radiation (Eco Mode Plus)
Eco Mode plus is indicated by the ½ icon ing tone. in the top left of the device display. If you listen in on the Aton CL110/ CLT110 using a handset that does not Deactivation support Eco Mode plus, this will be ¢... -
Page 45: Setting The Alarm Clock
Setting the alarm clock Status displays Display icon Reception strength Setting/ programming On/Off ‰ ¼ good Eco Mode+ no reception Eco Mode ‰ ¼ good Eco Mode+ ‰ no reception Eco Mode Ð i Ñ good to low Eco Mode+ ‰... -
Page 46: Using Several Handsets
¢ ually. on the base station ( page 2) (approx. 3 sec.). Manual registration to Aton CL110/ CLT110 De-registering handsets You must activate manual registration of Handsets can only be de-registered by the handset on both the handset and the resetting the base station to its default set- base station. -
Page 47: Making Internal Calls
Using several handsets Making internal calls Answering a waiting call If you receive an external call during an Internal calls to other handsets registered internal call, you will hear the call waiting on the same base station are free. tone (short tone). The caller's number will appear in the display if phone number Calling other handsets identification is enabled. -
Page 48: Handset Settings
Handset settings Setting the display This does not affect the connection between the other internal participants and the external caller. You have a choice of four colour schemes and several different contrasts. You can also set a screensaver and backlight. Handset settings ¢... -
Page 49: Changing The Handsfree/Earpiece Volume
Handset settings Changing the handsfree/ For how to set the ringer tones for the base station Aton CL110/CLT110, ¢ earpiece volume page 50. You can adjust the volume for handsfree Setting the ringer volume talking to one of five settings (1-5, e.g. -
Page 50: Activating/Deactivating Muting For The First Ringer Tone
Base station settings Activating/deactivating muting Setting the battery low beep ¢ ¢ for the first ringer tone Settings Audio Settings §Menu§ ¢ Battery Low Press the display key. §Menu§ During Call M 4 O 2 2 Select and press (‰ = on). §OK§... -
Page 51: Changing Ringer Tones
Base station settings Enter the old system PIN and Please note press . For security, the PIN §OK§ Repeater support and Eco Mode / Eco ¢ is shown as four stars ( **** ). Mode Plus ( page 43) cancel each other out, i.e. -
Page 52: Connecting The Phone To A Pabx
Connecting the phone to a PABX Connecting the phone to Setting pauses a PABX Changing pause after line seizure The following settings are only necessary You can change the length of pause that is when your PABX requires them; see the inserted between pressing the talk key c and sending the number. -
Page 53: Warranty/Maintenance/Repair/ Approval
If you have any general questions about products, services etc., please contact your Swisscom Information Centre (toll- free number 0800 800 800). * An exception is damage to wearing parts (cable, labels, batteries etc.) and due to improper handling (damage from dropping, infiltrated fluids etc.). -
Page 54: Faults And Self-Help With Troubleshooting
Faults and self-help with troubleshooting Faults and self-help with You cannot hear a ringer/dialling tone from the fixed line network. troubleshooting The phone cord supplied has not been used or has been replaced by a new cord with the wrong pin connections. ¥... -
Page 55: Approval
4. Do not switch on the handset again until it is completely dry. Swisscom hereby declare that this device meets the essential requirements and When it has fully dried out, you will nor- other relevant regulations laid down in mally be able to use it again. - Page 56 Appendix We recommend the following battery Base station power consumption types, because these are the only ones that guarantee the specified operating In standby condition times, full functionality and long service approx. 1.3 W – Handset in charging cradle life: –...
-
Page 57: Writing And Editing Text
Appendix Writing and editing text Setting upper/lower case or digits Press the hash key # briefly to switch The following rules apply when writing from "Abc" mode to "123" and from "123" text: to "abc" and from "abc" to "Abc" (upper Use t s to move the cursor to the right case: 1st letter upper case, all others lower case). -
Page 58: Accessories
Accessories Accessories Handsets Upgrade your device to a cordless PABX: Aton CL110/CLT110 handset with charging cradle Eco Mode Plus Eco Mode Power-saving mains adapter Illuminated graphical colour display Illuminated keypad Handsfree talking Directory for around 150 entries Headset socket (incl. headset) - Page 59 All accessories and batteries are available from your phone retailer or on the following website: www.swisscom.ch.onlineshop. Only use original accessories. This will avoid possible health risks and damage to property, and also ensure that all the relevant regulations are complied with.
-
Page 60: Mounting The Base Station To The Wall
Mounting the base station to the wall Mounting the base station to the wall CL110: 40 mm CLT110: 46 mm approx. 2.5 mm Mounting the charging cradle to the wall 21 mm approx. 2.5 mm... -
Page 61: Index
Index Index Call accepting ....ending ..... Access protection external . - Page 62 Index internal call screening ... keypad lock ....Fast access muting ringer ....answer machine .
- Page 63 Index Message copying number to the Key 1 (fast access) ... . . directory ....Key click .
- Page 64 Index SMS centre changing number ... . . Range ......setting .
Need help?
Do you have a question about the Aton CL110 and is the answer not in the manual?
Questions and answers