Table of Contents
Advertisement
Quick Links
Advertisement
Table of Contents

Related Manuals for Swisscom Aton CL400


Summary of Contents for Swisscom Aton CL400
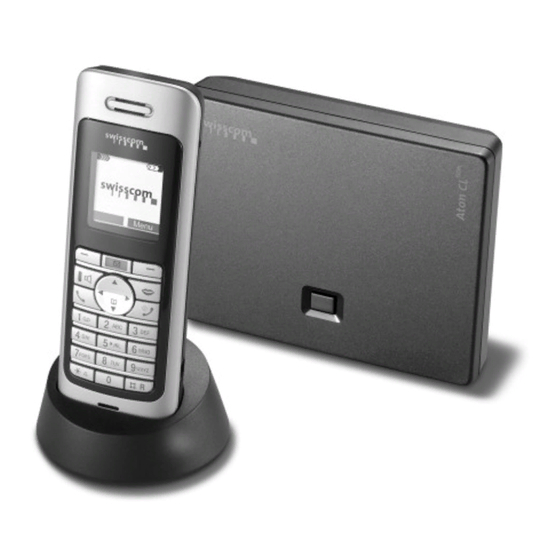
- Page 1 ISDN Aton CL400 User manual...
-
Page 3: Handset At A Glance
(press and hold in idle status) Ð 6 Hash key Confer (Flash) (press and hold), Toggle between upper/lower case and digits INT 1 7 "Swisscom Voice Portal" key 8 Connection socket for headset 9 Microphone 10.05.06 09:45 10 Star key... -
Page 4: Base Station "Single" Aton Clisdn
8.6.06 Base station "Single" Aton CLISDN Base station "Single" ISDN Aton CL Registration/Paging key... -
Page 5: Table Of Contents
Menu guidance ....17 Activating/deactivating auto-answer . 40 "Swisscom Voice Portal" key ..17 Adjusting the loudspeaker volume . . . 41 Correcting incorrect entries . - Page 6 Contents Making ISDN settings ..44 Setting up/deleting an ISDN phone number (MSN) ....44 Assigning an MSN .
-
Page 7: Safety Precautions
Notes: Not all of the functions described in this manual are available in all countries. CLIP (Calling Line Identification Presentation), SMS (Short Message Services) and "Swisscom Voice Portal": the functions are dependent on the network provider. EATONI predictive text: EATONI predictive text helps you when you are writing text messages. -
Page 8: Aton Cl400 Isdn - More Than Just Making Calls
Aton CL400 ISDN – more than just making calls ISDN Aton CL400 – Installing the base station more than just making calls The base station is designed for use in closed, dry rooms with a temperature range of +5°C to +45°C. -
Page 9: Setting Up The Handset For Use
First Steps Connecting the base station Inserting the batteries ¤ First connect the mains unit and then Caution: the phone jack as shown below and Use only the recommended rechargeable bat- place the cable in the cable channels. teries (page 53). This means that you must never use conventional (non-rechargeable) batteries or other battery types as this could result in significant health risks and damage to... - Page 10 First Steps Initial charging and discharging of Attaching the belt clip batteries There are notches for attaching the belt clip on the side of the handset at the same If the handset is activated, the flashing battery icon e in the top right of the dis- height as the display.
-
Page 11: Registering The Handset
Setting up the base station – Installation wizard ¢ ¢ Ð Headset socket Date/Time ¤ Change multiple line input: You can connect the enclosed headset and Date: the following types of headset (with jack Enter day, month and year in 6-digit connector): Plantronics M40, MX100 and format. -
Page 12: What Is An Msn
Setting up the base station – Installation wizard What is an MSN? Internal Receive MSN Send MSN subscriber MSN = Multiple Subscriber Number. You Handset: MSN4 MSN4 can request up to 10 different telephone INT 4 numbers for the ISDN multiple connec- Launching the installation tion. - Page 13 Setting up the base station – Installation wizard Entering own numbers (MSNs) manually Setting the send MSN and entering names for the MSNs Each internal subscriber or terminal can be specifically assigned one of the available Enter own numbers (MSNs)? send MSNs.
-
Page 14: Menu Tree
Menu tree Menu tree Instead of scrolling to locate a menu function, you can select a menu function faster by opening the menu and keying in the digit combination ("Shortcut"). Example: v 5 2 11 for "Set ringtone for external calls". You will find examples of symbols used, menu entries and multiple line input in the appendix to this user guide, page 54. - Page 15 Menu tree Ð Settings Date/Time Audio Settings 5-2-1 Ringer Settings (page 41) 5-2-2 Advisory Tones (page 42) Display 5-3-1 Screen Picture (page 40) 5-3-2 Colour Scheme (page 39) 5-3-3 Contrast (page 39) 5-3-4 Backlight (page 40) Handset 5-4-1 Language (page 39) 5-4-2 Auto Answer (page 40)
-
Page 16: Making Calls
You can answer the call by: ¤ Pressing the talk key c. ¤ Pressing the display key §Accept§ ¤ Pressing the handsfree key d. * In the Swisscom ISDN network, CLIP is transmitted automatically. -
Page 17: Handsfree Talking
Making calls Call display with CLIP/CLI If you wish to place the handset in the base station during a call: ¤ Press and hold the handsfree key d If the caller's number is saved in your directory, the caller's name will also be while placing the handset in the base station. -
Page 18: Operating The Handset
Operating the handset Operating the handset During an external call Open the directory. Initiate an internal consulta- Activating/deactivating the handset tion call. Adjust loudspeaker volume for Press and hold the end call earpiece and handsfree mode. key. You will hear the confir- mation tone. -
Page 19: Reverting To Idle Status
Do not press any key: after 2 minutes Note: the display will automatically revert to This key allows you to connect to the Swisscom idle status. Voice Portal, where you can activate additional Changes that you have not confirmed or... -
Page 20: Defining The Settings For The Next Call
Operating the handset Defining the settings for the Ringback when the number next call is busy (CCBS)/when there is no reply (CCNR) Depending on your network provider, you can make the following settings for the If the person you are calling does not next call: answer or their line is busy, you can initi- Withhold the number (CLIR), provided... -
Page 21: Identifying Callers
Operating the handset Identifying callers Accepting a ringback The handset is ringing and the screen dis- Precondition: You have requested the plays the ringback number. Identify caller function from your network provider. Please contact your network pro- Connecting vider first if you experience any problems. Press the talk key. -
Page 22: Functions During A Call
Functions during a call Functions during a call Consultation call subscriber's line is busy You will hear the busy tone. You can initi- ate ringback (page 18). ¤ Making calls to several Return to the subscriber on hold subscribers The consultation call subscriber answers There is now an active connection Please initiate a consultation call first if between the new subscriber, and the first... -
Page 23: Transferring Calls
Functions during a call Dealing with a waiting external Conference call call – CW (Call Waiting) You speak with two subscribers at the same time. You can establish a conference call as follows: Precondition: Call waiting has been set up (page 45). With two external subscribers or You will hear the call waiting tone (short one internal subscriber and one exter-... -
Page 24: Using The Directory And Lists
8.6.06 Using the directory and lists Using the directory and lists Selecting entries in the directory Open directory. The options are: You have the following options: Use s to scroll through the entries Directory Last number redial list until the required name is selected. SMS list Enter the first character of the name, or scroll to the entry with s if required. - Page 25 8.6.06 Using the directory and lists ticular ringtone. You can then identify Copying a displayed number to the VIP calls by their ringtones. directory Precondition: Calling Line Identifica- You can copy numbers that are displayed tion (page 15). in a list, e.g. the calls list or the last Copy Entry number redial list, in a text message or Send a single entry to a handset...
-
Page 26: Last Number Redial List
8.6.06 Using the directory and lists ¤ Save changes (page 55). The following functions can be selected with q: Note: Display Number (as in the directory, Reminder calls require a time stamp. If you page 22) select a visual signal, then a time stamp is not required and is automatically set to 00.00. - Page 27 8.6.06 Using the directory and lists SMS incoming message list List entry All received SMS messages are saved in New messages are at the top. the incoming message list, see page 30. Example of list entries: Calls list All Calls Susi Sorglos ‰...
-
Page 28: Making Cost-Effective Calls
8.6.06 Making cost-effective calls Checking receive MSN Setting the charge per unit and the currency You can have the receive MSN displayed ¢ ¢ ¢ í for every call. Call Charges (system PIN ¢ ¤ required) Settings Select entry. ¤ Change multiple line input: Open menu. -
Page 29: Sms (Text Messages)
SMS is sent as Note: a linked SMS (up to 4 messages with When supplied, the access number 153 characters each). (062 210 00 0) for the Swisscom SMS centre is pre-programmed. Please note: From a handset, you can only access Preconditions:... -
Page 30: Writing/Sending An Sms
§OK§ Select input language and 1234567890 press 21.09.05 09:45 §OK§ Press the end call key briefly to return to the text panel. The input language setting only applies to the current SMS. * Currently not supported in the Swisscom network. - Page 31 Select number from the direc- tory or enter directly. Enter the number with dialling code (even when you are in the same area). Press the display key. The SMS §Send§ is sent. * Provider-dependent. Currently not supported in the Swisscom network.
-
Page 32: Receiving An Sms
SMS (text messages) Receiving an SMS Opening the incoming message list with All received SMS messages are saved in Press. the incoming message list. Linked SMS The incoming message list is displayed as messages are displayed as one message. If follows (example): this is too long or has not transferred com- pletely, it will be split into individual mes-... - Page 33 SMS (text messages) Replying to or forwarding text Copying/dialling numbers from an SMS messages text ¤ ¤ Read SMS (page 30) and scroll to the Read the SMS (page 30): telephone number. Press the display key. §Options§ The digits are reverse-highlighted. You have the following options: Ó...
-
Page 34: Notification By Sms
Note: calls. A charge may be levied for this serv- ice. When supplied, the access number (062 210 00 0) for the Swisscom SMS centre Precondition: For missed calls, the caller's is pre-programmed. number (CLI) must have been transmit- ted. -
Page 35: Sms To A Pabx
SMS (text messages) SMS to a PABX Activating/deactivating the SMS function You can only receive an SMS when the Calling Line Identification is for- When you switch off you cannot send or warded to the extension of the PABX receive any SMS messages with your (CLIP).The CLIP of the phone number phone. -
Page 36: Sms Troubleshooting
SMS (text messages) SMS troubleshooting The message is played back. 1. The "display call number" service is not acti- Errors when sending vated. ¥ Have your service provider enable this E0 Calling Line Identification permanently service (there is a charge for this). withheld (CLIR) or Calling Line Identification not activated. -
Page 37: Using Several Handsets
Using several handsets Using several handsets Registering other handsets You can register other handsets and hand- sets for other devices with GAP functional- Registering handsets ity as follows. On the handset You can register up to six handsets to your ¤... -
Page 38: Changing The Base Station
Using several handsets Changing the base station Transferring a call to another handset You can transfer an external call to If your handset is registered to more than another handset (connect). one base station, you can set it to a partic- Open list of handsets. -
Page 39: Changing The Name Of A Handset
Using several handsets Changing internal number of a Accepting/rejecting call waiting handset If you get an external call while conduct- ing an internal call, you will hear the call waiting tone (short tone). The caller's A handset is automatically assigned the number will appear in the display if Calling lowest free number on registration. - Page 40 Using several handsets all keys are locked except the end call key. Activating the room monitor and The handset's speaker is muted. entering the number to be called ¢ ¢ í When the room monitor is activated, Room Monitor ¤ incoming calls to the handset are indi- Change multiple line input: cated without a ringtone and are only...
-
Page 41: Setting Handset
Setting handset Setting handset Changing previously set internal destination number ¢ ¢ í Your handset is preconfigured, but you Room Monitor can change these settings to suit your Scroll to the Call to: line. individual requirements. Press the display key. §Edit§... -
Page 42: Setting The Screen Picture
Setting handset Setting the screen picture Setting display backlight You can display a screen picture (picture or Depending on whether or not the handset digital clock) when the handset is in idle is in the base station you can set different status. -
Page 43: Adjusting The Loudspeaker Volume
Setting handset Adjusting the loudspeaker Settings for external calls volume During the setting up process (page 44), each receive MSN is automatically You can set the loudspeaker volume for assigned a ringtone. You can change this handsfree talking to five different levels assignment. -
Page 44: Activating/Deactivating Advisory
Setting handset Activating/deactivating advisory Settings for all functions to ring the same tones ¢ ¢ ¢ Ð Audio Settings ¢ Your handset uses ‘advisory tones’ to tell Ringer Settings ¤ you about different activities and statuses. Set the volume and ringtone (see The following advisory tones can be acti- above). -
Page 45: Setting The Alarm Clock
Setting handset Setting the alarm clock Deactivating the wake-up call/ repeating after a pause (slumber mode) Precondition: The date and time have already been set (page 9). Precondition: A wake-up call is sounding. Press the display key. The Activating/deactivating the alarm §OFF§... -
Page 46: Making Isdn Settings
Making ISDN settings Making ISDN settings Precondition: Call forwarding has not been set up for the MSN to be changed (page 46). ¢ ¢ ¢ ¢ Ð Please note: Base ISDN Configure ¢ Some settings cannot be made simulta- (system PIN if necessary) neously by several handsets. -
Page 47: Setting Up A Busy Signal For When The Msn Is Being Used
Making ISDN settings Activating/deactivating call If required, enter PIN and press §OK§ waiting – CW Receive MSN Select and press §OK§ This function can be set up separately for Select MSN and press §OK§ each handset. When call waiting is acti- e.g. -
Page 48: Diverting Calls
Making ISDN settings To find out how to withhold the number Forwarding calls externally – for a subsequent call, see page 18. CF (Call Forwarding) ¢ ¢ ¢ Ð Base ISDN For each receive MSN you can save a des- Always anon. -
Page 49: Changing Access Codes
Making ISDN settings Configuring the network mailbox Editing entries ¤ Open the list of calls currently being for fast access forwarded. Select call forwarding. You must request your network provider's answer machine in the network. Press the display key. §Change§ ¤... -
Page 50: Base Station Settings
Base station settings Base station settings Activating/deactivating the wait melody The base station settings are carried out ¢ ¢ ¢ Ð using a registered handset. Base Music on hold Press to activate or deactivate the hold §OK§ ‰ Protecting against unauthorised music ( = on). -
Page 51: Operation In A Pabx
PABX User Guide. The KEYPAD function must be activated ISDN when you connect your Aton CL400 Note: to an ISDN PABX or exchange (e.g. Cen- Assigning an MSN on an ISDN PABX can vary. trex) that is controlled using KEYPAD pro- For more information, please also refer to the manual belonging to your PABX. - Page 52 Operation in a PABX Activating/deactivating keypad during a call In addition to the permanent settings described above, you can also switch tem- porarily to the keypad. The setting only applies to the current external call and is automatically deacti- vated after the call is ended. Depending on whether Auto.
-
Page 53: Appendix
Appendix Appendix "Base station x" flashes on the display. 1. The handset is outside the range of the base station. ¥ Care Move the handset closer to the base station. ¤ Wipe down the base station and hand- 2. The handset has been de-registered. ¥... -
Page 54: Warranty/Maintenance/Repair/Authorisation
If you have any general questions about chase must be included with the defective products, services, etc., please contact device. your Swisscom Information Centre (toll- Excluded from the warranty are damages free number 0800 800 800). due to improper use, wear and tear, or tampering by others. -
Page 55: Specifications
Panasonic 700mAh "for DECT" dealer or network provider. GP 700mAh Swisscom hereby declare that this device Yuasa Technology AAA Phone 700 meets the essential requirements and other relevant regulations laid down in Varta Phone Power AAA 700mAh Directive 1999/5/EC. -
Page 56: Notes On The User Guide
Notes on the user guide General specifications Press the control key on the right or left: e.g. Selecting the setting. c / Q / * etc. DECT standard is supported GAP standard is supported Press the matching key on the handset. -
Page 57: Example: Multiple Line Input
Notes on the user guide Select contrast and Time: press Enter hours/minutes in 4 digits. §Save§ ¤ ¤ Press the s key. Press on the right or left of the control key to select the contrast. The fourth line is marked with [ ] to show ¤... - Page 58 Notes on the user guide If you press and hold the hash key # The following applies when writing an SMS: you switch from "Abc" mode to "123" and from "123" to "abc" and from "abc" to The display shows whether upper case, "Abc".
-
Page 59: Accessories
8.6.06 Accessories Accessories Handsets ISDN Upgrade your Aton CL400 to a cordless PABX: ISDN Handset Aton CL300/CL400 Illuminated colour display (4096 colours) Illuminated keypad Handsfree talking Polyphonic ringtones Directory for around 150 entries SMS (Precondition: CLIP must be enabled) Headset socket including headset... - Page 60 8.6.06 Accessories Handset Aton CL102 Dust and splash proof casing Illuminated colour display (4096 colours) Illuminated keypad Handsfree talking Polyphonic ringtones Directory for around 150 entries SMS (Precondition: CLIP must be enabled) Headset socket including headset Room monitor Charger Top S329 / Aton CL102 (Including mains adapter) Handset Aton CL303 Illuminated graphical colour display (65 k colours)
- Page 61 8.6.06 Accessories V2 or Type RTX repeater The repeater can be used to increase the reception range from your handset to the base station. Only use original accessories. This will avoid possible health risks and damage to property, and also ensure that all the relevant regulations are complied with.
-
Page 62: Index
Index Index Beep, see Advisory tones Best base station ....Birthday, see Anniversary Busy on Busy ....Access code . - Page 63 Index CLIR ..... . screen picture ....Conference call .
- Page 64 ....Handset charging times Swisscom Voice Portal ..... .
- Page 65 Index Microphone ....Missed calls ....Range .
- Page 66 ....Swisscom Voice Portal ......
Need help?
Do you have a question about the Aton CL400 and is the answer not in the manual?
Questions and answers