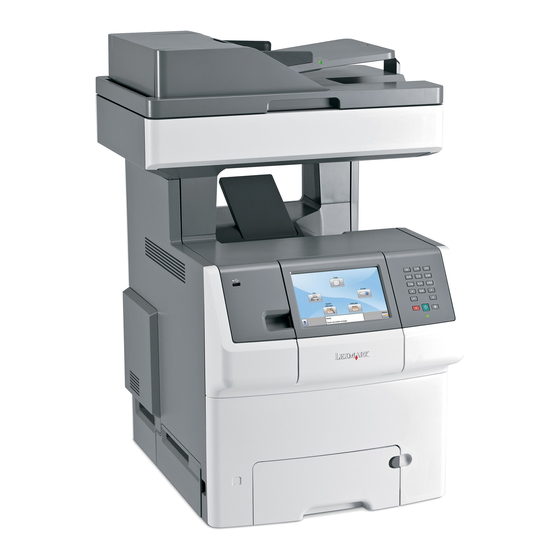
Lexmark X746de Service Manual
Colour laser mfp
Hide thumbs
Also See for X746de:
- Service manual (26 pages) ,
- User manual (350 pages) ,
- Administrator's manual (46 pages)
Table of Contents
Advertisement
Quick Links
Advertisement
Table of Contents

Related Manuals for Lexmark X746de


Summary of Contents for Lexmark X746de
- Page 1 X746de, X748de, X748dte 7526-576, 776 • Table of contents • Start diagnostics • Safety and notices • Trademarks • Index Lexmark and Lexmark with diamond design are trademarks of Lexmark International, Inc., registered in the United States and/or other countries.
- Page 2 Lexmark, Lexmark with diamond design, and MarkNet are trademarks of Lexmark International, Inc., registered in the United States and/or other countries. PrintCryption is a trademark of Lexmark International, Inc.
-
Page 3: Table Of Contents
7526 Table of contents Previous Notices and safety information ......... . . xi Laser notice . - Page 4 7526 144.xx—Motor (EP drive assembly middle cartridge) error service check ....2-54 Previous 145.xx—Motor (EP drive assembly bottom cartridge) error service check ....2-56 146.xx, 148.xx—Motor (MPF/duplex) error service check .
- Page 5 7526 902.59—Engine software error, NVRAM MGR problem ....... 2-111 Previous 920.03, 920.25—Transfer Module Missing error service check .
- Page 6 7526 EP Setup ..............3-23 Previous Reports .
- Page 7 7526 Front cover locked in place ............3-49 Previous Printhead verification .
- Page 8 7526 High-voltage power supply (HVPS) cable removal ........4-112 Previous Left bellcrank assembly removal .
- Page 9 7526 ADF separator pad removal ........... . . 4-246 Previous Carriage transport belt with clip removal .
- Page 10 7526 Part number index............I-9 Previous Next Go Back...
-
Page 11: Notices And Safety Information
7526 Notices and safety information Previous The following laser notice labels may be affixed to this printer. Next Laser notice Go Back This product is certified in the U.S. to conform to the requirements of DHHS 21 CFR Subchapter J for Class I (1) laser products, and elsewhere is certified as a Class I laser product conforming to the requirements of IEC 60825-1. -
Page 12: Aviso Sobre O Laser
7526 Previous Avvertenze sui prodotti laser Questo prodotto è certificato negli Stati Uniti come prodotto conforme ai requisiti DHHS 21 CFR Sottocapitolo J per i prodotti laser di Classe I (1), mentre in altri paesi è certificato come prodotto laser di Classe I conforme ai requisiti IEC 60825-1. - Page 13 7526 Previous Laserinformatie Dit product is in de Verenigde Staten gecertificeerd als een product dat voldoet aan de vereisten van DHHS 21 CFR paragraaf J voor laserproducten van klasse I (1). Elders is het product gecertificeerd als een laserproduct van klasse I dat voldoet aan de vereisten van IEC 60825-1. Next Laserproducten van klasse I worden geacht geen gevaar op te leveren.
- Page 14 7526 Previous Laser-notis Denna produkt är certifierad i USA i enlighet med kraven i DHHS 21 CFR underkapitel J för klass I (1)- laserprodukter, och på andra platser certifierad som en klass I-laserprodukt i enlighet med kraven i IEC 60825-1. Next Klass I-laserprodukter betraktas inte som skadliga.
- Page 15 7526 Previous Next Go Back Notices and safety information...
- Page 16 7526 Previous Next Go Back Service Manual...
-
Page 17: Lithium Battery Warning
7526 Previous Lithium battery warning CAUTION This product contains a lithium battery. THERE IS A RISK OF EXPLOSION IF THE BATTERY Next IS REPLACED BY AN INCORRECT TYPE. Discard used batteries according to the battery manufacturer’s instructions and local regulations. Go Back Safety information The safety of this product is based on testing and approvals of the original design and specific... - Page 18 7526 Previous Sicherheitshinweise • Die Sicherheit dieses Produkts basiert auf Tests und Zulassungen des ursprünglichen Modells und bestimmter Bauteile. Bei Verwendung nicht genehmigter Ersatzteile wird vom Hersteller keine Verantwortung oder Haftung für die Sicherheit übernommen. Next Die Wartungsinformationen für dieses Produkt sind ausschließlich für die Verwendung durch einen •...
- Page 19 7526 Previous Informació de Seguretat • La seguretat d'aquest producte es basa en l'avaluació i aprovació del disseny original i els components específics. El fabricant no es fa responsable de les qüestions de Next seguretat si s'utilitzen peces de recanvi no autoritzades. •...
-
Page 20: Preface
7526 Preface Previous This manual contains maintenance procedures for service personnel. It is divided into the following chapters: General information contains a general description of the MFP and the maintenance approach used to Next repair it. Special tools and test equipment, as well as general environmental and safety instructions, are discussed. -
Page 21: Navigation Buttons
7526 Previous Navigation buttons This manual contains navigation buttons in the right margin of each page, making it easier and quicker to navigate. Next Button Description Previous Click to move the document view backward by one page. Go Back Next Click to move the document view forward by one page. - Page 22 7526 Previous Next Go Back Service Manual xxii...
-
Page 23: General Information
Previous Models Next Machine type/ Model name Description model Go Back Lexmark X746de 7526-576 Multifunction with e-task and duplex Lexmark X748de 7526-776 Multifunction with e-task, duplex, and hard drive Lexmark X748dte 7526-776 Multifunction with e-task, duplex, hard drive, and 550 sheet tray... -
Page 24: Media Options
Go Back Media options The Lexmark X748 MFP supports 550-sheet drawers, special media drawers, and the 2000-sheet high-capacity input tray. The Lexmark X748 MFP supports up to four input options. The options can include any combination of 550 sheet drawers and 550 sheet Specialty Media Drawers, with a maximum of one 2000 sheet drawer (always at the lowest position.) A caster base is required with some... -
Page 25: Clearances
7526 Previous Height Width Depth Weight 550-sheet Specialty Media 122 mm* 435 mm 545 mm 4.4 kg Drawer (4.8 in) (17.1 in) (21.4in) (9.7 lbs) High-capacity input tray 385 mm 435 mm 545 mm 26.1 kg Next (2000-sheet) only (15.2 in) (17.1 in) (21.4 in) (57.5 lbs) -
Page 26: Multiple Function Printer Specifications
7526 Multiple function printer specifications Previous Flatbed scanner Scanner type Color/monochrome flatbed scanner with ADF (automatic document feeder) Scan technology Charge coupled device (CCD) Next Light source LED lamp Number of light sources One CCD module with one LED lamp Go Back Flatbed dimensions Maximum: 8.5 x 14 in (216 x 356 mm) -
Page 27: Resolution
7526 Previous All models Memory DIMM memory sizes available 256MB, 512MB, 1024MB Flash (Nand Flash) 256MB Next Maximum possible memory 1536MB Go Back Resolution The following resolutions are available: 4800CQ (default resolution) • 1200 x 1200 dpi (at reduced printer speed) •... -
Page 28: Electrical And Power Specifications
• • 198 to 254 V, extreme Notes: Using a power converter or inverter with the Lexmark X740 Series MFPs is not recommended. • The X746/X748 models are ENERGY STAR qualified. • All models ship with Sleep Mode = On. -
Page 29: Acoustic Specifications
ADF color scanning Standby mode Lexmark has implemented features in the X748 Series MFPs that allow our customers to easily select various operating modes in order to reach their sustainability goals related to environmental and noise pollution. These new features are Eco Mode and Quiet Mode. - Page 30 7526 Eco Mode optimizes printer settings to minimize the environmental impact while Quiet Mode significantly Previous reduces acoustics. For more information, refer to the Users Guide. Quiet Mode The parameters that are changed are returned to their factory default state. This mode will support performance claims for the product.
-
Page 31: Media Specifications
7526 Previous Media specifications Paper designed for use with xerographic copiers should provide satisfactory print quality and feed reliability. Other types of media may be suitable. It is recommended that users test any particular brand for suitability to their applications. Refer to the printer User's Guide for additional media specifications. Next Paper Go Back... - Page 32 7526 Using recycled paper and other office papers Previous Recycled office paper produced specifically for use in laser (electrophotographic) printers may be used in your printer. However, no blanket statement can be made that all recycled paper will feed well. Generally, the following property guidelines apply to recycled paper.
-
Page 33: Input And Output Capacities
(HCIT). The maximum number of input options is dependent upon whether the MFP is used on a desktop/tabletop or floor-standing with a caster base, and if the configuration meets UL Safety specifications. Please refer to for more information. www.lexmark.com/multifunctionprinters General information 1-11... -
Page 34: Input And Output Sizes And Types
7526 Input and output sizes and types Previous Next Media Sizes Go Back Paper sizes ✓ ✓ ✓ ✓ ✓ ✓ A4 210 x 297 mm A5 148 x 210 mm ✓ ✓ ✓ ✓ ✓ A6 105 x 148 mm ✓... - Page 35 7526 Previous Media Sizes (continued) Next Go Back Envelopes ✓ ✓ C6 Envelope 114 x 162 mm B6 Envelope 125 x 176 mm ✓ ✓ C65 Envelope 114 x 229 mm ✓ ✓ C5 Envelope 162 x 229 mm ✓ ✓...
-
Page 36: Paper Guidelines
7526 Previous Media weight, primary tray and option tray Size Type Weight Letter, Legal, A4 Xerographic and bond Long grain 60 g/m –162.7 g/m (16 lb–43 lb) Next Short grain 162.7 g/m –198.9 g/m (43 lb–53.2 lb) Recycled Long grain 75 g/m –177 g/m (20 lb–47 lb) - Page 37 7526 Grain direction—Grain refers to the alignment of the paper fibers in a sheet of paper. Grain is either grain long, Previous running the length of the paper, or grain short, running the width of the paper. For 60 to 135 g/m (16 to 36 lb bond) paper, grain long paper is recommended.
-
Page 38: Tools Required For Service
7526 Storing paper Previous Use these paper storage guidelines to help avoid jams and uneven print quality: For best results, store paper where the temperature is 21°C (70°F) and the relative humidity is 40%. Most • label manufacturers recommend printing in a temperature range of 18 to 24°C (65 to 75°F) with relative Next humidity between 40 and 60%. - Page 39 7526 HCOF High-Capacity Output Finisher Previous HVPS High-Voltage Power Supply Internal Solutions Port Image Transfer Unit Black LASER Light Amplification by Stimulated Emission of Radiation Next Liquid Crystal Display Light-Emitting Diode Long-Edge Fed Go Back LVPS Low-Voltage Power Supply Magenta Multipurpose Feeder MROM Masked Read Only Memory...
- Page 40 7526 Previous Next Go Back Service Manual 1-18...
-
Page 41: Diagnostic Information
7526 2. Diagnostic information Previous Start Next CAUTION Remove the power cord from the electrical outlet before you connect or disconnect any cable Go Back or electronic card or assembly for personal safety and to prevent damage to the printer. CAUTION—POTENTIAL INJURY: The printer weight is greater than 97 lbs (44kg), and requires three or more trained personnel to lift safety. -
Page 42: Operator Panel And Menus
7526 Previous Operator panel and menus Operator panel The operator panel consists of these items: Next Go Back WXYZ Buttons, icons, and light description Use the Display View printing, e-mailing, copying, and faxing options as well as status and error messages. Sleep button Enable Sleep Mode or Hibernate Mode. - Page 43 7526 Previous Use the Indicator light The two-toned light emitting diode called the indicator light on the operator panel gives information about the status of the printer using the colors red and green. Indicator light Next Indicates status The printer power is off. Go Back Blinking green The printer is warming up, processing data, or...
-
Page 44: Understanding The Home Screen
7526 Understanding the home screen Previous When the printer is turned on, the display shows a basic screen, referred to as the home screen. Touch the home screen buttons and icons to initiate an action such as copying, faxing, or scanning; to open the menu screen;... -
Page 45: Features
7526 Other buttons that may appear on the home screen: Previous Touch Held Jobs Display all current held jobs. Search held jobs Search on any of the following items: Next • User name for held or confidential print jobs • Job names for held jobs, excluding confidential print jobs •... -
Page 46: Using The Touch-Screen Buttons
7526 Using the touch-screen buttons Previous Note: Your home screen, icons, and buttons may vary depending on your home screen customization settings, administrative setup, and active embedded solutions. Sample touch screen Next Go Back Touch Submit Submit changes made in the printer settings. -
Page 47: Administrative Menu
7526 Tips Open a context-sensitive Help dialog on Previous the touch screen. Accept Save a setting. Next Go Back Cancel • Cancel an action or a selection. • Exit a screen and return to the previous screen without saving changes. Reset Reset values on the screen. -
Page 48: Power-On Self Test (Post) Sequence
When you turn the printer on, it performs a Power-On Self Test. Check for correct POST functioning of the base printer by observing the following: Next The operator panel turns on and displays the Lexmark logo. A progress bar displays. The LED turns on. -
Page 49: Print Quality Symptom Table
7526 Print quality symptom table Previous Symptom Action Background Go to “Print quality—background” on page 2-152. Blank page Go to “Print quality—blank page” on page 2-153. Next Blurred or fuzzy print Go to “Print quality—blurred or fuzzy print” on page 2-154. - Page 50 7526 Previous Error code Action Load <source> Load paper in the indicated source, touch Continue. <Custom String> Additional messages may include: • Show Me—the printer will present instructions. Next • Cancel Job—the printer job can be cancelled. • Wait for supplies—If job parking is enabled, and the job meets all the requirements for allowing the job to be parted, the printer adds this message.
- Page 51 7526 Previous Error code Action Restore Held Jobs If the printer detects Print and Hold (or parked) jobs stored on the hard disk during Power-On Go/Stop? Self Test (POST). Choices are: • Restore—Print jobs are restored, and Restoring Held Jobs x/y, where x is the number of the job restored and y is the total number of jobs to restore.
- Page 52 7526 Previous Error code Action 34 Short Paper • Touch Continue to clear the message and continue printing. Note: The printer does not automatically reprint the page that prompted the message. • Check the tray length and width guides to ensure the media is properly fitted. Next •...
- Page 53 7526 Previous Error code Action 39 Complex Page The page is too complex to print. Options are: • Touch Continue to continue. The job may not print correctly. • Cancel the job. Next • Additional memory may fix the problem. 50 PPDS Font Error •...
- Page 54 7526 Previous Error code Action 56 Parallel Port <x> • Touch Continue to clear the message. The printer discards any data received through Disabled the parallel port. • Make sure the Parallel Buffer menu item is not set to Disabled. •...
- Page 55 7526 Previous Error code Action 63 Unformatted disk • Touch Continue to clear the message and continue printing. • Format the disk. • If the error message remains, replace the hard disk. Next • If this does not fix the problem, replace the system board. See “System board removal”...
- Page 56 7526 Previous Error code Action 80.41 Fuser missing • Install the fuser. Replace the fuser if the problem persists. • If the problem continues, turn the printer off and remove the rear frame cover. See “Rear 4-37. Check the cable in connector JFUSER1 for proper frame cover removal”...
- Page 57 7526 Previous Error code Action 83.xx Transfer Module • Touch Continue to clear the message and continue printing. Life Warning • Order a replacement transfer module. When print quality is reduced, install the new transfer module using the instruction sheet that comes with the replacement transfer module.
- Page 58 7526 Previous Error code Action 84 <color> PC Unit • Scroll down the operator panel to see if the printer is showing that all four of the PC units Missing are missing. If so, check the HVPS cable between the system board and the HVPS. Ensure that the cable is not plugged in backwards on the HVPS.
- Page 59 7526 Previous Error code Action 84 <color> PC Unit Near • Touch Ignore to clear the message and continue printing. Life Warning • Order the specified photoconductor unit. When print quality is reduced, install the new specified photoconductor unit using the instruction sheet that comes with the replacement specified photoconductor unit.
-
Page 60: Error Codes And Messages
7526 Previous Error codes and messages Error code Description Action Next 1xx service error codes 110.01–110.07 Mirror A mirror motor error has occurred. • POR the printer. Motor • If the error message persists, go to Go Back “110.xx— Mirror motor service check” on page 2-47. - Page 61 7526 Previous Error code Description Action 146.01–146.08 Duplex motor has failed. • POR the printer. Motor Error • If the error message persists, go to “146.xx, 148.xx—Motor (MPF/duplex) error service check” on page 2-57. Next 147.09–147.25 Aligner motor has failed. •...
- Page 62 7526 Previous Error code Description Action 168.xx HCIT elevator motor error. • POR the printer. Motor Error • If the message persists, go to “168.xx—Motor (HCIT elevator) error service check” on page 2-67. Next 199.xx Unrecoverable RIP software error. • POR the printer. Software Error •...
- Page 63 7526 Previous Error code Description Action 200.22 Pick (tray 1) motor stalled. • Check for anything in the paper path that might cause the paper to jam. Possible causes: • If clearing a paper jam does not fix the problem, •...
- Page 64 7526 Previous Error code Description Action 201.08 Exit sensor is never made. • Check for anything in the paper path that might cause the paper to jam. Possible causes: • The fuser exit sensor may not be functioning • Improper loading properly.
- Page 65 7526 Previous Error code Description Action 201.32 Paper is jammed between the input • Check for anything in the paper path that might sensor and the exit sensor during cause the paper to jam. input options warm-up. • Open input tray and clear paper jams. Possible causes: Next •...
- Page 66 7526 Previous Error code Description Action 202.31 Paper jam at exit sensor during warm- • Check for anything in the paper path that might cause the paper to jam. • The fuser exit sensor may not be functioning Possible causes: properly.
- Page 67 7526 Previous Error code Description Action 230.03 During duplex printing, the input • Check for anything in the duplex paper path that sensor never broke. might cause the paper to jam. This includes the paper guides in tray 1. Possible causes: •...
- Page 68 7526 Previous Error code Description Action 242.03 Pick timeout from tray 2 exceeded • Remove all media present in the paper path. without a tray 2 sensor break. • Ensure proper media is set for the type of paper used in tray 2. Possible causes: •...
- Page 69 7526 Previous Error code Description Action 242.26 While feeding from tray 2, the pass • Clear away anything in the paper path that might thru sensor is not made. cause the paper to jam. • Ensure the proper media is set for the type of Possible causes: paper used in the lower tray.
- Page 70 7526 Previous Error code Description Action 243.03 Pick timeout from tray 3 exceeded • Remove all media present in the paper path. without a tray 3 sensor break. • Ensure proper media is set for the type of paper used in tray 3. Possible causes: •...
- Page 71 7526 Previous Error code Description Action 243.26 While feeding from a lower tray, tray 3 • Clear away anything in the paper path that might pass thru sensor is not made. cause the media to jam. • Make sure proper media is set for the type of Possible causes: paper used in lower feeding tray.
- Page 72 7526 Previous Error code Description Action 244.03 Pick timeout from tray 4 was • Remove all media present in the paper path. exceeded without a tray 4 sensor • Maker sure proper media is set for the type of break. paper used in tray 4.
- Page 73 7526 Previous Error code Description Action 244.21 Tray 4 motor stalled. 1. Remove all media present in the paper path. 2. Ensure proper media is set for the type of paper Possible causes: used. • Incorrect paper loading 3. Fan media, and stack it flat in the tray or Next •...
- Page 74 7526 Previous Error code Description Action 245.02 Tray 5 pass thru sensor made at • Check for anything in the paper path that might POR. cause the media to jam. • If the problem persists, go to “245.02—Paper Possible causes: Jam service check”...
- Page 75 7526 Previous Error code Description Action 245.21 Tray 5 motor stalled. 1. Remove all media present in the paper path. 2. Ensure proper media is set for the type of paper Possible causes: used. • Incorrect paper loading 3. Fan media, and stack it flat in the tray or Next •...
- Page 76 7526 Previous Error code Description Action 250.05 While feeding from the multipurpose • Remove all the media present in the paper path. feeder, the input sensor is not made. • Ensure proper media is set for the type of paper used.
- Page 77 7526 Previous Error code Description Action 292.00 Scanner ADF cover open jam. • Remove all media present in the media path. • Check ADF left door interlock sensor for proper Possible causes: operation. Go to “292.00—Scanner ADF cover • ADF cover sensor flag open jam service check”...
- Page 78 7526 Previous Error code Description Action 841.xx Image pipeline ASIC Replace MDC card. See “Scanner MDC card Scanner Error removal” on page 4-261. 842.00 Communication Failure Go to “842.xx—Scanner Failure— Next Scanner Failure Communication failure service check” on page 2-105. 843.00 Carriage failed to home or move to Go to...
- Page 79 7526 Previous Error code Description Action 849.00 • Scanner ADF eject jam • Remove all media present in the media path. • Scanner static jam—ADF exit • Check for obstructions in the media path. sensor • Check the ADF media exit sensor for proper operation.
- Page 80 7526 Previous Error code Description Action 920.02 Tray 1 motor not connected. • POR the printer. POST Error • If the error message persists, go to “140.xx, 920.02—Autocomp (tray 1) motor error service check” on page 2-51. Next 920.03 Transfer module not connected. •...
- Page 81 7526 Previous Error code Description Action 920.15 Bad transfer module NVRAM data. • POR the printer. POST Error • If the error message persists, go to “920.15, 920.20—POST—Bad transfer module NVRAM data error service check” on Next page 2-124. 920.16 Bad printhead NVRAM data.
- Page 82 7526 Previous Error code Description Action 920.30 Option sensor disconnected. Use the following list to determine which service POST Error check to use: • Tray 2—Go to “242.02—Paper Jam error service check” on page 2-76. Next • Tray 3—Go to “243.02—Paper Jam service check”...
- Page 83 7526 Previous Error code Description Action 945.04 Black transfer roll has failed. • POR the printer. Transfer Roll • If the error message persists, go to “945.xx, 947.xx—Transfer roll error service check” on page 2-133. Next 947.01 Yellow transfer roll has failed. •...
- Page 84 7526 Previous Error code Description Action 958.01–958.99 Processor failure. • POR the printer. Memory Failure • If the error message persists, replace the system board. See “System board removal” on page 4-157. Next 959.00–959.05 Invalid engine code • POR the printer. Engine Code Error •...
- Page 85 7526 Previous Error code Description Action 982.00–982.12 Communications error by specified 1. Turn the power off. <device> device. 2. Remove, and reinstall the option. Communications Error 3. Turn the main power back on. 4. Check all option interface connections if the Next problem remains.
-
Page 86: Service Checks
7526 Previous Service checks 31.xx—Cartridge errors service check Next Step Questions / actions POR the printer. Problem resolved. Go to step 2. Go Back Did this fix the problem? Replace the toner cartridge. Problem resolved. Go to step 3. Did this fix the problem? Reseat the toner cartridges and make sure Problem resolved. -
Page 87: Xx-Mirror Motor Service Check
7526 110.xx—Mirror motor service check Previous Step Questions / actions View the Event Log: Replace the printhead. See Go to step 2. “Printhead removal, Next 1. Enter Diagnostics mode (press and hold installation, and buttons 3 and 6, turn on the MFP, and adjustment”... -
Page 88: Xx-Fuser Error Service Check
7526 Previous Step Questions / actions 1. Turn the printer off, and then remove the Replace the 5 V interlock Go to step 3. rear frame cover. See switch. See “Rear frame cover “5 V interlock removal” on page 4-37. switch cable removal”... - Page 89 7526 Previous Step Questions / actions 1. Remove the fuser. See Replace the appropriate Go to step 3 “Fuser assembly cable (either the fuser AC removal” on page 4-104. or the fuser DC cable). See 2. Check the fuser AC autoconnect cable for damage, check the other end of the cable “Fuser AC cable Next...
- Page 90 7526 Previous Step Questions / actions Check for the following continuity between the Go to step 8. Replace the fuser DC DC autoconnect and JFUSER1 on the system cable. See “Fuser DC board. cable removal” on page 4-107. Next DC auto- JFUSER1 connect Pin 9...
-
Page 91: Xx, 920.02-Autocomp (Tray 1) Motor Error Service Check
7526 140.xx, 920.02—Autocomp (tray 1) motor error service check Previous Step Questions / actions 1. Turn the printer off. Problem resolved. Go to step 2. 2. Remove the rear frame cover. See Next “Rear frame cover removal” on page 4-37. 3. - Page 92 7526 Previous Step Questions / actions 1. Remove the right cover. See Go to step 3. Go to step 4. “Right cover removal” on page 4-38. 2. Check the cartridge motor 1/fuser motor cable for proper connection to the EP Next drive assembly, for pinch points for the cable, and for cable or connector damage.
-
Page 93: Xx-Motor (Ep Drive Assembly Top Cartridge) Error Service Check
7526 143.xx—Motor (EP drive assembly top cartridge) error service check Previous Step Questions / actions 1. Turn the printer off. Replace the cartridge Go to step 2. motor 1/fuser cable. See 2. Remove the rear frame cover. See Next “Rear “Cartridge motor 1/fuser frame cover removal”... -
Page 94: Xx-Motor (Ep Drive Assembly Middle Cartridge) Error Service Check
7526 Previous Step Questions / actions 1. Return the old motor 1/fuser motor cable. Replace the EP drive Go to step 6. assembly. See 2. Disconnect the motor drive cable from the EP drive assembly and connect it to the “Electrophotographic motor on a new EP drive assembly. - Page 95 7526 Previous Step Questions / actions 1. Remove the right cover. See Replace the cartridge Go to step 3. “Right motor 2/3 cable. See cover removal” on page 4-38. 2. Check the cartridge motor 2/3 cable for “Cartridge motor 2/3 proper connection to the EP drive cable removal”...
-
Page 96: Xx-Motor (Ep Drive Assembly Bottom Cartridge) Error Service Check
7526 145.xx—Motor (EP drive assembly bottom cartridge) error service check Previous Step Questions / actions 1. Turn the printer off. Replace cartridge motor 2/ Go to step 2. 3 cable. See “Cartridge 2. Remove the rear frame cover. See Next “Rear motor 2/3 cable removal”... -
Page 97: Xx, 148.Xx-Motor (Mpf/Duplex) Error Service Check
7526 146.xx, 148.xx—Motor (MPF/duplex) error service check Previous Step Questions / actions 1. Open the rear frame cover. Go to step 2. Problem resolved. 2. Reseat JDX1 cable. Next Does the problem persist? 1. Remove the tray. Replace the MPF/duplex Go to step 3. - Page 98 7526 Previous Step Questions / actions 1. Disconnect the MPF motor cable on the Go to step 6. Replace the MPF duplex motor side. motor assembly. See 2. Connect a new motor from outside of the “Multipurpose feeder machine. (MPF)/duplex motor Next assembly removal”...
-
Page 99: Xx, 920.01-Motor (Aligner) Error Service Check
7526 Previous Step Questions / actions 1. Check the MPF tray for any damage. Go to step 10. Replace the input tray. 2. Manually turn the MPF gear on the tray, and check if the MPF pick arm assembly would turn. Next 3. -
Page 100: Xx-Cam Motor Error Service Check
7526 155.xx—Cam motor error service check Previous Step Questions / actions 1. Turn the printer off. Replace the motor driver Go to step 2. cable. See “Motor driver 2. Remove the rear frame cover. See Next “Rear cable removal” on frame cover removal”... -
Page 101: Xx-Cod (Color On Demand) Motor Error Service Check
7526 Previous Step Questions / actions Visually inspect the motor driver card. Replace the motor driver Go to step 6. card. See “Motor driver card removal” on page 4-118. Next Go Back Is the motor driver card damaged? 1. Connect a new motor driver card without Install the new motor driver Go to step 7. -
Page 102: Xx, 161.Xx-Motor Error (Option Tray 2) Service Check
7526 Previous Step Questions / actions 1. Disconnect the cable in connector JBOR1 Replace the COD Replace the system board. and then connect the cable from the new assembly. See “Color on “System board COD group assembly. demand assembly removal” on page 4-157. - Page 103 7526 Previous Step Questions / actions Is the option tray 2 the high-capacity input tray Replace the HCIT top plate Replace the option tray 2 (2,000-sheet feeder)? assembly. See assembly. “Top plate assembly removal” on page 4-279. Next Go Back Diagnostic information 2-63...
-
Page 104: Xx, 163.Xx-Motor (Option Tray 3) Error Service Check
7526 162.xx, 163.xx—Motor (option tray 3) error service check Previous Step Questions / actions 1. Turn the printer off. Problem resolved. Go to step 2. 2. Reseat option tray 3. Next 3. Enter Diagnostics mode (press and hold buttons 3 and 6, turn on the MFP, and release the buttons when the progress bar Go Back displays. -
Page 105: Xx, 165.Xx-Motor Error (Option Tray 4) Service Check
7526 164.xx, 165.xx—Motor Error (option tray 4) service check Previous Step Questions / actions 1. Turn the printer off. Problem resolved. Go to step 2. 2. Reseat option tray 4. Next 3. Enter Diagnostics mode (press and hold buttons 3 and 6, turn on the MFP, and release the buttons when the progress bar Go Back displays. -
Page 106: Xx, 167.Xx-Motor Error (Option Tray 5) Service Check
7526 166.xx, 167.xx—Motor Error (option tray 5) service check Previous Step Questions / actions 1. Turn the printer off. Problem resolved. Go to step 2. 2. Reseat option tray 5. Next 3. Enter Diagnostics mode (press and hold buttons 3 and 6, turn on the MFP, and release the buttons when the progress bar Go Back displays. -
Page 107: Xx-Motor (Hcit Elevator) Error Service Check
7526 168.xx—Motor (HCIT elevator) error service check Previous Step Questions / actions Is the paper properly loaded in the high- Go to step 2. Fan the media, and then capacity input tray (HCIT)? stack flat in the HCIT Next drawer. 1. -
Page 108: 250.03-Paper Jam Error Service Check
7526 200.11, 250.03—Paper Jam error service check Previous Step Questions / actions Open the front access door. Turn the Go to step 2. Replace the transport belt. transport belt gear clockwise. “Transfer module Next removal” on page 4-180. Go Back Did the transport belt move? Run align motor test with old pick assembly Go to... -
Page 109: 201.08, 201.31-Paper Jam Error Service Check
7526 201.06, 201.08, 201.31—Paper Jam error service check Previous Step Questions / actions Open the front access door. Turn the Go to step 2. Replace the transport belt. transport belt gear clockwise. “Transfer module Next removal” on page 4-180. Go Back Did the transport belt move? 1. - Page 110 7526 Previous Step Questions / actions Remove the rear frame cover. See Replace the fuser DC Go to step 7. “Rear cable. See frame cover removal” on page 4-37. “Fuser DC cable removal” on Check the fuser DC cable in the connector page 4-107.
- Page 111 7526 Previous Step Questions / actions 1. Replace the fuser. Problem resolved. Replace the system board. 2. Enter Diagnostics mode (press and hold “System board buttons 3 and 6, turn on the MFP, and removal” on page 4-157. release the buttons when the progress bar Next displays.
-
Page 112: Paper Jam Error Service Check
7526 203.09—Paper Jam error service check Previous Step Questions / actions Open the front access door. Turn the Go to step 2. Replace the transport belt. transport belt gear clockwise. “Transfer module Next removal” on page 4-180. Go Back Did the transport belt move? Turn the printer off, and then remove the Replace the fuser. - Page 113 7526 Previous Step Questions / actions 1. POR the printer. Go to step 7. Replace the system board. 2. Place a voltmeter between the JFUSER1 “System board pin 8 and ground (pin 6). removal” on page 4-157. Next Go Back Pin 8 Pin 6 (ground)
-
Page 114: 230.05-Paper Jam Error Service Check
7526 Previous Step Questions / actions 1. Replace the fuser. Problem resolved. Replace the system board. 2. Enter Diagnostics mode (press and hold “System board buttons 3 and 6, turn on the MFP, and removal” on page 4-157. release the buttons when the progress bar Next displays. - Page 115 7526 Previous Step Questions / actions • Check the front access cover for any Replace the front access Go to step 6. damage. cover. See “Front access • Make sure the front access cover can cover assembly removal” close correctly. on page 4-21.
-
Page 116: Paper Jam Error Service Check
7526 242.02—Paper Jam error service check Previous Step Questions / actions Has paper been fed from an input option Go to step 4. Go to step 2. before? Next 1. Turn the printer off. Replace the option cable. Go to step 3. 2. -
Page 117: 242.11-Paper Jam Service Check
7526 242.03, 242.11—Paper Jam service check Previous Step Questions / actions 1. Enter Diagnostics mode (press and hold Problem resolved. Go to step 2. buttons 3 and 6, turn on the MFP, and Next release the buttons when the progress bar displays. -
Page 118: Paper Jam Service Check
7526 242.05—Paper Jam service check Previous Step Questions / actions Has the paper been fed from an input option Go to step 5. Go to step 2. before? Next 1. Enter Diagnostics mode (press and hold Problem resolved. Go to step 3. buttons 3 and 6, turn on the MFP, and release the buttons when the progress bar Go Back... -
Page 119: Paper Jam Service Check
7526 Previous Step Questions / actions Replace the tray 2 option. Problem resolved. Replace the system board. “System board Did the error clear? removal” on page 4-157. Next Replace the HCIT top plate. See Problem resolved. Replace the system board. “Top plate assembly removal”... -
Page 120: Paper Jam Service Check
7526 242.17—Paper Jam service check Previous Step Questions / actions Has paper been fed from an input option Go to step 4. Go to step 2. before? Next 1. Turn the printer off. Replace the option cable. Go to step 3. 2. -
Page 121: Paper Jam Service Check
7526 242.21, 243.21, 244.21. 245.21, 242.30, 243.30, 244.30, 245.30—Paper Jam service Previous check Step Questions / actions Next 1. Fan the media on the tray. Problem resolved. Go to step 2. • Use Tray 2 for 242.21 and 242.30 errors. •... -
Page 122: Paper Jam Service Check
7526 242.26—Paper Jam service check Previous Step Questions / actions 1. Determine the input tray. Navigate to Problem resolved. Go to step 2 Menus > Paper Menu > Default Source. Next 2. Enter Diagnostics mode (press and hold buttons 3 and 6, turn on the MFP, and release the buttons when the progress bar displays. -
Page 123: Paper Jam Service Check
7526 242.29—Paper Jam service check Previous Step Questions / actions 1. Enter Diagnostics mode (press and hold Problem resolved Go to step 2. buttons 3 and 6, turn on the MFP, and Next release the buttons when the progress bar displays. -
Page 124: Paper Jam Service Check
7526 Previous Step Questions / actions 1. Turn the printer off. Replace the option cable. Replace the system board. 2. Remove the rear frame cover. See “Option cable “System board “Rear removal” on page 4-128. removal” on page 4-157. frame cover removal” on page 4-37. -
Page 125: 243.11-Paper Jam Service Check
7526 Previous Step Questions / actions 1. Carefully lift the printer off the option, and Replace the option cable. Go to step 4. lay the printer on its back. “Option cable 2. Check the option connector for damage. removal” on page 4-128. -
Page 126: Paper Jam Service Check
7526 243.05—Paper Jam service check Previous Step Questions / actions Has paper been fed from an input option Go to step 5. Go to step 2. before? Next 1. Enter Diagnostics mode (press and hold Problem resolved. Go to step 3. buttons 3 and 6, turn on the MFP, and release the buttons when the progress bar Go Back... -
Page 127: Paper Jam Service Check
7526 Previous Step Questions / actions Replace the complete tray 3 option. Problem resolved. Replace the system board. “System board Did the error clear? removal” on page 4-157. Next Replace the high-capacity input tray (2,000- Problem resolved. Replace the system board. sheet feeder)? “System board removal”... -
Page 128: Paper Jam Service Check
7526 243.17—Paper Jam service check Previous Step Questions / actions Has paper been fed from an input option Go to step 4. Go to step 2. before? Next 1. Turn the printer off. Replace the option cable. Go to step 3. 2. -
Page 129: Paper Jam Service Check
7526 243.26—Paper Jam service check Previous Step Questions / actions 1. Determine the input tray. Problem resolved Go to step 2. 2. Enter Diagnostics mode (press and hold Next buttons 3 and 6, turn on the MFP, and release the buttons when the progress bar displays. -
Page 130: 244.11-Paper Jam Service Check
7526 Previous Step Questions / actions 1. Turn the printer off. Replace the option cable. Go to step 3. 2. Remove the rear frame cover. See “Option cable “Rear removal” on page 4-128. frame cover removal” on page 4-37. 3. Remove the right cover. See “Right Next cover removal”... -
Page 131: Paper Jam Service Check
7526 Previous Step Questions / actions Is tray 4 a high-capacity input option (2,000- Replace the HCIT top Replace the complete sheet feeder)? plate. See tray 4 option. “Top plate assembly removal” on page 4-279. Next 244.05—Paper Jam service check Go Back Step Questions / actions... -
Page 132: Paper Jam Service Check
7526 Previous Step Questions / actions 1. Carefully lift the printer off the option, and Replace the option cable. Go to step 5. lay the printer on its back. “Option cable 2. Check the option connector for damage. removal” on page 4-128. -
Page 133: Paper Jam Service Check
7526 244.17—Paper Jam service check Previous Step Questions / actions Has paper been fed from an input option Go to step 4. Go to step 2. before? Next 1. Turn the printer off. Replace the option cable. Go to step 3. 2. -
Page 134: Paper Jam Service Check
7526 244.26—Paper Jam service check Previous Step Questions / actions 1. Determine the input tray. Problem resolved Go to step 2. 2. Enter Diagnostics mode (press and hold Next buttons 3 and 6, turn on the MFP, and release the buttons when the progress bar displays. -
Page 135: Paper Jam Service Check
7526 245.02—Paper Jam service check Previous Step Questions / actions Has paper been fed from an input option Go to step 4. Go to step 2. before? Next 1. Turn the printer off. Replace the option cable. Go to step 3. 2. -
Page 136: 245.11-Paper Jam Service Check
7526 245.03, 245.11—Paper Jam service check Previous Step Questions / actions 1. Bring the printer up in Diagnostics Menu Problem resolved. Go to step 2. (turn the multifunction printer off, press Next and hold 3 and 6, turn the MFP on, and then release the buttons when the progress bar displays). -
Page 137: Paper Jam Service Check
7526 Previous Step Questions / actions 1. Carefully lift the printer off the option, and Replace the option cable. Go to step 5. lay the printer on its back. “Option cable 2. Check the option connector for damage. removal” on page 4-128. -
Page 138: Paper Jam Service Check
7526 245.17—Paper Jam service check Previous Step Questions / actions Has paper been fed from an input option Go to step 4. Go to step 2. before? Next 1. Turn the printer off. Replace the option cable. Go to step 3. 2. -
Page 139: Paper Jam Service Check
7526 245.29—Paper Jam service check Previous Step Questions / actions 1. Enter Diagnostics mode (press and hold Problem resolved. Go to step 2. buttons 3 and 6, turn on the MFP, and Next release the buttons when the progress bar displays. -
Page 140: Scanner Adf Cover Open Jam Service Check
7526 Previous Step Questions / actions 1. Remove the ADF motor side cover. See Replace the front case Reseat the cable. assembly. See “ADF motor side cover removal” on “ADF case page 4-212. assembly removal” on 2. Remove the ADF front side cover. See page 4-230. - Page 141 7526 Previous Step Questions / actions Check the covers where the ADF top cover Replace the damaged Go to step 4. latches (A) hook. cover. For the ADF motor side cover, see “ADF motor side cover Next removal” on page 4-212.
- Page 142 7526 Previous Step Questions / actions Check for proper ADF grounding. Go to step 6. Replace the steel discharge brush. See 1. Remove the ADF upper case cover. See “ESD brush removal” on “ADF upper case cover removal” on page 4-248.
-
Page 143: Scanner Locked Error Service Check
7526 Previous Step Questions / actions 1. Remove the ADF motor side cover. Go to step 8. Replace the cable. 2. Check the cabling (ADF front assembly to scanner ICC card) (A). Next Go Back Is the cable damaged? 1. Remove the left cover. See Replace the ICC card. -
Page 144: Flatbed Cover Open Jam Service Check
7526 Previous Step Questions / actions 1. Check the cable connection on the system Problem resolved. Go to step 4. card J1,J3 and J1,J6 on the MDC card for proper connection. 2. Reseat cable the cable. Next Does the error clear? Check for damages, pinch points and bents Go to step 5. -
Page 145: Xx-Scanner Failure-Communication Failure Service Check
7526 842.xx—Scanner Failure—Communication failure service check Previous Step Questions / actions 1. Check the scanner flex cable from the Go to step 2. Reseat the scanner flex scanner MDC card to the system board. cable. Next 2. Remove the left cover. See “Left cover removal”... -
Page 146: 843.02-Scanner Failure Service Check
7526 843.01, 843.02—Scanner Failure service check Previous Step Questions / actions Check the ADF cable. Replace the ADF cable. Replace the ADF. See “ADF removal (entire)” Next 1. Remove the left cover. See “Left cover on page 4-228. removal” on page 4-24. -
Page 147: Xx-Scanner Error-Scan Module Output Level Error Service Check
7526 844.xx—Scanner Error—scan module output level error service check Previous Step Questions / actions Check the flatbed lamp. Go to step 2. Replace the flatbed lamp. “Flatbed CCD carrier Next Is the lamp on brightly? module removal” on page 4-250. Remove the left cover. -
Page 148: Xx-Front Calibration Strip Error Service Check
Note: Before troubleshooting, determine the operating system used when the error occurred. If possible determine whether a PostScript or PCL file was sent to the device when the error occurred. Ask the customer which Lexmark Solutions applications are installed on the device. Step Action and questions POR the device. - Page 149 7526 Previous Step Action and questions Check all the cables connected to the RIP board for Go to step 5. Go to step 4. proper connectivity. Are the cables properly connected? Next Properly connect the cables to the RIP board. Restart Go to step 5.
- Page 150 7526 Previous Step Action and questions Install a Lexmark recommended memory option. Send Go to step 31. Problem a print job to the device. resolved. Does the 900.xx error reoccur? Next Is there a modem installed on the device? Go to step 17.
-
Page 151: Transfer Module Error Service Check
7526 Previous Step Action and questions Contact your next level of support. You will need the following information for them: • Exact 900.xx error digits and complete error message • Printed menu settings page Next • Printed network settings page •... -
Page 152: 920.25-Transfer Module Missing Error Service Check
7526 Previous Step Questions / actions Connect a new printhead assembly from Replace the system board. Replace the printhead outside of the printer and verify the printhead. assembly. See “System board “Printhead “Printhead verification” on page 3-52. removal” on page 4-157. -
Page 153: Post-Fuser Motor Not Connected Error Service Check
7526 920.04—POST—fuser motor not connected error service check Previous Step Questions / actions 1. Turn the printer off. Problem resolved. Go to step 2. 2. Remove the rear frame cover. See Next “Rear frame cover removal” on page 4-37. 3. Reseat the cables in connectors JCARTP1 and JCARTS1. -
Page 154: Post-Printhead Motor Not Connected Error Service Check
7526 920.05—POST—printhead motor not connected error service check Previous Step Questions / actions 1. Turn the printer off. Problem resolved. Go to step 2. 2. Remove the rear frame cover. See Next “Rear frame cover removal” on page 4-37. 3. Reseat the cables in connectors JMIRR1 and JPH1. -
Page 155: Post-Narrow Media Sensor Error Service Check
7526 Previous Step Questions / actions 1. Disconnect the cable in the connector Replace the paper pick Replace the system board. JTRAY1. mechanism. See “Paper “System board 2. Connect the cable from the new paper pick mechanism removal” on page 4-157. -
Page 156: Exit Sensor Service Check
7526 Previous Step Questions / actions 1. Disconnect the cable in JTRAY1, and Replace the paper pick Replace the system board. connect the cable from the new paper pick mechanism. See “Paper “System board mechanism. pick mechanism removal” on page 4-157. - Page 157 7526 Previous Step Questions / actions Place a voltmeter between the fuser DC Go to step 6. Go to step 5. autoconnect pin 8 and ground (pin 6). Next Go Back Does the meter rear +5 V dc? Place a voltmeter between the connector Go to step 6.
-
Page 158: Post-Four Toner Sensor Not Connected Error Service Check
7526 920.09—POST—Four toner sensor not connected error service check Previous Step Questions / actions 1. Turn the printer off. Problem resolved. Go to step 2. 2. Remove the rear frame cover. See Next “Rear frame cover removal” on page 4-37. 3. -
Page 159: Post-Three Toner Sensors Not Connected Error Service Check
7526 920.10—POST—Three toner sensors not connected error service check Previous Step Questions / actions 1. Turn the printer off. Problem resolved. Go to step 2. 2. Remove the rear frame cover. See Next “Rear frame cover removal” on page 4-37. 3. -
Page 160: Post-Two Toner Sensors Not Connected Error Service Check
7526 920.11—POST—Two toner sensors not connected error service check Previous Step Questions / actions 1. Turn the printer off. Problem resolved. Go to step 2. 2. Remove the rear frame cover. See Next “Rear frame cover removal” on page 4-37. 3. -
Page 161: Post-One Toner Sensor Not Connected Error Service Check
7526 920.12—POST—One toner sensor not connected error service check Previous Step Questions / actions 1. Turn the printer off. Problem resolved. Go to step 2. 2. Remove the rear frame cover. See Next “Rear frame cover removal” on page 4-37. 3. -
Page 162: Post Error Service Check
7526 920.13—POST error service check Previous Step Questions / actions 1. Turn the printer off. Problem resolved. Go to step 2. 2. Remove the rear frame cover. See Next “Rear frame cover removal” on page 4-37. 3. Reseat the cables in connectors JCARTP1 and JCARTS1. -
Page 163: Post-Cartridge Motor 2 Not Connected Error Service Check
7526 920.14—POST—Cartridge motor 2 not connected error service check Previous Step Questions / actions 1. Turn the printer off. Problem resolved. Go to step 2. 2. Remove the rear frame cover. See Next “Rear frame cover removal” on page 4-37. 3. -
Page 164: 920.20-Post-Bad Transfer Module Nvram Data Error Service Check
7526 920.15, 920.20—POST—Bad transfer module NVRAM data error service check Previous Step Questions / actions 1. Turn the printer off. Problem resolved. Go to step 2. 2. Remove the rear frame cover. See Next “Rear frame cover removal” on page 4-37. -
Page 165: Post Error Service Check
7526 920.17—POST error service check Previous Step Questions / actions 1. Turn the printer off. Problem resolved. Go to step 2. 2. Remove the rear frame cover. See Next “Rear frame cover removal” on page 4-37. 3. Reseat the bin full sensor cable in connector JBIN1. -
Page 166: Post-Cartridge Motor 3 Not Connected Error Service Check
7526 920.18—POST—Cartridge motor 3 not connected error service check Previous Step Questions / actions 1. Turn the printer off. Problem resolved. Go to step 2. 2. Remove the rear frame cover. See Next “Rear frame cover removal” on page 4-37. 3. - Page 167 7526 Previous Step Questions / actions 1. Open the right cover. Problem resolved. Go to step 4. 2. Reseat the motor driver cable on the motor driver side (A). 3. Reseat all cables connected to the motor Next driver card. Go Back Does this clear the error? Connect a new motor driver cable from...
-
Page 168: Post-24 V Power Supply Failure Error Service Check
7526 920.21—POST—24 V power supply failure error service check Previous Step Questions / actions Note: The LVPS must be turned off for Go to step 3. Go to step 2. several seconds before turning back on. This Next error can occur if the LVPS does not have time to recover after being turned off. -
Page 169: Post Error Service Check
7526 920.23—POST error service check Previous Step Questions / actions 1. Turn the printer off. Problem resolved. Go to step 2. 2. Remove the rear frame cover. See Next “Rear frame cover removal” on page 4-37. 3. Reseat the cable in connector JDX1. Did the error clear? Go Back Measure the continuity across all of the fuses... -
Page 170: Post Service Check
7526 920.26—POST service check Previous Step Questions / actions Open the top access cover. Replace the top cover Go to step 2. sensor. Next Go Back Is the top cover sensor damaged? 1. Turn the printer off. Replace the top cover Go to step 3. -
Page 171: 920.28, 920.29-Post (Power On Self Test) Option Tray Error Service Check
7526 920.27, 920.28, 920.29—POST (power on self test) option tray error service check Previous Step Questions / actions Is the specified option the 550-sheet tray? Replace the 550-sheet tray Go to step 2. with a new 550-sheet tray Next option. Is the specified option the special media tray? Replace the special media Go to step 3. -
Page 172: 925.04, 925.06-Blower Error Service Check
7526 Previous Step Questions / actions 1. Disconnect the cable in connector JFAN1, Replace the fan. See Replace the system board. and install a new cooling fan. “Cooling fan removal” on “System board 2. Turn the multifunction printer off, and turn page 4-73. -
Page 173: Xx, 947.Xx-Transfer Roll Error Service Check
7526 945.xx, 947.xx—Transfer roll error service check Previous Step Questions / actions 1. Replace the transfer module. See Problem resolved. Replace the original transfer module. “Transfer module removal” on Next page 4-180. Go to step 2. 2. POR the printer. Note: Print 5 pages, one at a time to check Go Back operation. - Page 174 7526 Previous Step Questions / actions 1. Remove the HVPS. See Go to step 5. Replace the transfer “High-voltage contact assembly. power supply (HVPS) removal” on page 4-110. 2. Check for continuity between the contacts Next (yellow1 and yellow2, cyan1 and cyan2, magenta1 and magenta2, or black1 and black2) on the transfer contact assembly.
-
Page 175: 950.29-Eprom Mismatch Failure
7526 950.00–950.29—EPROM mismatch failure Previous Warning: When replacing any one of the following components: • Scanner MDC card or flatbed scanner System board • Next Replace only one component at a time or the MFP will be rendered inoperable. Replace the required component, and bring the MFP up in Diagnostic Menu (see “Accessing test and diagnostic procedure 3-1), and verify that the problem is fixed before performing a POR. -
Page 176: Xx-System Board Failure Service Check
7526 956.xx—System board failure service check Previous Step Questions / actions 1. Turn the printer off. Replace the system board. Reseat the cable. “System board 2. Remove the rear frame cover. See Next “Rear removal” on page 4-157. frame cover removal” on page 4-37. -
Page 177: Interlock Switch Removal
7526 Previous Step Questions / actions 1. Disconnect the cable in connector JINT1. Replace the 5 V interlock Replace the system board. switch. See 2. Connect the new 5 V interlock switch to “5 V interlock “System board JINT1. switch cable removal” on removal”... -
Page 178: Adf Exit Sensor Service Check
7526 Previous Step Questions / actions 1. Disconnect the cable in connector JCVR1/ Replace the 24 V interlock Replace the system board. switch. See 2. Connect the new 24 V interlock switch. “24 V “System board interlock switch removal” removal” on page 4-157. -
Page 179: Adf Input Sensor Service Check
7526 Previous Step Questions / actions Remove the ADF motor side cover. See Go to step 3. Reseat the cable in connector. “ADF motor side cover removal” on page 4-212. Next Go Back Is the ADF exit sensor cable (A) connected correctly? Replace the ADF exit sensor. -
Page 180: Adf Jam Sensor Service Check
7526 Previous Step Questions / actions 1. Remove the ADF front cover. See Replace the ADF case Reseat connectors “ADF assembly. See front cover removal” on page 4-208. “ADF case 2. Remove the ADF motor side cover. See assembly removal” on page 4-230. -
Page 181: Adf Cover Open Service Check
7526 ADF cover open service check Previous Step Questions / actions 1. Open the ADF cover. Replace the flag. See Go to step 2. “ADF closed cover flag 2. Check the ADF cover sensor flag for any Next damage. removal” on page 4-233. -
Page 182: Adf Skew Sensor Service Check
7526 ADF skew sensor service check Previous Step Questions / actions 1. Turn the printer off. Replace the ADF case Go to step 2. assembly. See “ADF case 2. Open the ADF front cover. See Next “ADF assembly removal” on front cover removal”... -
Page 183: Adf Scanning Sensor Service Check
7526 ADF scanning sensor service check Previous Step Questions / actions Remove the ADF motor side cover. See Replace the ADF. See Reseat connector. “ADF motor side cover removal” on “ADF removal (entire)” Next page 4-212. on page 4-228. Go Back Are the connectors seated correctly? Bubble sensor service check Step... - Page 184 7526 Previous Step Questions / actions Place a voltmeter between fuser DC Go to step 5. Go to step 4. autoconnect pin 3, and ground (pin 6). Next Go Back Does the meter read +5 V dc? Place a voltmeter between the JFUSER1, pin Replace the system board.
- Page 185 7526 Previous Step Questions / actions 1. Replace the fuser. Problem resolved. Replace the system board. 2. Enter Diagnostics mode (press and hold “System board buttons 3 and 6, turn on the MFP, and removal” on page 4-157. release the buttons when the progress bar Next displays.) 3.
-
Page 186: Dead Printer Service Check
7526 Dead printer service check Previous A dead printer is a condition where the display is blank, the LED on the operator panel is off, no fans turn, no motors turn, and the fuser lamp does not come on. If a 550-sheet option assembly is installed, remove the option, and check the base printer for correct operation. Next If the base printer operates correctly, replace the 550-sheet option assembly. -
Page 187: Networking Service Check
Next interference. Have the network administrator verify that the device is using the correct SSID, and wireless security protocols. For more network troubleshooting information, consult the Lexmark Network Setup Guide. Go Back Step... -
Page 188: Operator Panel Service Check
7526 Previous Step Questions / actions Try using a different ethernet cable. Problem resolved. Go to step 14. Did this remedy the situation? Have the network administrator check the Replace the system board. Contact the network Next network drop for activity. administrator. - Page 189 7526 Service tip: The printer has detected a problem with the system board, the operator panel assembly cable (part Previous of the top cover access assembly), or the operator panel assembly if POST does not complete. The printer emits five beeps, and then sticks in a continuous pattern until the printer is turned off. Step Questions / actions Next...
-
Page 190: Stripes Display And Black Display During Boot Up Service Check
7526 Previous Step Questions / actions 1. Open the top access cover assembly, Replace UICC cable. See Go to step 4. Refer to “Top access cover assembly “UICC cable removal” on removal” on page 4-40. page 4-188. 2. Reseat the UICC cable on both ends. Next 3. -
Page 191: Print Quality Service Check
7526 Previous Step Questions / actions 1. Check the cable connection on the system Problem resolved. Go to step 5. card J1,J3 and J1,J6 on the MDC card for proper connection. 2. Reseat cable. Next Does the error clear? Check for damages, pinch points and bents Go to step 6. - Page 192 Measure all voltages from the connector to the printer ground. Print quality—background Next Service tip: Some background problems can be caused by rough papers, non-Lexmark toner cartridges or if the media texture is set to the rough setting. Go Back Some slick or coated papers may also cause background problems.
- Page 193 7526 Previous Step Questions / actions Clean the printhead. Problem resolved. Replace the printhead. See “Printhead removal, Does this fix the problem? installation, and adjustment” on Next page 4-140. Print quality—blank page Go Back Step Questions / actions Is all the packing material for the Go to step 2.
- Page 194 7526 Previous Step Questions / actions Turn off the printer and check the continuity of Go to step 6. Replace the cable the HVPS cable. assembly. Next Pin 23 Pin 1 Go Back Pin 24 Pin 23 Pin 2 Pin 24 Pin 2 Pin 1 Is there continuity?
- Page 195 7526 The photoconductor unit is defective. Replace the photoconductor unit. Previous Print quality—insufficient fusing Step Questions / actions Next Is the fuser properly installed? Go to step 2. Install the fuser properly. Replace the fuser. See Problem resolved. Replace the LVPS. see “Fuser assembly Go Back removal”...
- Page 196 7526 Service tip: Install a new print cartridge if available before doing this service check. Residual image can be Previous caused by the photoconductor, cleaning blade, and other parts inside the print cartridge. Step Questions / actions Is there any toner contamination on the fuser Replace the fuser.
-
Page 197: Tray 1 Missing Service Check
7526 Previous Step Questions / actions Turn the printer off, and then check the Go to step 4. Replace the cable continuity of the HVPS cable. assembly. Next Pin 23 Pin 1 Go Back Pin 24 Pin 23 Pin 2 Pin 24 Pin 2 Pin 1... - Page 198 7526 Previous Step Questions / actions 1. Disconnect the cable in JTRAY1, and Replace the paper pick Replace the system board. connect the cable from the new paper pick assembly. See “Paper pick “System board mechanism. mechanism assembly removal” on page 4-157.
-
Page 199: Diagnostic Aids
7526 3. Diagnostic aids Previous This chapter explains the tests and procedures to identify printer failures and verify repairs have corrected the problem. Next Accessing test and diagnostic procedure menus Go Back There are different test and diagnostic menus that can be accessed during POR to identify problems with the multiple function printer. -
Page 200: Diagnostics Menu Structure
7526 Previous Diagnostics menu Diagnostics menu structure When the Diagnostics menu is entered, each item displays on the operator panel. When a diagnostic test is Next selected from the main menu, a sub menu displays and each individual test displays in the order shown. Any options that are referred to in the menus are displayed when the option is installed. - Page 201 7526 Previous HARDWARE TESTS Panel Test “Panel Test” on page 3-12. Button Test “Button Test” on page 3-13. DRAM Test “DRAM Test” on page 3-13. Serial 1 Wrap (if a serial port is Next “Serial 1 Wrap” on page 3-13. available in the PCI slot 1) USB HS Test Mode “USB HS Test Mode”...
- Page 202 7526 Previous REPORTS Menu Settings Page “Menu Settings Page” on page 3-24. EVENT LOG Display Log “Display Log” on page 3-25. Print Log Next “Print Log” on page 3-25. Clear Log “Clear Log” on page 3-26. SCANNER TESTS Go Back ASIC “ASIC Test”...
-
Page 203: Registration
7526 Registration Previous Note: If you need to perform alignment or registration, see “Printhead alignment” on page 4-10. The following information is meant to explain the uses for the menu items. Next Print registration makes sure the black printing is properly aligned on the page. This is one of the steps in aligning a new printhead. - Page 204 7526 Print registration Previous To set print registration: Touch REGISTRATION from the Diagnostics Menu. Touch Quick Test. Next The message Quick Test Printing… appears on the display. Note: Retain this page to determine the changes you need to make to the margin settings. Go Back Touch the margin setting you need to change.
- Page 205 7526 Quick Test Previous The Quick Test contains the following information: • Print registration settings Alignment diamonds at the left, right, top and bottom • Next Horizontal lines to check for skew • • General printer information, including current page count, installed memory, serial number, and code level. Go Back To print the Quick Test page: Note: Print the Quick Test Page on letter or A4 paper.
-
Page 206: Alignment Menu
7526 Alignment Menu Previous Note: If you need to perform alignment or registration, see “Printhead alignment” on page 4-10. The following information is meant to explain the uses for the menu items. Next Alignment is part of the process of adjusting the printhead and the color planes to the black plane and to each other. - Page 207 7526 Motor diagnostic setup Previous Setup requirements Motor Notes Top cover Front door position position Next Tray 1 Closed • Ok • Picks paper – use empty or remove tray Go Back Open Align Closed Open • Ok defeat +25 V switch •...
- Page 208 7526 Motor diagnostics Previous Motor Direction Action Notes Tray 1 Forward Pick from Main Tray • Will pick continuously • View with tray removed or empty Next Reverse Function not supported Align Forward Push media toward belt • Nip is closed •...
-
Page 209: Print Tests
7526 Print Tests Previous Input source tests The purpose of the diagnostic Print Tests is to verify that the printer can print on media from each of the installed input options. The contents of the Print Test Page varies depending on the media installed in the selected input Next source. -
Page 210: Hardware Tests
7526 Print quality test pages (Prt Quality Pgs) Previous The print quality test consists of five pages. Pages one and two contain a mixture of graphics and text. The remainder of the pages only contain graphics. The test prints on the media in the default tray. Next Go Back This test may be printed from either Configuration Menu or the Diagnostics Menu. - Page 211 7526 Button Test Previous This test verifies the operator panel button function. To run the Button Test: Touch HARDWARE TESTS from the Diagnostics Menu. Next Touch Button Test. A keypad displays on the operator panel. Press each physical button one at a time and observe if its corresponding button on the display lights up.
- Page 212 7526 To interpret the test: Previous P:###### represents the number of times the serial port hardware has passed. Initially, 000000 is displayed. The maximum pass count is 999,999. F:###### represents the number of times the serial port hardware has failed. Initially, 0000 is displayed.
-
Page 213: Duplex Tests
7526 Duplex Tests Previous Quick Test (duplex) Note: Before you set the duplex top margin, be sure to set the skew and alignment. See “Printhead alignment” on page 4-10. Next This test prints a duplex version of the Quick Test that can be used to verify the correct placement of the top margin on the back side of a duplex page. - Page 214 7526 Print Test (duplex) Previous This test provides service personnel with a way to verify the function of the printer’s duplex hardware. After the user selects this test, the device automatically executes a continuous print test that generates a duplexed, color output page.
- Page 215 7526 Top Margin (duplex) Previous This setting controls the offset between the first scan line on the front of the duplex page and the first scan line on the back of the page. Therefore, be sure to set the top margin in REGISTRATION before setting the duplex top margin.
-
Page 216: Sensor Tests
7526 Perform Quick Test again to verify the adjustment. Check the page to see if the image on the page is still Previous skewed. If it is, repeat the adjustment. Sensor Tests There are two groups of sensors tests, static sensors and dynamic sensors. Next To run the Sensor Test: Touch SENSOR TESTS from the Diagnostics Menu. -
Page 217: Printhead Tests
7526 Previous Sensor type Sensor name Possible values Sensor activation Fuser Exit Open/Closed Open the top access cover. Activate the fuser exit flag. The sensor should change state. Input Open/Closed Remove the paper tray 1. Activate the input Next sensor flag. The sensor should change state. Front Door Open/Closed Open the front door. - Page 218 7526 These tests only appear if the flash or disk option is installed. Previous Quick Disk Test This test performs a non-destructive read/write on one block per track on the disk. The test reads one block on each track, saves the data, and then proceeds to write and read four test patterns to the bytes in the block. If the Next block is good, the saved data is written back to the disk.
-
Page 219: Printer Setup
7526 To interpret the test: Previous • xxxx Bad Blocks/yyyyyy Usable is displayed if fewer than 2000 bad blocks are detected. xxxx indicates the number of bad blocks, and yyyyyy indicates the number of usable blocks. xxxx Bad Blocks/Replace Disk is displayed if more than 2000 bad blocks are detected. The disk •... - Page 220 7526 Serial Number Previous The serial number can only be viewed and cannot be changed. To view or change the serial number: Touch PRINTER SETUP from the Diagnostics Menu. Next To change the value, touch the keyboard icon. A simulation of a typewriter allows you to enter an alphanumeric value. Touch Submit to save the value or Back to exit without saving.
-
Page 221: Ep Setup
7526 Reset color calibration (Reset Color Cal) Previous The Reset Color Cal enables the alignment of the color planes using pre-programed values. Automatic Color Adjust Calibration may be more effective. Touch PRINTER SETUP from the Diagnostics Menu. Next Touch Reset Color Cal. Resetting displays. -
Page 222: Reports
7526 Fuser temperature (Fuser Temp) Previous This adjustment can be used to help solve some customer problems with paper curl on low grade papers and problems with letterheads on some types of media. To adjust the fuser temperature: Next Touch EP SETUP from the Diagnostics Menu. Touch the left or right arrows beside Fuser Temp to toggle between Low, Normal, or High. -
Page 223: Event Log
• Additional debug information in some cases • The printed event log can be faxed to Lexmark or your next level of support for verification or diagnosis. To print the event log: Touch EVENT LOG from the Diagnostics Menu. Touch Print Log. -
Page 224: Scanner Tests
7526 Clear Log Previous Use Clear Log to remove the current information in the Event Log. This affects both the viewed log and the printed log information. Touch EVENT LOG from the Diagnostics Menu. Next Touch Clear Log. Touch YES to clear the Event Log or touch NO to exit the Clear Log menu. If YES is selected, Deleting EVENT LOG displays on the screen. - Page 225 7526 Sensor Tests Previous Tests to evaluate the scanner sensors in the ADF and the flatbed (FB). To view the sensor states: Touch SCANNER TESTS from the Diagnostics Menu. Next Touch Sensor Test. A screen similar to the one below will display. Go Back ADF Paper Present FB Cover Open...
-
Page 226: Scanner Calibration Reset
7526 Sensor Test descriptions (under Scanner Tests) Previous Sensor State Description Paper FB Long Legal paper is not present on the flatbed, or the scanner is not closed Legal paper is present on the flatbed, is covering the third length sensor, and the scanner cover is closed Next Paper ADF Long... -
Page 227: Configuration Menu (Config Menu)
7526 Previous Configuration menu (CONFIG MENU) Available tests The tests display on the operator panel in the order shown. Not all menus appear, depending upon the Next configuration of your multiple function printer. For example, if you do not have a hard disk installed, then Disk Encryption and Wipe Disk will not appear. -
Page 228: Reset Separator Roll And Pick Assembly Counter
7526 Disk Encryption (if hard disk is Previous “Disk Encryption” on page 3-41. installed) Wipe Disk (if hard disk is installed) “Wipe Disk” on page 3-42. Wipe All Settings “Wipe All Settings” on page 3-43. Duplex Gloss “Duplex Gloss” on page 3-43. -
Page 229: Black Only Mode
7526 Black Only Mode Previous This enables you to force the printer to always print color content in grayscale. Turning this setting On is equivalent to setting Print Mode to Black Only; the printer will ignore any PJL or data stream commands that attempt to change the Print Mode setting. -
Page 230: Color Trapping
7526 Printing Menu Settings Page… is displayed. A set of the Configuration Menu settings is printed. Previous Event Log This menu item lets the system support person print a limited set of the information contained in the Diagnostics mode version of the printed Event Log. For a sample of a Diagnostics Menu Event Log printout, see “Event Next 3-25. -
Page 231: Panel Menus
7526 Select Submit. Previous Panel Menus Lets the system support person lock users from Administrative menus. The Menu icon will not appear on the operator pane Selecting On (the default) prevents users from accessing menus. Off allows users to access the Next menus. -
Page 232: Energy Conserve
7526 To restore Factory Defaults: Previous Print Menu Settings from the Administration Menu, the Diagnostic Menu, and the Configuration Menu. If you need to reset customer settings you have a record. Touch Factory Defaults from the Configuration Menu. Touch Restore Base, Restore STD NET, or Restore LES. The Restore Network value only appears on Next printer models that have integrated network support. -
Page 233: Format Fax Storage
7526 This setting determines how much DRAM memory the MFP will allot to a priority queue. Amounts are 25, 35, 50, Previous 80, or 100MB. The default is 80MB. The regular queue is interrupted for copy jobs in the priority queue. To change the Min Copy Memory value: Touch Min Copy Memory from the Configuration Menu. -
Page 234: Fax Storage Location
7526 Fax Storage Location Previous This setting only appears if a hard disk is installed. Selections are NAND or Disk. Touch Fax Storage Location from the Configuration Menu. Touch the arrow to toggle between NAND and Disk. Next Touch Submit. Note: If a hard disk is not installed, the multiple function printer automatically stores all buffered faxes on NAND, and this menu does not appear. - Page 235 7526 Examine the copy of the Quick Test and compare it to the original. Adjust the Left Margin and/or the Top Previous Margin to match the original. Selection Effect Left Margin • Decrease the value and move the margin to the left. Next •...
-
Page 236: Disable Scanner
7526 Disable Scanner Previous If a scanner is not working, the scanner can be disabled, allowing the user to continue using the printer portion of the multiple function printer. Disable disables the entire scanner (ADF and flatbed), and then users attempting to use the scanner function receive Scanner disabled by administrator message. -
Page 237: Enforce Color Order
7526 Enforce Color Order Previous This setting gives the system support person the ability to enforce where the color cartridges may be placed, and if messages appear when cartridges are in the wrong location. When On (default) is selected, the printer lets users place each toner cartridge in only its specified slot. For Next instance, the Magenta toner cartridge must be in the Magenta slot. -
Page 238: Motor Calibration
7526 Motor Calibration Previous This setting synchronizes the aligner and fuser motor speeds with the transfer belt speed to ensure that the output is printed correctly. Note: This test should be run at 600 dpi resolution and with duplex disabled. Next To run the Motor Calibration: Touch Motor Calibration from the Configuration Menu. -
Page 239: Action For Prompts
7526 To change the settings for Env Prompts: Previous Touch Envelope Prompts from the Configuration Menu. Touch the arrow to toggle between Auto, Multi-Purpose Feeder, and Manual Envelope. Touch Submit. Submitting changes… is displayed. Next You are automatically returned to the Configuration menu. Go Back Action for Prompts This setting gives the user the option of having the printer resolve change prompt situations without requiring... -
Page 240: Wipe Disk
7526 To encrypt a disk: Previous Touch Disk Encryption from the Configuration Menu. Touch Enable to encrypt the disk. Touch Yes. Warning: To prevent damage to your disk, do not turn the MFP off while the following displays. Next Go Back Encrypting Disk DO NOT POWER OFF... -
Page 241: Wipe All Settings
After selecting Yes, the device initiates a non-critical NVRAM reset, and the operator panel displays the message Resetting the device, and then the device reboots. The progress bar area of the Lexmark logo screen that appears during boot up displays the following message until the wiping process is finished: Wiping disk...Pass [x] of [y]. -
Page 242: Ui Automation
When Disable is selected, the machine removes the ENABLE_UI_AUTOMATION file from the /var/fs/shared/ directory and prohibits automated testing. LES Applications Enables or disables Lexmark Embedded Solutions (LES) applications. The default is Enable. To change the setting: Touch LES Applications from the Configuration Menu. -
Page 243: Clear Custom Status
7526 Submitting changes… is displayed. Previous You are automatically returned to the Configuration menu. Clear Custom Status Next Executing this operation erases any strings that have been defined by the user for the Default or Alternate custom messages. To clear custom strings: Go Back Touch Clear Custom Status from the Configuration Menu. -
Page 244: Usb Speed
7526 USB Speed Previous A value of Full forces the USB port to run at full speed, and also disables its high-speed capabilities. Settings are Full and Auto. Auto is the default. To set USB Speed: Next Touch USB Speed from the Configuration Menu. Touch the arrow to toggle between Full and Auto. -
Page 245: Automatically Display Error Screens
7526 Automatically Display Error Screens Previous Selections include On (default) and Off (default). When On is selected, the operator panel automatically displays any existing printer-related IR after the device remains inactive on the Home screen for a length of time equal to the Screen Timeout setting. Any IR that Next appears on the operator panel will display the option to return to the Home screen without clearing it. -
Page 246: Service Engineer (Se) Menu
From browser, add “/se” to device’s IP address (for example: http://123.456.7.8/se). Next Print SE Menus General Go Back Copyright Displays copyright information. Lexmark Forms Mode On or Off Code Revision Info Network Code Level Displays network code level. Network Compile Info Display network compile information. -
Page 247: Front Cover Locked In Place
7526 Previous Front cover locked in place The front door locks during certain Busy events, and unlocks when those events are complete. This is a normal function. You can hear the door lock into place when one of these events take place. However, if the printer is turned off, or has an error while the front door is locked (for example, while printing or calibrating), the front door Next may not unlock. - Page 248 7526 Open the top cover. Previous Remove the screw (C) from the inside left cover. Next Go Back Press the waste toner release latch (D), swing the front of the waste toner assembly away from the printer, and remove. Remove the two screws (E). Press the locking tab (F), slide the cover down.
- Page 249 7526 Grasp the side at the point shown, and disconnect the tab on the upper edge. Push down with your thumb Previous on the outside while pulling up with the fingers to remove the cover. Warning: Be careful not to damage the two small locking tabs (G). Next Go Back Lift the rear of the left cover out, and rotate it out of position toward the front.
-
Page 250: Printhead Verification
7526 Previous Printhead verification Before you begin, you can verify that the printhead is the failing FRU by following this procedure: Turn the printer off, remove the power cord from the outlet, then remove all cords and cables from the Next printer before beginning. - Page 251 7526 Remove the rear frame cover. Previous Loosen the eight screws (A). Lift the rear frame cover, and remove. Next Go Back Diagnostic aids 3-53...
- Page 252 7526 If present, remove the hard disk. Previous Remove the two screws (B), and disconnect the hard disk from the system board (C). Next Go Back Pull the hard disk straight out to pop the hard disk standoffs free of the system board. Service Manual 3-54...
- Page 253 7526 Carefully disconnect the printhead ribbon (D) and the mirror motor cables (E) from the system board, and Previous carefully connect the printhead ribbon and mirror motor cables from the new printhead into the system board. Next Go Back Diagnostic aids 3-55...
- Page 254 7526 Use the packaging that came with the printhead FRU to prop the printhead up. Previous Next Go Back Connect the power cord to the outlet. Enter the Diagnostics menu (press and 3 and 6, turn on the multifunction printer, and release the buttons when the progress bar appears).
-
Page 255: Paper Jams
7526 Previous Paper Jams Error jam locations The following illustration shows the location and error codes generated for specific paper jams and the Next corresponding locations of these jams. ADF and flatbed scanner Go Back Diagnostic aids 3-57... - Page 256 7526 Printer base Previous Next Go Back Service Manual 3-58...
-
Page 257: Clearing Jams
7526 Clearing jams Previous By carefully selecting paper and loading it properly, you can avoid most jams. If jams do occur, follow the steps outlined in this section. To clear a jam message and resume printing, clear the entire paper path, and then touch Continue. - Page 258 7526 Previous Message See: 24x Paper jam, check [area name] “24x paper jam” on page 3-66 24x Paper jam, [x] pages jammed 250 Paper jam, check [area name] “250 paper jam” on page 3-68 Next 250 Paper jam, [x] pages jammed 290 Scanner jam, remove all originals from the “290–293 paper jams”...
- Page 259 7526 200–201 paper jams Previous Open the upper front door. CAUTION—HOT SURFACE: The inside of the printer might be hot. To reduce the risk of injury from a hot component, Next allow the surface to cool before touching. Open the lower front door. Go Back Note: To avoid overexposing the photoconductor units, do not leave the front door open longer than 10 minutes.
- Page 260 7526 If paper is not visible: • Previous Turn the screws on the fuser to the left. Next Go Back Remove the fuser, and then remove the jam. Replace the fuser, and then turn the screws to the right to fasten it securely. Close the lower front door, and then close the upper front door.
- Page 261 7526 202 paper jam Previous If the paper is visible in the standard exit bin, then grasp the paper and pull it away from the bin. Next Go Back Paper jam under the fuser Open the upper front door, and then open the lower front door. Warning: Potential Damage—To avoid overexposing the photoconductors, do not leave the front doors open for more than 10 minutes.
- Page 262 7526 If the paper is jammed behind the fuser, then remove the fuser: Previous Turn the screws on the fuser to the left. Next Go Back Lift the fuser, and then pull forward to remove it. Place the fuser on a flat surface. Pull the paper gently out of the printer or up toward the standard exit bin to remove it.
- Page 263 7526 203 paper jam Previous Grasp paper that is visible in the standard exit bin, and pull it away from the bin. Next Go Back Open the upper front door. CAUTION—HOT SURFACE: The inside of the printer might be hot. To reduce the risk of injury from a hot component, allow the surface to cool before touching.
- Page 264 7526 Pull the jam straight up to remove it. Previous Next Go Back Pull out on the release tabs to allow the front door to split. Pull straight out to remove any jammed paper. Close the lower front door, and then close the upper front door. Reinsert Tray 1.
- Page 265 7526 Paper jammed in front of Tray 1 Previous Open Tray 1, and then pull the jammed pages up and out. Next Go Back Close Tray 1. Touch Continue. Paper jammed in one of the optional trays Open the specified tray, and then pull the jammed pages out. After removing the tray, the tray above may need to be opened to access the jam.
- Page 266 7526 250 paper jam Previous Press the paper release lever, and then remove the jammed pages from the multipurpose feeder. Next Go Back Load new paper into the multipurpose feeder. Touch Continue. 290–293 paper jams Remove all original documents from the ADF. Open the ADF cover, and then remove any jammed paper.
-
Page 267: Theory Of Operation
7526 Previous Theory of operation Paper path Next Go Back Diagnostic aids 3-69... - Page 268 7526 Main Components Previous System board The system board provides the intelligence of the printer. Command and control signals originate in the system card that make print media travel possible. The system card controls the timing of the print media during the Next printing so the media arrives at certain positions in the print process at certain times.
- Page 269 7526 Print media transport Previous The print media is picked from the input source and fed to the bump aligner roll. The media movement is detected by a sensor located in the paper pick mechanism. It does not matter where the media comes from (Tray 1, Tray 2, or, the MPF);...
- Page 270 7526 Once the paper is fed onto the transfer belt, the photoconductor drums in conjunction with the transfer belt pull Previous the print media through the paper path. Next Go Back Photoconductor drums Transfer belt Service Manual 3-72...
- Page 271 7526 Once the print media exits the transfer belt, it enters the fuser where heat and pressure are applied to bond the Previous toner permanently to the media. The fuser rollers continue to turn and pull the print media through the paper path until it reaches the exit drive roll.
- Page 272 7526 If the page is to be duplexed, the fuser output drive roll continues to pull the media until it clears the paper exit Previous flag and then reverses the rotation of the roller in order to pull the media back into the printer duplex assembly. The media is then routed down through the duplex path until it reaches the bump aligner roll.
- Page 273 7526 Mechanical drive Previous In order for the print media to move through the paper path, there are several drive motors that supply the mechanical power to the rollers discussed previously. The drives for these components are illustrated and discussed in the following paragraphs. Next Paper pick mechanism drive When printing from Tray 1 or Tray 2, the paper pick motor drives the paper pick gears which causes the pick...
- Page 274 7526 Bump aligner drive Previous The power to turn the bump aligner roll is supplied from the bump aligner motor. The motor drives a set of bump aligner gears which causes the bump aligner roll to turn. Bump aligner roll Bump aligner gears Bump aligner gears Next...
- Page 275 7526 Photoconductor unit/toner cartridge drive Previous The photoconductor units (four) and toner cartridges (four) receive drive power from the EP drive assembly motors. The top cartridge motor 1 on the EP drive assembly provides drive to the top two photoconductor units and toner cartridges (yellow and cyan).
- Page 276 7526 Transfer belt drive Previous The transfer belt unit receives drive from a motor located on the EP drive assembly. When the top access door is open, the coupler for the transfer belt disengages. Outside Inside Next Go Back Coupler Transfer belt motor Fuser drive The fuser drive (motor) is built into the fuser assembly and drives the fuser rollers to turn.
- Page 277 7526 Duplex drive Previous The duplex drive is driven by the MPF/duplex motor through the MPF/duplex gear. Drive is provided to three drive shafts in the duplex unit by a belt that is driven by the MPF/duplex motor. The drive shafts move the print media through the duplex unit during printing.
- Page 278 7526 Paper exit/duplex entry sensor and bin full flag Previous The paper exit/duplex sensor flag detects movement in two directions: as the paper exits the fuser and as it is retracted from the exit tray back into the duplex path. Each sheet must be driven past the fuser exit flag and allowed to fall before being turned around and starting the duplex path.
-
Page 279: Electrophotographic (Ep) Process
7526 Electrophotographic (EP) process Previous Main components Next Go Back System Fuser board High voltage Printhead power supply Developer (toner) cartridge Transfer belt Photoconductor belt System board The system board is the brain of the printer. During the print process, an image is sent from a computer to the system board. - Page 280 7526 High voltage power supply (HVPS) Previous Provides a high voltage charge to: The charge roll located in the photoconductor unit • • The photoconductor drum located in the photoconductor unit The toner adder roller (TAR) located in the toner cartridge Next •...
- Page 281 7526 Charging Previous The primary component of the charging process is the high voltage power supply. The following provides information that covers the mechanical transfer of the high voltage through a set of springs to each subcomponent of the charging process. Next Photoconductor unit (charge roll) The following illustration shows the circuit path that allows high voltage current to flow from the HVPS to the...
- Page 282 7526 Toner cartridge Previous The following illustration shows the circuit path that allows high voltage current to flow from the HVPS to the toner cartridge. The toner cartridge contains three parts that are provided high voltage from the HVPS. These three parts are: the doctor blade, the developer roll, and the toner adder roll (TAR).
- Page 283 7526 Transfer belt Previous The transfer belt houses four transfer rollers that provide image transfer from the photoconductor drum to the print media. The transfer belt receives its high voltage charge through spring contacts located on the transfer contact assembly as shown in the following illustration. For the sake of simplicity, only one of the roller's high voltage paths is shown.
- Page 284 7526 Exposing Previous The main components in the exposure process are the system card, the printhead and the photoconductor unit. The following illustration depicts a typical data path for a single color exposure. Data is received from a computer into a port on the system card. The system card's RIP function converts this Next data into raster information which is fed to the printhead along with other control data.
- Page 285 7526 Developing Previous The two primary components of the developing process are the photoconductor unit and the toner cartridge. The toner cartridge contains a toner adder roll, developer roll and toner. Toner is advanced toward the toner adder roll by three paddle assemblies. The advanced toner clings to the electrically charged toner adder roll. The toner on the toner adder roll is then electrically attracted to the developer roll because of the difference in electrical Next charge between the toner adder roll and the developer roll.
- Page 286 7526 Transferring Previous After the toner is attracted to the photoconductor drum, the image is ready for transfer onto the print media. The print media is advanced in the paper path onto the transfer belt and is carried along the belt underneath each photoconductor unit.
- Page 287 7526 Fusing Previous After the image has been transferred onto the print media, it is ready for fusing. The print media is transported into the fuser where the hot roll and backup roll use a combination of high heat and pressure to melt and press the toner to the media.
- Page 288 7526 Cleaning Previous The transfer belt and photoconductor drum are cleaned at the end of the electrophotographic process cycle. The transfer belt surface is cleaned as it rotates past a cleaning blade and shaft located inside the transfer belt assembly. Any waste toner that is scraped off of the belt is collected in the waste toner container located next to the belt inside the transfer belt unit.
-
Page 289: Electrical Interlock
7526 Electrical interlock Previous 5 V interlock switch An interlock switch triggered by the front access door disables the +5 V output to the printhead which turns off the laser. Next Go Back 5v interlock switch Diagnostic aids 3-91... - Page 290 7526 24 V interlock switch Previous The 24 V interlock switch is located at the front-right side of the machine when you open the front door. Opening the front door disengages the 24 V interlock switch and cuts the 24 V supply to the system board, HVPS, motors, and fuser.
-
Page 291: Repair Information
7526 4. Repair information Previous CAUTION—POTENTIAL INJURY: The printer weight is greater than 97 lbs (44kg), and requires three or more trained personnel to lift safety. Next Go Back Safety information The safety of this product is based on testing and approvals of the original design and specific •... - Page 292 7526 Keep the ESD-sensitive part in its original shipping container (a special “ESD bag”) until you are • Previous ready to install the part in the printer. • Make the fewest possible movements with your body to prevent an increase of static electricity from clothing fibers, carpets, and furniture.
-
Page 293: Handing The Photoconductor Unit
7526 Previous Handing the photoconductor unit The following precautions must be observed when handling the photoconductor unit. The photoconductor unit is a supply item you will have to remove during some of the repair procedures: Next Transportation/storage Use the specified carton whenever moving or storing the photoconductor unit. Go Back Handling The optical photoconductor roller in the photoconductor unit exhibits the greatest light fatigue after being... -
Page 294: Screw And Retainer Identification Table
7526 Previous Screw and retainer identification table The following table contains screw types and retainers, locations, and quantities necessary to service the printer. Pay careful attention to each screw type location when doing removals. You must install the correct screw type in each location during reassembly. Next Sizes are as close to actual as possible, as long as the printout is not scaled or resized. - Page 295 7526 Screw identification table (continued) Previous Screw type Location 18B0832 Taptite M3 L6 5 V interlock switch to rightside frame PANHD Card support plate to upper plate Next Card support plate to lower plate Card support plate (and printhead ground) to leftside frame Card support plate to rightside frame Go Back Cartridge left guide assembly to leftside [late (interior side of plate...
- Page 296 7526 Screw identification table (continued) Previous Screw type Location 18B1236 Plastite panhead ADF open sensor to ADF M3x6 CCD belt to flatbed Next Sliding rod Go Back 18B2302 Machine M2.6 MP feeder/duplex drive motor to rightside plate L3-3.5 18B2315 Machine M3 Printhead PANHD L35 27S2836...
- Page 297 7526 Screw identification table (continued) Previous Screw type Location 88A0003 Machine M3X0.5- Printhead 6G 8L Next Go Back 88A0095 M2.5x10 Machine 5 V interlock switch actuator assembly 24 V interlock switch and shield to rightside frame 88A0133 Plastite M3x8 ADF front cover ADF handle cover ADF motor cover ADF upper front cover...
- Page 298 7526 Screw identification table (continued) Previous Screw type Location 88A0234 Taptite M3x10 Motor assembly to ADF Next Go Back 88A0293 Plastite M2.2 L5 Contact spring cap to left guide assembly 88A0312 Plastite M2.9 L6 Backup springs to reference edge plate assembly Cartridge cooling fan duct to top cover Cartridge left guide assembly to leftside plate assembly (exterior side of plate assembly)
- Page 299 7526 Screw identification table (continued) Previous Screw type Location 88A0324 M3.5X1.34 PANHD Door cap to door assembly EP drive to rightside plate Next Go Back 88A0412 M2.9x5.2 Plastite Door links to top access door cover Fuser retract link to top access door GS COD bellcranks to guide NGS COD bellcranks to guide Top cover links to top access door links...
-
Page 300: Adjustments
7526 Previous Adjustments Printhead alignment Next Overview When aligning the printhead, it is important to keep in mind that the printhead mounting screws should be initially loose enough to just hold the printhead in the printer. This allows the pages to be printed that will be used to Go Back align the black plane to the printer frame and also allows skew adjustment with the printhead alignment screw. - Page 301 7526 Remove the toner cartridges. Previous Loosen the printhead mounting screws (D). Next Go Back Reinstall the transfer module with the photoconductor units still attached. Reconnect the transfer module cable. Replace the toner cartridges. Close the front access door. Close the top access door. Connect the electrical cord into the printer.
- Page 302 7526 Touch Quick Test. A page similar to this one prints: Previous Next Go Back Service Manual 4-12...
- Page 303 7526 Adjust the printhead alignment screw (F) to adjust the skew and straighten the image on the printout. Previous Next Go Back If the top right alignment marks are lower than the top left alignment marks, rotate the alignment screw counterclockwise a full revolution, and print the Quick Test page. Repeat adjusting the screw and printing the Quick Test page until the top alignment marks are the same distance from the top of the media.
- Page 304 7526 Tighten the printhead mounting screws. Previous Turn off the printer. Disconnect the power cord from the electrical outlet. Disconnect the transfer module cable. Press the two tabs on either side of the transfer module, and lift out the transfer module with the photoconductor units in place.
- Page 305 7526 Registration (black) Previous Top Margin Reconnect the power cord to the electrical outlet, but do not turn on the printer yet. Enter Diagnostic mode (press and hold 3 and 6, turn on the printer, and release the buttons when the Next progress bar appears).
- Page 306 7526 Left Margin Previous Adjust the left margin until the points of the left alignment marks touch the edge of the page. Next Go Back The right arrow increases the value and moves the left side alignment marks to the right. •...
- Page 307 7526 Two pages print. You may have to print these pages several times until you get T (Top Margin) and Previous Z (Skew) aligned. Do not go to step 2 until T and Z are aligned. The first page is similar to the following: Next Go Back Repair information...
- Page 308 7526 Determine the line under Fine Adjustment that is closest. If the value is beyond the Fine Adjustment scale, Previous use either of the Coarse Adjustment scales. Next Go Back Enter the number determined from the Fine Adjustment scale or the Coarse Adjustment scales on the part of the page for the “T”...
- Page 309 7526 Repeat this process for skew (Z). Don't forget to subtract the T value and add the current cyan Z value to Previous obtain the new skew (Z) value. An example is shown below: Next Go Back Continue to follow the directions on the bottom of the first page to find the Cyan Top Margin (T), the Skew (Z), and on the second page of the Quick Test page, the Left Margin (L), Right Margin (R), and Bow (P).
-
Page 310: Printer Removal Procedures
7526 Previous Printer removal procedures Precautions to take before maintenance work Do not implement any operation, removal, or modification and so on, which is not presented in this manual. Next Turn the printer power off and unplug the power cable from the outlet prior to starting removals or checks. -
Page 311: Multifunction Printer Removals
7526 Previous Multifunction printer removals Front access cover assembly removal See Front access cover assembly for the part number for the models you need on Next page 7-3. Remove the paper tray. Disconnect the transfer module cable (A). Go Back Press the two tabs (B) to release the front access door cover assembly. - Page 312 7526 Looking down at the keyed end of the restraint (D), twist the end clockwise, slide the restraint upward Previous through the slit (E), and slip the end of the restraint through the keyed hole (F). Repeat for the other side. Next Go Back Service Manual...
- Page 313 7526 Close the front access door assembly. Previous Remove the two screws (G) that attach the pivot pin to the front access door cover assembly. Remove the bracket (H). Next Go Back Remove the front access cover assembly. Repair information 4-23...
-
Page 314: Left Cover Removal
7526 Left cover removal Previous for the part number. “Left cover” on page 7-3 Remove the left cover with the left door cover attached. Next Remove the rear cover. See “Rear cover removal” on page 4-36. Remove the waste toner assembly. See “Waste toner assembly removal”... - Page 315 7526 Remove the two screws (B). Previous Press the locking tab (C), slide the cover down. Grasp the side at the point shown, and disconnect the tab on the upper edge. Push down with your thumb on the outside while pulling up with the fingers to remove the cover. Warning: Be careful not to damage the two small locking tabs (D).
-
Page 316: Left Door Cover Removal
7526 Left door cover removal Previous Open the left door cover. Lift up to disengage the hinges. Next Go Back Remove the left door cover. Service Manual 4-26... -
Page 317: Operator Panel Assembly Removal
7526 Operator panel assembly removal Previous for the part number. “7 inch LCD touch screen” on page 7-3 Remove the top access cover assembly. See “Top access cover assembly removal” on page 4-40. Place the top access assembly on a soft lint-free cloth with the touchscreen facing down. Next Remove the six smaller screws (A) securing the position guide cover. - Page 318 7526 Flip open the lock of the LCD interface card cable connector on the UICC card then remove the cable from Previous the connector. Next Go Back Disconnect the UICC cable from the UICC card. See “UICC cable removal” on page 4-188.
- Page 319 7526 Turn the LCD interface card over then flip open the lock to disconnect the LCD ribbon cable from the LCD Previous interface card. Warning: Be careful not to bend the LCD ribbon cable to avoid damaging the resistors soldered on the cable. Next Go Back Installation note: Make sure to connect the LCD ribbon cable on the LCD interface card first before securing...
-
Page 320: Operator Panel Bezel Removal
7526 Installation note: When reinstalling the LCD back plate cover, make sure the screw holes on the metal plate Previous sits on top of the screw holes of the plastic back plate. Next Go Back Remove the operator panel touchscreen LCD. Operator panel bezel removal See Operator panel bezel on for the part number. -
Page 321: Operator Panel Buttons Removal
7526 Operator panel buttons removal Previous Remove the top access cover assembly. See “Top access cover assembly removal” on page 4-40. Place the top access assembly on a soft lint-free cloth with the touchscreen facing down. Remove the six smaller screws (A) securing the position guide cover. Next Go Back Remove the five larger screws (B) and the two smaller screws (C), then remove the position guide cover to... - Page 322 7526 Flip open the locks on the UICC cable (D) and LCD interface card cable (E) connectors, then disconnect Previous the cables from the connector. Next Go Back Remove the four screws (F) securing the UICC card, then remove the UICC card. Service Manual 4-32...
-
Page 323: Operator Panel Speaker Removal
7526 Gently pinch the small latches that secure the buttons and remove them. Previous Next Go Back Operator panel speaker removal Remove the top access cover assembly. See “Top access cover assembly removal” on page 4-40. Place the top access assembly on a soft lint-free cloth with the touchscreen facing down. Remove the six smaller screws (A) securing the position guide cover. - Page 324 7526 Remove the five larger screws (B) and the two smaller screws (C), then remove the position guide cover to Previous access the cables. Next Go Back Disconnect the speaker connector (C), then remove the three screws (D) securing the speaker. Service Manual 4-34...
-
Page 325: Output Bin Extension Cover Removal
7526 Remove the speaker bracket (E), then remove the speaker. Previous Next Go Back Output bin extension cover removal for the part number. “Output bin extension cover” on page 7-3 Lift to remove the output bin extension cover. Repair information 4-35... -
Page 326: Rear Cover Removal
7526 Rear cover removal Previous Remove the four screws (A). Next Go Back Lift up to disengage the two tabs (B). Note: If you are removing the rear cover to access another part, leave the cooling fan filter in place, and you are done. -
Page 327: Rear Frame Cover Removal
7526 Rear frame cover removal Previous for the part number. “Rear frame cover” on page 7-3 Loosen the eight screws (A). Lift the rear frame cover, and remove. Next Go Back Repair information 4-37... -
Page 328: Right Cover Removal
7526 Right cover removal Previous for the part number. “Right cover” on page 7-3 Remove the rear cover. See “Rear cover removal” on page 4-36. Open the top access cover. Next Open the front access cover. Remove the plastic screw on the front (A). Go Back Remove the two black screws on the front (B). - Page 329 7526 Remove the three screws (C). Previous Next Go Back Pull up on the rear of the right cover, and then press down at the indicated location to disengage the tab. Repair information 4-39...
-
Page 330: Top Access Cover Assembly Removal
7526 Top access cover assembly removal Previous for the part number. “Top access cover assembly” on page 7-3 Remove the operator panel bezel. See “Operator panel bezel removal” on page 4-30 Remove the right cover. See “Right cover removal” on page 4-38. - Page 331 7526 Remove the screw securing the ground cable (D) and remove the USB cable from the cable restraints (E). Previous Remove the cables through the openings (F) in the system board frame. Next Go Back Repair information 4-41...
- Page 332 7526 Remove the toroid (G) from the UICC cable, and then remove the UICC, USB, speaker, and ground cables Previous from the cable clamps (H) above the system board frame. Next Go Back Remove the cables through the frame, over the cartridge fan, through the cable clamps (I), and through the frame holes (J) towards the front of the MFP.
- Page 333 7526 Unlatch and rotate the pivots on the left and right side (M) until they are upright, then remove them. Previous Next Go Back Note: If you are removing the top access cover to access another part, leave the top access cover and the operator panel bezel attached, and you are done.
-
Page 334: Top Cover Assembly Removal
7526 Top cover assembly removal Previous Remove the top access cover. See “Top access cover assembly removal” on page 4-40. Remove the flatbed scanner. See “Flatbed scanner removal” on page 4-255. Remove the LVPS. Note: Make sure you note the routing of the cable for reinstallation. The cable should pass through the Next cable restraint (A) Go Back... - Page 335 7526 Disconnect the cables in connectors JBIN1 (B), JFDS1 (C), and JFUSER1 (D), on the system board. Previous Remove the output bin sensor cable (A) and the feed through sensor cable (B) through the side of the frame (E). Next Go Back Remove the two screws (F), and disconnect the cooling fan.
- Page 336 7526 Remove the six screws (G). Previous Next Go Back Remove the screw (H) in front. Service Manual 4-46...
- Page 337 7526 Remove the ground screw (J) on the right side, and remove the ground cable from the cable restraint (K). Previous Next Go Back Note: If you need to replace the top cover FRU, continue with the next step to remove the separate output bin extension cover FRU.
-
Page 338: Interlock Switch Cable Removal
7526 5 V interlock switch cable removal Previous for the part number. “5 V interlock switch” on page 7-7 Remove the EP drive assembly. See “Electrophotographic (EP) drive assembly removal” on page 4-78. Next Disconnect the cable in connector at JINT1 (A) on the system board. Go Back Open the front access door cover, and remove the screw (B). - Page 339 7526 Remove the cable from the two cable retainers (C). Previous Next Go Back Remove the 5 V interlock switch and bracket from the printer. Remove the screw (D), and remove the 5 V interlock switch cable from the bracket. Repair information 4-49...
-
Page 340: Interlock Switch Removal
7526 24 V interlock switch removal Previous See for the part number. Remove the LVPS. See “24 V interlock switch” on page 7-7. Disconnect the connector at JCVR1 (A) at system board. Next Go Back Remove the screw (B), and the bracket separates from the 24 V interlock switch. Service Manual 4-50... - Page 341 7526 Installation note: Observe the routing of the 24 V interlock switch cable (A). Previous Next Go Back Repair information 4-51...
-
Page 342: Bin Full Sensor Assembly Removal
7526 Bin full sensor assembly removal Previous Remove the top cover assembly. See “Top cover assembly removal” on page 4-44. Remove the cable from the openings, including the loop through the frame (A). Press up on the tab (B) to remove the flag. Next Go Back Installation notes:... -
Page 343: Cartridge Cooling Fan Removal
7526 Cartridge cooling fan removal Previous Remove the rear frame cover. See “Rear frame cover removal” on page 4-37. Disconnect JBLW1 (A). Next Go Back Remove the toroid on the cable located above the system board frame. Note: Retain the toroid to reinstall later. Remove the right cover. -
Page 344: Cartridge Motor 1/Fuser Cable Removal
7526 Remove the two screws (C). Previous Next Go Back Remove the cartridge cooling fan. Cartridge motor 1/fuser cable removal Remove the LVPS. See “Low-voltage power supply (LVPS) removal” on page 4-115. Disconnect the connectors in JCARTP1 (A) and JCARTS1 (B) on the system board. Service Manual 4-54... - Page 345 7526 Disconnect the connectors from the cartridge motor 1 (C) and the fuser motor (D). Previous Next Go Back Disconnect the camshaft cable connector (E) from the motor card and unwind the two cables. Repair information 4-55...
- Page 346 7526 Remove the cable from the six retainers (F). Previous Next Go Back Installation notes: Make sure you wrap the camshaft cable around the cartridge motor 1/fuser cable, as shown, to prevent the • cables from interfering with the motors or the motors damaging the cables. Note the routing of the cables and the cable retainers.
-
Page 347: Cartridge Motor 2/3 Cable Removal
7526 Cartridge motor 2/3 cable removal Previous Remove the LVPS. See “Low-voltage power supply (LVPS) removal” on page 4-115. Disconnect the connectors in JCARTP2 (A) and JCARTS2 (B) on the system board. Next Go Back Disconnect the connectors from the cartridge motor 2 (C) and cartridge motor 3 (D). Repair information 4-57... -
Page 348: Color On Demand Assembly Removal
7526 Remove the cable from the seven retainers (E). Previous Next Go Back Installation note: Pay attention to the routing of the cables and the cable retainers. Color on demand assembly removal Remove the print cartridges. Remove the top cover assembly. See “Top cover assembly removal”... - Page 349 7526 Remove the five screws (B). Previous Next Go Back Remove the COD assembly. Repair information 4-59...
- Page 350 7526 Installation notes: Previous Push the actuators (A) all the way down. Next Go Back Turn the printer around, and verify the actuators are in the correct location by looking inside the front of the printer. The actuators (B) should be visible in the triangular holes in the frame, as shown. Service Manual 4-60...
- Page 351 7526 Rotate the large COD gear until the stop (C) on the gear is against the housing. Previous Next Go Back Engage the gears on the left side of the COD. Repair information 4-61...
- Page 352 7526 Engage the gears (D) on the right side of the COD. Previous Replace the five screws (E). Next Go Back Verify the actuators can be seen by looking inside the printer at the triangular holes, as in step 2. Check to make sure you can rotate the large COD gear from stop to stop.
-
Page 353: Contact Springs Kit Removal
7526 Contact springs kit removal Previous for the part number. “Contact springs kit” on page 7-11 Toner cartridge contacts removal Next Remove the LVPS. See “Low-voltage power supply (LVPS) removal” on page 4-115. Remove the printhead. See “Printhead removal, installation, and adjustment” on page 4-140. - Page 354 7526 Remove the three screws (B) securing the top three bell crank links. Previous Next Go Back Remove the bell crank link (C) together with its bell crank spring (D). Service Manual 4-64...
- Page 355 7526 Installation notes: Previous When installing the bell crank link and spring back to the machine, guide the mounting hole on the bell crank link to the mounting pin on the cartridge guide (E), and guide one end of the spring onto the boss rest on the bell crank link and the other end onto the boss rest on the bell crank (F).
- Page 356 7526 Remove the lower-most bell crank spring (H) and bell crank (I). Previous Next Go Back Using a spring compression tool (J), align its opening to the rib on the cartridge guide as shown, then push and hold the spring compression tool into the cartridge contact spring. Note: Make sure to properly align the opening on the spring compression tool to the rib on the cartridge guide.
- Page 357 7526 Remove the cartridge contacts from the right side of the machine, then release the spring compression Previous tool. Note: Pay attention to the color coding of the cartridge contact cables, and the appropriate slots where each cartridge contact is installed. Next Go Back Installation notes:...
- Page 358 7526 Previous Position the spring compression tool (K) as shown below and align its opening to the rib on the cartridge guide, then push and hold the spring compression tool into the cartridge contact spring. Note: Make sure to properly align the opening on the spring compression tool to the rib on the cartridge guide.
- Page 359 7526 Charge roll contact spring removal Previous Remove the HVPS. See “High-voltage power supply (HVPS) removal” on page 4-110. Remove the charge roll contact springs (A). Be sure to push the springs under the retainers that hold them in place. Installation note: Make sure the springs are behind the retainers when installing the new springs.
- Page 360 7526 HVPS contact springs removal Previous Remove the HVPS. See “High-voltage power supply (HVPS) removal” on page 4-110. Pull out the spring that will be replaced: HVPS DB contact spring (A) • HVPS DR contact spring (B) • Next HVPS TAR contact spring (C) •...
- Page 361 7526 Torsion spring removal Previous Remove all the toner cartridges. Remove the screw (A) and the spring cap (B) of the appropriate contact spring. Next Go Back Press the lower half (C, D) of the springs, and remove the springs. Repair information 4-71...
- Page 362 7526 Installation notes: Previous • When installing, make sure the top half (E) of the spring is under the straight spring (F). This is typical for both types of springs. Also make sure the bottom half (D,G) of both springs are compressed and locked by the appropriate locking tabs (H, I).
-
Page 363: Cooling Fan Removal
7526 Cooling fan removal Previous Remove the rear frame cover. See “Rear frame cover removal” on page 4-37. Remove the rear cover. See “Rear cover removal” on page 4-36. Disconnect the cable at the connector JFAN1 (A) on the system board. Next Go Back Remove the two screws (B). -
Page 364: Cooling Fan Filter Removal
7526 Cooling fan filter removal Previous Remove the rear cover. See “Rear cover removal” on page 4-36. Turn the cover over. Squeeze the right side of the filter, and remove it from the tabs (A). Next Go Back Service Manual 4-74... -
Page 365: Duplex Reference Edge Guide Assembly Removal
7526 Duplex reference edge guide assembly removal Previous Remove the paper tray. Disconnect the transfer module cable (A). Press the two tabs (B) to release the front access door cover assembly. Press the two tabs (C) on either side of the transfer module, and lift out the transfer module. Next Note: Leave the photoconductor units on the transport belt when removing. - Page 366 7526 Looking down at the keyed end of the restraint (D), twist the end clockwise, slide the restraint upward Previous through the slit (E), and slip the end of the restraint through the keyed hole (F). Repeat for the other side. Next Go Back Close the front access door assembly.
- Page 367 7526 Remove the two screws (G) on the duplex aligner, and then remove the screw (H) securing the duplex Previous reference edge guide assembly. Next Go Back Remove the duplex reference edge guide assembly. Repair information 4-77...
-
Page 368: Electrophotographic (Ep) Drive Assembly Removal
7526 Electrophotographic (EP) drive assembly removal Previous for the part number. “EP drive assembly” on page 7-7 Remove the paper tray. Disconnect the transfer module cable (A). Next Press the two tabs (B) to release the front access door cover assembly. Press the two tabs (C) on either side of the transfer module, and lift out the transfer module. - Page 369 7526 Disconnect the cartridge 1/fuser motor cable (two connectors) (D), and remove the cables from the cable Previous retainers (E). Next Go Back Disconnect the camshaft/transport cable connector (F), and remove the cable from the cable clamp (G). Repair information 4-79...
- Page 370 7526 Unwind the camshaft/transport cable and the cartridge 1/fuser cables (H). Previous Note: Be sure to rewind the camshaft/transport cable around the other cables with about four twists to keep them from interfering with or being damaged by the motors. Next Go Back Disconnect the cartridge 2/cartridge 3 motor cable (two connectors) (J), and remove the cable from the...
- Page 371 7526 Remove the two screws (N) to remove the motor driver card assembly. Previous Next Go Back Remove the three screws (P) on the front. Repair information 4-81...
- Page 372 7526 Remove the two screws (O) on the inside. Previous Next Go Back Service Manual 4-82...
- Page 373 7526 Remove the seven screws (R) securing the EP drive. Previous Next Go Back R (First) Repair information 4-83...
- Page 374 7526 Remove the 5 V interlock switch cable from the restraint (S) on the backside of the EP drive. Previous Next Go Back Remove the EP drive. Installation notes: The EP drive assembly for the single-function printers and the multiple-function printers (MFP) are the same, except for the fuser retract link.
- Page 375 7526 Install the new fuser retract link (C), the follower cam (D), and the E-clip (E). Previous Note: Be sure to orient the follower cam so that the smaller diameter side is against the fuser retract link, and the larger diameter is next to the E-clip. Next Go Back Repair information...
- Page 376 7526 To install the EP drive: Previous Push the actuator rack all the way to the right (A). Pull the link all the way up (B). Next Go Back Note: After installing the EP drive assembly, be sure to test the link by moving it up and down. It should move freely and not rub against any motor cables.
- Page 377 7526 Fasten the 5 V interlock cable into the cable retainer (C) on the bottom of the EP drive. Previous Next Go Back Align the gear so the first gear tooth (D) of the top cover camshaft meshes with the first two gear teeth (E) after the flat area in the EP drive actuator rack, and then seat the right side of the top cover camshaft into the boss (F) on the EP drive.
- Page 378 7526 Hold the drive in place while replacing the first of the seven screws, then continue replacing the rest of the Previous screws (G). Next Go Back Service Manual 4-88...
- Page 379 7526 Replace the two screws (H) from the inside. Previous Replace the three screws (J) on front. Next Go Back Wind the camshaft cable (K) around the cartridge 1/fuser cables about four times to make sure they do not interfere with or are damaged by the fuser motor. Connect the cartridge 1/fuser motor cable (two connectors) (L), and place the cables in the cable retainers (M).
- Page 380 7526 Connect the cartridge 2/cartridge 3 motor cable (two connectors) (N), and make sure the cable is in the Previous cable clamps (O). Next Go Back Hold the motor driver card in place and reinstall the two screws (P) to secure the motor driver card. Connect the three connectors (Q), and secure the cables in the cable clamps (R).
-
Page 381: Fax Modem Removal
7526 Replace the paper tray. Previous Fax modem removal Warning: This part might contain customer confidential information. See “Data Security Notice” on page 4-1 for more details. After removing this part, return it to your next level of support so any data can be Next removed. -
Page 382: Front Door Assembly Removal
7526 Front door assembly removal Previous See the part number for the Front door assembly for the specific model you need on. Remove the front access cover assembly. See “Front access cover assembly removal” on page 4-21. Remove the LVPS. See “Low-voltage power supply (LVPS) removal”... - Page 383 7526 Open the front door assembly. Previous Unwrap and remove the cable from the left and right pulleys (C). Next Go Back Close the front door assembly, and remove the mounting screw (D) and the cap (E). Repair information 4-93...
- Page 384 7526 Open the front door assembly, slide it to the right, and remove. You need to press firmly to slide the front Previous door assembly to the right. Next Go Back Installation note: See “Front door assembly front cable (left) removal” on page 4-95 “Front door for proper installation of the cable restraints.
-
Page 385: Front Door Assembly Front Cable (Left) Removal
7526 Front door assembly front cable (left) removal Previous Remove the paper tray. Disconnect the transfer module cable (A). Press the two tabs (B) to release the front access door cover assembly. Press the two tabs (C) on either side of the transfer module, and lift out the transfer module. Next Note: Leave the photoconductor units on the transport belt when removing. - Page 386 7526 Looking down at the keyed end of the restraint (D), twist the end clockwise, slide the restraint upward Previous through the slit (E), and slip the end of the restraint through the keyed hole (F). Repeat for the other side. Next Go Back Service Manual...
- Page 387 7526 Remove the fuser. See “Fuser assembly removal” on page 4-104. Previous Push down on both of the front door locking mechanism simultaneously to close the camshaft. Next Go Back Close the front access door assembly. Release the cable spring (G) from the front door assembly. Note: In order to access the springs, make sure the top access cover is closed.
- Page 388 7526 Remove the end of the cable (H) from the frame. Previous Next Go Back Installation notes: The longer cable installs on the left side of the printer. • Service Manual 4-98...
- Page 389 7526 Push down on the lever to raise front door locking mechanism and open the camshaft. • Previous Next Go Back Repair information 4-99...
-
Page 390: Front Door Assembly Front Cable (Right) Removal
7526 Front door assembly front cable (right) removal Previous Remove the paper tray. Disconnect the transfer module cable (A). Press the two tabs (B) to release the front access door cover assembly. Press the two tabs (C) on either side of the transfer module, and lift out the transfer module. Next Note: Leave the photoconductor units on the transport belt when removing. - Page 391 7526 Looking down at the keyed end of the restraint (D), twist the end clockwise, slide the restraint upward Previous through the slit (E), and slip the end of the restraint through the keyed hole (F). Repeat for the other side. Next Go Back Repair information...
- Page 392 7526 Close the front access door assembly. Previous Release the spring (G) from the front door assembly. Note: In order to access the springs, make sure the top access cover is closed. Next Go Back Remove the end of the cable (H) from the frame. Remove the right restraint cable.
- Page 393 7526 Installation notes: Previous The shorter restraint cable installs on the right side of the printer. Next Go Back Repair information 4-103...
-
Page 394: Fuser Assembly Removal
7526 Fuser assembly removal Previous V”, or for the “Fuser assembly, 115 V”, “Fuser assembly, 230 “Fuser assembly, 100 V” on page 7-5 part number. CAUTION—HOT SURFACE: Next The inside of the printer might be hot. To reduce the risk of injury from a hot component, allow the surface to cool before touching. -
Page 395: Fuser Ac Cable Removal
7526 Fuser AC cable removal Previous Note: The LVPS to fuser AC cable is black. Remove the top cover assembly. See “Top cover assembly removal” on page 4-44. Turn the top cover assembly over. Next Slide the connector down, and remove the connector from the keyed hole (A). Go Back Repair information 4-105... - Page 396 7526 Remove the cable from the cable openings (B). Previous Note: Observe the routing of the cable for reinstallation. Next Go Back Remove the cable from the cable restraint (C) on the right side, and remove the cable. Service Manual 4-106...
-
Page 397: Fuser Dc Cable Removal
7526 Fuser DC cable removal Previous Note: The fuser to system board autoconnect cable is red. Remove the top cover assembly. See “Top cover assembly removal” on page 4-44. Turn the top cover assembly over. Next Remove the connector (A) from the top cover assembly. Warning: You will damage the old connector in the process. -
Page 398: Hard Drive Assembly Removal
7526 Hard drive assembly removal Previous Warning: This part might contain customer confidential information. See “Data Security Notice” on page 4-1 for more details. After removing this part, return it to your next level of support so any data can be removed. - Page 399 7526 Open the left cover door, and remove the two screws (B). Previous Next Go Back Pull the hard disk straight out to pop the hard disk standoffs free of the system board. Repair information 4-109...
-
Page 400: High-Voltage Power Supply (Hvps) Removal
7526 High-voltage power supply (HVPS) removal Previous for the part number. “High-voltage power supply” on page 7-11 Remove the left cover. See “Left cover removal” on page 4-24. Remove the six mounting screws (A). Next Go Back Release the locking tab (B) from the front, lower corner of the HVPS. Service Manual 4-110... - Page 401 7526 Disconnect the five connectors (C) from the HVPS. Previous Next Go Back Repair information 4-111...
-
Page 402: High-Voltage Power Supply (Hvps) Cable Removal
7526 Installation notes: Previous • Make sure to replace the spring when replacing the HVPS. There are two types of spring forces on the cartridge contacts. Make sure to put the springs in their • appropriate slots and in the proper orientation as shown below. Next Go Back High-voltage power supply (HVPS) cable removal... - Page 403 7526 Disconnect the cable connector (C) from the back of the HVPS. Previous Remove the cable from the two cable restraints (D). Next Go Back Repair information 4-113...
-
Page 404: Left Bellcrank Assembly Removal
7526 Left bellcrank assembly removal Previous for the part number. “Left bellcrank assembly, with spring” on page 7-5 Remove the left cover. See “Left cover removal” on page 4-24. Remove the C-clip (A). Next Go Back Remove the left bellcrank assembly. Service Manual 4-114... -
Page 405: Low-Voltage Power Supply (Lvps) Removal
7526 Low-voltage power supply (LVPS) removal Previous for the part number. “Low-voltage power supply” on page 7-7 Remove the right cover. See “Right cover removal” on page 4-38. Remove the rear frame cover. See “Rear frame cover removal” on page 4-37. - Page 406 7526 Installation notes: Previous • When installing the new LVPS, make sure the voltage switch (A) is set for the proper value (115 V or 230 V), depending on the country. Next Go Back Install the LVPS, and make sure the fuser AC cable is in the cable guides, and not behind the LVPS. •...
-
Page 407: Motor Driver Cable Removal
7526 Motor driver cable removal Previous Remove the LVPS. See “Low-voltage power supply (LVPS) removal” on page 4-115. Disconnect the connector in JDVR1 (A) on the system board. Next Go Back Disconnect the connector on the motor driver card (B). Remove the cable from the cable from the four cable retainers (C). -
Page 408: Motor Driver Card Removal
7526 Motor driver card removal Previous Remove the right cover. See “Right cover removal” on page 4-38. Disconnect the three cables (A). Remove the two screws (B), and remove the motor driver card. Next Go Back Service Manual 4-118... -
Page 409: Multipurpose Feeder (Mpf)/Duplex Gear And Housing Removal
7526 Multipurpose feeder (MPF)/duplex gear and housing removal Previous Remove the paper pick mechanism assembly. See “Paper pick mechanism assembly removal” on page 4-130. Remove the two E-clips (A) from the gears. Next Go Back Remove the three screws (B). Slide the front gear (C) off. - Page 410 7526 Slide a flathead screwdriver up and under the front cover. Previous Slide the remaining two gears and housings off. Next Go Back Service Manual 4-120...
-
Page 411: Multipurpose Feeder (Mpf)/Duplex Motor Assembly Removal
7526 Multipurpose feeder (MPF)/duplex motor assembly removal Previous for the part number. “MP feeder/duplex motor” on page 7-7 Remove the low-voltage power supply (LVPS). See “Low-voltage power supply (LVPS) removal” on page 4-115. Next Remove the multipurpose feeder/duplex gear and housing. See “Multipurpose feeder (MPF)/duplex gear and housing removal”... - Page 412 7526 Slide the motor out of the housing. Previous Disconnect the connector (D) from the motor. Next Go Back Installation notes: Connect the cable (A) at the motor. Slide the cable tie (B) onto the motor. Service Manual 4-122...
- Page 413 7526 Insert the motor into the frame. Previous Next Go Back Replace the screws (C). Repair information 4-123...
- Page 414 7526 Slide the housing onto the motor, making sure the four tabs of the housing slide under the cable tie. Previous Next Go Back Replace the multipurpose feeder/duplex gear and housing assembly. Service Manual 4-124...
-
Page 415: Multipurpose Feeder (Mpf)/Duplex Motor Cable Removal
7526 Multipurpose feeder (MPF)/duplex motor cable removal Previous Remove the multipurpose feeder/duplex motor. See “Multipurpose feeder (MPF)/duplex motor cable removal” on page 4-125. Disconnect the connector from JDX1 (A) on the system board. Next Go Back Remove the cable from the cable retainers (B). Repair information 4-125... -
Page 416: Multipurpose Feeder (Mpf) Paper Present Sensor
7526 Multipurpose feeder (MPF) paper present sensor Previous Remove the right cover. See “Right cover removal” on page 4-38. Remove the standard 550-sheet input tray. Remove the rear frame cover. See “Rear frame cover removal” on page 4-37. Remove the Low-voltage power supply (LVPS). See “Low-voltage power supply (LVPS) removal”... - Page 417 7526 Remove the JMPFPP1 connector (B) from the system board, then remove the cable. Previous Installation note: Pay attention to the routing of the cable. Next Go Back Remove the MPF paper sensor bracket from the machine. Repair information 4-127...
-
Page 418: Option Cable Removal
7526 Pry the sensor off the bracket, then disconnect the sensor (C) from the cable (D). Previous Next Go Back Remove the cable from the bracket. Installation note: Pay attention to the routing of the cable. Option cable removal Remove the LVPS. See “Low-voltage power supply (LVPS) removal”... - Page 419 7526 Position the printer on its back. Previous Remove the two screws (B). Next Go Back Press the tabs together to remove the option cable connector. Note: Be sure to note the cable routing for reinstallation. Repair information 4-129...
-
Page 420: Paper Pick Mechanism Assembly Removal
7526 Paper pick mechanism assembly removal Previous for the part number. “Paper pick assembly” on page 7-5 Remove the paper tray. Remove the waste toner assembly. See “Waste toner assembly removal”. Next Remove the rear frame cover. See “Rear frame cover removal” on page 4-37. - Page 421 7526 Open the front access cover. Previous Disconnect the transfer module cable (D). Press the two tabs (E) to release the front access cover assembly. Press the two tabs (F) on either side of the transfer module, and lift out the transfer module. Note: Leave the photoconductor units on the transport belt when removing.
- Page 422 7526 Remove the four screws (G) from the bottom pan. Previous Next Go Back With one hand, disengage the gear (H), then grasp the paper pick assembly, and pull forward and downward to disengage the assembly until the front (J) and rear locking tabs release (not visible). Service Manual 4-132...
- Page 423 7526 Lower the paper pick mechanism, and remove through the front of the printer. Previous Note: Make sure the JTRAY1 and JTRAY2 connectors do not bind when passing through the frame access hole. Next Go Back Installation notes: Remove the waste toner assembly. See “Waste toner assembly removal”...
- Page 424 7526 Tape the ADF (scanner) cover to the flatbed scanner. Previous Next Go Back Turn the printer on its back. Slide the paper pick assembly toward the back of the printer, and down to engage the tabs (A). Slide the tabs (A), and engage the gear (B). Reach into the printer, and replace the front right screw (C) to secure the paper pick assembly.
- Page 425 7526 Secure the remaining three screws (D). Previous Next Go Back Remove the rear frame cover. Route the cables through the hole in the frame, and connect them to JFDPCK1 (E) and JTRAY1 (F). Repair information 4-135...
- Page 426 7526 Reattach the toroids (G) to the cables. Previous Next Go Back Replace the rear frame cover. Replace the waste toner assembly. Replace the toner cartridges. Replace the transfer module with the photoconductor units. Close the front access cover. Replace the paper tray. Open the ADF (scanner) cover and slide the scanner lock to the open position.
-
Page 427: Photoconductor Unit Removal
7526 Photoconductor unit removal Previous Note: This is not a FRU. Warning: To avoid damaging the photoconductor drum, hold the photoconductor units by their handle and place the photoconductor units on a clean surface. See “Handing the photoconductor unit” on for additional information. -
Page 428: Pick Tires Removal And Replacement
7526 Pick tires removal and replacement Previous See for the part number. The autocompensator pick roll tires are located in the base printer. There are also tires in all input options. If you have additional input options, and you are having problems with media picking, replace these tires also. Always Next replace the pick tires in pairs. -
Page 429: Printer Pad Removal
7526 Installation notes: Install the new rubber tires with the surface texture turning in the direction as shown. Previous Note: Feel the rubber surface to verify it turns properly in the direction shown. Next Go Back Printer pad removal Slide the corner of the printer containing the damaged pad over the corner of the table. Remove the side cover that corresponds to the damaged pad so you can see if the pad fully seats in the installation holes. -
Page 430: Printhead Removal, Installation, And Adjustment
7526 Printhead removal, installation, and adjustment Previous for the part number. “Printhead assembly” on page 7-9 Service tip—Testing the new printhead Next for quick way to verify that the NVRAM on a printhead is good “Printhead verification” on page 3-52 before you install the printhead. - Page 431 7526 Remove all of the toner cartridges. Previous Remove the four screws (D). Next Go Back Lift the rear cover and remove it. Remove the rear frame cover. Loosen the eight screws (E). Lift the rear frame cover, and remove. Remove the right cover.
- Page 432 7526 Remove the printhead. Previous Remove the printhead mounting screws (F). Next Go Back While holding the printhead in place, loosen the printhead alignment screw (G) until the printhead comes out easily. Warning: Secure the printhead when loosening the printhead alignment screw. Failure to do this allows the printhead to fall out of the printer, potentially damaging the printhead.
- Page 433 7526 Install the printhead and replace parts Previous Warning: When reinstalling the printhead, it is important to keep in mind that the printhead mounting screws • should be initially tightened just enough to hold the printhead in the printer. The printer parts are installed with the printhead mounting screws loose so you can print the pages that will be used to Next align the black plane to the printer frame.
- Page 434 7526 Lightly tighten the alignment screw (C). Previous Next Go Back Feed the ground cable through the hole in bottom left side of the frame. Replace the system board support shield. Loosely attache the two mounting screws (D2). Set the system board shield in place. Note: Check that the ribbon cables do not rub against the edges of the frame.
- Page 435 7526 Replace the system board. Previous Place the system board in position. Note: Check that the mirror motor cable, printhead, and UICC cables do not rub against the edges of the frame. Replace the nine screws (E) in the system board in the following order: Loosely attach the four corners (E1) in a clockwise order, beginning with the left top center.
- Page 436 7526 Replace the ground strap (F) on the screw (G), and tighten the screw. Previous Replace the two screws (H) for the hard disk shield. Next Go Back Reconnect all the connectors to the system board. Use the diagram below for a guideline. Warning: Be careful reconnecting the printhead ribbon cable (J) and the UICC cable (K).
- Page 437 7526 Replace the fax modem card and/or the hard disk, if appropriate. Previous Replace the LVPS. Install the LVPS. Replace the five LVPS mounting screws. Reconnect the AC LVPS cable to the LVPS. Reconnect the AC power cable to the LVPS. Next Reconnect the AC LVPS cable to the JLVPS1 connector on the system board.
- Page 438 7526 Skew (black) Previous Connect the electrical cord into the printer. Connect the electrical cord into the outlet. Set the skew for black. Open the top access cover. Next Open the front access cover. Enter Diagnostic mode (turn off the printer, press and hold 3 and 6, turn on the printer, and release the buttons when the progress bar appears).
- Page 439 7526 Adjust the printhead alignment screw (A) to adjust the skew and straighten the image on the printout. Previous Next Go Back If the top right alignment marks are lower than the top left alignment marks, rotate the alignment screw counterclockwise a full revolution, and print the Quick Test page. Repeat adjusting the screw and printing the Quick Test page until the top alignment marks are the same distance from the top of the media.
- Page 440 7526 Disconnect the transfer module cable. Previous Press the two tabs on either side of the transfer module, and lift out the transfer module with the photoconductor units in place. Remove all of the toner cartridges. Tighten the printhead mounting screws in the following order: G1, G2, and G3. Next Go Back Replace the toner cartridges.
- Page 441 7526 Registration (black) Previous Top Margin Reconnect the power cord to the electrical outlet, but do not turn on the printer yet. Enter Diagnostic mode (press and hold 3 and 6, turn on the printer, and release the buttons when the Next progress bar appears).
- Page 442 7526 Left Margin Previous Adjust the left margin until the points of the left alignment marks touch the edge of the page. Next Go Back The right arrow increases the value and moves the left side alignment marks to the right. •...
- Page 443 7526 Two pages print. You may have to print these pages several times until you get T (Top Margin) and Previous Z (Skew) aligned. Do not go to step 2 until T and Z are aligned. The first page is similar to the following: Next Go Back Repair information...
- Page 444 7526 Determine the line under Fine Adjustment that is closest. If the value is beyond the Fine Adjustment scale, Previous use either of the Coarse Adjustment scales. Next Go Back Enter the number determined from the Fine Adjustment scale or the Coarse Adjustment scales on the part of the page for the “T”...
- Page 445 7526 Repeat this process for skew (Z). Don't forget to subtract the T value and add the current cyan Z value to Previous obtain the new skew (Z) value. An example is shown below: Next Go Back Continue to follow the directions on the bottom of the first page to find the Cyan Top Margin (T), the Skew (Z), and on the second page of the Quick Test page, the Left Margin (L), Right Margin (R), and Bow (P).
-
Page 446: Right Bellcrank Assembly Removal
7526 Right bellcrank assembly removal Previous for the part number. “Right bellcrank assembly, with spring” on page 7-5 Remove the right cover. See “Right cover removal” on page 4-38. Remove the C-clip (A). Next Go Back Remove the right bellcrank assembly. Service Manual 4-156... -
Page 447: System Board Removal
7526 System board removal Previous See the system board part number for the model you need on page 7-9. CAUTION Next This product contains a lithium battery. THERE IS A RISK OF EXPLOSION IF THE BATTERY IS REPLACED BY AN INCORRECT TYPE. Discard used batteries according to the battery manufacturer’s instructions and local regulations. - Page 448 7526 Ground screw (1 screw) • Previous Next Go Back Disconnect all the cables from the system board. Service Manual 4-158...
- Page 449 7526 Warning: Do not use tools to remove the UICC cable (B) or the printhead ribbon cable (C). Flat ribbon Previous cables can be damaged and should be removed gently by hand. When installing, carefully line up the cable, and press straight into the connector. Next Go Back Remove the nine screws (D) from the system board.
- Page 450 7526 Installation notes: Previous Place the system board in position. Note: Check that the mirror motor cable and the printhead cable do not rub against the edges of the frame. Replace the nine screws (A) in the system board in the following order: Next Loosely attach the four corners (A1) in a clockwise order, beginning with the left top corner.
- Page 451 7526 Replace all the screws (B) from the left side of the printer, including: Previous • Ethernet port connector (1 screws) Modem shield (1 screws) • • Hard disk shield (2 screws) Ground screw (1 screw) • Note: Be sure to attach the ground wire (C) to the ground screw. Next Go Back Repair information...
- Page 452 7526 Reconnect all the connectors to the system board. Use the diagram below for a guideline. Previous Warning: Be careful reconnecting the printhead ribbon cable (D) and the MDC cable (E). Ribbon cables can be damaged easily and should be handled carefully. Next Go Back Install the toroids, hard disk, modem, and wireless network card, if appropriate.
-
Page 453: System Board Support Shield Removal
7526 System board support shield removal Previous for the part number. “System board support shield” on page 7-9 Remove the system board. See “System board removal” on page 4-157. Remove the right cover. See “Right cover removal” on page 4-38. Next Pull the cables through the access holes on the right side of the printer. - Page 454 7526 Remove the five mounting screws (D) from the top and bottom of the support shield. Previous Note: Only the ribbon and mirror motor cables come through the access holes in the system board support shield. Next Go Back Lower and remove the support shield. Note: Be careful not to damage the ribbon cables that route through the top and bottom frame of the printer.
- Page 455 7526 Installation notes: Previous Loosely attach the two mounting screws (A). Set the system board shield in place. Note: Check that the ribbon cables do not rub against the edges of the frame. Replace the remaining system board shield screws in the following order: Next Replace the five screws (B) from the inner right side of the support shield.
-
Page 456: Toner Level Sensor Removal
7526 Toner level sensor removal Previous for the part number. “Toner level sensor” on page 7-11 Note the locations of the toner sensors. Next Go Back Service Manual 4-166... - Page 457 7526 Remove the HVPS. See “High-voltage power supply (HVPS) cable removal” on page 4-112. Previous For the upper two sensors: These sensors are more difficult to reach because the toner is difficult to reach: It is difficult to press both locking tabs at the same time. Using a spring hook, press the locking tab (A), and disengage the sensor on that side.
-
Page 458: Top Access Cover Links Removal
7526 Top access cover links removal Previous Links come two in a package and fit either the right or the left. Lower links Next Open the top access cover. Remove the side cover that corresponds to the link you need to replace. For example, if you are replacing the right lower link, remove the right cover. -
Page 459: Top Access Cover Sensor Removal
7526 Top access cover sensor removal Previous This cable is gray. Remove the rear frame cover. See “Rear frame cover removal” on page 4-37 Disconnect the cable in connector JFDS1, and remove the cable through the top left frame. Next Go Back Remove the right cover. - Page 460 7526 Installation notes: Previous Turn over the top access cover. Snap the sensor into place. Note: Make sure the sensor is replaced with the slot (A) in the center aligned with the gap in the top cover frame. Also note the placement of the cable connector. Next Route the cable through the opening (B), and through the openings in the other side of the top cover assembly.
-
Page 461: Top Access Cover Springs Removal
7526 Top access cover springs removal Previous If the cover will not open Lift the top access cover as far as you can, slip the spring hook into the opening between the top access cover and the side cover, hook the link, and pull on the link to open the top access cover. Next Go Back Replacing the right spring... - Page 462 7526 Pull the pivot upward to unlatch it from the frame then slide the pivot out of the frame and outer top access Previous cover holes. Note: Do not remove the pivot from the inner hole. Next Go Back Slide out and remove the spring out of the pivot. Insert the new spring in place to hook onto the pivot, and push the pivot back into the outer top access cover holes to secure the spring.
- Page 463 7526 Attach the other end of the spring onto the link. Previous Note: Depending on the orientation of the spring, the spring will attach from either the inside or outside. Next Go Back Replacing the left spring Open the top access cover. With a spring hook, detach the spring from the left link.
- Page 464 7526 Place the new spring in place to hook onto the pivot, and push the pivot back into the outer top access Previous cover holes to secure the spring. Next Go Back Push the pivot back into the slot to lock it in place. Attach the other end of the spring to the top access cover link.
-
Page 465: Top Cover Camshaft Assembly Removal
7526 Top cover camshaft assembly removal Previous for the part number. “Top cover camshaft assembly” on page 7-12 Remove the top access cover. See “Top access cover assembly removal” on page 4-40. Remove the fuser. See “Fuser assembly removal” on page 4-104. - Page 466 7526 Rotate the camshaft up using the camshaft actuator handle (D) so you can access the other two Previous screws (E), and remove them. Next Go Back Flex the EP drive assembly to remove the right side of the camshaft from the boss (F) and lift to remove the camshaft.
- Page 467 7526 Installation notes: Previous On the left side, align the mark on the idler gear (A) with the mark on the camshaft gear (B), and slide the camshaft into place, meshing the gears on the left side. Next Go Back Repair information 4-177...
- Page 468 7526 Rotate the camshaft up using the camshaft actuator handle (C), and make sure the gears on the right side Previous mesh so the first gear tooth of the camshaft aligns with the first two gear teeth of the EP drive actuator rack (D).
- Page 469 7526 Rotate the camshaft using the camshaft actuator handle, and replace the two screws (H). Previous Next Go Back Replace the screw in the EP drive that allowed you to flex the EP drive, and tighten the other screw (see step 4 of the removal).
-
Page 470: Transfer Module Removal
7526 Transfer module removal Previous for the part number. “Transfer module” on page 7-5 Open the top access cover. Open the front access door. Next Disconnect the transfer module cable (A). Press the two tabs (B) to release the front access cover assembly. Press the two tabs (C) on either side of the transfer module, and lift out the transfer module. - Page 471 7526 Remove the photoconductor units. Lift the right end handle (D) of the photoconductor unit, releasing from Previous the mount. Lift the unit up and away from the left side of printer, ensuring the left end of the photoconductor is released from the holding pin (E).
-
Page 472: Transport Cable Removal
7526 Transport cable removal Previous Remove the LVPS. See “Low-voltage power supply (LVPS) removal” on page 4-115. Disconnect the transfer module cable (transport cable) (A). Press the two tabs (B) to release the front access cover assembly. Press the two tabs (C) on either side of the transfer module, and lift out the transfer module. Next Note: Leave the photoconductor units on the transport belt when removing. - Page 473 7526 Disconnect the transport cable from the system board at JTPS1 connector (D). Previous Note: The cable connector on the system board end of the cable is smaller than the connector on the front access door, and it may be easier to get that end through the openings. Next Go Back Extract the cable through the opening in the frame to the right side of the printer (E).
- Page 474 7526 Remove the six screws (H) from the cable shield. Previous Next Go Back Remove the cable through the cable channel (J). Service Manual 4-184...
-
Page 475: Transport Motor Cable Removal
7526 Transport motor cable removal Previous Remove the right cover. See “Right cover removal” on page 4-38. Disconnect the cable from the transport motor drive (A). Disconnect the cable from the transport motor (B). Next Go Back Remove the cable. Repair information 4-185... -
Page 476: Uicc Card Removal
7526 UICC card removal Previous Warning: This part might contain customer confidential information. See “Data Security Notice” on page 4-1 for more details. After removing this part, return it to your next level of support so any data can be removed. - Page 477 7526 Flip open the lock on the UICC cable (D) and LCD interface card cable (E) connectors, then disconnect the Previous cables from the connector. Next Go Back Remove the four screws (F) securing the UICC card. Remove the UICC card. Repair information 4-187...
-
Page 478: Uicc Cable Removal
7526 UICC cable removal Previous Remove the top access cover assembly. See “Top access cover assembly removal” on page 4-40. Place the top access assembly on a soft lint-free cloth with the touchscreen facing down. Remove the six smaller screws (A) securing the position guide cover. Next Go Back Remove the five larger screws (B) and the two smaller screws on the side (C), then remove the position... -
Page 479: Usb Connector Cable Removal (Front Panel)
7526 Flip open the lock on the UICC cable, then disconnect the cable from the connector. Previous Next Go Back Remove the UICC cable. Installation note: Pay attention to the routing of the UICC cable. and make sure it is properly connected to the UICC connector. - Page 480 7526 Remove the five larger screws (B) and the two smaller screws on the side (C), then remove the position Previous guide cover to access the cables. Next Go Back Disconnect the USB ground cable (D) and remove the screw (E) securing the USB connector. Note: Pay attention to the routing of the ground cable Remove the USB connector cable with the ground cable Service Manual...
-
Page 481: Waste Toner Assembly Removal
7526 Waste toner assembly removal Previous Note: This is not a FRU. Press the waste toner release latch (A). Swing the front of the waste toner assembly away from the printer and remove. Next Go Back Repair information 4-191... -
Page 482: Waste Toner Hv Contact Assembly Removal
7526 Waste toner HV contact assembly removal Previous Disconnect the transfer module cable (A). Press the two tabs (B) to release the front access cover assembly. Press the two tabs (C) on either side of the transfer module, and lift out the transfer module. Note: Leave the photoconductor units on the transport belt when removing. - Page 483 7526 Remove the six mounting screws (D) holding the HVPS in place. Previous Next Go Back Release the locking tab (E) from the front, lower corner of the HVPS. Repair information 4-193...
- Page 484 7526 Lay the board to the left. Previous Next Go Back Disconnect the three top toner level sensor cables (F) from the HVPS. Service Manual 4-194...
- Page 485 7526 Remove the two screws (G). Previous Next Go Back G (18B1236) Repair information 4-195...
- Page 486 7526 Remove the cleaner shutter actuator (H) from the waste toner HV contact assembly. Previous Next Go Back Service Manual 4-196...
- Page 487 7526 Remove the four screws (J), the two screws (K), and the screw (L). Tilt the Waste toner HV contact Previous assembly forward and up to remove it. Next Go Back L (27S2838) J (18B0832) K (88A0313) Repair information 4-197...
- Page 488 7526 Installation note: Do the following procedures when re-installing the waste tone HV contact assembly: Previous Remove the fuser. Remove all four toner cartridges Remove the four sets of torsion springs. Remove the screw (A) and the spring cap (B) of the appropriate contact spring.
- Page 489 7526 Install the waste toner HV contact assembly into place. Route the toner level sensor cables (E) through the Previous holes in the waste toner HV contact assembly while positioning the assembly. Make sure the aligner shaft worm gear is aligned as shown. Ribs aligned Next Go Back...
- Page 490 7526 Install the seven screws in the order shown below. Previous Next Go Back Install 3 27S2838 Install 4 Install 1 Install 2 (18B0832) (18B0832) (88A0313) Service Manual 4-200...
- Page 491 7526 Use two screws (F) to attach the cleaner shutter actuator to the Waste toner HV contact assembly. Make Previous sure the gear aligns as shown. Ribs aligned Next Go Back F (27S2838) Repair information 4-201...
- Page 492 7526 Attach the eight springs (G) to the Waste toner HV contact assembly as shown. Make sure the springs are Previous behind the retainers. Retainer Next Go Back Service Manual 4-202...
- Page 493 7526 Install the contact springs. When installing each contact spring, make sure the top half (H) of the spring is Previous under the straight spring (J). This is typical for both types of springs. Also make sure that the bottom half (K,L) of both springs are compressed and locked by the appropriate locking tabs (M,N).
- Page 494 7526 Connect the three top toner level sensor cables to the HVPS, making sure the cables (O) are attached Previous properly to the retainers (P). Next Go Back Reassemble the rest of the printer. Service Manual 4-204...
-
Page 495: Wireless Network Antenna Removal
7526 Wireless network antenna removal Previous Remove the wireless network card. see “Wireless network card removal” on page 4-206. Disconnect the wireless network antenna cable (A) from the wireless network card. Next Go Back With pliers, squeeze the inner tabs (B), and pull the antenna out. Pull the cable through, and remove the antenna with the cable. -
Page 496: Wireless Network Card Removal
7526 Wireless network card removal Previous Remove the rear frame cover. See “Rear frame cover removal” on page 4-37. Squeeze the connector (A) to disconnect the wireless cable from the system board at J5. Next Go Back Open the left door cover. Remove the two screws (B) that secure the card into place. - Page 497 7526 Pop the posts (C) on the card from the sockets (holes) in the system board. Previous Next Go Back Note: If you are removing the wireless network card to access another part, leave the antenna attached to the card, and you are done. If you need to replace the wireless network card FRU, continue with the next step to remove the separate wireless network antenna FRU.
-
Page 498: Scanner Flatbed And Automatic Document Feeder (Adf)
7526 Previous Scanner flatbed and automatic document feeder (ADF) ADF front cover removal Open the ADF front cover. Next Remove the two screws (A). Go Back Close the ADF front cover. Separate the cover from the ADF case assembly by pressing on the release and cover. Service Manual 4-208... - Page 499 7526 Lift the cover from the ADF. Previous Next Go Back Repair information 4-209...
-
Page 500: Adf Front Side Cover Removal
7526 ADF front side cover removal Previous Remove the input tray. See “Input tray removal” on page 4-222. Open the ADF front cover. Remove the screw (A). Next Go Back Lift the cover to remove. Service Manual 4-210... -
Page 501: Adf Handle Cover Removal
7526 Installation notes: Insert the tab into the slot, and lower it into place. Previous Next Go Back ADF handle cover removal Open the ADF. Remove the two screws (A) in the handle cover. Remove the handle cover. Repair information 4-211... -
Page 502: Adf Motor Side Cover Removal
7526 ADF motor side cover removal Previous Remove the input tray. See “Input tray removal” on page 4-222. Remove the ADF front cover. See “ADF front cover removal” on page 4-208. Open the ADF case assembly. Remove the two screws (A). Next Go Back Service Manual... - Page 503 7526 Lift the ADF motor side cover, and disconnect the tray connector (B). Previous Next Go Back Note: If you are removing the ADF motor side cover to access another part, leave the cable attached, and you are done. If you need to replace the ADF motor side cover FRU, continue with the next step to remove the separate left door cover FRU.
- Page 504 7526 Remove the screw (D) to remove the cable from the ADF motor side cover. Previous Next Go Back Installation notes: • Install the cable from the old FRU in the new FRU. Be sure to route the cable through the hole. The smaller connector goes through the hole. •...
-
Page 505: Adf Upper Case Cover Removal
7526 ADF upper case cover removal Previous Open the ADF cover. Remove the two screws (A). Next Go Back Repair information 4-215... - Page 506 7526 Lift the ADF upper case cover up to access the ground screw, and remove the ground screw (B). Previous Next Go Back Note: If you are removing the ADF upper case cover to access another part, leave the cable attached, and you are done.
-
Page 507: Flatbed Cave Led Card And Cover Removal
7526 Flatbed cave LED card and cover removal Previous The flatbed cave LED card and the flatbed cave LED cover are separate FRUs. The removal for each is the same. Remove the screw (A). Next Go Back Pull the assembly down. Disconnect the cable (B). - Page 508 7526 Pinch each of the two clear posts (C), separate the flatbed cave LED cover from the flatbed cave LED Previous card. Next Go Back Separate the FRU you need to replace. Service Manual 4-218...
-
Page 509: Flatbed With Glass Cover Removal
7526 Flatbed with glass cover removal Previous Remove the ADF. See “ADF removal (entire)” on page 4-228. Disconnect the two cables (A). Next Go Back Remove the scanner left cover. See “Scanner left cover removal” on page 4-224. Remove the scanner right cover. See “Scanner right cover removal”... - Page 510 7526 Remove the four screws (C) from the right and left sides. Previous Next Go Back Remove the two screws (D) from the top. Service Manual 4-220...
- Page 511 7526 Lift up and extract the two cables (E) through the frame. Previous Next Go Back Remove the flatbed with glass cover. Repair information 4-221...
-
Page 512: Input Tray Removal
7526 Input tray removal Previous Lift the input tray. Remove the screw (A) securing the cable cover. Next Go Back Disconnect the cable connector (B). Lift the left front side, and ease the rear right edge out. Service Manual 4-222... -
Page 513: Scanner Front Cover Removal
7526 Disengage the cable from the channel, and remove the tray. Previous Note: Observe the routing for re-installation. Next Go Back Scanner front cover removal Open the ADF. Grasp the front cover and the top right, and pull to remove the scanner front cover. Repair information 4-223... -
Page 514: Scanner Left Cover Removal
7526 Scanner left cover removal Previous Remove the scanner front cover. See “Scanner front cover removal” on page 4-223. Remove the left cover. See “Left cover removal” on page 4-24. Remove the three screws (A). Next Go Back Pull the bottom out, and slide it toward the front. Lift the left cover away. -
Page 515: Scanner Rear Cover Removal
7526 Scanner rear cover removal Previous Remove the six screws (A). Next Go Back Remove the scanner rear cover. Note: Make sure the flatbed filter does not get lost. Repair information 4-225... -
Page 516: Scanner Right Cover Removal
7526 Scanner right cover removal Previous Remove the scanner front cover. See “Scanner front cover removal” on page 4-223. Remove the right cover. See “Right cover removal” on page 4-38. Remove the screw (A). Next Go Back Slide the cover toward the front of the multifunction printer. Service Manual 4-226... - Page 517 7526 Grasp the cover on the lower right, and pull up. Previous Next Go Back Repair information 4-227...
-
Page 518: Adf Removal (Entire)
7526 ADF removal (entire) Previous Remove the left cover. See “Left cover removal” on page 4-24. Remove the ground screw (A) secured to the MDC card. Disconnect the cable (B). Next Go Back Remove the scanner rear cover. See “Scanner rear cover removal” on page 4-225 Service Manual 4-228... - Page 519 7526 Remove the screw (C) that secures the ground cable. Previous Remove the cable from the cable restraint (D). Next Go Back LIft the ADF until it has resistance, press the release tabs (D), and complete removing the ADF. Note: It may be easier to release the tab closest to the left side first. Repair information 4-229...
-
Page 520: Adf Case Assembly Removal
7526 Installation note: Make sure to attach the ground cable to the screw (see step 5 from previous page). Previous Warning: Whenever you replace the ADF (entire), the flatbed scanner, or the MDC card, perform the “Scanner in Configuration menu. Manual Registration”... - Page 521 7526 Rotate the ADF case assembly until the flattened shaft ends come out of the opening. Previous Next Go Back Remove the sensor cable from the narrow retainer by untwisting the cable wires and easing them out individually. Remove the ADF case assembly. Repair information 4-231...
-
Page 522: Adf Skew Sensor Card Removal
7526 ADF skew sensor card removal Previous Remove the ADF front cover. See “ADF front cover removal” on page 4-208. Disconnect all cables, and remove the screw (B) from the skew sensor card (A). Next Go Back Remove the skew sensor card. Service Manual 4-232... -
Page 523: Adf Closed Cover Flag Removal
7526 ADF closed cover flag removal Previous Remove the ADF front cover. See “ADF front cover removal” on page 4-208. Remove the screw (A). Lift the sensor (B) out of the way. Next Go Back Remove the closed cover flag (C). Repair information 4-233... -
Page 524: Adf Exit Sensor (With Cable) Removal
7526 ADF exit sensor (with cable) removal Previous Remove the ADF motor side cover. See “ADF motor side cover removal” on page 4-212. Disconnect the output sensor cable. Next Go Back Push the cable and connector through the opening (B) in the ADF frame. Service Manual 4-234... -
Page 525: Adf Hinge (Left And Right) Removal
7526 Remove the ADF pressure plate cover. See “ADF pressure plate cover removal” on page 4-244 Previous Use a flat-blade screwdriver to open the latch (C) the output sensor card. Next Go Back Remove the ADF exit sensor and cable. ADF hinge (left and right) removal The hinges are removed in a similar manner. - Page 526 7526 Installation notes: Previous Note: The hinges are different. The heavy weight hinge has a blue dot on the side and should be installed on the side indicated below. Next Go Back Install the heavy weight hinge with the blue dot in the position indicated below. Replace the four screws (A).
-
Page 527: Adf Motor Gear Train Removal
7526 ADF motor gear train removal Previous Remove the ADF motor side cover. See “ADF motor side cover removal” on page 4-212. Disconnect the three connectors (A). Next Go Back Remove the two screws (B), and the two ground screw (C). Remove the ADF motor gear train. - Page 528 7526 Installation notes: Previous Place the ADF motor gear train assembly over the clutch motor, and make sure the clutch motor cable (A) is through the housing. Next Go Back Make sure the fork of the clutch assembly (B) is up, and the gear (C) is up. Slide the left side of the ADF motor gear train assembly into place, and then press down on the lever (D) with your finger to make sure the arm of the motor gear assembly slides in below the ledge.
- Page 529 7526 Slide the right side of the ADF motor gear train assembly into place, making sure that the fork (E) engages Previous the plate (F). Next Go Back Rotate the gear arm (G) down until the spring (H) latches into the frame. Repair information 4-239...
- Page 530 7526 Route the clutch assembly cable through the cable retainers (J). Previous Replace the four screws (K), making sure that the ground cable (L) is attached to the indicated screw. Next Go Back Reconnect the cables. Replace the covers and ADF input tray. Service Manual 4-240...
-
Page 531: Adf Paper Stop Removal
7526 ADF paper stop removal Previous Pull the paper stop all the way out, and slide out. Next Go Back ADF pick pad removal Open the ADF cover. Lift the pick pad (A), and remove the pad. Note: Although the spring is not part of the ADF pick pad FRU, be careful not to lose the spring. Repair information 4-241... -
Page 532: Adf Pick Pad Spring Removal
7526 ADF pick pad spring removal Previous Remove the ADF pick pad. See “ADF pick pad removal” on page 4-241. Lift out the spring (A). Next Go Back ADF pick roller assembly removal Open the ADF. Rotate the locking lever (A), and remove the ADF pick roller assembly. Service Manual 4-242... - Page 533 7526 Installation notes: Previous Install the left side of the ADF pick roller assembly first. Push the assembly flat into the ADF, while turning the gear on the right (A). Next Go Back When the assembly clicks into position, rotate the locking lever until it is flat against the ADF. Repair information 4-243...
-
Page 534: Adf Pressure Plate Cover Removal
7526 Verify that the installation was correct by pressing the ADF pick roller into the ADF door, then pulling the Previous door down until the ADF pick roller assembly smoothly falls forward, without falling out. Next Go Back ADF pressure plate cover removal Open the ADF. - Page 535 7526 Pull the pressure plate cover down, and remove it. Previous Next Go Back Installation note: Set the pressure plate face down over the glass of the flatbed, and close the ADF. The ADF pressure pad will snap into place as the ADF is lowered. Repair information 4-245...
-
Page 536: Adf Separator Pad Removal
7526 ADF separator pad removal Previous Open the ADF cover. Lift the ADF separator pad (A), and remove the pad. Note: Cover the separator pad with your other hand to prevent the pad from flying away and getting lost or hitting someone. -
Page 537: Carriage Transport Belt With Clip Removal
7526 Carriage transport belt with clip removal Previous Remove the flatbed CCD carrier module. See “Flatbed CCD carrier module removal” on page 4-250. Remove the two screws (A) on either end of the carriage transport belt. Next Go Back Remove the cable from the posts. Installation notes: •... -
Page 538: Esd Brush Removal
7526 Be sure to face the toothed edge (A) on the cable as shown. • Previous Next Go Back ESD brush removal Remove the ADF upper case cover. See “ADF upper case cover removal” on page 4-215. Gently pry the brush off the two posts with a flat-bladed screwdriver. Note: One post firmly holds the brush, and the other post is a alignment guide. -
Page 539: Flatbed Air Filter Removal
7526 Flatbed air filter removal Previous Press the tab (A) and remove the filter door cover. Next Go Back Remove the filter. Repair information 4-249... -
Page 540: Flatbed Ccd Carrier Module Removal
7526 Flatbed CCD carrier module removal Previous Remove the flatbed with glass cover. See “Flatbed with glass cover removal” on page 4-219. Remove the two screws (A), and remove the cover. Next Go Back Service Manual 4-250... - Page 541 7526 Disconnect the two CCD cables (B). Previous Warning: Be careful disconnecting and reconnecting the ribbon cables. Ribbon cables can be damaged easily and should be handled carefully. Next Go Back Loosen the ground screw (C), and remove the screw (D). Repair information 4-251...
- Page 542 7526 Rotate the clip (E). Previous Next Go Back Lift rod and slide the flatbed CCD carrier module off the rod. Service Manual 4-252...
- Page 543 7526 Installation note: Previous Be sure to route the carriage transport belt correctly. Next Go Back Repair information 4-253...
-
Page 544: Flatbed Cooling Fan Removal
7526 Flatbed cooling fan removal Previous Remove the flatbed with glass cover. See “Flatbed with glass cover removal” on page 4-219. Remove the four (A) screws. Next Go Back Remove the fan. Service Manual 4-254... -
Page 545: Flatbed Scanner Removal
7526 Flatbed scanner removal Previous Remove the ADF. See “ADF removal (entire)” on page 4-228. Remove the right cover. See “Right cover removal” on page 4-38. Remove the two screws (A) and the smaller screw (B) on the right side. Next Go Back Repair information... - Page 546 7526 Disconnect the two cables (C) at the connectors on the MDC card (ribbon cable). Previous Note: Be careful disconnecting and reconnecting the ribbon cables. Ribbon cables can be damaged easily and should be handled carefully. Next Go Back Remove the 3 long screws (D) and the two short screws (E). Service Manual 4-256...
-
Page 547: Paper Present Led Card Removal
7526 Slide the flatbed scanner forward, and lift it up to remove it. Previous Next Go Back Warning: Whenever you replace the ADF (entire), the flatbed scanner, or the MDC card, perform the “Scanner in Configuration menu. Manual Registration” To enter Config Menu: Turn off the multifunction printer. -
Page 548: Scanner Icc Card Removal
7526 Disconnect the cable at the connector (B). Previous Note: Observe the routing of the cable for re-installation. Remove the screw (C) securing the LED to the input tray, and removal the paper present LED card. Next Go Back Scanner ICC card removal Remove the ADF. - Page 549 7526 Disconnect the ICC cable (B) from the scanner ICC card. Previous Next Go Back Turn the ADF over. Remove the ADF motor side cover. See “ADF motor side cover removal” on page 4-212. Disconnect all the cables. Remove the two screws (C), and the ground cables from the screws (D). Note: Be sure to reconnect the ground cables when you reinstall the card.
-
Page 550: Scanner Icc Cable Removal
7526 Remove the card. Previous Scanner ICC cable removal Remove the ADF. See “ADF removal (entire)” Turn the ADF over. Be sure to brace the ADF to prevent damage. Next Remove the three screws (A) securing the MDC cable cover, and remove the cover. Go Back Disconnect the ICC cable (B) from the scanner ICC card. -
Page 551: Scanner Mdc Card Removal
7526 Turn the ADF over. Previous Remove the ADF motor side cover. See “ADF motor side cover removal” on page 4-212. Remove the screw (F) and disconnect the scanner ICC cable ground cable (G). Next Go Back Remove the scanner ICC cable. Scanner MDC card removal Warning: This part might contain customer confidential information. - Page 552 7526 Remove the screw (A) that secures the ground cable, and remove the ADF cable (B). Previous Next Go Back Service Manual 4-262...
- Page 553 7526 Disconnect the eight cables (C) from the MDC card Previous Warning: Be careful when disconnecting and reconnecting the ribbon cables. Ribbon cables can be damaged easily and should be handled carefully. Next Go Back Remove the three screws (D) from the MDC card cage. Remove the MDC card cage.
- Page 554 7526 Remove the three screws (E) securing the MDC card, and remove the MDC card. Previous Next Go Back Warning: Whenever you replace the ADF (entire), the flatbed (entire), or the MDC card, perform the “Scanner in Configuration menu. Manual Registration” To enter Config Menu: Turn off the multifunction printer.
-
Page 555: High-Capacity Input Tray (Hcit) Option Removals
7526 Previous High-capacity input tray (HCIT) option removals HCIT media tray assembly removal Note: When removing the high-capacity input tray (HCIT) media tray assembly, it is not necessary to remove it Next from the base machine and the caster base. Open the HCIT media tray assembly (A) until it reaches a stop. -
Page 556: Hcit Front Tray Cover Removal
7526 HCIT front tray cover removal Previous Note: When removing the high-capacity input tray (HCIT) front tray cover, it is not necessary to remove the HCIT media tray assembly from the base machine and the caster base. Remove the HCIT media tray assembly. See “HCIT media tray assembly removal”... -
Page 557: Hcit Rear Cover Removal
7526 HCIT rear cover removal Previous Remove the four screws (A) securing the HCIT rear cover to the drawer. Remove the HCIT rear cover. Next Go Back Repair information 4-267... -
Page 558: Hcit Right Cover Removal
7526 HCIT right cover removal Previous Carefully remove the printer or multifunction printer from the high-capacity input tray (HCIT) and remove the HCIT from the caster base. Remove the HCIT media tray assembly. See “HCIT media tray assembly removal” on page 4-265. -
Page 559: Hcit Left Cover Removal
7526 HCIT left cover removal Previous Carefully remove the printer or multifunction printer from the high-capacity input tray (HCIT) and remove the HCIT from the caster base. Remove the HCIT media tray assembly. See “HCIT media tray assembly removal” on page 4-265. -
Page 560: Feed With Bushing Roller Removal
7526 Feed with bushing roller removal Previous Remove the high-capacity input tray (HCIT) top plate assembly. See “Top plate assembly removal” on page 4-279. Remove the four screws (A) securing the pass thru sensor bracket to the top plate assembly. Note: The bushing may come off when removing the pass thru sensor bracket. -
Page 561: Hcit Controller Board Assembly Removal
7526 HCIT controller board assembly removal Previous Remove the HCIT right cover. See “HCIT right cover removal” on page 4-268. Disconnect the seven connectors (A) from the HCIT controller board. Next Go Back Remove the ground screw (B) from the HCIT controller board. Remove the two screws (C) securing the HCIT controller board to the card mount option. -
Page 562: Hcit Drawer Slide Assembly Removal
7526 HCIT drawer slide assembly removal Previous The left and right drawer slide assemblies are the same, and only one is in a package. The instructions below are for removing the left slide, but removing the right slide is similar. Remove the HCIT media tray assembly. - Page 563 7526 Release the hooks (B) securing the pass thru sensor to the top plate assembly. Previous Remove the pass thru sensor from the top plate assembly. Release the harness from the clamps (C). Remove the eight screws (D) securing the elevator motor with sensor to the side frame. Next Go Back Remove the elevator motor with sensor.
-
Page 564: Hcit Pick Tires Removal
7526 HCIT pick tires removal Previous Remove the high-capacity input tray (HCIT) media tray assembly. See “HCIT media tray assembly removal” on page 4-265. Pull the autocompensator pick arm (A) down. Next Go Back Remove the pick tire (B) from the pick roll assembly (C). Repeat for the other pick tire (D). -
Page 565: Hcit Slide Assembly With Spring Removal
7526 HCIT slide assembly with spring removal Previous Remove the HCIT controller board assembly. See “HCIT controller board assembly removal” on page 4-271. Disconnect the two springs (A) from the frame. Note: Leave the springs attached to the cam size sensing plate (B) and the actuator switch. Next Slide the cam size sensing plate (B) through the access hole in the rear side frame. - Page 566 7526 Remove the four screws (E) securing the card mount option to the frame. Previous Next Go Back Remove the card mount option. Installation note: Place the card mount option into position, and secure it with the four screws. Reinstall the media size actuator to the card mount option. Reinstall the actuator switch with spring through the inside of the drawer.
-
Page 567: Photointerrupter Sensor With Cable Assembly Removal
7526 Photointerrupter sensor with cable assembly removal Previous Remove the high-capacity input tray (HCIT) right cover. See “HCIT right cover removal” on page 4-268. Disconnect the photointerrupter sensor cable connector (A) from the HCIT controller board. Next Go Back Turn the drawer rear side down, and use 4.0 mm Allen wrench to remove the four screws (B) securing the counterweight to the rear frame. - Page 568 7526 Remove the screw (C) securing the sensor to the rear frame, and then release the hooks (D). Previous Note: Remove the cable from the restraint, and observe the routing for reinstallation. Next Go Back Remove the photointerrupter sensor with cable assembly. Service Manual 4-278...
-
Page 569: Top Plate Assembly Removal
7526 Top plate assembly removal Previous Remove the high-capacity input tray (HCIT) right cover. See “HCIT right cover removal” on page 4-268. Disconnect the five connectors (A) from the HCIT controller board. Next Go Back Repair information 4-279... - Page 570 7526 Release the hooks (B) securing the pass thru sensor from the top plate assembly. Previous Remove the fourteen screws (C) securing the top plate assembly to the frame. Next Go Back Remove the top plate assembly. Service Manual 4-280...
-
Page 571: Connector Locations
7526 5. Connector locations Previous Locations—printer base Next Go Back Connector locations... -
Page 572: Connectors
7526 Previous Connectors System board Next JHVPS1 JMIRR1 JBLW1 JBIN1 JFUSER1 JSB1 JT0PP1 JFAN1 JBOR1 JCVR1 JLVPS1 Go Back JPJ1 JLVPS2 JCARTP1 JCARTS1 JCARTS2 JFMUSB1 JCARTP2 JDVR1 JTPS 19 JOX1 JFDS1 JINT1 JFDPCK1 JTRAY1 JSEC1 JMPFPP1 JPH1 JT 9 Service Manual... - Page 573 7526 Previous System board listing “System board” on page 5-2. Connector Description Next F(#) Fuse Operator panel I/F Go Back Ethernet connector JBIN1 Output bin sensor JBLW1 Cartridge blower JBOOT1 Daughter card boot connector JBOR1 Black only retract connector JBUSB1 USB device port JCARTP1 Cartridge 1 BLDC motor (upper)
- Page 574 7526 System board listing (continued) Previous “System board” on page 5-2. Connector Description JLVPS1 Low voltage power supply Next Modem interface Go Back Service Manual...
-
Page 575: Preventive Maintenance
• Damaged, missing, or altered covers, especially in the area of the top cover and the power supply cover • Possible safety exposure from any non-Lexmark attachments • Lubrication specifications Lubricate only when parts are replaced or as needed, not on a scheduled basis. Use of lubricants other than those specified can cause premature failure. -
Page 576: Maintenance
7526 Previous Maintenance Cleaning the scanner glass Clean the scanner glass if you encounter print quality problems, such as streaks on copied or scanned images. Next Slightly dampen a soft, lint-free cloth or paper towel with water. Open the scanner cover. Go Back White underside of the ADF cover White pressure plate cover... -
Page 577: Cleaning The Adf Parts
7526 Cleaning the ADF parts Previous Clean the ADF parts periodically to maintain optimal printing performance. Residue on the ADF parts may cause print quality issues and false 290–293 paper jam messages. Turn the printer off. Next Slightly dampen a soft, lint-free cloth with water. Open the ADF cover. - Page 578 7526 Wipe the entire surface under the ADF cover, including the two small white rollers. Previous Wipe the separator pad, and then wipe the pick pad. Next Go Back Pull the flap up as shown, and then wipe the sensor behind it. Close the flap, and then close the ADF cover.
-
Page 579: Cleaning The Printhead Lenses
7526 Cleaning the printhead lenses Previous Clean the printhead lenses when you encounter print quality problems. Turn the printer off, and disconnect the power cord. Open the upper front door, and then open the lower front door. Next Warning: Potential Damage—To avoid overexposing the photoconductors, do not leave the front doors open for more than 10 minutes. - Page 580 7526 Previous Next Go Back Service Manual...
-
Page 581: Parts Catalog
Model information used in the parts catalog: • Abbreviation Machine Model name Description used type/model 7526-576 Lexmark X746de MFP with e-task and duplex 7526-776 Lexmark X748de MFP with e-task, duplex, and hard drive 7526-776 Lexmark X748dte MFP with e-task, duplex, hard drive,... -
Page 582: Assembly 1: Covers-Printer
7526 Assembly 1: Covers—printer Previous Next Go Back Service Manual... - Page 583 Rear frame cover 40X5172 Right cover 40X5184 Front access door cover assembly 40X5173 Left cover 40X5221 Left door cover 40X7960 Operator panel bezel, X746de 40X7961 Operator panel bezel, X748de 40X7967 LCD bracket assembly 40X7703 Speaker 40X7861 7 inch LCD touch screen 40X7955...
-
Page 584: Assembly 2: Front
7526 Assembly 2: Front Previous Next Go Back Service Manual... - Page 585 7526 Assembly 2: Front Previous Units/ Units/ Index Description mach 2—1 40X8110 Fuser assembly, 115 V Next 40X8111 Fuser assembly, 230 V 40X8112 Fuser assembly, 100 V Printer pad, included in screws parts packet (P/N 40X5136) Go Back 40X1446 Right bellcrank assembly, with spring 40X5132 Parts packet, MP feeder/duplex drive, including: •...
-
Page 586: Assembly 3: Right
7526 Assembly 3: Right Previous Next Go Back Service Manual... - Page 587 7526 Assembly 3: Right Previous Units/ Units/ Index Description mach 3–1 40X5290 EP drive assembly Next 40X7709 Low-voltage power supply 40X5126 Motor driver card 40X8309 MP feeder/duplex motor Go Back 40X5128 24 V interlock switch 40X5998 MPF paper present sensor with cable 40X5127 5 V interlock switch Parts catalog...
-
Page 588: Assembly 4: Rear
7526 Assembly 4: Rear Previous Next Go Back Service Manual... - Page 589 7526 Assembly 4: Rear Previous Units/ Units/ Index Description mach 4—1 40X5123 Printhead assembly Next 40X5107 System board support shield 40X5997 System board 40X0269 Power cord—USA, Canada, Bolivia, Peru Go Back 40X0288 Power cord (8 ft.)—Argentina 40X0301 Power cord (8 ft.)—Australia, New Zealand 40X3141 Power cord (8 ft.)—Austria, Belgium, Catalan, Czechoslovakia, Finland, France, Germany, Greece, Hungary, Ireland, Italy, Netherlands, Norway,...
-
Page 590: Assembly 5: Left
7526 Assembly 5: Left Previous Next Go Back (4 places) (4 places) (4 places) (4 places) (4 places) 1G (4 places) (8 places) Service Manual 7-10... - Page 591 7526 Assembly 5: Left Previous Units/ Units/ Index Description mach 5—1 40X5137 Contact springs kit Next includes the following: • A—Torsion PCD contact spring • B—Torsion CR contact spring • C—Contact spring cap Go Back • D—Charge roll contact spring •...
-
Page 592: Assembly 6: Top
7526 Assembly 6: Top Previous Next Go Back Units/ Units/ Index Description mach 6—1 40X5109 Cooling fan 40X5122 Color on demand assembly 40X5130 Top cover camshaft assembly 40X5108 Cartridge cooling fan Service Manual 7-12... -
Page 593: Assembly 7: Cable Parts Packet
7526 Assembly 7: Cable parts packet Previous Units/ Units/ Index Description mach 40X7973 Cables, including Next • Duplex/MPF motor cable • Fuser AC cable • Fuser DC cable Go Back • HVPS cable • Transport cable • Fuser and cartridge 1 motor cable •... -
Page 594: Assembly 8: Covers-Scanner
7526 Assembly 8: Covers—scanner Previous Next Go Back Service Manual 7-14... - Page 595 7526 Assembly 8: Covers—Scanner Previous Units/ Units/ Index Description mach 8—1 40X5196 ADF front case cover Next 40X5202 ADF upper motor side cover 40X5192 ADF document input tray 40X5193 ADF paper stop Go Back 40X5194 Pressure plate cover 40X5198 Flatbed filter door cover 40X5218 Flatbed air filter 40X5207...
-
Page 596: Assembly 9: Automatic Document Feeder (Adf)
7526 Assembly 9: Automatic document feeder (ADF) Previous Next Go Back Service Manual 7-16... - Page 597 7526 Assembly 9: Automatic document feeder (ADF) Previous Units/ Units/ Index Description mach 9—1 40X5190 ADF, complete Next Parts packet—cables (40X5217) A—ADF input tray cable B—ADF case cable Note: Additional cables listed in assembly 10 (5 total). Go Back 40X5210 Paper present LED card 40X5209 ADF hinge (left or right)
-
Page 598: Assembly 10: Flatbed Scanner
7526 Assembly 10: Flatbed scanner Previous Next Go Back Service Manual 7-18... - Page 599 7526 Assembly 10: Flatbed scanner Previous Units/ Units/ Index Description mach 10—1 40X7959 Flatbed scanner, complete Next 40X5215 Cave LED card 40X5216 Flatbed cave LED cover (clear) 40X7957 Flatbed CCD carrier module, including lamp assembly Go Back 40X5214 Carriage transport belt with clip 40X7975 Scanner MDC card 40X5199...
-
Page 600: Assembly 11: Optional 550-Sheet Media Drawer And Tray
7526 Assembly 11: Optional 550-sheet media drawer and tray Previous Next Go Back Units/ Units/ Index Description 11—1 40X5140 550-sheet tray option (drawer and tray assembly) 40X5168 Pick tire (550-sheet tray) 40X5141 550-sheet tray assembly Service Manual 7-20... -
Page 601: Assembly 12: Optional Special Media Tray Assembly
7526 Assembly 12: Optional special media tray assembly Previous Next Go Back Units/ Units/ Index Description opt. 12—1 40X5142 Special media assembly, including tray 40X5152 Pick tire (550-sheet drawer) 40X5143 Special media tray assembly Parts catalog 7-21... -
Page 602: Assembly 13: Optional High-Capacity Input Option (Hcit)
7526 Assembly 13: Optional high-capacity input option (HCIT) Previous Next Go Back Service Manual 7-22... - Page 603 7526 Assembly 13: Optional high-capacity input option (HCIT) Previous Units/ Units/ Index Description option 13—1 40X5157 Top plate assembly Next 40X5168 HCIT pick tire 40X5156 Feed with bushing 40X5149 HCIT rear cover Go Back 40X4585 Tray latch with spring 40X5159 HCIT controller card assembly 40X4587 Slide assembly with springs...
-
Page 604: Assembly 14: Options And Features
Traditional Chinese font card 40X5970 Simplified Chinese font card 40X5972 Japanese font card 40X8323 Bar code and Forms card 40X7051 Lexmark PrintCryption™ card 40X8329 Prescribe card 40X8326 IPDS SCS TNE card 40X4826 MarkNet™ N8120 10/1000 40X4827 MarkNet N8130 10/100 fiber... -
Page 605: Index
7526 Index Previous bezel Numerics Next parts catalog 1xx service error codes – 2-20 2-22 removal 4-30 24 V interlock switch bin full sensor assembly, removal 4-52 parts catalog Black Only Mode 3-31 Go Back removal 4-50 black only retract (BOR), see color on demand assembly theory 3-92 blower fan, see cartridge cooling fan... - Page 606 7526 Disk Encryption Hardware Tests 3-41 Previous Download Emuls Button Test 3-33 3-13 Energy Conserve DRAM Test 3-34 3-13 Enforce Color Order Panel Test 3-39 3-12 Env Prompts Motor Tests 3-40 Event Log Align Motor Test 3-32 Next exit Config Menu Mirror Motor Test 3-47 3-19...
- Page 607 7526 parts catalog removals 4-21 Previous removal front cover locks 4-78 3-49 service check front door assembly 2-53 2-54 electrophotographic (EP) process left front cable removal 3-81 4-95 charging parts catalog 3-83 cleaning removal 3-90 4-92 Next developing right front cable removal 3-87 4-100 exposing...
- Page 608 7526 low-voltage power supply (LVPS) description Previous parts catalog parts catalog 7-24 removal 4-115 service check 2-128 Panel Menus 3-33 lubrication specifications Panel Test 3-12 paper Next maintenance, scheduled See media mechanical drive paper jams, error locations 3-57 bump aligner drive paper path 3-76 Go Back...
- Page 609 7526 horizontal banding contact springs 2-154 4-63 Previous horizontal line cooling fan 2-154 4-73 insufficient fusing cooling fan filter 2-155 4-74 missing image at edge covers, printer 2-155 mottle (2–5mm speckles) front access cover assembly 2-155 4-21 narrow vertical line left cover 2-155 4-24...
- Page 610 7526 operator panel bezel scanner specifications 4-30 Previous operator panel buttons screw and retainer identification table 4-31 operator panel speaker sensors 4-33 option cable ADF exit sensor 4-128 4-234 options bin full 4-52 HCIT controller board assembly diagnostic tests 4-271 3-18 Next HCIT drawer slide assembly...
- Page 611 7526 service error top access cover Previous 900.xx System software error parts catalog 2-108 service error codes removal 2-20 4-40 Servo Laser Test sensor 3-19 4-169 Size Sensing springs 3-32 4-171 skew won’t open 4-10 4-171 Next speaker top access cover links, removal 4-168 removals top cover...
- Page 612 7526 Previous Next Go Back Service Manual...
- Page 613 7526 Part number index Previous Description Page Next 40X0269 Power cord—USA, Canada, Bolivia, Peru - - - - - - - - - - - - - - - - - - - - - - - - - - - - - - - - - - - - - - - - - - - - - 40X0271 Power cord (8 ft.)—Hong Kong, Ireland, United Kingdom - - - - - - - - - - - - - - - - - - - - - - - - - - - - - - - - - - 40X0273...
- Page 614 7526 40X5146 HCIT front tray cover - - - - - - - - - - - - - - - - - - - - - - - - - - - - - - - - - - - - - - - - - - - - - - - - - - - - - - - - - - 7-23 Previous 40X5147...
- Page 615 Operator panel bezel, X746de - - - - - - - - - - - - - - - - - - - - - - - - - - - - - - - - - - - -...
- Page 616 7526 Previous Next Go Back Service Manual I-12...
Need help?
Do you have a question about the X746de and is the answer not in the manual?
Questions and answers