Yeastar Technology S20 Administrator's Manual
S-series voip pbx
Hide thumbs
Also See for S20:
- Extension user manual (14 pages) ,
- Installation manual (12 pages) ,
- Getting started manual (21 pages)

Related Manuals for Yeastar Technology S20


Summary of Contents for Yeastar Technology S20
-
Page 1: Administrator Guide
S-Series VoIP PBX Administrator Guide Sales Tel: +86-592-5503309 E-mail: sales@yeastar.com Support Tel:+86-592-5503301 E-mail: support@yeastar.com Web: http://www.yeastar.com Version: 30.0.0.32 Revised: 2016.07.19... - Page 2 S-Series IP PBX Administrator Guide Copyright Copyright 2006-2016 Yeastar Information Technology Co., Ltd. All rights reserved. No parts of this publication may be reproduced or transmitted in any form or by any means, electronic or mechanical, photocopying, recording, or otherwise, for any purpose, without the express written permission of Yeastar Information Technology Co., Ltd.
-
Page 3: Table Of Contents
Expansion Board – EX08 ......................3 Expansion Board – EX30 ......................3 D30 Module ..........................3 Hardware Overview ........................4 Yeastar S20 ..........................4 Yeastar S50 ..........................4 Yeastar S100 ..........................5 Yeastar S300 ..........................6 LED Indicators and Ports ......................6 LED Indicators ........................... - Page 4 S-Series IP PBX Administrator Guide Date & Time ..........................22 Email ............................23 Storage ............................23 Storage Devices ........................23 Storage Locations ........................25 Auto Cleanup ........................... 25 Extensions .........................27 Add New Extension ........................27 Add Bulk Extensions ........................32 Search and Edit Extension ......................
- Page 5 S-Series IP PBX Administrator Guide SMS ............................72 SMS to Email ........................... 72 Email to SMS ........................... 73 Voice Prompts ........................75 Prompt Preference ........................75 System Prompt ..........................75 Upload System Prompts ......................75 Download Online Prompt ......................76 Music on Hold ..........................76 Custom Prompt ...........................
- Page 6 S-Series IP PBX Administrator Guide Memory ..........................101 LAN ............................102 Storage Usage .......................... 102 Maintenance ........................103 Upgrade ............................ 103 Automatic Upgrade ........................ 103 Browsing File from Local PC to Upgrade ................104 Upgrade through HTTP......................104 Upgrade through TFTP ......................104 Backup and Restore ........................
-
Page 7: About This Guide
PBX. We begin by assuming that you are interested in S-Series IP PBX and familiar with networking and other IT disciplines. Products Covered This guide explains how to configure the following products: Yeastar S20 IP PBX Yeastar S50 IP PBX Yeastar S100 IP PBX ... -
Page 8: S-Series Overview
S-Series IP PBX Administrator Guide S-Series Overview This chapter provides the following sections: Introduction Feature Highlights Expansion Board Hardware Overview Introduction Designed with the small and medium sized enterprises in mind, supporting up to 500 users and built using the very latest technology, the Yeastar S-Series delivers exceptional cost savings, productivity and efficiency improvements, delivering power, performance, quality and peace of mind. -
Page 9: Expansion Board
S-Series IP PBX Administrator Guide Expansion Board Yeastar S100 and S300 are expandable. S100 supports up to 2 EX08/EX30 Expansion Spans; supports 1 D30 Module. S300 supports up to 3 EX08/EX30 Expansion Spans; supports up to 2 D30 Modules. Expansion Board –... -
Page 10: Hardware Overview
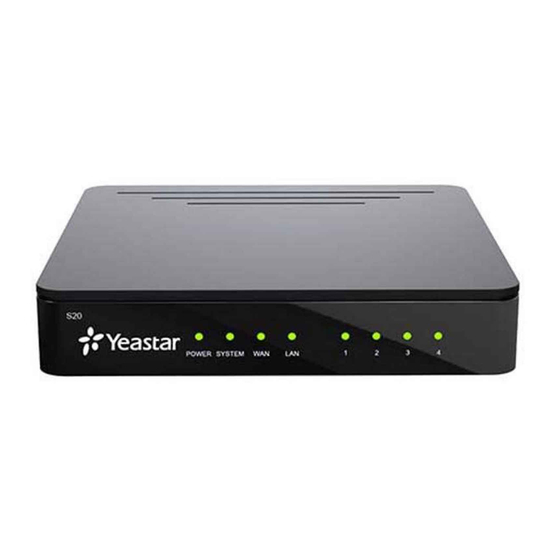
S-Series IP PBX Administrator Guide Hardware Overview Yeastar S20 Front Panel Power Indicator System Status RJ11 Port Status WAN Status LAN Status Rear Panel Power RJ11 Port Reset Antenna Socket TF Slot Yeastar S50 Front Panel System Indicator Power Indicator... -
Page 11: Yeastar S100
S-Series IP PBX Administrator Guide Rear Panel Power Switch Antenna Socket Power Inlet Protective Earth Yeastar S100 Front Panel (1*EX30 + 1*EX08) E1/T1 Port RJ11 Port RJ11 Port Status Rear Panel Antenna Socket SD Slot Console Power Switch Power Power Inlet System Protective Earth Reset... -
Page 12: Yeastar S300
S-Series IP PBX Administrator Guide Yeastar S300 Front Panel (1*EX30 + 2*EX08) E1/T1 Port RJ11 Port RJ11 Port RJ11 Port Status RJ11 Port Status Rear Panel Antenna Socket SD Slot Console Power Switch Power Power Inlet System Protective Earth Reset USB Slot LED Indicators and Ports LED Indicators... -
Page 13: Port Description
Insert SD card. USB Slot Connect to USB external disk. Yeastar S20 provides two 10/100M adaptive RJ45 Ethernet ports, S50/100/300 supports two 10/100/1000M Ethernet ports. There are 2 Ethernet modes for the system. The default mode is “Bridge”. Ethernet Port ... -
Page 14: Getting Started
S-Series IP PBX Administrator Guide Getting Started This chapter explains how to log in Yeastar S-Series Web GUI, use the taskbar and widgets, and open applications with the Main Menu. Accessing Web GUI Web Configuration Desktop Make Your First Call Accessing Web GUI Yeastar S-Series provides web-based configuration interface for administrator and extension users. -
Page 15: Web Configuration Desktop
S-Series IP PBX Administrator Guide Web Configuration Desktop When you log in Yeastar S-Series Web GUI, you will see the desktop. From here, you can manage settings, install applications, or view system resource information. Desktop The desktop is where your application windows are displayed. Figure 2-2 Desktop Taskbar The taskbar at the top of the desktop includes the following items:... -
Page 16: Options
S-Series IP PBX Administrator Guide Figure 2-4 Main Menu Options Click the options icon to logout, change Web language or modify your account settings. Figure 2-5 Options Language Select Language to change web language. My Settings Click My Settings to modify your account settings. Here you can change the login password and bind your email address with the account. -
Page 17: Save And Apply Changes
S-Series IP PBX Administrator Guide Figure 2-6 My Settings Logout Click Logout to log out the Web GUI. Save and Apply Changes Click on Save button after your configurations on the S-Series system, do not forget to click Apply button on the upper right of the desktop to submit all the changes. -
Page 18: System Settings
S-Series IP PBX Administrator Guide System Settings This chapter explains system settings on S-Series. Go to Settings > System to check the system settings. Network Security User Permission Date & Time Email Storage Network After successfully logging in the S-Series Web GUI for the first time with the factory IP address, users could go to Settings >... -
Page 19: Openvpn
S-Series IP PBX Administrator Guide VLAN Check this option to enable VLAN. Enable VLAN Enter the VLAN ID. VLAN ID Set the VLAN priority. The default is 0. VLAN Priority OpenVPN S-Series supports OpenVPN. The system provides detailed VPN configurations on the Web GUI and you can also upload the VPN configuration package to the system to make it work. -
Page 20: Static Route
S-Series IP PBX Administrator Guide your router cannot support DDNS, we can set up DDNS on Yeastar system. Yeastar S-Series supports the following DDNS servers: dyndns.org freedns.afraid.org www.no-ip.com www.zoneedit.com www.oray.com 3322.org Check the DDNS configuration parameters below. Table 3-3 DDNS Configuration Parameters Description DDNS This shows the current DDNS status of the device. -
Page 21: Security
S-Series IP PBX Administrator Guide Static Routes Click Static Routes tab, you can add static routes here. Click to add a static route. Click to edit the static route. Click to delete the static route. Check the Static route settings below. Table 3-4 Static Routes Settings Description Static Route Enter the destination IP address or IP subnet for the S-Series to... -
Page 22: Firewall Rules
S-Series IP PBX Administrator Guide .Firewall Rules Users could add rules to accept or reject traffic through the system. Go to Settings > System > Security > Firewall Rules to configure firewall for the system. Before adding firewall rules, please check the option Enable Firewall, then click Save to enable the firewall. -
Page 23: Ip Auto Defense
S-Series IP PBX Administrator Guide Example: 192.168.5.100/255.255.255.255 means this rule is for 192.168.5.100. 192l168.5.100/z55.255.255.0 is for IP from 192.168.5.0 to 192.168.5.100. Set the port for the firewall rule. The end port must be equal to or greater Port than start port. IP Auto Defense Users could create auto defense rules, then the system will prevent massive connection attempts or brute force attacks. - Page 24 S-Series IP PBX Administrator Guide If you have uploaded HTTPS certificates to S-Series, select it from Certificate the drop-down menu. The default port for HTTP is 80. HTTP SSH port is used to access S-Series underlying configurations to debug the system. The default port is 8022. We recommend you disable SSH port if you do not need it.
-
Page 25: Certificate
S-Series IP PBX Administrator Guide file from this address. For Grandstream and Panasonic phones, enter the PBX’s IP address, for example: 192.168.5.150. For other IP phones, remember to specify the protocol, for example, tftp://192.168.5.150. NTP Server: the PBX can be a NTP server. By default, it is the PBX’s IP address. ... -
Page 26: Database Grant
S-Series IP PBX Administrator Guide should upload this certificate to S-Series. If TLS client (i.e. IP phone) enables “TLS Verify server”, you should also upload the relevant CA certificate on IP phone. Database Grant Yeastar S-Series is using MySQL database. The 3 party software can access MySQL via the Internet. -
Page 27: Add New User Permission
S-Series IP PBX Administrator Guide cannot create new users for login. Custom User is created by the Super Admin. The Super Admin sets the privileges for those users according to different situations. Add New User Permission Log in the S-Series Web GUI with the Super Admin account, go to Settings > System > User Permission. -
Page 28: Date & Time
S-Series IP PBX Administrator Guide Figure 3-10 User Portal Date & Time Go to Settings > System > Date & Time to check the current time on the system. Here you can adjust time of the system (including time zone) to your local time. Figure 3-11 Date &... -
Page 29: Email
S-Series IP PBX Administrator Guide Date: choose the date. Time: choose the time. Email Set the system’s email to send voicemail to email, alert event emails, fax to email, email to SMS and SMS to email. Go to Settings > System > Email to configure the system email. Check the email settings parameters below. - Page 30 S-Series IP PBX Administrator Guide Figure 3-12 Storage Devices To format a external storage: Click Click on the pop-up window to start formatting. To add Network Drive: The Network Drive feature is used to extend storage space. Before network drive can be properly configured, an SMB share folder accessible from Yeastar system must be set up on a Windows based machine.
-
Page 31: Storage Locations
S-Series IP PBX Administrator Guide Name: give this network drive a name to help you identify it. Host/IP: set the IP address where the recordings will be stored. Share Name: the shared folder name where the recordings will be stored. ... - Page 32 S-Series IP PBX Administrator Guide threshold is reached. Recordings Preservation Set the maximum number of days that recording files should be Duration retained. The default is left blank. Logs Auto Cleanup Set the maximum number of days that logs should be retained. Logs Preservation Duration The default is 7.
-
Page 33: Extensions
S-Series IP PBX Administrator Guide Extensions This chapter explains how to create and configure extensions on S-Series. Yeastar S-Series supports SIP, IAX and FXS extensions. An extension can be set to the 3 types and be registered to different devices. Go to PBX > Extensions page to configure the extensions. ... - Page 34 S-Series IP PBX Administrator Guide Table 4-1 Extension Configuration Parameters – Basic General Check the box to set the extension type. You can set the extension to multiple types. Type FXS: S2 or SO module should be installed on the device if you ...
- Page 35 S-Series IP PBX Administrator Guide Always redirect the call to the designated destination. Voicemail: redirect the caller to leave a voice message. Extension: redirect the caller to another extension. Always Users' Mobile Number: redirect the caller to the mobile ...
- Page 36 S-Series IP PBX Administrator Guide Don’t Disturb. When DND is enabled for an extension, the extension will not be available. Advanced Settings Table 4-3 Extension Configuration Parameters – Advanced VoIP Settings This setting should be used when the system is using a public IP address, communicating with devices hidden behind a NAT device (such as a broadband router).
- Page 37 S-Series IP PBX Administrator Guide Set the maximum amount of time, in milliseconds, that a hook Max Flash Detection flash must remain depressed in order for the system to consider it as a valid flash event. The default is 1000 ms. Enable or disable echo cancellation on the FXS port.
-
Page 38: Add Bulk Extensions
S-Series IP PBX Administrator Guide Add Bulk Extensions You can batch add SIP/IAX extensions on the system, which help you add a large amount of extensions quickly. Click to add extensions in bulk. Figure 4-3 Add Bulk Extensions Table 4-4 Bulk Add Extensions Configuration Parameters General Choose the type for the extensions: Type... -
Page 39: Search And Edit Extension
S-Series IP PBX Administrator Guide Set the max concurrent registrations for SIP extensions. Concurrent Registrations Set the language of voice prompt for extensions. Prompt Language Search and Edit Extension All the extensions are listed on the extension page. Each extension has a checkbox for you to edit or delete in bulk. -
Page 40: Extension Group
S-Series IP PBX Administrator Guide Extension Group Extension Group feature allows you to assign and categorize extensions in different groups, which helps you to better manage the configurations in the system. For example, you can create Support and Sales groups, when configuring Outbound Route, you can select a extension group instead of each extension. This feature simplifies the configuration process. -
Page 41: Trunks
S-Series IP PBX Administrator Guide Trunks Yeastar S-Series supports FXO trunk, BRI trunk, GSM/CDMA/3G trunk, VoIP trunk and E1 trunk. In this chapter, we give a simplified guide of setting up trunks. FXO Trunk BRI Trunk GSM/CDMA/3G Trunk ... - Page 42 S-Series IP PBX Administrator Guide Polarity Reversal: the call will be considered as “hang up” on a polarity reversal. Specify how many busy tones to wait for before hanging up. The Busy Count default is 4. If you wish to customize, enter the value in the text box directly.
-
Page 43: Bri Trunk
S-Series IP PBX Administrator Guide This option defines the type of caller ID signaling to use. Bell202 Caller ID Signaling ETSI-V23 V23-Japan DTMF 5) Other Settings Table 5-4 Other Settings Option Description FXO (FXS devices) must have a timeout to determine if there was a hangup before the line is answered. - Page 44 S-Series IP PBX Administrator Guide Specify whether this interface will act like the user or the network. Signaling Role The default is User. Configure the switch type according to the direction provided by Switch Type your service provider. 2) Advanced Settings Table 5-6 BRI Trunk Configuration Parameters –...
- Page 45 S-Series IP PBX Administrator Guide Select the Called Party Numbering Plan. Called Party Numbering Plan Select the Called Party Numbering Type. Called Party Numbering Type The PI provides instructions on whether or not the Presentation Indicator provided calling line identity is allowed to be presented, or indicate that the number is not available.
-
Page 46: Gsm/Cdma/3G Trunk
S-Series IP PBX Administrator Guide Bind Consecutive DOD Numbers to Multiple Extensions Enter the DOD number range and select the extensions. Figure 5-2 Bind Consecutive DOD Numbers to Multiple Extensions GSM/CDMA/3G Trunk Yeastar S-Series supports GSM/CDMA/3G trunk. To extend the trunk, you need to install GSM/CDMA/3G module to the S-Series and insert SIM card on the module. -
Page 47: Voip Trunk
S-Series IP PBX Administrator Guide A name for this DNIS, when a call reaches the selected trunk, the name will DNIS Name be displayed on the ringing phone. VoIP Trunk Yeastar S-Series supports SIP and IAX protocols and provides 2 types of VoIP trunks: ... - Page 48 S-Series IP PBX Administrator Guide be domain name or IP address. Table 5-9 SIP Peer Trunk Configuration Parameters - Basic SIP Peer Trunk Set the trunk protocol as “SIP”. Protocol Choose the trunk type “Peer Trunk”. Trunk Type Give this trunk a name to help you identify this trunk. Provider Name Set the transport method used by the trunk.
- Page 49 S-Series IP PBX Administrator Guide 2) Codec Select codec for the VoIP trunk. Yeastar S-Series supports the codecs: a-law, u-law, GSM, iLBC, SPEEX, G722, G726, ADPCM, G729A, H261, H263, H263P, H264, MPEG4 and iLBC. Figure 5-3 VoIP Trunk Codec 3) Advanced Table 5-12 VoIP Trunk Configuration Parameters - Advanced VoIP Settings Enable this to send SIP OPTIONS packet to SIP device to check if the...
- Page 50 S-Series IP PBX Administrator Guide 4) DOD DOD (Direct Outward Dialing) means the caller ID displayed when dialing out. Before configuring this, please make sure the provider supports this feature. Global DOD Configure Global direct outward dialing number. DOD (Direct Outward Dialing) is the caller ID displayed when dialing out.
-
Page 51: E1/T1/J1 Trunk
S-Series IP PBX Administrator Guide Figure 5-5 Bind Consecutive DOD Numbers to Multiple Extensions E1/T1/J1 Trunk Yeastar S100 supports expanding up to 2 digital trunks, S300 supports expanding up to 3 digital trunks. Go to Settings > PBX > Trunks to edit the digital trunk. Please note that choosing different trunk signaling would have different settings. - Page 52 S-Series IP PBX Administrator Guide your service provider. Specify whether this interface will act like the user or the network. Signaling Role The default is User. Define whether the system can dial this switch using overlap digits Overlap Dial or not. If you need Direct Dial-in, then enable this option. The default is Disable.
- Page 53 S-Series IP PBX Administrator Guide CRC4 is a method of checking for errors in data transmitted on E1 trunk lines. When the Interface Type is T1 or J1, the options are: · ESF · D4 Choose the line code for this trunk. When the interface Type is E1, the options are: ·...
- Page 54 S-Series IP PBX Administrator Guide trunk lines. When the Interface Type is T1 or J1, the options are: · ESF · D4 Choose the line code for this trunk. When the interface Type is E1, the options are: · HDB3 ·...
- Page 55 S-Series IP PBX Administrator Guide Select the Calling Party Numbering Type. Calling Party Numbering Type Select the Called Party Numbering Plan. Called Party Numbering Plan Select the Called Party Numbering Type. Called Party Numbering Type The PI provides instructions on whether or not the provided Presentation Indicator calling line identity is allowed to be presented, or indicate that the number is not available.
- Page 56 S-Series IP PBX Administrator Guide MFC/R2 value in milliseconds for the MF timeout. The default MF Back Timeout is None. MFC/R2 value in milliseconds for the metering pulse timeout. Metering Pulse Timeout Enter -1 to use the default value. Specify the DTMF Detection timeout in milliseconds.The DTMF Detection Timeout default is 5000 ms.
- Page 57 S-Series IP PBX Administrator Guide Figure 5-6 Add One DOD with Multiple Extensions Bind Consecutive DOD Numbers to Multiple Extensions Enter the DOD number range and select the extensions. Figure 5-7 Bind Consecutive DOD Numbers to Multiple Extensions...
-
Page 58: Call Control
S-Series IP PBX Administrator Guide Call Control This chapter shows you how to control outgoing calls and incoming calls. Inbound Routes Outbound Routes Auto CLIP Routes Time Conditions Inbound Routes When a call comes into S-Series from the outside, S-Series needs to know where to direct it. It can be directed to an extension, a ring group, a queue or a digital Receptionist (IVR) etc. - Page 59 S-Series IP PBX Administrator Guide 3) Caller ID Pattern Define the Caller ID Number that is allowed to call in through this inbound route. Leave this field blank to match any or no CID info. You can also use patterns match to map a range of numbers. Press Enter to input multiple patterns.
-
Page 60: Outbound Routes
S-Series IP PBX Administrator Guide sent to the FXS fort (fax machine). Fax To Email: sent the fax as an email attachment to the designated email address, which could be associated to an extension or a custom one. Note: Please make sure the sender email address is correctly configured in “System >... - Page 61 S-Series IP PBX Administrator Guide matches are possible. Strip Allow the users to specify the number of digits that will be stripped from the front of the phone number before the call is placed. For example, if users must press 0 before dialing a phone number, one digit should be stripped from the dial string before the call is placed.
-
Page 62: Auto Clip Routes
S-Series IP PBX Administrator Guide 5) Password You can prompt users for a password before allowing calls to progress. The options are: None PIN List: select a list of PIN Password: enter a single password which will be needed when dialing through this outbound route 6) Rrmemory Hunt Round robin with memory, remembers which trunk was used last time, and then use the next... -
Page 63: Time Conditions
S-Series IP PBX Administrator Guide Match Outgoing Trunk: if enabled, only the incoming call that came to the PBX through the same trunk which made the call will be match against the AutoCLIP List. Member Trunks: choose the trunks, AutoCLIP Route will apply to the selected trunks. Click View AutoCLIP List to view the records. -
Page 64: Add A Holiday
S-Series IP PBX Administrator Guide Days of Week: select a week day, month day, and/or month range in which you want this time range to apply. Advanced Options: this option is disabled by default. If it is enabled, you need to set the month and the day of the month. -
Page 65: Call Features
S-Series IP PBX Administrator Guide Call Features This chapter explains various call features on Yeastar S-Series. Ring Group Queue Conference Pickup Group Speed Dial Callback DISA Blacklist/Whitelist Pin List Paging/Intercom ... -
Page 66: Ring Group
S-Series IP PBX Administrator Guide The number of seconds to wait for a digit input after prompt. Response Timeout How long (in seconds) we wait for the caller to enter an option on their phone Digit Timeout keypad before we consider it timed out and it follows the Timeout Destination as defined below. -
Page 67: Queue
S-Series IP PBX Administrator Guide The extension number dialed to reach this ring group. Number Give this ring group a brief name to help you identify it. Name Select an appropriate ring strategy for this ring group. Ring Strategy Ring All Simultaneously: ring all the available extensions simultaneously. - Page 68 S-Series IP PBX Administrator Guide Random: ring a random agent. Rememory: Round Robin with Memory, remembers where it left off in the last ring pass. Linear: rings agents in the order specified in the configuration file. Set the failover destination. Failover Destination This selection shows all users.
-
Page 69: Conference
S-Series IP PBX Administrator Guide How often to play the periodic announcements. Frequency Events Once the events settings are configured, the callers are able to press the key to enter the destination you set. Usually, a prompt should be set on Periodic Announcements to guide the callers to press the key. -
Page 70: Pickup Group
S-Series IP PBX Administrator Guide phones to access voice menu for conference room. Please check the options for the voice menu. Table 7-6 Conference Voice Menu Conference Administrator IVR Menu Mute/ un-mute yourself. Lock /unlock the conference. Eject the last user. Decrease the conference volume. -
Page 71: Speed Dial
S-Series IP PBX Administrator Guide Figure 7-1 Add Pickup Group Speed Dial Sometimes you may just need to call someone quickly without having to look up his/her phone number. You can by simply define a shortcut number. Speed Dial feature is available on Yeastar S-Series that allowing you to place a call by pressing a reduced number of keys. - Page 72 S-Series IP PBX Administrator Guide Speed Dial Code: enter the speed dial code. Phone Number: enter the number you want to call. 2) Import Speed Dial Click , you will see a dialog window shown as below. Figure 7-3 Import Speed Dial Number Click and select the file to start uploading.
-
Page 73: Callback
S-Series IP PBX Administrator Guide 3) Export Speed Dial Select the checkbox of the speed dial, click , the selected speed dial will be exported to your local PC. Figure 7-6 Export Speed Dial Callback Callback feature allows callers to hang up and get called back to Yeastar S-Series Callback feature could reduce the cost for the users who work out of the office using their own mobile phones. -
Page 74: Disa
S-Series IP PBX Administrator Guide Table 7-7 Call Back Configuration Parameters Option Description Give this Callback a brief name to help you identify it. Name Callback Through Choose a trunk, the call will be called back through the selected trunk. Delay Before Callback Set the number of seconds before calling back a caller. -
Page 75: Blacklist/Whitelist
S-Series IP PBX Administrator Guide Table 7-8 DISA Configuration Parameters Option Description Give this DISA a brief name to help you identify it. Name Password The password for this DISA. The maximum amount of time the system will wait before hanging up Response Timeout the call if the user has dialed an incomplete or invalid number. -
Page 76: Pin List
S-Series IP PBX Administrator Guide 2) Import Blacklist/Whitelist Click , you will see a dialog window shown as below. Figure 7-10 Import Blacklist Click and select the file to start uploading. The file must be a .csv file. Open the file with notepad, check the sample below. -
Page 77: Linking A Pin List To Outbound Routes/Disa
S-Series IP PBX Administrator Guide features such as outbound routes. The PIN can also be presented in the CDR record. Go to Settings > PBX > Call Features > Pin List and click to add Pin list. Figure 7-13 Add PIN List Linking a PIN List to Outbound Routes/DISA After creating PIN lists, you can link the PIN lists to Outbound Routes or DISA. -
Page 78: Sms
S-Series IP PBX Administrator Guide Go to Settings > PBX > Call Features > Paging/Intercom, click to add a paging group. Figure 7-14 Add Paging Group 11) Number: the extension number dialed to reach this Paging Group. 12) Name: give this Paging Group a brief name to help you identify it. 13) Type: select the mode of paging group. -
Page 79: Email To Sms
S-Series IP PBX Administrator Guide Figure 7-15 Enable SMS to Email Choose a GSM trunk and click , you will see the dialog appear as below. Click to add email address then click Figure 7-16 Edit SMS To Email When you send a SMS from your mobile to the GSM trunk number, the SMS message will be delivered to the email addresses. - Page 80 S-Series IP PBX Administrator Guide The system supports 4 email subjects. 1) Email Subject: Destination Phone Number If you choose this format, you don’t need to set access code. 2) Email Subject: port:Port Number-Destination Phone Number If you choose this format, you don’t need to set access code. 3) Email Subject: 500:Access Code-Destination Phone Number 4) Email Subject:...
-
Page 81: Voice Prompts
S-Series IP PBX Administrator Guide Voice Prompts In this chapter, we introduce how to manage voice on Yeastar S-Series, including the following sections: Prompt Preference System Prompt Music on Hold Custom Prompts Prompt Preference Select prompt files for the relevant options on this page. Table 8-1 Prompt Preference Configuration Parameters Option Description... -
Page 82: Download Online Prompt
S-Series IP PBX Administrator Guide Figure 8-1 Upload System Prompts Download Online Prompt Click , a dialog window appears as the following figure. All the available system prompts are listed on the window. Figure 8-2 Download Online Prompt Click to download the latest prompts. The new downloaded system prompt will be displayed once installed successfully. -
Page 83: Custom Prompt
S-Series IP PBX Administrator Guide 2) Upload New Music Figure 8-4 Upload New Music Choose MOH Playlist from the drop-down menu. Click to select music file from your local computer, click to start uploading. Custom Prompt The default voice prompts and announcements in the system are suitable for almost every situation. However, you may want to use your own voice prompt to make it more meaningful and suitable for your case. - Page 84 S-Series IP PBX Administrator Guide Figure 8-6 Record New Custom Prompt Click , the selected extension will ring, pick up the call to start recording.
-
Page 85: General
S-Series IP PBX Administrator Guide General This chapter explains general settings in the system, which can be applied globally to Yeastar S-Series. Preference Feature Code Voicemail Preference Table 9-1 Preference Configuration Parameters Option Description Max Call Duration Select the absolute maximum number of seconds permitted for a call. -
Page 86: Feature Code
S-Series IP PBX Administrator Guide IVR Extensions Specify the IVR extension range. The default range is 650-659. Queue Extensions Specify the Queue extension range. The default range is 660-669. Feature Code Feature Codes are used to enable and disable certain features available in the system. The S-Series local users can dial feature codes on their phones to use a particular feature. - Page 87 S-Series IP PBX Administrator Guide that is ringing at the extension. The default feature code is *04. Intercom Intercom Dial this feature code and an extension number to page that extension. The default feature code is *5. Call Parking Call Parking Dial this feature code to put a call on hold and park the call at an extension number directed by the system.
-
Page 88: Voicemail
S-Series IP PBX Administrator Guide The default feature code is *072. Enable Forward No Answer Dial this feature code to forward calls to voicemail or a designated number when no answer. For example: dial *73 to forward calls to voicemail when no answer, and dial *73500 to forward all calls to number 500 when no answer (this number does cont include prefix, if you are required to dial with prefix, you need to configure it in Call Forwarding in Edit Extension window). - Page 89 S-Series IP PBX Administrator Guide Table 9-3 Voicemail Configuration Parameters Message Options Max Messages per Folder This sets the maximum number of messages that can be stored in a single folder of voicemail. Max Message Time This sets the maximum length of a single voicemail message (in seconds).
-
Page 90: Voicemail To Email Template
S-Series IP PBX Administrator Guide Voicemail to Email Template You can customize the Voicemail Email contents by clicking Figure 9-1 Voicemail To Email Template Settings Go to Settings > PBX > General > SIP to configure SIP settings. It is wise to leave the default setting as provided on this page. -
Page 91: Nat
S-Series IP PBX Administrator Guide Note: the actual duration needs to minus 10 seconds from the value you filled in. If your PBX is operating in a network connected to the internet through a single router, your PBX is behind NAT. The NAT device has to be instructed to forward the right inbound packets (from internet) to the PBX server. - Page 92 S-Series IP PBX Administrator Guide address/port. No: use NAT mode only according to RFC3581. Never: never attempt NAT mode or RFC3581 support. Route: use NAT but do not include rport in headers. 2) External IP Address Figure 9-3 NAT Settings – External IP Address Table 9-6 External IP Address Configuration Parameters Option Description...
-
Page 93: Codec
S-Series IP PBX Administrator Guide Table 9-7 External Host Configuration Parameters Option Description External Host Alternatively you can specify an external host, and the system will perform DNS queries periodically. This setting is only required when your external IP address is not static. -
Page 94: Tls
S-Series IP PBX Administrator Guide Figure 9-5 Codec Settings Yeastar S-Series supports TLS protocol, to use TLS, you need enable TLS via Settings > PBX > General > SIP > TLS. Check the TLS configuration parameters below. Table 9-8 TLS Configuration Parameters Option Description Enable TLS... -
Page 95: Qos
S-Series IP PBX Administrator Guide Require: include “timer” value in Require header Forced: include “timer” value in both "Supported" and "Required" header. The default is Supported. Session-expires The max refresh interval in seconds. Session-minse The min refresh interval in seconds, it must not be less than 90. QoS (Quality of Service) is a major issue in VoIP implementations. -
Page 96: Advanced
S-Series IP PBX Administrator Guide Advanced Table 9-10 SIP Advanced Settings Option Description Allow RTP Re-invite By default, the system will route media steams from SIP endpoints through itself. Enabling this option causes the system to attempt to negotiate the endpoints to route packets to each other directly, bypassing the system. -
Page 97: Recording
S-Series IP PBX Administrator Guide Recording This chapter explains how to configure auto recording on Yeastar S-Series. Yeastar S-Series supports auto recording for an established call. Go to Settings > PBX > Recording to configure auto recording settings. Figure 10-1 Recording Prompt Settings Table 10-1 Recording Configuration Parameters General Preferences Click the option to link the Storage settings. -
Page 98: Event Center
S-Series IP PBX Administrator Guide Event Center Yeastar S-Series can monitor system events and logs, then send email notifications to the specified contacts. Event Settings The system events are divided into three categories: Operation Modify Administrator Password User Login Success ... -
Page 99: Notification Contacts
S-Series IP PBX Administrator Guide Notification Contacts The administrator could add contacts here to define where to send the notifications. The system supports to send Email notification, Call notification and SMS notification. Click to add a contact. Figure 11-2 Notification Contacts Table 11-1 Notification Contact Configuration Parameters Option Description... -
Page 100: Event Log
S-Series IP PBX Administrator Guide Event Log Go to Settings > Event Center > Event Log to check the event log. You can filter the event logs by selecting a event type, event name, and specifying a certain time period. Click , the matching results will be displayed. -
Page 101: Cdr And Recording
S-Series IP PBX Administrator Guide CDR and Recording In CDR and Recording center, you can check all the call logs and recordings on the system. You can run reports against the logs and filter on the following: Time Call From ... -
Page 102: Pbx Monitor
S-Series IP PBX Administrator Guide PBX Monitor The PBX monitors the status of Extensions, Trunks and Concurrent Call. Go to PBX Monitor to check the real time status. Extension Status Figure 13-1 Extension Status Table 13-1 Extension Status Description Status Description The extension is idle. -
Page 103: Trunk Status
S-Series IP PBX Administrator Guide Malfunction in FXS interface; please examine the relevant interface and module. Trunk Status Figure 13-2 Trunk Status Table 13-2 FXO Trunk Status Description FXO Trunk Status The trunk is idle. The trunk is busy in use. No PSTN line plugged in FXO interface. - Page 104 S-Series IP PBX Administrator Guide The module is powered off. No SIM card inserted. No signal. PIN/PUK Error. GSM network registration failed. Malfunction in module; please examine the relevant module. Table 13-4 BRI/E1/T1 Trunk Status Description BRI/E1/T1 Trunk Status The trunk is idle. 1.
-
Page 105: Concurrent Call
S-Series IP PBX Administrator Guide Concurrent Call Figure 13-3 Concurrent Call... -
Page 106: Resource Monitor
S-Series IP PBX Administrator Guide Resource Monitor Resource Monitor allows you to monitor the CPU usage, memory usage, disk utilization and network flow. Information On this page, you can check the system information, including Product, SN, Hardware version, Software version etc. Figure 14-1 System Information Network Click on Network tab to view the system's network status. -
Page 107: Performance
S-Series IP PBX Administrator Guide Performance Click on Performance tab to view the resource utilization data. The information of the chart will be shown upon mouseover. Figure 14-3 CPU Status Memory Figure 14-4 Memory Status... -
Page 108: Lan
S-Series IP PBX Administrator Guide Figure 14-4 LAN Status Storage Usage Figure 14-5 Storage Usage... -
Page 109: Maintenance
S-Series IP PBX Administrator Guide Maintenance This chapter describes system maintenance settings including the followings: Upgrade Backup and Restore Reboot and Reset System Log Operation Log Trouble Shooting Upgrade Yeastar S-Series provides automatic updates; new firmware file will be checked via a cloud server. In addition, you can upgrade firmware manually. -
Page 110: Browsing File From Local Pc To Upgrade
S-Series IP PBX Administrator Guide updates without even asking. Browsing File from Local PC to Upgrade Choose Type "Browsing File". Click , select the firmware file from your local PC. Note that the file should be a BIN file. Click to start uploading. -
Page 111: Backup And Restore
S-Series IP PBX Administrator Guide Figure 15-4 TFTP32 Settings Go to Yeastar system upgrade page, select Type as "Download From TFTP Server". Fill in the TFTP Server IP , the IP should be the local PC's IP address. Fill in the name of firmware update. It should be a BIN file name. Figure 15-5 Upgrade Manually –... -
Page 112: Reset And Reboot
S-Series IP PBX Administrator Guide 2. Backup from an earlier version cannot be restored on the system of a later version. Create a New Backup Click to create a new backup. Figure 15-6 Create New Backup File Upload a Backup Click to upload a backup. -
Page 113: System Log
S-Series IP PBX Administrator Guide Click to reboot the system Click to reset the system to factory configurations. System Log Users could check system logs under Maintenance > System Log . The system logs will be generated everyday automatically and a log file will be listed in the System Log. -
Page 114: Troubleshooting
S-Series IP PBX Administrator Guide Figure 15-11 Operation Log Troubleshooting Yeastar S-Series provides multiple tools on the Web GUI for you to do troubleshooting. Go to Maintenance > Troubleshooting to check the tools. Ethernet Capture Tool Figure 15-12 Ethernet Capture Tool 1. -
Page 115: Dahdi Monitor Tool
S-Series IP PBX Administrator Guide The output result is in .tar format. Decompress the file and open the .pcap file using Wireshark software. DAHDI Monitor Tool This feature is used to monitor PSTN trunks on the system. Users could choose a PSTN trunk, then start to monitor the trunk. -
Page 116: Traceroute
S-Series IP PBX Administrator Guide Traceroute Enter the target IP address or hostname. Click Start to start capturing logs. The output result will display in the window as below. Figure 15-15 Traceroute... -
Page 117: App Center
S-Series IP PBX Administrator Guide App Center Yeastar S-Series has integrated Yeastar-designed applications into packages that can be installed on S-Series and managed with App Center. Yeastar S-Series provides you with a variety of applications. This chapter introduces applications available at App Center and how to manage the applications. What App Center Offers Go to App Center to find out what App Center has to offer. -
Page 118: Auto Provisioning
S-Series IP PBX Administrator Guide Auto Provisioning Auto Provisioning is used to provision IP phones in bulk, including all user information, local phone book, firmware, and so on. Auto Provision is an easy and time-saving way to configure IP phones. How to use Auto Provisioning, please refer to Auto Provisioning section. - Page 119 S-Series IP PBX Administrator Guide Figure 16-3 Uninstall App NOTE: PBX Center is the core module of the system, it cannot be uninstalled. You can only upgrade the App. To update App, do any of the following: Click on Installed tab, choose one App and click Upgrade to update the App. ...
-
Page 120: Ldap Server
S-Series IP PBX Administrator Guide LDAP Server This section explains how to use S-Series LDAP with different phones. The configuration settings you enter in your phone will alter wildly dependant on how your LDAP server is configured. In this guide, the LDAP settings on IP phone are configured according to Yeastar S-Series LDAP default settings. - Page 121 S-Series IP PBX Administrator Guide Figure 17- 2 Add Phonebook 2) Choose the phone book, click to edit it. Figure 17-3 LDAP Phone Book 3) Fill in the contact information on the page, click to add the contact in the phone book. Add other contacts in the same way.
- Page 122 S-Series IP PBX Administrator Guide To import a phone book: 1) Click , you will see a dialog window shown as below. Figure 17-5 Import LDAP Phonebook 2) Click and select the file to start uploading. The file must be a .csv file. Check the sample file below.
- Page 123 S-Series IP PBX Administrator Guide LDAP Attributes The following table lists the most common attributes used to configure the LDAP lookup on IP phones. LDAP Attribute Name gn – givenName. First Name. cn – commonName. LDAP attribute is made up from given name joined to surname.
- Page 124 S-Series IP PBX Administrator Guide The example configurations are set according to S-Series LDAP default settings. You can use the below settings as a starting point and adjust the filter and display attributes according to your needs. Field Value LDAP Name Filter (|(cn=%)(sn=%)) LDAP Number Filter (|(telephoneNumber=%)(homePhone=%)(mobile=%))
-
Page 125: Auto Provisioning
S-Series IP PBX Administrator Guide Auto Provisioning Yeastar S-Series supports provisioning of IP phones and Yeastar gateways in bulk. Yeastar S-Series provides two methods to do auto provisioning: PnP (Plug and Play) and DHCP. Provisioning Methods Auto Provisioning Settings Provisioning Methods Yeastar S-Series supports provisioning in PnP mode and DHCP mode. - Page 126 S-Series IP PBX Administrator Guide Figure 18-1 Auto Provisioning Device List Click to scan all the devices in the local network. Click to add one device, choose the device model and fill in the device MAC address on the pop-up window.
-
Page 127: Upload Files
S-Series IP PBX Administrator Guide Choose the IP phone MAC address from the drop-down menu, and assign an extension for the phone, click . Assign extensions to other phones in the same way. Click Features tab, Preferences tab and Codec tab to configure other settings for the selected phones. -
Page 128: Firmware Upgrade
S-Series IP PBX Administrator Guide Figure 18-4 Auto Provisioning Phonebook Add Contact to add contacts on S-Series. If you choose the type as “Blacklist”, the contact will be Click added in the blacklist. A contact in the blacklist could not call in the IP phone. Figure 18-5 Auto Provisioning - Add Contact ... - Page 129 S-Series IP PBX Administrator Guide Click to upload the phone firmware file to S-Series. Check the box “Enable Download Firmware”, then the phone firmware will be updated during the phone provisioning process. [END]...
Need help?
Do you have a question about the S20 and is the answer not in the manual?
Questions and answers