Advertisement
Quick Links
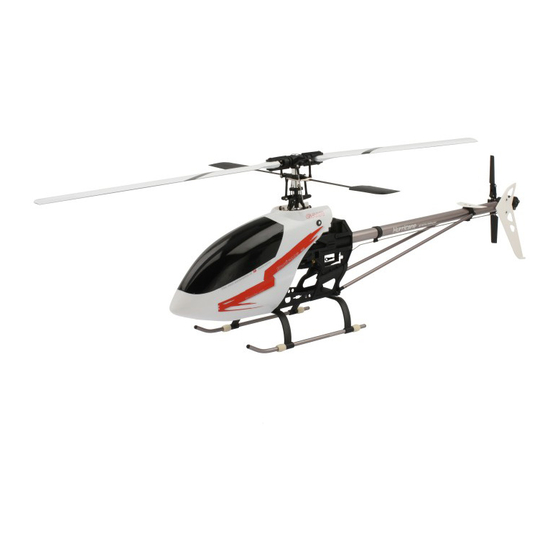
規格資料
Specification
Overall Length (w/o main blades):900mm
機身長度(不含主旋翼)
Flybar Paddle:788x42x6mm
平衡翼尺寸
Tail Blade Length:75mm
尾旋翼葉片長度
Speed Ratio
(Motor and Main) : 11.47 : 1 (Varied by gear ratio changed)
馬達與主旋翼減速比(可更換減速比)
Total weight:1375g (Equipped with Blades and all electronic gears except Battery)
全配重量(不含電池)
Power System(Recommanded):
動力系統(原廠建議):
Improtant : The gear ratio, motor and battery should be set properly if the power system changed!!
Overall Height:310mm
機身高度
Main Blade Length:425mm
適用主旋翼長度
尾旋翼迴轉直徑
Motor -- 1400 KV Battery -- 11.1V 2200mah 25C LI - Po in series(22.2V)
馬達 1400 KV
注意:更改動力系統請注意電池電壓,馬達KV值及減速比關係來做搭配!!
Main Rotor Diameter:965mm
主旋翼迴轉直徑
Speed Ratio (Main and Tail ): 1:4.36
主旋翼與尾旋翼轉速比
電池 -- 11.1V 2200mAh 25C Li - Po 兩組串接(22.2V)
Overall Width:80mm
機身寬度
Advertisement

Related Manuals for GAUI Hurricane 425


Summary of Contents for GAUI Hurricane 425
- Page 1 規格資料 Specification Overall Length (w/o main blades):900mm Overall Height:310mm Overall Width:80mm 機身長度(不含主旋翼) 機身高度 機身寬度 Main Rotor Diameter:965mm Main Blade Length:425mm Flybar Paddle:788x42x6mm 平衡翼尺寸 適用主旋翼長度 主旋翼迴轉直徑 Tail Blade Length:75mm Speed Ratio (Main and Tail ): 1:4.36 尾旋翼葉片長度 尾旋翼迴轉直徑 主旋翼與尾旋翼轉速比 Speed Ratio (Motor and Main) : 11.47 : 1 (Varied by gear ratio changed) 馬達與主旋翼減速比(可更換減速比) Total weight:1375g (Equipped with Blades and all electronic gears except Battery)
-
Page 2: Table Of Contents
目錄 Fonward 前言 Check List before First Flight 飛行前注意事項 Gear Ratios 齒輪減速比 ~ 組裝代號說明 Frame Assembly 1 機身組立 1 Frame Assembly 2 機身組立 2 Frame Assembly 3 機身組立 3 Rotor Head Assembly 1 旋翼頭組立 1 Rotor Head Assembly 2 旋翼頭組立 2 Rotor Head Assembly 3 ~ Tail Assembly 1 旋翼頭組立... - Page 3 This war ra nty does not co ver any com ponents damaged by us e o r modific ati on. I t is welc o me th a t c ontac t <gaui@gaui.com. tw> fo r more details about GAU I dis tri butors .
- Page 4 飛行前注意事項 Check List before First Flight 1. B e g in n e r’s o p e rating under t he super vision of the exper ienc ed pil ots is nec ess ary. It i s highly re co mm e nd e d that inspec t the mechanism and check the s etting of trans mitter by ex perienc ed p ilot s fo r fir st f l ight.
- Page 5 15T pinion = 13.05:1 15T pinion = 12.40:1 16T 馬達齒 = 12.24:1 16T 馬達齒 = 11.62:1 16T pinion = 12.24:1 16T pinion = 11.62:1 The Head Speed calculation : http://www.gaui.com.tw/html-en/550_rotor_speed.html 主旋翼轉數計算 : http://www.gaui.com.tw/html/550_rotor_speed_tc.html 組裝代號說明 Figures instruction 請注意 IMPORTANT Use the thread-lock adhesive if the screws are tightened to the metal parts.
-
Page 6: Frame Assembly
機身組立1 Frame Assembly 1 請注意 IMPORTANT Use the thread-lock adhesive if the screws are tightened to the metal parts. 組裝時如遇螺絲鎖於金屬件,請適量 使用 螺絲止鬆劑 以確保飛行安全! Use the thread-lock adhesive on the tip of screw for 1mm width. 螺絲止鬆劑上膠位置約為螺紋前端 1mm寬度。 IMPORTANT 請注意 Install the bearings onto the frame. 置入側板軸承。... -
Page 7: Frame Assembly
機身組立2 Frame Assembly 2 請注意 IMPORTANT Install the mount and skids. (Make sure not to install the ESC here or in the canopy, the overheated ESC will cut off the motor power temporarily during flight.) 將接收機電池架鎖至機身並套入腳架鋁管。(勿將ESC 安裝在此架上或置於艙罩內,散熱不良的ESC可能會在 飛行中進入保護模式而暫時切斷馬達電源。) Pitch & Roll Arm Set #204512 前搖臂... - Page 8 機身組立3 Frame Assembly 3 請注意 IMPORTANT Install the pullet shaft and the front pulley, tighten the screw (M2X10) at the flat side of the pulley race.(as shown in perspective) 置入皮帶齒軸,並以螺絲將前皮帶齒輪 (有平面)固定至軸上,組合完成如右透視圖。 The letter-marked side of one 透視圖 way bearing should be downward 單向軸承有標注字體面朝下。...
-
Page 9: Rotor Head Assembly
旋翼頭組立1 Rotor Head Assembly 1 CAUTION: Replace the main blades immediately after crash, inspect and replace the Main Mast / Spindle Shaft / Main Rotor Yoke & Hub if the impact of the crash 請注意 IMPORTANT damage sthe parts and results in vibration. 1.Join the yoke and center hub,install the 警... -
Page 10: Rotor Head Assembly
旋翼頭組立2 Rotor Head Assembly 2 請注意 IMPORTANT Install the flybar paddle (Both paddles should have the same turns), secure the flybar and paddle by M3X3 set screw. (Fig.1) 旋入平衡翼時請注意旋入圈數兩端要相同。 (圖一) Install washout guide.(The slot should be in the exact position and do not (Fig.1) overtight the screw.(Fig.2) (圖一) -
Page 11: Rotor Head Assembly
旋翼頭組立3 Rotor Head Assembly 3 (Fig.2) 請注意 IMPORTANT (圖二) Assemble the rear main gear and hub,join it with the main mast and frame assembly. Install the mast collar,the mast should not able to be moved up and down. (Fig.1) 鎖上輪檔(注意主軸上下不要有間隙) 組合主齒盤並如圖結合主軸並鎖上止附螺絲。... - Page 12 尾部組立2 Tail Assembly 2 IMPORTANT 請注意 1.Use the thread-lock on the tip of the screw and assemble the hub, install the tail grips as shown.(Fig.1) 將軸承置入尾旋翼頭內並將螺絲上螺絲膠再 組合(請勿用力過度導致滑牙),將尾旋翼夾片 鎖緊。(圖一) 2.Assemble the tail pitch slider and the bush. (Fig.2) 利用滑套旋入組合尾螺距推桿座。(圖二) 3.Assemble the grips assembly & the pitch (Fig.2) slider assembly.(Fig.3) (圖二)
-
Page 13: Tail Assembly
尾部組立3 Tail Assembly 3 IMPORTANT 請注意 1.Make sure the belt is not winding in tail boom,rotate it 90 degrees clockwise. (Front view) (Fig.1) 檢視皮帶是否平行(不可捲繞)並旋轉90度。 (圖一) 2.Loosen the 4 screws and install the tail boom Assembly. (Fig.2) 鬆開尾管夾螺絲並將尾管總成插入機體。 (圖二) 3.Hook the belt onto the pulley,set the belt Front view (Fig.1) (Fig.2) - Page 14 Wiring & Installing 電裝組立 IMPORTANT 請注意 Notic: With the servo at its neutral position, make sure the four control sticks are all in middle position,and the setting of CCPM SWASH AFR are all in 50%. 組裝伺服機時,需將搖控器設定為CCPM SWASH AFR都設定為50%並將遙控器開啟(全部保持 中立位置) IMPORTANT 請注意 (Fig.1) (圖一) Drill the holes on servo horn as figure above...
- Page 15 設定 Setting Initial setting position with 0 pitch degrees 此狀態為遙控器中立點設定(pitch = 0) The pushrod should be perpendicular to the mixing level. 此時旋翼搖臂與拉桿成垂直。 原廠齒輪配備為50T前齒盤、19T單向鋼齒、61T主齒 The kit come with 50T Front Main Gear / 19T One Way Gear 盤。馬達與馬達齒為選配,齒輪減速比請參考P.3。 / 61T Rear Main Gear, The BL motor and Pinion gear are optional. 如使用1400KV無刷馬達並使用22.2V電池1顆或(11.1V Horizontal If using the BL-Motor (KV-1400) / 22.2V battery (or 11.1V*2 = 22.2V),...
- Page 16 電池架組立~泡殼艙罩組立 Battery Mount & Canopy Assembly Use C.A to glue it onto main frame. IMPORTANT 請注意 請在電池架與機身接合處上膠。 Disassemble the RX Battery mount, assemble the #A mount and use C.A to glue it onto main frame. Assemble the RX Battery mount and use the Velcro to secure the battery.
- Page 17 升級配件表 Upgrade & Replacement Parts 機體 204010 Main Frame Set ———————————————————————————————————————————————————————— 42T齒輪 204021 Front Main Gear(42T) ———————————————————————————————————————————————————————— 61T齒輪 204022 Rear Main Gear(61T) ———————————————————————————————————————————————————————— 平衡桿座 204041 Seesaw ———————————————————————————————————————————————————————— 平衡桿 204042 Flybar ———————————————————————————————————————————————————————— 剪形臂滑座 204051 Washout Base ———————————————————————————————————————————————————————— 尾軸 204123 Tail Output Shaft ————————————————————————————————————————————————————————...
- Page 18 升級配件表 Upgrade & Replacement Parts 皮帶齒軸附鋼齒(14T) 204577 Pulley Shaft with Steel Gear(14T) ———————————————————————————————————————————————————————— 軸承(8x12x3.5)x2(附墊片) 204578 B. with washer (8x12x3.5)x2 ———————————————————————————————————————————————————————— 橡膠減震腳墊 204580 Skid Damper Rubber ———————————————————————————————————————————————————————— 馬達座(附軸承) 204581 Motor Mount Set(with B.) ———————————————————————————————————————————————————————— 8mm 新單向軸(L43) 204582 8mm New One Way Gear Shaft Set(L43) ————————————————————————————————————————————————————————...
Need help?
Do you have a question about the Hurricane 425 and is the answer not in the manual?
Questions and answers