Table of Contents
Advertisement
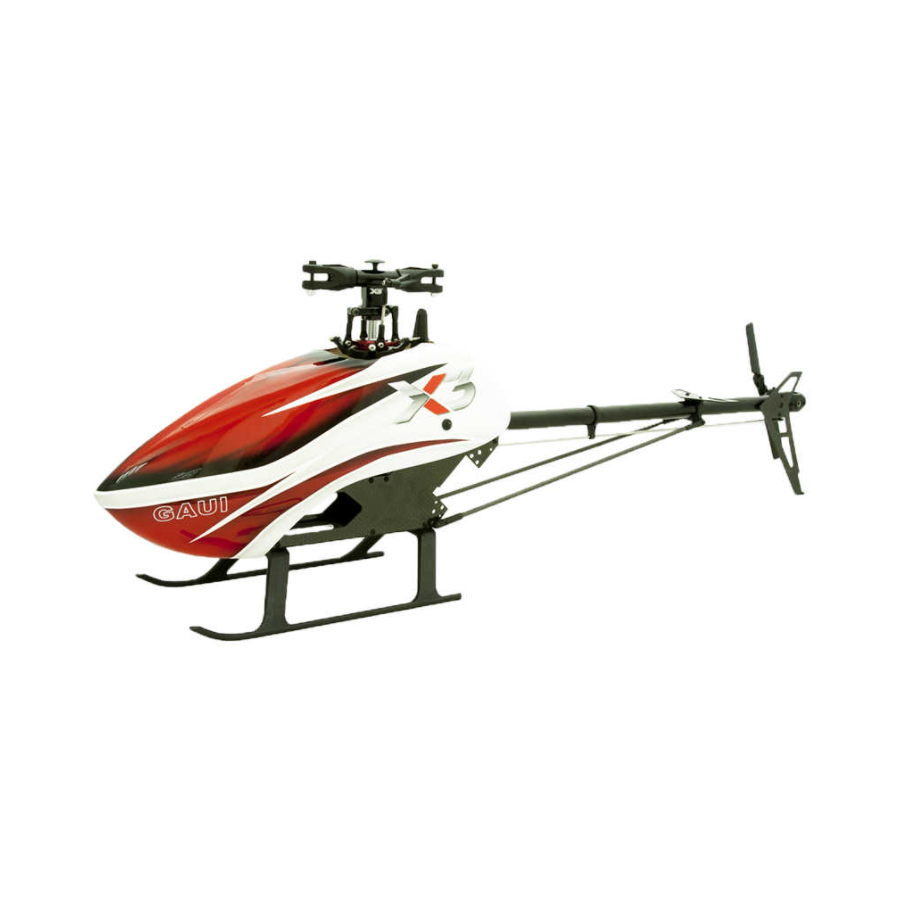
Specifications
Overall Length (with Canopy): 690 mm
Main Rotation Diameter: 738 ~ 808 mm
Main blade length: 315 ~ 360 mm
Overall Height: 230 mm
Overall Width: 190 mm
Tail Blade Length: 62 mm
Tail Rotation Diameter: 164 mm
Flight duration: 3~4 minutes (3D flight)
Power system (recommended):
ESC: Minimum 40A ESC
LiPo battery (max size: 34 x 34 x 110mm):
3S 11.1V 2000~2300mAh (3400~4000kV BL motor)
6S 22.2V 1000~1400mAh (1300~1800kV BL motor)
Total weight: 465g ±3% (kit with canopy,
w/o all electronics, blades and batteries.)
We recommend downloading and using the latest manual
from Official GAUI website's download area.
This product is for a radio controlled (RC) helicopter.
Improper operation, maintenance or assembly can
potentially cause a RC helicopter to pose a danger
to persons or objects including but not limited to
the possibility of causing serious physical injury and
even death.
INSTRUCTION MANUAL
規格
機身長度(含艙罩):690 mm
主旋翼迴轉直徑:738 ~ 808 mm
主旋翼長度:315 ~ 360 mm
機身高度:230 mm
機身寬度:190 mm
尾旋翼葉片長度:62 mm
尾旋翼迴轉直徑:164 mm
飛行時間:3~4分鐘 (3D飛行)
動力系統(原廠建議):
1.適用40A以上的電子變速器
2.鋰聚電池(110x34x34mm)及馬達規格:
11.1V 3S 2000~2300mAh (適合3400~4000 KV 無刷馬達)
22.2V 6S 1000~1400mAh (適合1300~1800 KV 無刷馬達)
全配重量: 465g ±3% (不含電池&電子裝備&主槳)
我們建議您從 GAUI 官方網站的下載區下載,
並使用最新的手冊。
本產品是無線遙控的直升機,不當的操作,保養或是組裝
有可能導致遙控直升機對於人身或是物品造成危險。包括,
但是不局限於對於人體產生嚴重傷害甚至死亡的可能性。
V 1.0.4
© 2013
MADE IN TAIWAN
Advertisement
Table of Contents

Subscribe to Our Youtube Channel
Related Manuals for GAUI X3


Summary of Contents for GAUI X3
- Page 1 Total weight: 465g ±3% (kit with canopy, w/o all electronics, blades and batteries.) 我們建議您從 GAUI 官方網站的下載區下載, We recommend downloading and using the latest manual from Official GAUI website’s download area. 並使用最新的手冊。 This product is for a radio controlled (RC) helicopter. 本產品是無線遙控的直升機,不當的操作,保養或是組裝...
- Page 2 Code Spare Part Number Spare part number Scissors High Strength Tape FBL system 零件料號 剪刀 高韌性強力黏著膠帶 陀螺儀 #216000 M2x4 x3 pcs 尺寸 數量 size specs. Quantity Transmitter & Receiver (6 channel +) CCPM Mini servo x3pcs Tail Specialized Servo x1pc 六動以上接收機&發射機 CCPM伺服機x3個...
- Page 3 Thank you for purchasing GAUI RC Helicopter from Tai Shih Hobby Corporation (TSH). We hope you will enjoy the joy of flight. In order to understand full assembly sequences, this instruction manual show the assembly information of this model, even though some elements might be supplied as pre-assembled.
- Page 4 The Academy of Model Aeronautics (AMA) is a national organization representing modelers in the United States. Please refer to the National Model Aircraft safety code from AMA Member Manual for details: http://www.modelaircraft.org/files/memanual.pdf Partially reprinted rules that are especially pertinent for Radio Controlled flight: RADIO CONTROL 1.
- Page 5 Bearing 6x13x5 M2x5 Bearing 6x13x5 Bearing 2x5x2.5 Bearing 6x13x5 #842005 #821605 #216127 M2x5 #216125 #216135 x2 pcs x3 pcs #803733 #805111 主軸板組裝 Main shaft mounts assembly...
- Page 6 13.5 mm N2x4 Recommended ball head screw installation distance. 建議球頭安裝參考距離。 #821608 #821605 #884001 N2x4 x6 pcs x4 pcs x3 pcs #216253 主軸板組裝 Main shaft mounts assembly...
- Page 7 #821608 x6 pcs #216252 機體組裝 Frame assembly...
- Page 8 Remove the battery slider plate and assemble back with instruction on P.26. 取出電池滑板並配合P.26組裝。 #821605 x5 pcs #216139 #216133 機體組裝 Frame assembly...
- Page 9 #821608 x3 pcs #216129 機體組裝 Frame assembly...
- Page 10 º #821605 #821608 º Confirm assembled frame is 90 degree to level surface (not twisted) x5 pcs x9 pcs º 確認機體與平面呈90 #216251 機體組裝 Frame assembly...
- Page 11 #821608 x2 pcs #216147 機體組裝 Frame assembly...
- Page 12 M2x12 Insert 2x8 and M2x12 screws thru the side frames and boom clamp but do not tighten yet, wait until step in P.22 where the boom in installed and adjusted before tightening these screws. 將 2x8跟M2x12穿過碳纖側板並鎖入管夾組, 不鎖緊待P.22組裝尾管時一並鎖緊固定。 #821608 #842012 M2x12 x8 pcs x1 pcs 12.00...
- Page 13 Adjust with different washers and double check smooth operation of the main gear assembly 適當的調整華司厚度以確認主齒盤旋轉順暢。 Washer M2x4 W10.2x13.5x0.1 M2x4 Counter threaded (you should assemble the two part from the usual opposite direction). 逆牙方向鎖入 *Important: Use CLEANING NAPHTHA or Alcohol to remove the protective oil from the One Way Sleeve &...
- Page 14 Top: longer distance to the notch W6.2x7.6x0.5 平面離洞口處較遠朝上 W6.2x7.6x0.1 Bottom: shorter distance to the notch 平面離洞口處較 近朝下 See P.22 installation of tail boom, adjust with washer(s), lift up the main gear/shaft /rotor head assembly to adjust , confirm proper mesh between crown gear and tail transmission gear.
- Page 15 Make sure M2.6x6 screw is secured with glue and tightened with moderate/proper force. Do not over-tighten screw and strip it or it may become a flight safety risk. M2.6x6螺絲請確實上膠並適當鎖緊,不可硬鎖以避免造成螺絲受損,影響飛行安全性。 M2x8 Bearing 5x9x3 W5.1x9x1.1 Bearing 5x9x3 W2.6x8x1 M2.6x6 Thrust Bearing 5x10x4 Bigger inner race Smaller inner race 內徑較大...
- Page 16 M2x3.2 Short ball head screw 短球頭 Long ball head screw 長球頭 2x3.5 #832232 #216104 M2x3.2 2x3.5 #805116 x4 pcs x3 pcs #216340 #216104 P.12 主旋翼頭組裝 Main rotor head assembly...
- Page 17 W2x3.5x0.5 Bearing 2x5x2.5 W2x3.5x.05 M2x10 N2.5x5 M2.6x12 Very important to tighten M2.6x12 screw. 務必鎖緊M2.6x12螺絲。 #842010 #842024 #884003 M2x10 M2.6x12 N2.5x5 #805111 #216107 x4 pcs x1 pcs x1 pcs 10.0 12.0 #216341 #803735 主旋翼頭組裝 P.13 Main Rotor Head Assembly...
- Page 18 13.6 mm Different ball head installation on grip lever affects flight response, adjust position according to pilot own preference. However the same position must be selected for both grip levers. 不同的球頭位置會影響飛行的反應速度,請依個人需求調整適當的位置。 兩組主旋翼槳夾的球頭需同位置。 #803735 #216342 P.14 主旋翼頭組裝 Main rotor head assembly...
- Page 19 5.6 mm 1. Assemble the 3 CCPM ball links and clip onto place. 1.組裝3組CCPM拉桿並扣上。 #803735 #216342 主旋翼頭組裝 P.15 Main rotor head assembly...
- Page 20 M2x10 Use Hex wrench from the tools pack to tighten M2x10 screw. 可使用配件包內的L型板手鎖附M2x10螺絲。 #821608 #835505 M2x10 x2 pcs x2 pcs 10.0 #216145 #216137 P.16 艙罩支柱組裝 Canopy post assembly...
- Page 21 M3x5 M3x3 M2x4 When installing the pinion One can use a small strip of paper to confirm the position of pinion/ main gear as adjust the pinion / main gear mesh to be pictured below. around 0.1mm. 安裝完成時需確認馬達齒位置如下圖。 可使用1張紙滾入齒輪之間 調整間隙為0.1mm。 Gear Ratios 齒輪傳動比...
- Page 22 Bearing 7x11x3 M2x3.2 Bearing 7x11x3 P1.45X7 Bearing 4x8x3 M2x4 M2x2 Use Hex wrench from the tools pack to tighten M2x2 screw. 可使用配件包內的L型板手鎖附M2x2螺絲。 #842004 #835502 #832232 #216185 M2x4 M2x2 M2x3.2 #805112 #216186 x2 pcs x1 pcs x2 pcs #216119 #805115 P.18 尾殼組裝...
- Page 23 Make sure M2.6x6 screw is secured with glue and tightened with moderate/proper force. Do not over-tighten screw and strip it or it may become a flight safety risk. M2x5螺絲請確實上膠並適當鎖緊,不可硬鎖以避免造成螺絲受損,影響飛行安全性。 Tighten properly P2x2.95x3.1 M2x8 screws 適當鎖緊M2x8螺絲。 W5.1x7x0.7 Bearing 5x8x2.5 M2x8 Thrust Bearing 3x6x2.8 W3.1x4.6x0.6 Bearing 3x6x2.5...
- Page 24 M2x8 P2x2.95x3.1 Bearing Tighten properly 3x6x2.5 M2x8 screws 適當鎖緊M2x8螺絲。 M2.6x3.7 固定點 Notch to tighten M3x3 screw M2x14 M3x3 #842008 #842029 M2x8 M3x3 x2 pcs x1 pcs #842014 #216143 M2x14 M2.6x3.7 #216341 #805107 x1 pcs x2 pcs 14.0 #883552 #216143 P.20 尾殼組裝...
- Page 25 M3x3 固定環 Collar Oring Bearing 5x10x4 Adjust position of collar so it won't interfere with the screw securing the Tail Gear Case / tail Boom. Insert Retainer collars on both ends of the TT/adapter end then secure with the 2pc set screws (use loctite glue on the screws). 將固定環套入兩端並切齊接合處後鎖緊止付螺絲M3x3。...
- Page 26 Coordinate with P.8 about installation of tail boom and tightening 2x8 and M2x12 locking screw. 配合P.8組裝尾管後鎖緊 2x8夾持螺絲M2x12定位螺絲。 Use adjustment washers to avoid screw interfering with the torque tube collar. 調整墊片厚度避免螺絲干涉固定環。 M2x10 2x14 W2x5x0.5 #821605 #821614 2x14 x1 pcs x2 pcs 14.0 #842009 #216208...
- Page 27 2x14 P2x4x2 2x14 Use AB glue to glue together the support ends and tail support rod. 使用AB黏著劑黏合支撐桿。 #821605 #821608 #821614 2x14 x2 pcs x5 pcs x3 pcs 14.0 #216211 #216254 支撐桿組裝 P.23 Support rods assembly...
- Page 28 N2x4 M2x5 M3x5 Cut excess servo horn 切除 #842018 #842008 M2x8 M3x5 x2 pcs x4 pcs #842005 #884001 #821605 M2x5 N2x4 #216150 x2 pcs x1 pcs x1 pcs #216210 #803735 P.24 尾拉桿組裝 Tail push rod assembly...
- Page 29 90º 90º Level 水平 Level 水平 Level 水平 After installation of the tail push rod, double check all the parts are leveled as depicted above. 安裝尾拉桿完成後,請確認各部位設定值如上圖。 尾拉桿組裝 P.25 Tail push rod assembly...
- Page 30 GYRO Receiver M3x19 N3x5.5 Use high strength tapes to secure battery to the battery slider plate. 配合P.4使用高韌性膠帶固定電池。 #842035 #810003 M3x19 N3x5.5L x2 pcs x2 pcs 19.0 #216139 P.26 電裝配置 Electronics installation...
- Page 31 Insert the battery slider plate into the battery mount, make sure it is inserted all the way and clips (secured) into place. 將固定好的電池滑板組置入電池滑座內,確認插入 至底與扳扭完全嵌合。 Battery mount clip on this location 扳扭崁合處 M2x5 M2x8 迷你伺服機組裝 P.27 Mini Servo Installation...
- Page 32 GAUI www.gaui.com.tw E-mail: gaui@gaui.com.tw TEL: +886-2-86305567 FAX: +886-2-26105567 No.118, Ren’ai Rd., Bali Dist., New Taipei City 249, Taiwan © 2013 MADE IN TAIWAN...
Need help?
Do you have a question about the X3 and is the answer not in the manual?
Questions and answers