Table of Contents
Advertisement
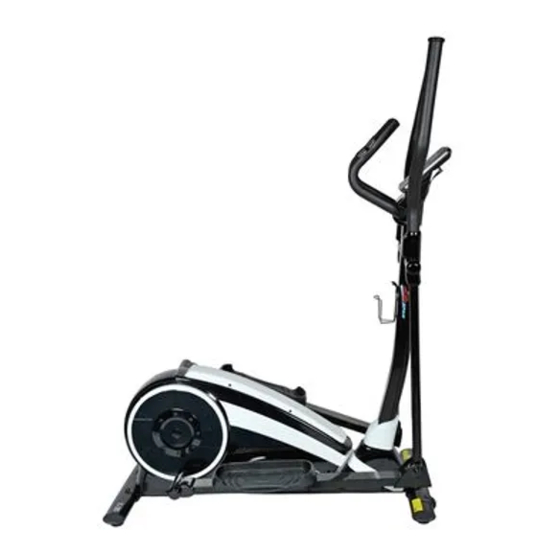
X-20 OWNER'S MANUAL
Product may vary slightly from the item pictured due to model upgrades
Read all instructions carefully before using this product. Retain this owner's manual for
future reference.
NOTE: This manual may be subject to updates or changes. Up to date manuals are available through our website at
www.lifespanonline.com.au
Advertisement
Table of Contents

Subscribe to Our Youtube Channel
Related Manuals for LifeSpan X-20


Summary of Contents for LifeSpan X-20
- Page 1 X-20 OWNER’S MANUAL Product may vary slightly from the item pictured due to model upgrades Read all instructions carefully before using this product. Retain this owner’s manual for future reference. NOTE: This manual may be subject to updates or changes. Up to date manuals are available through our website at...
-
Page 2: Table Of Contents
TABLE OF CONTENTS IMPORTANT SAFETY INSTRUCTIONS ASSEMBLY INSTRUCTIONS PROGRAM OPERATION EXERCISE GUIDE EXPLODED DIAGRAM PARTS LIST WARRANTY X-20... -
Page 3: Important Safety Instructions
Before using the equipment, check that the nuts and bolts are securely tightened. If you hear any unusual noises coming from the equipment during use and assemble, stop immediately. Do not use the equipment until the problem has been rectified. X-20... - Page 4 The equipment is not suitable for therapeutic use. There are many functions of the computer, which value will show when using the equipment according the amount of exercise, here warmly remind you that the value of heart pulse just give you some reference. X-20...
-
Page 5: Assembly Instructions
25L/R Front/rear neck cover Pulse wire Bolt ST4.2*19 Bottle holder Bolt ST4.2*25 Washer d5*Φ10*1 Bolt M5*10 Bolt M4*12*Φ6 Long plastic spacer Wrench S13-14-15 Upright post Wrench S13-14 Washer d8*Φ16* 1.5 Wrench S17-19 Bolt M8*15 Wrench S5 Upright cover Wrench S6 Front stabilizer X-20... - Page 6 STEP 1: #41 M8*50 4PCS #31 d8*Φ16*1.5 4PCS 1. Use bolt (41) and washer (31) to lock the front stabiliser (34) and rear stabiliser (44) on the frame (42). X-20...
- Page 7 2. Connect mid-sensor wire 1 (35) and mid-sensor wire 2 (37) 3. Use the bolt (32) and washer (31) lock the upright post (30) on the main frame (42) and then cover the upright post (33) on the main frame (42) X-20...
- Page 8 2. Using the nylon nut (52), washer (53) lock the connecting pole post (51L/R) to each crank axle of main frame (42). 3. Using the bolt (46), washer (31) and the nylon nut (20) lock the swing pole post and the pedal pole post. X-20...
- Page 9 1. Lock the pedal (49) on each connecting pole post (51 L/R) by the bolt (48), washer (31) and the nylon nut (20) 2. Cover the front connecting pole cover (47L/R, 54L/R) and rear connecting pole cover (50L/R 55L/R) to each connecting pole( 51L/R) and lock it by the bolt (45) X-20...
- Page 10 19 20 1. Use the square neck bolt (18), arc washer (19),nylon nut (20) lock the handlebar (12L/R) to each connecting pole post (21 L/R) 2. Attach the swing pole cover (24 L/R, 17L/R) to each swing pole post (21L/R) X-20...
- Page 11 Use the bolt (10), spring washer (9) to lock the mid-handlebar (5) onto the upright post (30) Connect the computer wire (1) to the mid sensor wire1 (35), and then lock the computer (1) on the upright post (30) using the bolt(28) X-20...
- Page 12 1. Place the front/rear neck cover (25L/R) onto the upright post (30), and the lock it into place with bolt (26 ,27) Using the washer (61) and bolt (62), lock the bottle holder (60) onto the upright post(30) 3. Insert the pulse pad wire(59) into the back of the computer (1) X-20...
-
Page 13: Program Operation
3. PROGRAM OPERATION Function Programs: there are 21 programs as follows 1. 1 Manual Program 2. 10 Pre-set Program Profiles Rolling Interval Valley Cardio Fatburn Endurance Ramp Slope Mountain P10 Rally X-20... - Page 14 X-20...
- Page 15 3. Watt Control Program Heart Rate Control Programs 55%H.R 75%H.R 90%H.R TARGET H.R X-20...
- Page 16 5. User Setting Programs CUSTOM 1 to CUSTOM 4 X-20...
- Page 17 B: When setting values, press ENTER to confirm the value that you would like to preset. During the start mode (display showing START), press ENTER to choose to display speed RPM, or switch automatically. During any mode, hold down this button for 2 seconds to totally reset the computer. X-20...
- Page 18 First test your current heart rate and show your heart rate value, press this button to enter into pulse recovery testing. When you are in pulse recovery mode, press this button to exit. NOTE: It is suggested to completely cover the buttons with your finger when pressing to ensure the correct functioning of the button. X-20...
- Page 19 Plug in one end of the adaptor to the AC electrical source and connect the other end to the computer. The computer will beep and enter into initial mode 2. Program selection and value setting Manual Program and Preset Programs (P1-P10) a) Press UP and DOWN buttons to select the desired program. X-20...
- Page 20 The time will flash, and then press UP and DOWN buttons to set up your desired time. Press ENTER to confirm the value d) The distance field will being flashing. Press UP and DOWN buttons to set up the desired distance value. Press ENTER to confirm the value X-20...
- Page 21 Distance will flash, and then press UP/DOWN to set up the desired distance value. Press ENTER to confirm the value. e) Calories will flash, and then press UP/DOWN to set up the desired calories to be burnt. Press ENTER to confirm the value. X-20...
- Page 22 Distance will flash, and then press UP/DOWN to set desired distance value. Press ENTER to confirm the value. e) Calories will flash, and then press UP/DOWN to set up the desired calories to be used. Press ENTER to confirm the value. X-20...
- Page 23 Distance will flash, and then press UP/DOWN to set up the desired distance value. Press ENTER to confirm the value e) Calories will flash, and then press UP/DOWN to set up the desired calories to be consumed. Press ENTER to confirm the value X-20...
- Page 24 Time display will flash, and then press UP/DOWN to set up the desired time to do the exercise. Press ENTER to confirm the value. d) Distance will flash, and then press UP/DOWN to set up the desired distance value. Press ENTER to confirm the value. e) Calories will to confirm the value. X-20...
- Page 25 Press ENTER to confirm. Then repeat above operation to set the resistance from 1 to 16 g) Press START/ STOP to begin exercise Body Fat Measurement Program a) Press UP, DOWN to select BODY FAT TEST program see below: b) Press ENTER to confirm your choice, and enter into height setting model X-20...
- Page 26 The weight display will flash, and then press UP, DOWN to set up your weight. Press ENTER to confirm the value. See below: e) The age display will flash, and then press UP, DOWN to set up your age. Press ENTER to confirm the value. See below: X-20...
- Page 27 Press START/STOP to begin testing your body fat. See below: NOTE: a) During the body fat measurement, place both your palms on the contact pads (pulse sensors). The test results are: FAT%, BMR (Basal Metabolic Rate), BMI (Body Mass Index), BODY and body shape. See below: X-20...
- Page 28 Hold the pulse sensors for 60 seconds d) When time counts down to 0, the test result (ranging from F1 - F6) appears on the display. F1 Excellent Below Average F2 Good Not good F3 Fair Poor X-20...
- Page 29 10.0 - 90.0 990. When the calorie reaches 0, the program will stop and the computer will alarm. PULSE: Range: 30 - 240 BPM(beats per minute) RESISTANCE LEVEL: Range:1 - 16 WATT: exercise watt X-20...
- Page 30 Please ensure that the motor is in good working condition and that all wires are connected and not damaged ERROR2 Please ensure that your hands are in correct contact with the pulse sensors Adapter INPUT: AC (varies with country) OUTPUT: 8VDC 500mA X-20...
-
Page 31: Exercise Guide
90% of your maximum heart rate. If just starting an exercise program, work out at the low end of your target heart rate zone. As your aerobic capacity improves, gradually increase the intensity of your workout by increasing your heart rate. X-20... - Page 32 Warm-up for two to five minutes before strength training or aerobic exercising. Perform activities that raise your heart rate and warm the working muscles. Activities may include brisk walking, jogging, jumping jacks, jump rope and running on the spot. X-20...
- Page 33 Pull the chest down to touch the thigh on the leg that is bent, and twist at the waist. Hold this position at least 10 seconds. Repeat 10 times on each side. X-20...
- Page 34 A proper cool-down slowly lowers your heart rate and allows blood to return to the heart. Your cool-down should include the stretches listed above and should be completed after each strength training session. X-20...
-
Page 35: Exploded Diagram
5. EXPLODED DIAGRAM 19 20 X-20... -
Page 36: Parts List
End cap with wheel L/R Spring washer d8*Φ20*2*R16 48L/R PT80*40*71.5*90*65 Washer d5*Φ13*1.0 Nylon nut M8 Front tube Computer wire 1 Bushing 2 Φ32*3*Φ28*21*Φ19.4 Bolt M8*50 Spring washer d19*Φ25*0.3 Rear tube Adjusted end cap Bushing Φ31.8*Φ19.2*54 PT80*40*71.5*90*65 Bolt M8*16 Bolt ST4.2*19 X-20... -
Page 37: Warranty
Full details of your consumer rights may be found at www.consumerlaw.gov.au Please visit our website to view our full warranty terms and conditions: http://www.lifespanonline.com.au/Warranty-Policy Please email us through support@lifespanfitness.com.au for all warranty or support issues. X-20...
Need help?
Do you have a question about the X-20 and is the answer not in the manual?
Questions and answers