Table of Contents
Advertisement
Quick Links
Requires : (Glider) 2-channel radio with Elevon mixing, 2 high
Wing Span
Wing Area
Flying Weight(Glider)
Fuselage Length
Warning ! This model is not a toy.
It is designed for maximum performance. Please seek advice if one is not familiar with this kind
of electric powered precision model. Operating this model without prior preparation may cause
injuries. Remember, safety is the most important thing. Always keep this instruction manual at
hand for quick reference.
E268XMPO17220807
torque standard size servos.
(EP Glider) 3-channel radio with Elevon mixing, 2 high
torque standard size servos, EP package (6x225W outrunner
motor, mounting brackets, propellers and electric wires),
6x25A ESC, 3x4000 mAh 11.1V Li-Po battery and charger.
(EP Glider)
*Specifications are subject to change without notice.*
The World Models
Manufacturing Co., LTD.
www.theworldmodels.com
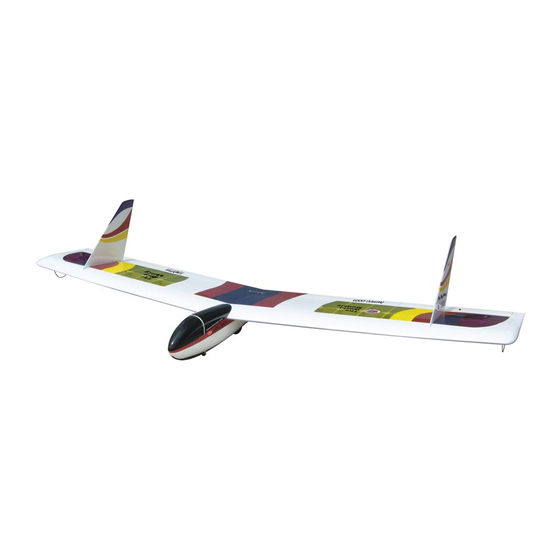
Specifications
120 in / 3035 mm
2800 sq in / 180.6 sq dm
10 Ib / 4600 g
15.5 Ib / 7100 g
42.5 in / 1075 mm
INSTRUCTION MANUAL
FACTORY PRE-FABRICATED
ALMOST-READY-TO-FLY(ARF)SERIES
MADE IN CHINA
Advertisement
Table of Contents

Related Manuals for THE WORLD MODELS The Big Wings


Summary of Contents for THE WORLD MODELS The Big Wings
- Page 1 Operating this model without prior preparation may cause injuries. Remember, safety is the most important thing. Always keep this instruction manual at hand for quick reference. The World Models FACTORY PRE-FABRICATED Manufacturing Co., LTD. ALMOST-READY-TO-FLY(ARF)SERIES www.theworldmodels.com...
-
Page 2: Parts List
INDEX BEFORE YOU BEGIN PARTS LIST ASSEMBLY P.3-P.12 SAFETY PRECAUTIONS P.13 BEFORE YOU BEGIN Read throuht the manual before you begin, so you will have an overall idea of what to do. Check all parts. If you find any defective or missing parts contact your local dealer. Please DRY FIT and check for defects for all parts that will require CA or Epoxy for final assembly. -
Page 3: Table Of Contents
Parts List 1. MAIN WING -- 1 pair 6. LARGE SCALE TREADED INFLATABLE WHEELS PL3115140 Ø140mm -- 1 set 2. SCREW PM4x50mm -- 2 pcs WHEEL COLLAR Ø5.1mm w/ set screw -- 2 sets SCREW PWA2x8mm -- 8 pcs PLASTIC COLLAR d5.1xD9mm -- 1 pc. M4 NYLON INSERT LOCK NUT -- 2 pcs COPPER TUBE d5.3xD6.4x14mm -- 1 pc. -
Page 4: Main Wing -- 1 Pair
Main Wing Aileron Servo Lead Pre-glued Bottom View Aileron Servo PM2x12mm PL4120300 PWA2x8mm Screw PM4x50mm M4 Nylon Insert Lock Nut M2 Nut Screw PWA2x8mm 1.5mm Bottom View Heavy Duty Horn Bracket M4 Nylon Insert Lock Nut PM2x8mm M2 Nut Heavy Duty Clevis Heavy Duty Clevis M2 Nut... -
Page 5: Wing Tube Ø32X900Mm -- 1 Pc
Main Wing Wing Tube Ø32x900mm Completed Top View Vertical Fin Screw PM3x35mm Large Scale Treaded Screw PM3x40mm Inflatable Wheels Ø140mm d3xD12mm Washer 3mm set screw 3mm set screw 5.1 Collar d3xD12mm d3xD12mm PM3x40mm PM3x35mm Wire Ø5x75mm 5.1 Collar Copper Tube d5.3xD6.4x14mm Plastic Collar d5.1xD9mm... -
Page 6: Wire Ø5X75Mm -- 1 Pc
Main Wheel 5.1mm Wheel Collar Large Scale Treaded Inflatable Wheels Ø140mm d5.1xD9mm Plastic Collar 3mm set screw Copper Tube d5.3xD6.4x14mm 3mm set screw 5.1 Collar Wire Ø5x75mm 5.1 Collar Copper Tube d5.3xD6.4x14mm Plastic Collar d5.1xD9mm Bottom View Main Wing Wire Wheel Ø30mm Plastic Collar d3xD6.5mm... - Page 7 E268XMEPTS If you want to use electric power, please follw step 8A & 8B & 8C & 8D & 8E. To complete The Big Wings (electric powered), you need to purchase The World Models E268XMEPTS Motor Cover(Right)--3 pcs Outrunner 28/32 Deluxe...
- Page 8 Motor Mounting Template 842.7x117x3mm Completed PM3x18mm PM3x25mm Washer Washer d3xD7mm d3xD7mm Washer d3xD12mm Washer d3xD12mm M3 Nylon Insert Lock Nut E268XMPO17220807...
- Page 9 Electric PM2x8mm Washer d3xD7mm PM3x6mm Screw Electrical Wire PWA2.3x8mm PWA2.3x8mm 1.5mm Completed PM2x12mm PM2x12mm Spinner Don't over-tighten the PM2 screws, let the propeller Ø45 blades align themselves when spinning. PL6314020 PL6315020 PL6314020 PL6315020 PL6314020 PL6315020 Completed E268XMPO17220807...
- Page 10 Radio Equipment Install and arrange the equipment as shown in the diagram. Receiver Battery Battery Tie 250mm Receiver 25A Brushless ESC Ballast Weight Front Battery Sponge 70x122x60mm 25A Brushless ESC Connection Diagram Battery Battery Battery Throttle Receiver 1.It is recommended to use one battery to supply outer/ middle/ inner pairs of Motors. With this power supply arrangement, any battery problem will affect pairs of Motor, not a single one which may result in uneven thrust and turning of the model.
- Page 11 Main Wing Screw PM4x40mm Washer d3xD12mm PM4x40mm d3xD12mm PVC Plate 118x40x1mm Cockpit Cockpit Clip Pin HW4201325 If you want to use electric powered. Please cut openings for improving cooling of Motor and battery. Fuselage Tail 20mm 28mm 40mm 20mm 30mm 33mm 20mm Cockpit...
-
Page 12: Control Throws
Wing Setting Adjust the wing and fuselage configuration as shown in the diagrams. A=A' B=B' Control Throws Adjust the control throws as shown in the diagram. These throws are good for general flying. You can adjust according to your personal preference. Aileron/ Elevator 15mm 15mm... - Page 13 C.G. The ideal C.G. position is 240mm (9.45 in.) behind the leading edge measured at where the wing meets the fuselage. In order to obtain the C.G. specified, add weight to the fuselage or move the battery position. Check the C.G. before flying. 240mm 9.45in C.G.
- Page 14 Warning! Important Safety Precautions # First time flyer should never fly by himself / herself. Assistance from experienced flyer is absolutely necessary. # Pre-flight adjustment must be done before flying, it is very dangerous to fly a badly pre-adjusted aircraft. (EP Glider) is specially designed to be powered by 6x225W Outrunner Motor System.
- Page 15 E268XMPO17220807...
- Page 16 E268XMPO17220807...
Need help?
Do you have a question about the The Big Wings and is the answer not in the manual?
Questions and answers