Table of Contents
Advertisement
Quick Links
Download this manual
See also:
User Manual
Advertisement
Table of Contents

Related Manuals for MeiTrack T1


Summary of Contents for MeiTrack T1
- Page 1 MEITRACK T1 User Guide MEITRACK T1 User Guide...
-
Page 2: Change History
Change History File Name MEITRACK T1 User Guide Created By Kyle Lv Creation Date 2014-06-10 Project Update Date 2015-09-30 Subproject User Guide Total Pages Version V2.5 Confidential External Documentation Copyright © 2015 Meitrack Group All rights reserved. - 2 -... -
Page 3: Table Of Contents
3.1.3 Other Functions ...............................- 4 - 3.1.4 Functions of Optional Accessories ...........................- 5 - 3.2 Specifications ..................................- 5 - 4 T1 and Accessories ..................................- 6 - 5 Appearance....................................- 7 - 6 First Use ......................................- 7 - 6.1 Installing the SIM Card ................................- 7 - 6.2 Charging ....................................- 8 -... -
Page 4: Copyright And Disclaimer
The user manual may be changed without notice. Without prior written consent of Meitrack Group, this user manual, or any part thereof, may not be reproduced for any purpose whatsoever, or transmitted in any form, either electronically or mechanically, including photocopying and recording. -
Page 5: Functions Of Optional Accessories
Green indicator showing the GSM signal LED indicator Blue indicator showing the GPS signal 1 SOS button (for sending SMSs or dialing) Button/Switch 1 power button Memory 8 MB byte Copyright © 2015 Meitrack Group All rights reserved. - 5 -... -
Page 6: T1 And Accessories
USB cable Optional accessories: Camera Handset RFID reader A21 LCD display (dialing and SMS display) A53 fuel sensor A52 digital temperature sensor + LED display iButton A61 sensor box Copyright © 2015 Meitrack Group All rights reserved. - 6 -... -
Page 7: Appearance
Ensure that the phone card PIN lock has been closed properly. Ensure that the SIM card in the T1 has subscribed the caller ID service if you want to use your authorized phone number to call the T1. ... -
Page 8: Charging
6.2 Charging When you use the T1 for the first time, connect the T1 GND (-Black) and Power (+Red) wires to 12 V or 24 V external power supply for charging. Ensure that the T1 is charged at least three hours. Eight hours are recommended. -
Page 9: Tracking By Mobile Phone
6.5 Tracking by Mobile Phone Call or send the 0000,A00 command by SMS to the T1 SIM card number. The device will reply an SMS with a map link. Click the SMS link. The location will be displayed on Google Maps on your mobile phone. -
Page 10: Common Sms Commands
If no phone numbers are set and commas are remained, phone numbers set before will be deleted. If all phone numbers need to be deleted, send 0000,A72. Example: 0000,A72,13844444444,13855555555 Reply: 353358017784062,A72,OK Copyright © 2015 Meitrack Group All rights reserved. - 10 -... -
Page 11: Setting The Smart Sleep Mode - A73
Visit http://ms03.trackingmate.com, enter the user name and password, and log in to the MS03. (Purchase the login account from your provider.) For more information about how to add a tracker, see the MEITRACK GPS Tracking System MS03 User Guide (chapter 4 "Getting Started"). -
Page 12: Installing The T1
View various reports. Send commands in batches. Support OTA updates. For details, see the MEITRACK GPS Tracking System MS03 User Guide. 8 Installing the T1 8.1 Installing GPS and GSM Antennas GSM antenna GPS antenna Connect the GSM antenna to the connector which is labeled "GSM". The GSM antenna is non-directional, so you can hide it in any place of a vehicle. -
Page 13: Power Cable/Ground Wire (Pin 1/2)
8.2.1 Power Cable/Ground Wire (Pin 1/2) Connect the power cable (red) and ground wire (black) to the positive and negative charges of the vehicle battery respectively. Copyright © 2015 Meitrack Group All rights reserved. - 13 -... -
Page 14: Acc And Door Detection (Pin 5/7)
OFF-ON. 8.2.3 Output Control (Pin 10/11) Note: To implement remote fuel and power cut-off, connect the relay to the fuel pump cable or the engine cable in series. Copyright © 2015 Meitrack Group All rights reserved. - 14 -... -
Page 15: Sensor Input
User Guide and Meitrack iButton User Guide. Note: The white plug on the T1 harness consists of the power cable (red), ground wire (black), AD2 cable (blue), and SEN cable (blue). The T1 can connect to a maximum of two A61 sensor boxes. You can install a maximum of eight A52 temperature sensor ports. -
Page 16: Installing The Rfid Reader (Rs232 Port)
White TX, T1 sends data to the camera. To connect T1 to a camera, an 8 pin to 4 pin conversion cable is required. 8 pins are connected to T1, and 4 pins are connected to the camera. Connect 8 pins to the Connect 4 pins to the device. -
Page 17: Mounting The T1
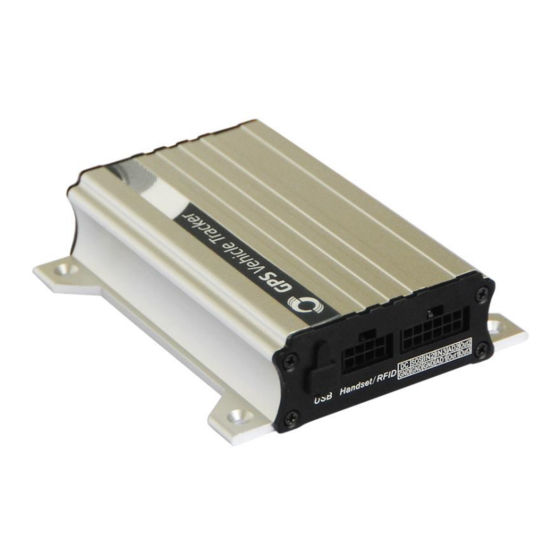
Note: The RS232 port can be used with either the handset or the RFID reader at a time. 8.6 Mounting the T1 Tighten the four screws shown in the following figure. If you have any questions, do not hesitate to email us at info@meitrack.com. Copyright © 2015 Meitrack Group All rights reserved. - 17 -...
Need help?
Do you have a question about the T1 and is the answer not in the manual?
Questions and answers