Table of Contents
Advertisement
Advertisement
Table of Contents

Subscribe to Our Youtube Channel
Related Manuals for Expobar ROSETTA CAPSULE GROUP


Summary of Contents for Expobar ROSETTA CAPSULE GROUP
- Page 1 ROSETTA CAPSULE GROUP USER MANUAL UM_EN Date: 150106 Original instruction...
-
Page 2: Table Of Contents
CONTENT Rosetta Capsule Group CONTENT ..................................2 SYMBOL DESCRIPTION ............................4 Hazard intensity levels .................................4 GENERAL ..................................5 Introduction ...................................5 General instructions ................................5 Warnings ....................................5 Precautions .....................................6 Intended use ...................................6 TECHNICAL SPECIFICATIONS ........................7 Data sheet....................................7 Accesories ....................................7 OVERVIEW OF COMPONENTS ........................8 Rosetta mini control 2GR capsule ............................8... - Page 3 CONTENT Rosetta Capsule Group Rinsing the capsule group ..............................20 Cleaning the capsule group ...............................21 Disassemble the group gasket............................22 Cleaning the Group Gasket and Capsule Holder .......................22 Reassembling the Group Gasket .............................22 Removing the adjustable spout ............................23 Cleaning the adjustable spout ............................23 Additional handling of the machine..........................24...
-
Page 4: Symbol Description
SYMBOL DESCRIPTION Rosetta Capsule Group Hazard intensity levels There are three different levels of hazard intensity, identified by signal words DANGER, WARNING and IMPORTANT. The level of hazard is determined by the following definitions. Observe the statements to ensure safety, performance, prevent injury and machine damage. -
Page 5: General
GENERAL Rosetta Capsule Group Introduction Thank you for choosing a Rosetta capsule machine. We hope you enjoy it ! Read the user manual before using the machine. Keep this manual close to hand for future This manual contains important instructions on reference. -
Page 6: Precautions
GENERAL Rosetta Capsule Group In case of emergency, (e.g. the machine catches to three units of the same model. Do not place fire or becomes unusually hot or noisy), other heavier packages on top of the box. disconnect the power immediately and close The machine is likely to be exposed to the water inlet tap. -
Page 7: Technical Specifications
TECHNICAL SPECIFICATIONS Rosetta Capsule Group Data sheet Rosetta 2GR capsule SPECIFICATIONS Mini control Display control EBAD-C32D-12AF Machine model, Standard 220-230V 1N~ 2600W 50-60Hz Machine model, Take Away Steam wand 1 unit 2 units Hot water lever 1 unit 1 unit... -
Page 8: Overview Of Components
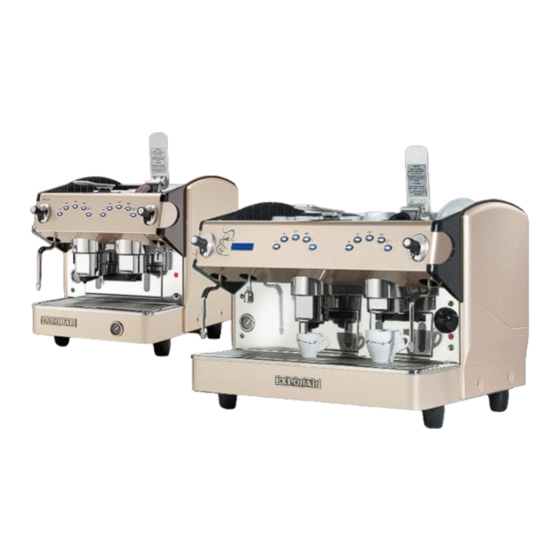
OVERVIEW OF COMPONENTS Rosetta Capsule Group Front view of the machine Rosetta mini control 2GR capsule Steam wand Drink Buttons Hot water lever Steam lever Capsule group lever Hot water outlet Capsule ON/OFF switch Pump pressure drawer gauge Boiler pressure gauge... -
Page 9: Rosetta Display Control 2Gr Capsule
OVERVIEW OF COMPONENTS Rosetta Capsule Group Front view of the machine Rosetta display control 2GR capsule Hot water lever Capsule group Steam lever lever Hot water outlet Display Drink Buttons Steam wand Pump pressure gauge Adjustable coffee Heater element spout... -
Page 10: Dimension Sketch
DIMENSION SKETCH Rosetta Capsule Group Rosetta mini control 2GR capsule Model Min.~ Max. Rosetta mini 2Gr 530 mm 460 mm 590 mm 58 mm ~ 115 mm 680 mm... -
Page 11: Rosetta Display Control 2Gr Capsule
DIMENSION SKETCH Rosetta Capsule Group Rosetta display control 2GR capsule Model Min.~ Max. Rosetta 2Gr 530 mm 680 mm 590 mm 58 mm ~ 115 mm 680 mm... -
Page 12: Transport
TRANSPORT Rosetta Capsule Group Packaging The machine is shipped in a unique carton box which uses expanded polystyrene paddings. The machine box is provided with conventional symbols that can be perfectly visible during the handling and storage tasks. The machine box must stay in a vertical position during the transport. Do not tip or try to place the box tilted sideways in any way. -
Page 13: Electrical Installation
INSTALLATION Rosetta Capsule Group Electrical installation The coffee machine should only be connected to the power supply by qualified personnel. The following safety instructions should be followed at all times: Check that the electrical specifications on the ratings plate match the specifications of the power supply at the point of installation. -
Page 14: Water Connection
INSTALLATION Rosetta Capsule Group Water connection The Installation of the machine to a water mains connection must be done by a qualified person. Rinse around 20 liters of water from the main water supply before connecting the machine to the water connection. -
Page 15: Operation
OPERATION Rosetta Capsule Group Espresso brewing Lift up the lever for the group. (the last used Insert the capsule in the correct position as capsule will be ejected into the capsule drawer) shown in the picture and push down the lever into locked position. -
Page 16: Steaming And Frothing Milk With The Manual Steam Wand
OPERATION Rosetta Capsule Group Steaming and frothing milk with the manual steam wand Steaming Frothing Place the steam wand over the drip tray and Immerse the steam wand into the jug containing the open the steam tap for a few seconds, this will milk, make sure the wand tip is submerged. -
Page 17: Steaming And Frothing Milk With Turbo Steamer
OPERATION Rosetta Capsule Group Steaming and frothing milk with turbo steamer Place the steam wand over the drip tray and Immerse the steam wand (with temperature press the steam button, this will allow condensed sensor) into the jug containing the milk, make water to be ejected. -
Page 18: Dispensing Hot Water
OPERATION Rosetta Capsule Group Dispensing hot water Machine equipped with manual water lever Place a jug (or similar) under the hot water outlet Open the hot water lever. Close the lever as soon as the machine has dispensed the desired amount of water. -
Page 19: Cleaning And Maintenance
CLEANING AND MAINTENANCE Rosetta Capsule Group Coffee machine cleaning Important: To obtain the best efficiency, quality and performance of the machine, you should always follow the cleaning and care instructions provided in this manual. Turn off the power switch when cleaning the exterior of the machine. -
Page 20: Rinsing The Capsule Group
CLEANING AND MAINTENANCE Rosetta Capsule Group Rinsing the capsule group Open the lever so the last used capsule Push down the lever into locked position. falls into the capsule drawer and the group Start the continuous brewing and stop after becomes empty. -
Page 21: Cleaning The Capsule Group
CLEANING AND MAINTENANCE Rosetta Capsule Group Cleaning the capsule group Cleaning with powder Open the lever so the last used capsule Push down the lever into locked position. falls into the capsule drawer and the group Start the continuous brewing and stop becomes empty. -
Page 22: Disassemble The Group Gasket
CLEANING AND MAINTENANCE Rosetta Capsule Group Disassemble the group gasket Turn the machine off at the Push the metal tension ring After the tension ring releases, main power supply switch (pictured in blue) back using pull the gasket forward from... -
Page 23: Removing The Adjustable Spout
CLEANING AND MAINTENANCE Rosetta Capsule Group Removing the adjustable spout Pull down the spout to its lowest position. Once in its lowest position, squeeze the hooks on each side that hold the spout in place and pull downwards. Cleaning the adjustable spout... -
Page 24: Additional Handling Of The Machine
CLEANING AND MAINTENANCE Rosetta Capsule Group Additional handling of the machine Important: Avoid placing wet cups directly on the cup shelf, it may drip into the machine and cause machine damage. Remove and insert the porta-filter gently. Never use excessive force to try to close the porta-filter. -
Page 25: Programming
PROGRAMMING Rosetta Capsule Group Buttons functions Here is some of the additional functions that the electronics offers: Volume control of four different espresso drinks per brewing group. Time-controlled hot water dispensing. (if available) Automatic filling and level control of the boiler. -
Page 26: Programming The Coffee Dosage
PROGRAMMING Rosetta Capsule Group Programming the coffee dosage This section explains how to program the doses dispensed automatically by the drink buttons. Important: Use a porta-filter filled with fresh coffee for every new dose you program. On machines not equipped with a display, hold down the Continuous Dispensing button 4 seconds. -
Page 27: Programming The Turbo Steamer
PROGRAMMING Rosetta Capsule Group Programming the turbo steamer To program the temperature at which the turbo steamer will stop automatically: Press the Continuous Dispensing button and hold it down for 8 seconds. The continuous dispensing button light will flash and all of the button panel lights will be turned on (see fig. 02). -
Page 28: Programming Using The Display
PROGRAMMING USING THE DISPLAY Rosetta Capsule Group Machine status Machines equipped with a display include the following additional functions: Automatic daily on/off timer (stand-by function). Clock settings (current time and date). Promotional display. Number of coffees/infusions dispensed. Digital boiler-temperature display and control. -
Page 29: Accessing The Second Menu Level
PROGRAMMING USING THE DISPLAY Rosetta Capsule Group Accessing the second menu level With the machine on, press the Continuous Dispensing button Doses setting Select within 30s the Left-hand drink buttons and hold it down (for over 8 seconds) until the dose-programming menu is displayed. All the drink buttons lights fig. -
Page 30: Auto On/Off
PROGRAMMING USING THE DISPLAY Rosetta Capsule Group Auto on/off After accepting the changes made in the “set clock” menu, pressing the 2 Auto On/Off Short Espressos button accesses the coffee machine’s auto on/off hh.mm programming menu (see fig. 09). fig. 9... -
Page 31: Messages And Alarms
MESSAGES AND ALARMS Rosetta Capsule Group Flow meter Fault in flow meter X Gr. X Flow fault detected in counter X Time-out alarm Check that the machine is receiving water. Boiler filling up Probe unconnect Temperature sensor fault Service the machine. -
Page 32: Troubleshooting
TROUBLESHOOTING Rosetta Capsule Group The following checks can be carried out by users once the machine has been turned off and disconnected from the power supply. For all other non-specified machine faults, disconnect the machine from the power supply and immediately contact authorised and qualified service personnel. -
Page 33: Technical Support
For the warranty to be valid the conditions for maintenance must have been followed according to our instructions, proper precaution has been made and warranty claim been issued without delay. The affected equipment may not be used during awaiting service if there is any risk that the damage or defect would worsen.
Need help?
Do you have a question about the ROSETTA CAPSULE GROUP and is the answer not in the manual?
Questions and answers