Advertisement
Quick Links
Advertisement

Related Manuals for HeliArtist EC145


Summary of Contents for HeliArtist EC145
-
Page 2: Important Notes
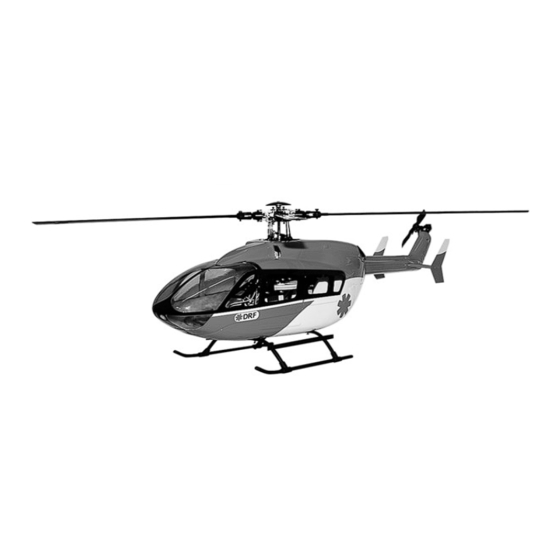
Thank you for buying HeliArtist Products.450 scale fuselage is designed as an easy way to assembly. Please read this instruction manual carefully before assembling the model,and follow all precautions and recommendations in the manual.Make sure to retain the manual for future reference,routine maintenance,and tuning.This scale fuselage is designed for TREX 450 Helicopter series.You can easily put it on your TREX 450 with belt tail system for new clothing. IMPORTANT NOTES R/C helicopters are not toys.R/C helicopter utilize various hightech products and technologies to provide superior performance.Improper use of this product can result in serious injury or even death.Please read this manual carefully before using and make sure to be conscious of your personal safety and the safety of others and your environment when operating all HeliArtist products. Manufacturer and seller assume no liability for the operation or the use of this product.Intended usage of this fuselage is only for adults with experience of flying remote control helicopters at legal flying field.After the sale of this product we cannot maintain any control over its operation or usage. After assembling the scale fuselage,the weight will increase and the structure will become more complex,so we do not recommmend to have any 3D fly as to avoid any accident and damage. R/C products require a certain degree of skill to operate,and is a consumables item.Any damage or dissatisfaction as a result of accidents or modifications are not covered by any warranty and cannot be returned for repair or experience problems during operation or maintenance. -
Page 3: Before Assembling
Fly only in safe areas,away from other people.Do not operate R/C aircraft within the vicinity of homes or crowds of people.R/C aircraft are prone to accidents,failures,and crashes due to a variety of reasons including lack of maintenance,pilot error,and radio interference.Pilots are responsible for their actions and damage or injury happened during the operation or as a result of R/C aircraft models. 450scale fuselge,suitable for T-REX450 Helicopter series TOOL 1:Cutter knife. 2:Hexagon screw driver 3:Phillips screw driver. 4:File. BEFORE ASSEMBLING 5:Diagonal cutting pliers.6:Silicone 7:CA glue. 8:AB(epoxy) glue 9:Fine sandpaper. 10:Scissors. 1:Check for all the parts in the list shown at bellow. 2:Some basic tools are needed to help the assembly. - Page 4 Tighten the Aluminum Landing Gear to the bottom of Insert the Landing Gear Mounts to the Aluminum the fuselage using four 2x14mm SelfTapping Screws Landing Gear. and 2x5mm Washers. Tighten the Landing Gear Stairs onto the Landing Gears using Assemble the Aluminum Skids to the Landing Gear two 2x10mm SelfTapping Screws for each Stair. and secure them with CA glue. Disassembly the Tail boom from the heli mechanism. Disassembly the Tail Gear Case from the heli mechanism. Replace the belt with a longer one included in the fuselage Loosen the screw from the Scorpion Tail System circled and assemble the Scorpion Tail Gear box with the tail boom of above. the helicopter and set a proper angle as shown above to get ready for insert to the Heli mechanism and fuselage.
- Page 5 Insert the tail system assembled on Step 8 into the Heli Fix the tail push rod with a Zip Tie. mechanism body. Glue the wood pieces together to form two wood blocks. Glue the wood blocks to the landing gear position of the Heli (Remarks: the hight of the wood block is depend on what heli Assembly using four 2x12mm Hex Cap Screws. you use.) Insert the Heli assembly into the fuselage.(Remarks: loosen Disassembling the Tail Cover from the fuselage same as and take off one M2 screw from the Scorpion Gear Box and other HeliArtist Scorpion Fuselages. strengthen it before the insertion.) Insert the Wood Block installed on the Heli machanism to Reinstall the M2 screw which is took off in the previous the trough of the Quick Lock System on the fuselage body. step 7 back to the Scorpion Tail Gear Box and tighten it now. And insert the Linkage Ball to the Ball Link of the Tail Push rod.
-
Page 6: End Of Manual
Reinstall the M2 screw which is took off in the previous step 7 back to the Scorpion Tail Gear Box and tighten it now. And insert the Linkage Ball to the Ball Link of the Tail Push rod. Adjust the Heli Mechanism in the fuselage and drill 2mm Secure the Heli mechanism onto the wood block of the holes on both the left and right side of the Fuselage body fuselage using two 2x12mm Hex Cap Screws and Washers wood block. with M2 Nuts. Or we can secure the Heli mechanism onto the wood block Install the Tail Cover back to the fuselage using Self of the fuselage using a Zip Tie. Tapping screws. Assemble the Horizontal and Vertical Stabilizers together Insert the Horizontal Stabilizers into the tail of the fuselage using two 2x6mm SelfTapping Screws. and secure them using epoxy. End of Manual...
Need help?
Do you have a question about the EC145 and is the answer not in the manual?
Questions and answers