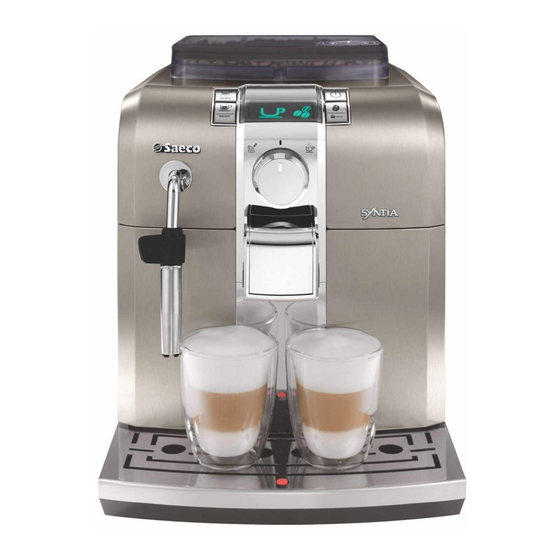
Saeco Syntia Service Manual
Hide thumbs
Also See for Syntia:
- Service manual (56 pages) ,
- Operating instructions manual (23 pages) ,
- Quick start manual (2 pages)
Table of Contents
Advertisement
All parts of this document are the property of Saeco International Group.
All rights reserved. This document and all the information herein is provided without liability deriving
from any errors or omissions. Furthermore, no part may be reproduced, used or collected, except where
express authorisation has been provided in writing or through a contractual agreement.
Saeco International Group
SYNTIA
SERVICE
MANUAL
Revision 01 February 2010
Rev. 01 February 2010
SYNTIA
Advertisement
Table of Contents

Related Manuals for Saeco Syntia


Summary of Contents for Saeco Syntia
- Page 1 MANUAL Revision 01 February 2010 All parts of this document are the property of Saeco International Group. All rights reserved. This document and all the information herein is provided without liability deriving from any errors or omissions. Furthermore, no part may be reproduced, used or collected, except where express authorisation has been provided in writing or through a contractual agreement.
-
Page 2: Table Of Contents
Operation, cleaning and maintenance Operating logic 4.1. Water circuit Control ringnut and valve Coffee cycle operating diagram Single microswitch Temperature sensor Coffee grinder operation Low bean level detection, dose quantity adjustment, coffee grinder blocked Dose self-learning Saeco International Group Rev.01 February 2010 SYNTIA... - Page 3 OETIKER clamps assembly and disassembly 7.10 Coffee grinder disassembly 7.11 Grinder adjustment / assembly and disassembly Notes Water circuit diagram 9.1. Water circuit diagram Electrical diagram 10.1 Digital wiring diagram 10.2 Focus wiring diagram Saeco International Group Rev.01 February 2010 SYNTIA...
-
Page 4: Introduction
CHAPTER 1 INTRODUCTION Saeco International Group Rev.01 February 2010 SYNTIA... -
Page 5: Documentation Required
Simply turning off the main machine power switch is not an adequate safety precaution. This appliance is rated as protection class I. Insulation and dielectric rigidity tests must be performed on completion of any repair. Saeco International Group Rev.01 February 2010 Page 1 / 04... - Page 6 SYNTIA 01 INTRODUCTION 1.5. Syntia range Syntia Syntia Focus Display interface Led interface Painted details Water/steam valve Alarm LED Automatic rinse Automatic dosage Frother Dispensed coffee memory capacity Automatic switch off (after 60’ inactivity) Saeco International Group Rev.01 February 2010 Page 2 / 04...
-
Page 7: External Machine Parts
Long coffee coffee key dispensing button Selector Coffee/hot water/steam F O C U S Aroma/pre-ground LED display coffee key Long coffee Long coffee luminous button luminous button Selector Coffee/hot water/steam Saeco International Group Rev.01 February 2010 Page 3 / 04... -
Page 8: Internal Machine Parts
SYNTIA 01 INTRODUCTION 1.6.2 Internal machine parts Side door microswitch Coffee grinder motor Coffee grinder Boiler insulation and boiler PWR/CPU card Pump Temperature sensor Water level sensor Saeco International Group Rev.01 February 2010 Page 4 / 04... -
Page 9: Technical Specifications
CHAPTER 2 TECHNICAL SPECIFICATIONS Saeco International Group Rev.01 February 2010 SYNTIA... -
Page 10: Machine Parameters And Performance
Maximum PRODUCT Programm. Programm. by amount amount amount QUANTITY by the user Production / Service (Puls.) (Puls.) (Puls.) Espresso Medium coffee Long coffee Pre-ground Hot water Continues until the water supply has been exhausted (capacitive sensor) Steam for Continues until the water supply has been exhausted (capacitive sensor) frother Saeco International Group Rev.01 February 2010 Page / 02... - Page 11 60 minutes Inlet time (default) Inlet time prog. by the user Inlet time prog. by Production/Service department WATER TANK Description Level sensor Water reserve (pulses) with water filter Water reserve (pulses) with no water filter Water reserve modifiable by Production/Service departments "Fill tank" alarm "No tray" alarm Water mains Saeco International Group Rev.01 February 2010 Page / 02...
-
Page 12: Brief Instructions Rev.01
CHAPTER 3 BRIEF INSTRUCTIONS Rev.01 February 2010 Saeco International Group Rev.01 February 2010 SYNTIA... -
Page 13: Customer Menu And Digital Programming
Machine dispensing one coffee (dispensing stops when you press the key again) Wait for the dispensing process to end Machine dispensing two coffees (dispensing stops when you press the key again) MEMO The machine is being programmed Stop dispensing as desired with the coffee cup fill level Saeco International Group Rev.01 February 2010 Page 1 / 07... - Page 14 Service Centre Water circuit fill request Turn the knob to the cup Circuit filling in progress When the filling cycle ends turn the knob back to the central position No coffee beans inside container. After filling the coffee container, start the cycle again No water Fill the water tank Saeco International Group Rev.01 February 2010 Page 2 / 07...
- Page 15 2) O pen the hot water valve 7) R insing in progress 3) D escaling in progress 8) C lose the valve 4) C lose the valve 9) F ill the tank with fresh water 10) P ress the key indicated 5) F ill the tank with fresh water by the arrow Saeco International Group Rev.01 February 2010 Page 3 / 07...
-
Page 16: Coffee Temperature
This function lets you adjust the water hardness so that machine maintenance is managed better = very soft water =soft =hard =very hard “INTENZA” water filter This function lets you manage the “INTENZA” water filter. RESET Factory settings This function allows the factory values to be reset Saeco International Group Rev.01 February 2010 Page 4 / 07... - Page 17 MEMO MEMO Machine in the phase of program- Blinking ming the quantity of coffee to be di- spensed (Keep the espresso or long Stop dispensing as desired coffee button pressed) Blinking MEMO MEMO Saeco International Group Rev.01 February 2010 Page 5 / 07...
- Page 18 - The brew group is not inserted - Close the service door Fixed Empty the dregs drawer Blinking Insert dregs drawer No beans inside the coffee Re-start the cycle after filling Fixed container the container Fixed Fill water tank Saeco International Group Rev.01 February 2010 Page 6 / 07...
-
Page 19: Operation, Cleaning And Maintenance
Hard water (15° - 21°dH) Approx. every 6 weeks or Approx. every 3 60 litres months / 120 litres Very hard water (over 21°dH) Approx. every 4 weeks or Approx. every 6 weeks 30 litres or 60 litres Saeco International Group Rev.01 February 2010 Page 7 / 07... -
Page 20: Operating Logic
CHAPTER 4 OPERATING LOGIC Saeco International Group Rev.01 February 2010 SYNTIA... -
Page 21: Water Circuit
Turbine Pump Coffee dis- penser Brewing unit Compensation valve Water collection tank • Traditional water system • T urbine – Amount of coffee dispensed into the cup • R eciprocating piston type pump (13 - 15 bar) • C ompensation valve (opening pressure 16 - 18 bar) • B oiler – 1400 W • P resblok valve – select coffee – hot water - steam Saeco International Group Rev.01 February 2010 Page / 06... -
Page 22: Control Ringnut And Valve
Manual opening when dispensing water Manual opening when dispensing steam TOTAL STROKE COFFEE CLOSED -30° + 30° Valve opening Valve closing stroke stroke STEAM WATER OPEN OPEN Extra stroke Extra stroke Saeco International Group Rev.01 February 2010 Page / 06... -
Page 23: Coffee Cycle Operating Diagram
- The boiler begins to heat water for approx. 45 seconds. It absorbs all the available heating power in order to reach the optimal temperature. The temperature will then remain at a constant level. Coffee cycle T he coffee grinder starts the grinding process (controlled by pulses generated by a sensor) T he gear motor (brewing unit) moves to the dispensing position P reliminary dispensing phase (short pump activity, short pause) P roduct dispensing (the pump operation period is defined by the amount of product dispensed) T he gear motor moves to its home position (the dregs are expelled automatically) Saeco International Group Rev.01 February 2010 Page / 06... -
Page 24: Single Microswitch
The electronic system detects the current boiler temperature from the drop in voltage and ad- justs it accordingly. Resistor values: see table Temp. (°C) R nom (kΩ) ΔR (+/- %) 61,465 17,599 7,214 6,121 5,213 4,459 1,653 0,893 Saeco International Group Rev.01 February 2010 Page / 06... -
Page 25: Low Bean Level Detection, Dose Quantity Adjustment, Coffee Grinder Blocked
Coffee grinder blockage If the coffee grinder becomes blocked for any reason, pulses will no longer be transmitted to the electronic sys- tem and the grinder will come to a stop Saeco International Group Rev.01 February 2010 Page / 06... -
Page 26: Dose Self-Learning
Caution: In the case of excessive dosage, powder may be expelled into the dreg drawer. This is not a fault, but can occur during preliminary operation or after a service. Saeco International Group Rev.01 February 2010 Page / 06... -
Page 27: Service Mode Rev.01
CHAPTER 5 SERVICE MODE Rev.01 February 2010 Saeco International Group Rev.01 February 2010 SYNTIA... -
Page 28: Digital Test Mode
Y” and display 1 2 3 4 interface card and/or flat cable N N Y N remains green JP21. PRESS THE ON/OFF KEY TO ACCESS THE NEXT LEVEL UP Saeco International Group Rev.01 February 2010 Page 1 / 07... - Page 29 TAPCOFFE=N Incorrect incorrect TAPSTEAM=N DOOR=Y display from position pos. TAPWATER=N BU-P=Y “N to Y” TAP - ERR =Y DREG=Y TANK-H2O=Y PRESS THE ON/OFF KEY TO ACCESS THE NEXT LEVEL UP Saeco International Group Rev.01 February 2010 Page 2 / 07...
- Page 30 BU PAGE current absorption higher than 300mA, display from WORK=N HOME=N CUR= 337 green to red: check gearmotor unit and/or motor PRESS THE ON/OFF KEY TO ACCESS THE NEXT LEVEL UP Saeco International Group Rev.01 February 2010 Page 3 / 07...
- Page 31 CPU/POWER OPEN card connection (JP13 may be disconnected) ERROR: Power absorption KO and temperature does not increase: check power supply wiring and/or CPU/ POWER card connection (JP17-3) Saeco International Group Rev.01 February 2010 Page 4 / 07...
-
Page 32: Focus Test Mode
JP21 wiring MEMO MEMO If the LED does not turn on, check the knob card and the JP21 wiring MEMO PRESS THE ON/OFF KEY TO ACCESS THE NEXT LEVEL UP Saeco International Group Rev.01 February 2010 Page 5 / 07... - Page 33 .If this does not occur and the symbol turns on, check the sensor and/or the coffee grinder motor, the wiring of the sensor and/or the connec- tion on the CPU/Power card (JP2), the wiring of the coffee grinder motor and/or the connection on the CPU/Power card (JP8) Saeco International Group Rev.01 February 2010 Page 6 / 07...
-
Page 34: Error Codes
3", torque error trying to move up, ascent time out exceeded) Water circuit / flow meter problems (water circuit blocked or no flow meter signal) Boiler temperature sensor short circuited Boiler temperature sensor open circuit The boiler temperature has exceeded the maximum allowed value (165°c) The boiler temperature has not increased by x°c in y sec (boiler power supply disconnected, incorrect boiler fitted must be a 1300W boiler, partial power supply to boiler, cut out thermostat tripped) Mains voltage trouble Saeco International Group Rev.01 February 2010 Page 7 / 07... - Page 35 CHAPTER 6 SERVICING AND MAINTENANCE Saeco International Group Rev.01 February 2010 SYNTIA...
-
Page 36: Repair Schedule
Brewing unit Grease solvent / Grease Hoses, attachments and Oetiker clamps Pump ES/TR ES/TR Gear motor Coffee grinder Vacuum cleaner / brush Water circuit Saeco descaler Hot water/steam valve ES/S Saeco International Group Rev.01 February 2010 Page 1 / 02... -
Page 37: Final Test
Remove the grounds Grounds drawer missing drawer missing indication indication Low bean Start brewing a coffee Low bean level level while the coffee bean indication indication container is empty Saeco International Group Rev.01 February 2010 Page 2 / 02... -
Page 38: Disassembly Rev
CHAPTER 7 DISASSEMBLY Rev.01 February 2010 Saeco International Group Rev.01 February 2010 SYNTIA... -
Page 39: Outer Elements Disassembly
7) Lift the lid and disconnect the earth wire shown When refitting the machine cover, take great care not to scratch the keypad cover. Put a sheet of paper on the keypad cover (see photo) before refitting the machine cover and slide it out at the end of assembly Saeco International Group Rev.01 February 2010 Page / 09... - Page 40 Unscrew the screws shown 7.2. Coffee dispenser disassembly 1) Unscrew the screw shown 2) Slide out the fork clip 3) Unscrew the screws shown and remove the support 4) Coffee dispenser assembly parts Saeco International Group Rev.01 February 2010 Page / 09...
-
Page 41: Disassembling Keypad Card And Digital Control Knob
1) Remove the display frame by lifting it and slip off the upper cover 2) Slip off the flat cable and loosen the highlighted screw 4) Display and interface cards as 3) Loosen the highlighted screws and remove the elastic sembly washer Saeco International Group Rev.01 February 2010 Page / 09... -
Page 42: Power/Cpu Card Disassembly
- R emove the gear (C) that meshes with the motor transmission shaft - R emove the large gear (B) - R emove the motor (A), complete with transmission shaft 3) Replace the gear (B), making sure that the imprint of the arrow is aligned with the opening containing the pin (P) 4) When replacing the motor and the transmission shaft, make sure the bearings (L) are in the right position. Grease the shaft thoroughly and evenly Saeco International Group Rev.01 February 2010 Page / 09... -
Page 43: Boiler Disassembly
2) Remove the control knob cover and unscrew the screw as indicated 3) Lift and remove the dispenser assembly, slide out the fork clip shown and unscrew the screws holding the front piece 4) Unscrew the screws shown to remove the front piece support 5) Remove the spring washer and the control knob gear (steam/water) Saeco International Group Rev.01 February 2010 Page / 09... -
Page 44: Pump And Turbine Disassembly
PUMP Remove the connection 1, disconnect the silicone hoses 2 Unscrew the safety valve and remove the pump from the two supports TURBINE Remove the connection and disconnect the silicone hoses Saeco International Group Rev.01 February 2010 Page / 09... -
Page 45: Oetiker Clamps Assembly And Disassembly
07 DISASSEMBLY 7.9. OETIKER clamps assembly and disassembly 1) Boiler connection 2) Other connections Replacing the hoses 1) Use a suitable pair of pliers to remove the clamp (as illustrated) 2) Tighten the clamp as illustrated Saeco International Group Rev.01 February 2010 Page / 09... -
Page 46: Coffee Grinder Disassembly
SYNTIA 07 DISASSEMBLY 7.10. Coffee grinder disassembly 1) To remove the coffee grinder, simply slide it out and remove its connections 2) When replacing it, make sure the spring (A) and the coffee pipe (B) are positioned correctly Saeco International Group Rev.01 February 2010 Page / 09... -
Page 47: Grinder Adjustment/Assembly And Disassembly
3) To remove the lower grinder blade, keep the increment pin (A) locked in position and turn the grinder blade anti-clockwise, until it detaches from the bayonet coupling 4) When refitting the upper grinder support, make sure you reposition it so that the mark is as illustrated in the photo Saeco International Group Rev.01 February 2010 Page / 09... - Page 48 CHAPTER 8 NOTES Saeco International Group Rev.01 February 2010 SYNTIA...
- Page 49 SYNTIA 08 NOTES Saeco International Group Rev.01 February 2010 Page / 01...
- Page 50 CHAPTER 9 WATER CIRCUIT DIAGRAM Saeco International Group Rev.01 February 2010 SYNTIA...
- Page 51 SYNTIA 09 WATER CIRCUIT DIAGRAM 9.1. Water circuit diagram Saeco International Group Rev.01 February 2010 Page / 01...
- Page 52 CHAPTER 10 ELECTRICAL DIAGRAM Saeco International Group Rev.01 February 2010 SYNTIA...
- Page 53 SYNTIA 10 ELECTRICAL DIAGRAM 10.1 Wiring diagram Digital Saeco International Group Rev.01 February 2010 Page / 01...
- Page 54 SYNTIA 10 ELECTRICAL DIAGRAM 10.2 Wiring diagram Focus Saeco International Group Rev.01 February 2010 Page / 01...
Need help?
Do you have a question about the Syntia and is the answer not in the manual?
Questions and answers