
Related Manuals for Saeco MAGIC M2


Summary of Contents for Saeco MAGIC M2
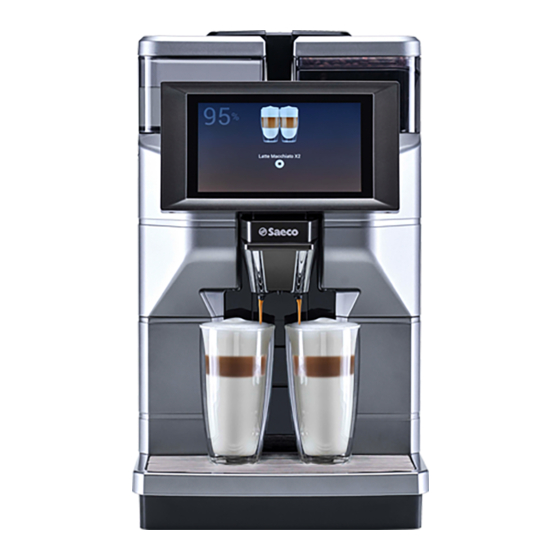
- Page 1 Automatic machine for espresso coffee and hot beverages OPERATION AND MAINTENANCE ATTENTION: Read this user manual carefully before using the machine. EN-GB...
- Page 2 English MAIN PARTS MAIN PARTS VERSION M2/B2 Tank lid with lock Coffee bean hopper lid Water tank lid Coffee bean hopper Water tank Brew group Touch Screen Control Panel Service door Mobile dispenser Cappuccino maker (*only M2 version) Suction tube for Cappuccino maker (*only USB port M2 version) Coffee grounds drawer...
- Page 3 English MAIN PARTS VERSION M1/B1 Water tank lid Coffee bean hopper lid Water tank Coffee bean hopper Touch Screen Control Panel Brew group Mobile dispenser Service door Suction tube for Cappuccino maker (*only Cappuccino maker (*only M1 version) M1 version) Coffee grounds drawer USB port Cup holder grill...
- Page 4 English SAFETY INSTRUCTIONS Never allow water to Children must not play come into contact with the appliance. with Children cannot clean or electrical parts of the service the machine out of machine: danger supervision of an adult. short circuit! water and steam may cause scalding! Intended Use Power Supply...
- Page 5 English Do not pass the power Do not touch the hot cord around corners, over water wand with bare sharp edges or over hot hands. Always use the objects and keep it away handles knobs from oil. provided. Do not use the power Danger of Burning cord to carry or pull the Do not touch the hot...
- Page 6 English The machine may only be The machine must only be moved service installed in places where it provider. checked qualified staff. Do not use the machine outdoors. Cleaning the machine Do not install the machine Before cleaning in a location where water machine, switch OFF (0) jets may be used.
- Page 7 English Using Milk (*only Store the machine in a dry versions M2 and M1). place, out of the reach of children. Keep it protected Milk must be used and from dust and dirt. stored in accordance with the instructions given on Servicing the manufacturer's original Maintenance...
-
Page 8: Table Of Contents
English CONTENTS INTRODUCTION TO THE MANUAL... Hot Water Dispensing......Preamble..........Using the Machine with Credits....Icons Used..........Emptying the coffee grounds drawer and..drip tray..........INFORMATION ABOUT THE..... APPLIANCE........CLEANING AND MAINTENANCE..Information for the Maintenance Technician. 10.1 General Notes for Correct Operation..Description and Intended Use.... -
Page 9: Introduction To The Manual
This article is marketed under the responsibility of performed. SaGa Coffee S.p.A. which guarantees the product. Saeco is a registered trademark of Koninklijke Philips Important N.V. and its use is licensed by Koninklijke Philips N.V. It is used to indicate operations that, if correctly... - Page 10 English Suggested solutions It is used to indicate alternative procedures which make programming and/or maintenance operations quicker. User It is used to indicate the user of the machine. Users are not allowed to perform any cleaning or maintenance operations. Supply operator It is used to indicate those operations that must be performed only by the person in charge of refilling and cleaning the machine.
-
Page 11: Information About The............. Appliance
English INFORMATION ABOUT THE APPLIANCE Information for the Description and Intended Use Maintenance Technician This machine is automatically used to brew: The appliance must be • coffee and espresso coffee using instantly ground coffee beans; installed well-lit, • hot water to prepare beverages; •... -
Page 12: Appliance Identification
English Appliance Identification The appliance is identified by the model name and serial number shown on the special plate. The plate contains the following data: • name of the Manufacturer; • marks of conformity; • model; • serial number; • year and month of manufacture; •... -
Page 13: Technical Data - Version M2 And B2
English Technical Data - version M2 and B2 Size (w x h x d) 280 x 470 x 481 mm Weight approx. 15 kg Machine housing material Thermoplastic material Power Rating See the data plate Supply Voltage See the data plate Power cord length approx. -
Page 14: Technical Data - Version M1 And B1
English Technical Data - version M1 and B1 Size (w x h x d) 280 x 435 x 481 mm Weight approx. 12 kg Machine housing material Thermoplastic material Power Rating See the data plate Supply Voltage See the data plate Power cord length approx. -
Page 15: Safety
English SAFETY It is mandatory to: Preamble • check conformity of the power supply; In compliance with the regulations and directives in force, SaGa Coffee has established at its offices a • use original spare parts; technical pamphlet relative to the MAGIC appliance. •... -
Page 16: Operator Requirements
English case failure Maintenance technician malfunctioning, please The maintenance technician is the only person authorised service machine, start refer only to the qualified programming procedures and perform the adjustment, set up and maintenance operations. personnel of the technical Access to the internal area service. -
Page 17: Handling And Storage
English HANDLING AND STORAGE Storage operations The machine is contained in cardboard packages. described in this chapter must performed If the appliance is not immediately installed, it shall be kept in a sheltered place according to the following exclusively by the service instructions: •... -
Page 18: Installation
English INSTALLATION Make sure that the installation place is compatible with operations the following specifications, before unpacking the appliance: described in this chapter must performed • the power socket which the appliance is connected to should be easily accessible and at a distance not exclusively by the service higher that 1.2 metres;... -
Page 19: Unpacking And Positioning
English The following illustration shows the required access distances: Unpacking and Positioning • to the keypad on the front of the appliance; On receipt of the appliance, make sure that it has not • to the service units in the event of failure. suffered any damage during transport or that the packaging been... -
Page 20: Connection To The Electric Network
English Water hardness test: quick test to determine the Group cleaning tablets: allow a correct cleaning of the actual hardness of the water used to prepare brew group, increasing its durability. beverages; this test is of fundamental importance to set the water hardness in the machine. "Intenza +"... - Page 21 English In case of doubt, do not proceed with installation qualified authorised personnel accurately check the system. Do not use adapters or multi-sockets. Make sure that the power cord plug easily reachable after installation.
-
Page 22: Description Of Controls
English DESCRIPTION OF CONTROLS Move and drag Power button To move and drag icons and objects, tap and drag them It is located in the rear of the machine. If set to the "I" to a new location. position the machine turns on (electrical functions enabled). -
Page 23: Operating In Normal User Mode
English Display the status panel in detail Operating in normal user Tap the icons shown in the upper part of the mode touchscreen. The layout and arrangement of the icons/screens in this manual is indicative only and may vary from those displayed on the appliance, depending on the settings (layouts, themes, and/or icons). -
Page 24: Supply And Start Up
English SUPPLY AND START UP Opening the Upper Lid Now the water tank and the coffee bean hopper can be filled. Coffee Blends (* only versions M2 and B2). The upper protection cover should be removed in • We recommend using fresh, non-oily... -
Page 25: Filling The Water Tank
English The coffee grinder contains If the water tank is not moving parts that may be inserted, check that no dangerous. Do not insert coffee beans fall into the fingers and/or other tank compartment. If this objects. happens, remove them to avoid any malfunctions. -
Page 26: Measuring And Adjusting Water Hardness
English Remove the tank; lift it using the inside handles. Measuring and Adjusting Water Hardness Measuring water hardness is very important in order to correctly manage the anti-scale filter and the frequency with which the machine must be descaled. Immerse the water hardness test strip in water for 1 second. -
Page 27: Water Filter
English Remove the water filter from its packaging. Set the The machine is supplied filter in the standard position on letter B. Use the water hardness test strip provided with the machine. with standard adjustments, Set the "Intenza Aroma System" as specified on the filter package (see section "Measuring and Adjusting suitable for most uses. -
Page 28: Closing The Upper Lid
English Put the filter into the empty tank. Press it to its limit Replace the water filter at stop. least every 3 months, even if the machine has not yet indicated need replace it. Pull out the water filter. Follow the steps indicated in the "Water filter"... -
Page 29: Coffee Grind Adjustment
English Coffee Grind Adjustment Adjusting the "Aroma" - Amount of Ground Coffee The machine allows the coffee grind to be slightly The machine makes it possible to regulate the quantity adjusted in order to adapt it to the kind of coffee of coffee being ground for the preparation of every used. -
Page 30: Turning On/Off The Machine
English • To use tall glasses. Manually move the dispensing spout up or down to adjust its height. Two cups can be placed under the dispensing spout to brew two cups of coffee at the same time. The recommended positions are: •... -
Page 31: First Use - Use After A Long Period Of
English 7.12 First Use - Use after a Long 7.12.1 After a Period of Inactivity Period of Inactivity Empty the water tank, wash and rinse it and fill it with fresh water (see section "Filling the Water Tank"). Refill the machine (follow the instructions above). Place a large container under the dispensing spout. -
Page 32: Washing The Parts Coming Into Contact With Food
English 7.13 Washing the Parts coming into Contact with Food Rinse all the parts coming into contact with food. • Thoroughly wash your hands. • Prepare a chlorine-based, antibacterial disinfecting solution (the products can be purchased at the chemist's) following the concentrations indicated on the product. -
Page 33: Programming Menu
English PROGRAMMING MENU Notes on programming This chapter contains The electronic control unit of the appliance allows many functions to be used. A brief explanation of instructions on how to set these main functions is listed below. They are useful for better managing the appliance's operation but are change not necessarily in the same order as they are displayed... -
Page 34: Button Description In Programming Mode
English Open the service compartment door. Button Description in Programming Mode Menu Tap the "menu" icon to view the appliance's menu functions. All the functions are displayed and only those for the profile of the current operator are enabled. Some of the functions and/or parameters may not be displayed: simply scroll through the screen. -
Page 35: Enter Values
English Numeric keypad Check-box Tap the check-box to enable/disable the option. Tap the "numeric keypad" icon to display the numeric keypad. Enter values The values of the programming menu can be entered/modified as follows: • Keypad • Numeric keypad Drop-down lists Tap to open the drop-down list and select the value. -
Page 36: Programming Menu
English Programming Menu OPTION NO. MENU ITEM 3.6.2 Descaling settings The structure of the programming menu is indicated in 3.6.3 Water filter settings section "Structure of the Programming Menu". Other settings The "Description items of the programming menu" Information on the machine describes all the items included in the programming Failures menu. - Page 37 English OPTION NO. MENU ITEM 8.2.8 Automatic test 8.2.9 Reset to first Power On 8.2.10 Reboot system Date/Time Settings Languages User profiles Network 8.6.1 Wi-Fi 8.6.2 BLUETOOTH SW update Information Connectivity E-mail alerts 9.1.1 Settings 9.1.2 Events alert 9.1.3 Faults alert...
- Page 38 English 8.4.2 Items description of the programming menu Description MENU ITEM OPTION NO. Menu This menu makes it possible to access all the configuration parameters of the machine. Daily actions Groups together all of the functions that are used on a daily or more frequent basis (washes, resetting the residue counters, etc.) Washing/rinsing Automatic washing and rinsing functions of the appliance's functional units (Cappuccino...
- Page 39 English Description MENU ITEM OPTION NO. - Customise a beverage CREATING / MODIFYING A BEVERAGE It is possible to: - Assign/modify the name of beverages displayed during normal user mode. - Select which recipe to use for the preparation of the beverage. By default, the appliance uses recipes for single drinks;...
- Page 40 English Description MENU ITEM OPTION NO. and then "Add customisation" For every customisation it is possible to set various parameters. - Save the settings and return to the main screen. On the main screen of the recipe with "Test the recipe" it is possible to dispense a test selection in order to check the recipe created.
- Page 41 English Description MENU ITEM OPTION NO. BASIC COFFEE PARAMETERS It is possible to set: - The name of the ingredient - The doses (water and powder) - Dispense a test beverage For appliances with a payment system, it is possible to set the change in the price of the selection.
- Page 42 English Description MENU ITEM OPTION NO. 3.1.2 Backup and Restore Backup Allows the machine settings to be saved as a backup file. RESTORE Allows the backed-up machine settings to be restored. The appliance can be restored to its: - Factory settings - Previously-saved custom settings.
- Page 43 English Description MENU ITEM OPTION NO. A name must be assigned to a new playlist. The playlist contents can be played in the following modes: random or cyclic Input settings The functional unit allows the operation of some of the appliance's sensors to be set. 3.4.1 Solid residues Enables/disables the solid residue count that manages the "residue full"...
- Page 44 English Description MENU ITEM OPTION NO. Installation date Allows the date that the appliance was installed to be set. Tap "Modify" to set the date. Contacts Information Allows the contact information (name and phone number) of technical support to be entered that should be contacted in case of breakdown.
- Page 45 English Description MENU ITEM OPTION NO. Protocol It is possible to decide which of the payment system protocols to enable and manage the relative functions. Some of the parameters, which are used in numerous payment systems, keep the set value even if the system type is changed. 6.1.3 Virtual Credits 6.1.4...
- Page 46 English Description MENU ITEM OPTION NO. 8.1.5 Export logs It allows the log file to be exported onto a USB memory stick. The log file is the sequential and chronological record of operations that have been carried out by the appliance. Enables events to be recorded in the log file from the "advanced functions"...
- Page 47 English Description MENU ITEM OPTION NO. User profiles The use of some programming functions can be enabled/disabled via the access profiles. The access profile ensures that only the functions linked to it can be used. Each user profile has an access password. The default passwords are: - Technician (4444), - User (1111)
- Page 48 English Description MENU ITEM OPTION NO. 9.1.1 Settings Enable the function so that you can set the parameters for sending emails, in addition to the email addresses of notification recipients. The parameters vary depending on the email server used (supplier of email services). The appliance provides a set of preconfigured parameters for the major email service providers on the internet.
-
Page 49: Setting User Profiles Passwords
English Setting user profiles passwords The use of some programming functions can be enabled/disabled via the access profiles. The access profile ensures that only the functions linked to it can be used. Each user profile has a default access password. The user profiles are: •... -
Page 50: Operation And Use
English OPERATION AND USE Turning on the Machine The use by children older than 8 years or by persons Connection to the power with reduced physical, supply should be carried mental or sensory abilities exclusively or with lack of experience service provider! skills allowed,... -
Page 51: Warm-Up And Rinsing
English Warm-up and Rinsing When the product selection screen appears, the machine is ready to use. Upon start-up, the machine activates the warm-up phase. Wait until it is completed. If the machine is used for the first time or after a long period of inactivity, The bars advance and contact... -
Page 52: Energy Saving Mode
English Dispensing beverages coffee only Insert the cup or glass under the dispenser. Wait for this cycle to be completed automatically. Energy Saving mode The machine can be set to energy saving mode. If set to energy saving mode, after a certain period of inactivity since the last delivery, the machine turns off automatically. -
Page 53: Dispensing Beverages With Milk
English Dispensing beverages with To ensure better results milk when preparing milk, use (*only versions M2 and M1). cold milk. correctly achieve an optimal result Use cold (~5°C / 41°F) of the milk product in cup milk with protein the silicone suction hose content of at least 3% to supplied must be used ensure... - Page 54 English Insert the cup or glass under the dispenser. Always remember to store milk in the fridge when not used. After a preset period of time following the last beverage with milk dispensing, machine automatically rinses milk circuit. To dispense a beverage with milk tap the icon of the beverage with milk desired.
- Page 55 English Emptying the coffee grounds Danger burning! drawer and drip tray Dispensing preceded by small jets of This operation must be hot water and steam. performed with machine turned on and/or Start the dispensing cycle. The hot water starts to in stand-by mode.
- Page 56 English Raise the coffee grounds drawer. Empty the coffee grounds drawer and the drip tray. Liquids and coffee grounds must disposed separately, as appropriate. Insert the residue collector drawer and the drip tray into the machine. If the drip tray is inserted without coffee grounds...
- Page 57 English CLEANING AND MAINTENANCE 10.1 General Notes for Correct Before performing Operation maintenance and/or cleaning operation, unplug N o n - r e m o v a b l e the power cord. components machine itself must be cleaned, when differently specified, only The Manufacturer is not by using cold or lukewarm...
- Page 58 English 10.2 Cleaning and Scheduled 10.2.1 Maintenance Schedule Maintenance Operation to be carried out yes - Drip tray All parts requiring cleaning yes - Emptying and cleaning the coffee grounds drawer are easily accessible, so no yes - Cappuccinatore quick clean yes - Thorough cleaning of tools are needed.
- Page 59 English In any case, whenever maintenance of the machine is Remove the tank; lift it using the inside handles. carried out, it is suggested you remove and clean the coffee grounds drawer. At this time, it is also advisable to clean the cup holder grills.
- Page 60 (*only versions M2 and M1). Once a day thoroughly clean all the components of the cappuccino maker using the Saeco detergent. The Saeco detergent may be purchased at your local dealer Confirm the process. The machine summarizes on the or at authorised service centres.
- Page 61 English Pour a sachet of solution into a container with 1/2 The machine runs a washing cycle of the cappuccino (half) litre of fresh drinking water. maker with detergent. Wait until the cycle stops automatically. The following screen is displayed: Do not drink the solution Insert the clean tube directly into the container.
- Page 62 English Remove the aesthetic cover. The steps below show how to remove and clean the Cappuccinatore. Remove the aesthetic cover. Remove the two dispensing nozzles as shown in the figure. Push the button on the left side and remove the Cappuccinatore.
- Page 63 English Remove the upper seal of the cappuccino maker. Wash the parts under running water. Make sure any milk deposits/residues are removed. After washing, reassemble the parts following the same procedure used for disassembly, but in reverse order. Make sure to insert the milk distribution hose into the lower part of the cappuccino maker before...
- Page 64 The "Coffee Oil Remover" system has no descaling properties. For descaling, use the Saeco descaling solution and follow the procedure described the "Descaling" chapter. Empty the coffee grounds drawer and the drip tray.
- Page 65 English Open the service door. Place an empty container under the dispenser. Remove the brew group by pulling it by the handle and pressing the «PUSH» button. If this option is confirmed, cycle must completed. Otherwise remove the tablet from the coffee unit.
- Page 66 English Open the service door. At the end of the cycles, the machine returns to the normal operating cycle after running the rinse cycle. recommended remove the group and wash Remove the brew group by pulling it by the handle and it under fresh running water.
- Page 67 "Manual cleaning of the coffee unit". Lubricate the brew group guides using Saeco grease only. Make sure that the hook which locks the brew group is in the correct position. Firmly press the "PUSH"...
- Page 68 English Lubricate the shaft too. Push the button on the left side and remove the Cappuccinatore. (*only versions M2 and M1). Remove the coffee dispenser container unit. Insert the brew group into its seat again until it locks into place WITHOUT pressing the "PUSH" button. Insert the coffee grounds drawer and the drip tray.
- Page 69 English Access the programming of the machine as described in the paragraph "Access to the programming menus". Tap the "menu" icon to view the appliance's menu functions. Select "Daily actions". Select "Washing/rinsing". Select descaling. The machine summarizes on the display all the phases Wash the parts under running water.
- Page 70 English Remove the anti-limescale filter from the water tank, if Put back the water tank. Insert Cappuccinatore present. Insert the clean suction hose into an empty container of at least 250 ml. Pour 250 ml of descaling product into the water tank. Add water into the water tank up to the "CALC CLEAN"...
- Page 71 English After emptying it put the drip tray back into place. Insert the clean suction hose into an empty container Insert a large container under the dispensers. of at least 250 ml. Empty the container placed under the dispensers. Run the first descaling phase. When the solution in the Remove and empty the drip tray.
- Page 72 English Run the second descaling phase, in other words rinse. Wait for the rinse cycle to be completed. Re-insert the small white filter or water filter based on how you have chosen to proceed. Fill the water tank again up to the MAX level with fresh drinking water. After completing the descaling cycle, empty the containers used to collect the liquids during descaling.
- Page 73 English TROUBLESHOOTING 11.1 Warning signals This chapter describes all the warning messages that the machine may display to the user and the actions that can and/or must be performed by the user. String Description Drip tray full Liquid container full Coffee temperature not ready The coffee heating unit is not ready to dispense Waiting for milk rinsing...
- Page 74 English 11.2 Problems - Causes - Solutions The following table indicates the possible error or alarm causes which may lead to a partial or total shutdown of the appliance. String Error code Description Board communication error Communication error GRINDER BLOCKED E305 The coffee grinder is blocked and won't turn Brewing unit can't reach WORK...
- Page 75 English STORAGE - DISPOSAL 12.1 Location Change Should the machine be placed in a different location, it is necessary to: • disconnect the appliance from the supply network; • carry out the general cleaning of the appliance as indicated in chapter "Cleaning and Maintenance"; •...
- Page 76 English INSTRUCTIONS FOR END OF OPERATIONAL LIFE DISPOSAL INFORMATION TO THE USER pursuant to Art. 13 of Legislative Decree no. 151 of 25 July 2005 "And in compliance with the provisions of the RAEE Directive relative to the reduction of the use of hazardous substances in electric and electronic appliances, as well as the disposal of the waste".
Need help?
Do you have a question about the MAGIC M2 and is the answer not in the manual?
Questions and answers
If I’m trying to use the water supply line, is there anything I have to change for the unit?
To use the Saeco MAGIC M2 with the water supply line, you must enable the "Watermain" option in the programming menu under "Machine settings" > "Other settings". A technician is required to restore the water mains connection.
This answer is automatically generated