Table of Contents
Advertisement
Advertisement
Table of Contents

Related Manuals for Rena Envelope Imager I


Summary of Contents for Rena Envelope Imager I
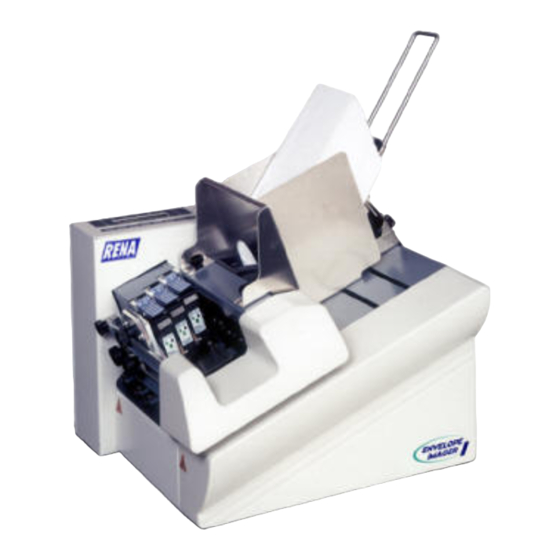
- Page 1 INSTRUCTION MANUAL RENA MODEL Envelope Imager I (DA-612S) DIRECT ADDRESS INKJET PRINTER M-3039 Revision Date: 5/12/03 Rena Systems Inc. 136 Green Tree Road STE 140 Oaks, PA 19456-1069 610-650-9170 610-650-9171 (FAX) E-Mail: support@renausa.com Web Site:www.renausa.com...
- Page 2 Web Site: http://www.renausa.com Every effort has been made to assure the accuracy of this manual. RENA Systems shall not be held liable for any errors contained herein or for any consequential or incidental damages incurred as a result of acting on information contained in this manual.
-
Page 3: Table Of Contents
RENA Address Printer Contents Safety........................4 Hazards associated with the printer.............4 General notes on safety.................4 Handling the print cartridges .................6 Location of the printer..................6 Disposal......................6 System requirements..................7 Transport and packaging................7 Transport......................7 Unpacking the printer..................7 Assembly of contact brackets and guide bar..........8 Description of the address printer...............9... -
Page 4: Safety
RENA Address Printer 1. Safety Before operating your printer, read the following safety hints carefully both for your own safety as well as to ensure the reliable operation of the printer. Be sure always to heed all warnings and other information marked or labeled on the printer. - Page 5 RENA Address Printer • Never touch any moving parts of the printer! Such action can lead to injury from being caught up in the rotating rollers. Also be sure to keep long hair and clothing away from the printer while it is running.
-
Page 6: Handling The Print Cartridges
RENA Address Printer 1.3 Handling the print cartridges • Keep all print cartridges out of the reach of children. • Under normal circumstances, ink cannot run out of a cartridge. Wash off any ink spray which gets onto the skin immediately under running water. -
Page 7: System Requirements
RENA Address Printer 2. System requirements The printer is designed for use with a PC (Pentium 200 MHz) equipped with a parallel and serial interface. It can be operated with the following operating systems: Windows 3.x, Windows 95 / 98 / 2000 or Windows NT4. -
Page 8: Assembly Of Contact Brackets And Guide Bar
• Suitable print cartridges: C8842A (fast-drying ink) or HP 51645A, C6168A, C6169A, C6170A are available from your Rena dealer • Suitable printer cable: twisted parallel interface cable 3.3 Assembly of contact brackets and guide bar •... -
Page 9: Description Of The Address Printer
RENA Address Printer 4. Description of the address printer 4.1 Applications The address printer is an ink-jet printer offering high print speed and high print quality. It prints addresses in the correct positions on print media such as envelopes, cards, leaflets and periodicals up to dimensions of: •... -
Page 10: Overview Of The Printer
RENA Address Printer 4.3 Overview of the printer Printer cable terminal Power cable terminal ON/OFF switch Control panel with display Outer contact bracket Inner contact bracket Guide bar Separator Knurled screw for separator 10 Print unit 11 Knurled screws for print-unit cradle... -
Page 11: Installation And Operation
See Section 9.4 for important notes on cartridge maintenance. The printer requires three “HP51645A style” print cartridges. Rena ink cartridges are available in Black (C6131A), Versatile Black (C8842), Fast Dry (C6195), Red (C6168A), Green (C6169A) and Blue (C6169A) Blue (C6170A), and Yellow (C6173A) Ink. - Page 12 RENA Address Printer To ensure that a secure contact exists between the print cartridge and the printer electronics at all times, the restraining lever has two functions: • To place the ink cartridge into its final position • To restrain it securely during operation This means that the cartridge must not be inserted manually into its final position.
-
Page 13: Installing Printer Drivers
Section 6 - Programming mode. IMPORTANT! When using a Windows program, in conjunction with a Rena printer driver, do NOT set the Menu Feature: “Setting Locked” to yes. Doing so will cause image printi ng problems and positioning problems. -
Page 14: The Control Panel
RENA Address Printer 5.4 The control panel A 2-line display is integrated into the control panel. The first line displays how much ink is left, the selected font and the counter status. The second line shows the operating mode (e.g. On for on-line mode), the resolution, the configuration number and finally the print direction. -
Page 15: Key Combinations
RENA Address Printer 5.5 Key combinations The key combinations have the following functions in conjunction with turning the printer on: Initiate download of new firmware or other software supplied by RENA Default Reset (Default setting) Hex Dump (all received characters are printed... -
Page 16: Adjusting The Printer To The Medium
RENA Address Printer • Now press the start key: the display changes: Set Paper Size Now? Enter=YES End=NO Do you want to measure the paper size now? Press enter key = YES. Press end key = NO. Keep the enter key pressed down until an (L) appears on the display! (The paper length has now been measured and locked.) - Page 17 RENA Address Printer Adjusting the printer to the thickness of the medium 1. Height adjustment of the print unit To obtain a well-defined print-out, it is important to adjust the height of the print unit above the print medium. This can only be done when the cradle of the print unit has been detached: •...
- Page 18 RENA Address Printer • Loosen the knurled screws of the two separators. • Lift the two separators and place the print medium under the separator fingers. If the print medium is narrow, such as postcards and C10 envelopes, only separator fingers may contact it.
- Page 19 RENA Address Printer Adjusting to the format of the print medium 1. Adjusting the contact bracket You must first of all know whether your print medium runs through the printer in a longitudinal or transverse direction. The lines are always printed in the direction in which the print medium moves.
- Page 20 RENA Address Printer If your print medium exceeds the holding capacity of the two contact brackets supplied, a medium and a long contact bracket are also available (see p. 39 – “Accessories”) as an alternative to the front contact bracket.
-
Page 21: Setting The Address Print Position
RENA Address Printer 5.8 Setting the address print position Before setting your desired address position, you must know which areas the printer can reach. The address height is positioned by shifting the print unit. The printable area results from the neces sary margins and the offset path of the print unit: X+Y = 2 mm (0.078) with Flashware V9.xx or ↑... - Page 22 RENA Address Printer The print direction depends on the size of your print medium and of the upper margin. If the desired margin cannot be reached by the print unit, then the address block and thus the print medium must be rotated by 180°.
-
Page 23: Printing Addresses
RENA Address Printer Measuring the length of the medium • Insert a medium. • If the printer is not in off-line mode, press the start key and switch the printer OFF. • Press the (AutoPL) key and keep it pressed down until (L) appears in the display. -
Page 24: Resetting The Address Printer
RENA Address Printer Print test • Insert a sheet of paper. • Switch to off-line mode. • Press the test key. A print test is now carried out. TIP! If the printer feeds very slowly, you may have forgoten to set and “local lock“... -
Page 25: Programming Mode
RENA Address Printer 6. Programming mode 6.1 The purpose of programming mode Programming mode is used to set certain parameters manually via the control panel. These comprise settings for the fonts, the print quality, the paper as well as special and test fu nctions. - Page 26 RENA Address Printer Key assignment in programming mode Programming mode uses the four middle keys as well as the key at the extreme right. The upper line of key lettering applies. Menu field Option field enter: Aktivate menu/option field. (last status stored) next: Select next menu point/Increase value.
-
Page 27: Menu Overview (Valid With Flashware V9.08 Or Higher)
RENA Address Printer 6.3 Menu overview (valid with Flashware V9.08 or higher) MENU OPTION SETTING No 0 No 1 ... No 9 FONT Cour12 Cour12bo Cour12it Helv07 Helv10 Helv12 Helv12bo Helv12it Helv13 LetGot12 TmsRm12 Bru12 OCR-A PRINT QUALITY 600D 550D 500D 450D... - Page 28 RENA Address Printer MENU OPTION HEAD12 CORRECT. -24 -23 -22 -21 ...-2 -1 0 1 2... 21 22 23 24 HEAD23 CORRECT. -24 -23 -22 -21 ...-2 -1 0 1 2... 21 22 23 24 PAPER SENSOR on off SETTING LOCKED no yes SPECIAL FUNCT.
-
Page 29: Description Of Parameters
6.4 Description of parameters NOTE: If you are using a Windows based program in conjunction with a Rena printer driver, the Windows program must be used to control the menu features in the printer. If you have set up the printer, using the printer’s programming mode, these settings will be over-ridden (reset) -
Page 30: Top Margin
RENA Address Printer TOP MARGIN Setting the upper margin within a range from 0 – 35 mm. The value is changed in mm increments. If the next or prev keys are pressed down, the value changes in cm increments. NOTE: This feature should normally be set to zero. If a top margin is entered, the usable printing area is reduced by the value set. -
Page 31: Line Spacing
RENA Address Printer CHAR. SPACING Increases the character spacing in dots from 0 to 90. CHAR. HEIGHT Increases the character height up to six times without changing the width. CHAR. WIDTH Increases the character width up to six times without changing the height. - Page 32 RENA Address Printer Overview of format sizes supported in the printer menu Format Designation Type Size in inches in mm Contact bracket No format size EXEC Executive Paper 7 x 10 184 x 267 LETT Letter Paper 8 x 11...
-
Page 33: Character Set
The printer will prompt you with “Local Lock? yes no”. In many cases, it is acceptable to “local lock” the following menu features when using a Windows ® program in conjunction with a Rena printer driver: Paper Size (should always be local locked), Print Quality, Orientation Doing so may be necessary if your Windows ®... - Page 34 RENA Address Printer SPECIAL FUNCT. AUTO LF This defines how the printer should interpret the control characters CR = Carriage Return LF = Line Feed FF = Forward Feed The settings mean: off: CR = CR LF = LF FF = FF...
- Page 35 RENA Address Printer off = the paper transport will continue to feed, even after the job is completed and or even if the printer runs out of material. TEST ADDRESS Select test address 1 or 2. AUTO PAP SPEED on = printer will automatically try to determin optimum paper feed speed based on print quality, amount and type of data being sent.
- Page 36 RENA Address Printer Font Displays the font Flashware version that is installed in the printer. Example: Rena3 Displays the amount of memory (RAM) installed in the printer. 4MB Standard, 8MB Max. Note: The RAM is part of the Galileo (CPU) board and can only be adjusted by replacing of the Galileo (CPU) board.
- Page 37 RENA Address Printer If a grid pattern contains gaps (see the examples below), th e affected cartridge should be cleaned, or the affected cartridge should be replaced (see Section 9.4 -Notes on maintenance). of defects: XAMPLES N1 N2 a.1 = No connection at contact “K“ ( for print-head H1) a.2 = No connection at contact “B“...
-
Page 38: Hardware Test
RENA Address Printer HexD This function is used to check the connection from the printer to the PC and for troubleshooting software problems. In hex-dump, all characters currently being received from the receive buffer are printed in LetGot12. Prints out data that is currently being received. -
Page 39: Accessories
RENA Address Printer 7. Accessories The following accessories are available (at a charge) to extend the usable format size and to increase the print media stack: Item Designation Qty. Order No. Assembled bar R0612.3.051 Medium contact bracket R0612.2.044 Long contact bracket R0612.2.045... - Page 40 RENA Address Printer Deflector unit for ejecting the print medium onto a conveyor belt. Item. Designation Qty. Order No. Deflector unit R0613.2.010 612s(Ei1)_Operations Rev: 5/12/03...
-
Page 41: Technical Data
RENA Address Printer 8. Technical data Dimensions of print media min. width 140 mm (5.5“) max. width 320 mm (12.5“) standard min. height 70 mm (2.8“) max. height 215 mm (8.4“) standard, 355 mm (14“) special accessories min. thickness 0.1 mm (0.004“) max. - Page 42 RENA Address Printer Operating height Standard Desktop printer Usable cartridges HP51645A, C8842A, C6168A, C6169A, C6170A Main memory 4 MB standard, 8 MB optional Address buffer The last 20 addresses Counter Resettable address counter Continuous address counter (life counter) Interfaces Data...
-
Page 43: Annex
RENA Address Printer 9. Annex 9.1 Contact brackets Short contact brackets (2x) R0612.1.043 (standard) Medium contact bracket R0612.2.044 (accessories) Long contact bracket R0612.2.045 (accessories) Adjustable widths of the contact brackets The specifications (in mm/inches) refer to the print media widths transverse to the transport direction. -
Page 44: Meanings Of Some Displayed Messages
RENA Address Printer Special format sizes Overview of format sizes which can be entered in the PAPER SIZE menu under USER. These format sizes are not supported in the printer menu. Format Size in inches in mm Contact bracket x 13... -
Page 45: Error Messages And Warnings
RENA Address Printer 9.3 Error messages and warnings 9.3.1 Error messages Error message Description Solving the problem ERROR LCA INITIALIS. Error in loading the hardware into Check connection on/to print CALL SERVICE the XC5210 module board of Module XC5210 Module XC5210 may need to be ERROR LCA1 Ready Error in printing –... - Page 46 RENA Address Printer Error message Description Solving the problem TEST MACRO TOO LONG The user-defined test address is too Keep within maximum lenght. long BUFFER OVERFLOW !! Overflow of receive buffer. Check connection to PC RAM ERROR !! Error in RAM.
- Page 47 RENA Address Printer Error message Description Solving the problem WRONG LCA REVISION! Incorrect LCA revision loaded Obtain valid flashware from Support/ PLEASE UPDATE LCA! Internet and load into the printer Reduce Paper Speed: Paper speed is set too fast for print Set “Auto Paper Speed“...
-
Page 48: Notes On Maintenance
Cleaning ink cartridges Clean the nozzles of the ink cartridge with a lint free cleaning cloth of ® brand TexWipe (Rena part #. 2023). The following materials are NOT suitable for cleaning the print-head and the ink cartridges ! • Paper towels •... - Page 49 Ensure that the contact and media rollers are kept clean at all times. We recommend the use of use of Rena Care (Part # 2024) to clean these rubber rollers. After the application of Rena Care, you will need to wait for the cleaner to evaporate from the rollers and or wipe dry with a clean, cloth.
Need help?
Do you have a question about the Envelope Imager I and is the answer not in the manual?
Questions and answers