Table of Contents
Advertisement
1
INTRODUCTION ..................................................................................................... 1
THANK YOU!.................................................................................................... 1
DD1500 SYSTEM OVERVIEW......................................................................... 1
FEATURES....................................................................................................... 2
ABOUT THIS MANUAL ..................................................................................... 4
2
TERMINOLOGY ..................................................................................................... 5
3
HOW THE DD1500 WORKS................................................................................... 7
DD1500 'FLOWCHART' .................................................................................... 7
4
DD1500M FRONT AND REAR PANELS.................................................................. 10
DIGITAL INPUTS A AND B ............................................................................... 10
MIX A/MIX B DIGITAL OUTPUTS..................................................................... 10
OPTION SLOTS ............................................................................................... 10
ANALOGUE UNIT............................................................................................. 10
SMPTE IN ........................................................................................................ 11
SMPTE OUT..................................................................................................... 11
LEVEL.............................................................................................................. 11
MIDI IN, OUT, THRU ......................................................................................... 11
WORDCK (A)/VIDEO SYNC (A) IN .................................................................... 11
WORDCLOCK (B) IN/OUT................................................................................. 11
VIDEO - VITC/SYNC (B) IN ............................................................................... 11
BI-PHASE SYNC IN.......................................................................................... 11
BI-PHASE SYNC OUT ...................................................................................... 11
VTR CONTROL................................................................................................. 12
GPI/O............................................................................................................... 12
SCSI................................................................................................................. 12
REMOTE - AKAINET/DIGITAL AUDIO OUT ...................................................... 12
DIP SWITCHES................................................................................................ 12
SIGNAL GND.................................................................................................... 12
MAINS INPUT................................................................................................... 12
DD1500X FRONT AND REAR PANELS .................................................................. 13
FRONT PANEL - INSERTING AN MO DISK ...................................................... 14
DISK ACTIVITY LED............................................................................. 14
DISK EJECT BUTTON .......................................................................... 14
WRITE PROTECT SWITCH .................................................................. 14
REAR PANEL CONNECTIONS ......................................................................... 15
SCSI CONNECTIONS........................................................................... 15
NOTES REGARDING SCSI................................................................... 15
DIP SWITCHES - SETTING SCSI ID AND TERMINATION..................... 16
SIGNAL GND.................................................................................................... 16
MAINS INPUT................................................................................................... 16
DD1500A FRONT AND REAR PANELS .................................................................. 17
RECOMMENDED DD1500A CONFIGURATIONS.............................................. 17
DL1500 REAR PANELS ......................................................................................... 19
DISPLAY CONTRAST....................................................................................... 19
HEADPHONE ................................................................................................... 19
AUDIO MONITOR OUTPUT .............................................................................. 19
FOOT SW......................................................................................................... 19
KEYBOARD...................................................................................................... 19
EXPANSION CONNECTION ............................................................................. 19
DISPLAY .......................................................................................................... 19
PRINTER PORT................................................................................................ 20
SERIAL PORT .................................................................................................. 20
DIGITAL AUDIO IN ........................................................................................... 20
AKAINET .......................................................................................................... 20
TERM............................................................................................................... 20
OPTION SLOT.................................................................................................. 20
SIGNAL GND.................................................................................................... 20
CONNECTION TO RS422 VTR ......................................................................... 22
CONNECTION USING BI-PHASE...................................................................... 26
Advertisement
Table of Contents

Subscribe to Our Youtube Channel
Related Manuals for Akai DD1500


Summary of Contents for Akai DD1500
-
Page 1: Table Of Contents
DD1500 SYSTEM OVERVIEW................. 1 FEATURES....................... 2 ABOUT THIS MANUAL ..................4 TERMINOLOGY ..................... 5 HOW THE DD1500 WORKS................... 7 DD1500 ‘FLOWCHART’ ..................7 DD1500M FRONT AND REAR PANELS..............10 DIGITAL INPUTS A AND B ................10 MIX A/MIX B DIGITAL OUTPUTS..............10 OPTION SLOTS .................... - Page 2 DL1500 REAR PANELS (Cont) POWERING UP THE DD1500 SYSTEM ............27 BASIC CONCEPTS....................29 CUE........................29 EDIT REGION....................29 SELECT CUE ....................29 DL1500 PANEL LAYOUT ..................31 TOP PANEL ..................... 31 TRACK SELECT KEYS................. 31 GROUP KEYS..................31 HELP KEY.................... 31 NAME KEY...................
- Page 3 GETTING AROUND THE GRID ................44 TRANSPORT KEYS..................44 GOTO FUNCTION..................... 44 NEXT/PREVIOUS EDIT ..................45 JOG WHEEL ....................45 JOG/SPOOL SET..................... 46 10 SYSTEM SETUP....................47 DISK - FORMATTING DISKS................54 NOTES ON FORMATTING DISKS ............56 SHOW (SHIFT+SYSTEM) ................. 57 11 RECORDING ......................
- Page 4 14 EDITING (Cont) IN KEY ......................89 SYNC KEY ....................... 89 OUT KEY......................89 TO SELECT A TRACK FROM THE IN POINT TO THE END ......90 TO SELECT A TRACK FROM THE OUT POINT TO THE START....... 90 TO SELECT A TRACK FROM THE SYNC MARK TO THE START OR END..90 TO SELECT A WHOLE TRACK ................
- Page 5 RS422 MASTER CONTROL OF NON-LINEAR VIDEO RECORDERS ..167 AUTO CONFORM..................... 168 OVERVIEW OF AUTO CONFORM............168 SETTING UP THE DD1500 FOR AUTO CONFORM ......171 SETTING UP TO IMPORT AN EDL............172 IMPORTING THE EDL................175 PERFORMING THE AUTO CONFORM ..........176 PERFORMING A PARTIAL AUTO CONFORM ........
- Page 6 DEALING WITH DD1000 ENVELOPES ............273 CONVERTING DD1000 CUTS INTO DD1500 LIBRARY CLIPS ......273 PLAYING DD1000 DISKS CREATED ON A DD1500 ON A DD1000....274 FORMATTING A DD1000 DISK IN THE DD1500..........275 SAVING A DD1500 PROJECT AS A DD1000 QLIST ........275 STEREO EDITS SAVED IN DD1000 FORMAT..........
- Page 7 NOTES ON CHOOSING A DISK DRIVE............278 NOTES REGARDING SCSI................278 NOTES REGARDING THE USE OF MULTIPLE DISK DRIVES......279 APPENDIX 2 ........................ 280 PIN WIRING - DD1500..................280 ANALOGUE XLR CONNECTIONS ............280 RS422 9-PIN CONNECTION..............280 GPI/O CONNECTION................280 BI-PHASE INPUT..................
-
Page 9: Introduction
INTRODUCTION - 1 The staff at Akai would like to thank you for buying the DD1500. Developed by the same team of engineers that developed the Akai DD1000, the world’s first Magneto Optical Disk recorder/editor, we are confident that the DD1500 will be a sound investment, offering many years of reliable service and will be a product you can rely on in your daily work. -
Page 10: Features
SCSI. • 16-track operation (8-track record/16-track playback) using a fixed hard disk. The largest single drive the DD1500 can accommodate is 4Gbytes offering in excess of 12 hours of mono recording at 44.1kHz. • SMPTE/EBU IN and OUT (at all frame rates), Bi-phase IN and OUT, VITC IN and RS422 (Sony™... - Page 11 INTRODUCTION - 1 • The JOG wheel allows you to ‘scrub’ audio across all 16-tracks for editing. • Dedicated track select keys for easy selection of play, mute, edit and record. • Dedicated keys for nearly all main editing functions (i.e. COPY, CUT, ERASE, PASTE, INSERT, TRIM, NUDGE).
-
Page 12: About This Manual
It is assumed that the DD1500 is being used in recording, editing and syncing audio to picture, the main application for which it was designed and it is assumed you have some experience of the techniques involved in this field. -
Page 13: Terminology
As with any piece of new gear, there is always a bit of new jargon to get to grips with. The DD1500 is no exception! What follows, therefore, is a short list of some of the terms you will come across during the course of this manual. - Page 14 On the DD1500, you could have a library where all your ‘raw’ recordings are kept, another where you keep all your traffic sound effects, another where you keep all your animal sound effects, another where you keep all your music cues, etc..
-
Page 15: How The Dd1500 Works
HOW THE DD1500 WORKS - 3 The following is a ‘flowchart’ of the DD1500. INPUTS (Analogue/Digital) TRACK SELECT (RECORD) RECORDINGS TO 'RECORDINGS' LIBRARY DIALOGUE HORN MUSIC 1 THUNDER TO PROJECT TRAFFIC 2 FOOTSTEPS DIALOGUE DIALOGUE DIALOGUE MUSIC 3 COPY EDITS TO LIBRARIES... - Page 16 3 - HOW THE DD1500 WORKS In the GRID, the source audio may be edited and that may be all you ever do with it! For example, you may record a long piece of dialogue onto track 1, edit out all the mistakes, coughs, breath noises and other unwanted artefacts and simply save the project.
- Page 17 HOW THE DD1500 WORKS - 3 The music is recorded directly to tracks 1 and 2 of the project you are working on. At the same time, you can see it is also placed in a library called RECORDINGS (it could be called anything you like, however) and the recording is called MUSIC 1.
-
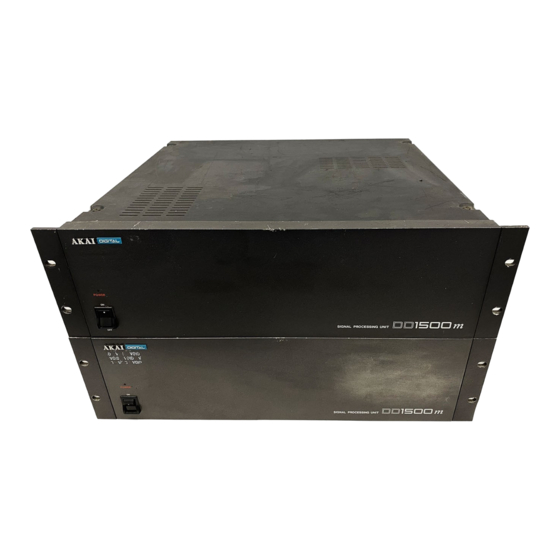
Page 18: Dd1500M Front And Rear Panels
DI04 and DO4 digital interface boards. In this way, up to 12 inputs and 12 track outputs may be added if you wish allowing you to integrate the DD1500 into a totally digital studio where you may be using a digital mixing console. -
Page 19: Smpte In
A level control is also provided so that you may set the output level of the timecode. MIDI IN, OUT, THRU MIDI IN will accept MIDI data to control the DD1500’s internal 16-channel mixer. Using a synchronised MIDI sequencer, mix data can be recorded into the sequencer to achieve automated mixing. -
Page 20: Vtr Control
AUTO CONFORM process The DD1500 may also be set to work as a slave to RS422 where it can be controlled by a video editor. This is useful in situations where you can compile the audio for a project as the picture is being edited. -
Page 21: Dd1500X Front And Rear Panels
(for example, four tracks from the hard disk and four from the MO) as this is the maximum allowed by the MO drive which, in this case, is the slowest drive in the system. This is not a restriction imposed by the DD1500 but by SCSI. -
Page 22: Front Panel - Inserting An Mo Disk
4 - CONNECTIONS - DD1500X FRONT PANEL - INSERTING AN MO DISK Assuming you have an MO drive installed, the disk is inserted thus: W R I T E P R O T E C T S W I T C H W R I T E P R O T E C T S W I T C H ( T h i s s i d e ) ( O t h e r s i d e ) -
Page 23: Rear Panel Connections
SCSI devices and is not a fault with the DD1500. The DD1500 system can accommodate up to seven disk drives and it is good practice to set the SCSI IDs sequentially so you can keep track of things more easily (i.e. first drive ID#0, second drive ID#1, third drive ID#2, etc.). -
Page 24: Dip Switches - Setting Scsi Id And Termination
4 - CONNECTIONS - DD1500X DIP SWITCHES - SETTING SCSI ID AND TERMINATION If you have just one DD1500x, you need not concern yourself with this too much as the correct SCSI ID will have been set at the factory. The default settings for a single drive is SCSI ID#0, termination ON and the rear panel DIP switches should look like this: 2 1 0 2 1 0... -
Page 25: Dd1500A Front And Rear Panels
CONNECTIONS - DD1500A - 4 POWER dd1500 ANALOG INPUT ANALOG OUTPUT PUSH PUSH PUSH PUSH TO MAIN PROCESSING UNIT The DD1500a contains the Analogue to Digital Converters (ADCs - inputs) and the Digital to Analogue Converters (DACs - outputs) for the system. The system can accommodate up to twelve inputs, sixteen track outputs and two stereo mix outputs A and B. - Page 26 4 - CONNECTIONS - DD1500A A fully loaded system’s input and output configuration would be as follows: UNIT 1 INPUTS 5-8 OUTPUTS 1-4 PUSH PUSH PUSH PUSH ANALOG INPUT ANALOG OUTPUT PUSH PUSH PUSH PUSH TO MAIN PROCESSING UNIT INPUTS 1-4 MIX A MX B OUTPUTS 5-8...
-
Page 27: Dl1500 Rear Panels
CONTRAST PHONES MONITOR OUTPUT FOOT SW. KEYBOARD TO MAIN PROCESSING UNIT DIGITAL AUDIO AKAI NET. EXPANSION DISPLAY PRINTER PORT SERIAL PORT TERM. ON OFF In this section, we take a look at the DL1500’s rear panel connections. Actual operation of the DL1500 will be discussed later. -
Page 28: Printer Port
4 - CONNECTIONS - DL1500 Any size monitor may be used and the graphics automatically resize accordingly. You may even use very large RGB monitors but you will need a suitable S-VGA to RGB converter for this. Again, please speak to your dealer for information on choosing and connecting a monitor. - Page 29 CD and/or DAT. A rough mix may be done within the DD1500 and the disk then transferred to a larger mixdown room for the final mix. The DD1500m connects to the DD1500x using SCSI (taking care to pay attention to SCSI ID and termination settings) and to the DL1500 using the BNC AKAINET connection (the AKAINET termination MUST be ON on both machines for system to work).
-
Page 30: Connection To Rs422 Vtr
DL1500. Mixing would be done internally using the DD1500’s digital mixer. Any size VGA monitor may be used and probably, in a small setup such as this, something like a 14” or 17” screen would be sufficient. - Page 31 The DD1500m must receive a timecode feedback from the VTR (i.e. the RS422 tells the VTR what to do, the timecode back to the DD1500 tells the DD1500m the timecode position the VTR is at). This timecode can be derived from a number of sources.
- Page 32 Analogue inputs DD1500a Special DD1500a To other drives VIDEO connector cable MONITOR DD1500x SCSI House Sync Source Digital inputs To DD1500 SMPTE input Digital outputs T/C out RS422 00:00:00:00 DD1500m RS422 equipped VTR TERMINATOR ON Special digital audio monitor link AKNET...
- Page 33 DD1500m and the sync type selected from the DL1500. NOTE: One unique feature of the DD1500 is its ability to read one type of timecode and generate another. For example, in the diagram shown above, you could be controlling a VTR using RS422 with the DD1500 synchronised using SMPTE/EBU timecode but, at the same time, be generating Bi-Phase to synchronise film equipment.
-
Page 34: Connection Using Bi-Phase
Once the audio has been edited and synced using the system described above, the disk can be taken to the mixdown room where the DD1500 (or the compatible Akai DR8 or DR16) would be set to be a slave to a master Bi-Phase controller in sync with other film playback machines. -
Page 35: Powering Up The Dd1500 System
CONNECTIONS - POWERING UP - 4 POWERING UP THE DD1500 SYSTEM It is recommended that the following power up procedure is observed when turning the system on: First, turn on any disk drives that may be connected to the system. Next, turn on the DD1500a ADC/DAC unit(s). - Page 36 4 - CONNECTIONS - POWERING UP If everything seems alright but the problem persists, press any key on the DL1500. You will be taken to the SYSTEM LOAD O/S screen. This is normally used for upgrading your system software but, in circumstances like this, can be used to restart the system. Pressing any key will display this screen: The screen shows that the current operating system in the DD1500m is Version 0.00.
-
Page 37: Basic Concepts
BASIC CONCEPTS - 5 BASIC CONCEPTS Audio in the GRID is known as a CUE. A cue is a block of audio from start to finish. This may be a raw recording in its entirety or may be the result of an edit. For example: This shows two cues. - Page 38 Of course, this is just a very simple example and there are many different ways the DD1500 may be used to edit and sync audio. However, whatever it is you are trying to achieve, you will find that all functions are consistent making operation easy and fast.
-
Page 39: Dl1500 Panel Layout
DL1500 PANEL LAYOUT - 6 Track Select Keys Timecode Display Meters PLAY GROUP TR1-8/_ TR9-16/. ALL/I CLEAR/J STORE/K G1/L G2/M HELP dl1500 REMOTE CONTROLLER RECORD/EDIT EDIT/- REC/# ALL/V CLEAR/W G3/X G4/Y G5/Z NAME NOW TIME /C RCV /C RCV HOUR FRAME OUT A OUT B... -
Page 40: Exit, Undo And Execute Keys
Also included in the EDIT section are EXIT, UNDO and EXECUTE keys. Located directly beneath the LCD is a row of six soft keys, the function of which depends on the DD1500’s current status. The JOG wheel emulates reel rocking for finding edit points. It is possible to jog all tracks simultaneously. -
Page 41: Vga Monitor Layout
The waveforms/blocks scroll during playback and you may zoom in horizontally or vertically for more precise editing and the DD1500’s real-time operating system even allows you to zoom in or out when the machine is currently busy doing other things such as playing back, recording, etc.. -
Page 42: Overview
GRID, this one shows track status even when zoomed in to a few tracks. If you are using the DD1500 with an external mixing console that has good metering, you may prefer to display the DL1500’s LCD instead of the meters. E.g.:... -
Page 43: Edit Clipboard
FOOTSTP1 R DD1500 cue name display. On the DD1500, regardless of the length of the cue, the entire name is shown clearly. At the top tight of the monitor, you can see the EDIT CLIPBOARD. This shows the ten edits available for pasting and/or inserting into a project at any time:... -
Page 44: Getting Around The Dl1500
The external monitor is used purely for referencing your work to see what is going on. You can think of it as an animated track sheet. In theory, the DD1500 could be used without it as most work is done from the DL1500’s front panel in association with the large LCD that sits in the centre of the DL’s upper panel. -
Page 45: Cursor Keys
‘below’ the screen which may be accessed by scrolling up or down. This is a convention used in all file-lists in the DD1500 (for example, when loading PROJECTS, pasting or inserting from a library list, etc.). If the arrows don’t appear, there are no files ‘off-screen’. -
Page 46: Track Zoom Keys
8 - GETTING AROUND THE DD1500 TRACK ZOOM KEYS The CURSOR keys are also used with the SHIFT key to zoom in and out on tracks. SHIFT plus the CURSOR allow horizontal zoom in/out. You may also use these keys... -
Page 47: Editing Names That Include Numbers
GETTING AROUND THE DD1500 - 8 EDITING NAMES THAT INCLUDE NUMBERS In names that have a number as part of the name (i.e. PROJECT 5), this can be renamed very quickly simply by pressing any other number on the numeric keypad. For example, pressing 9 would immediately change this name to PROJECT 9. -
Page 48: Data Entry/Nudge Keys
DATA ENTRY/NUDGE KEYS These two keys allow you to set data values and select parameters in the DD1500. To set a data value, simply move the cursor to appropriate field and press the DATA ENTRY ‘+’... -
Page 49: Undo
GETTING AROUND THE DD1500 - 8 At all times, the EXIT key will take you out of the current page and back to a ‘safe’ situation. In cases where you have arrived at a page by going through other pages first (for example, SYSTEM SETUP, SETTINGS, FLASH ROM, LOAD) the EXIT key will take you back step by step through those pages until you arrive back at the main display. -
Page 50: Naming Files
- just start typing (see below - USING A COMPUTER KEYBOARD). USING A COMPUTER KEYBOARD It must be said that naming files on the DD1500 from the track select keys can be a little tricky. This has been included merely as a convenience for those occasions where using a PC computer keyboard is not practical due to studio layout, restricted desk space or whatever and you need to name a file without a keyboard attached. -
Page 51: Help
HOME END F7-F12 PRINT SCREEN SCROLL LOCK PROMPTS Two types of prompts are used in the DD1500. One is a temporary one that is displayed for information only. I.e.: This pops up and lasts for a few seconds. Pressing any key while it is displayed will clear the message. -
Page 52: Getting Around The Grid
NOTE: When rewinding or fast forwarding with ‘chatter’, you may notice that some tracks will be dropped. This is normal as the DD1500 cannot play all tracks at high speed. However, if your project only has a few tracks to begin with, then this won’t be so noticeable. -
Page 53: Next/Previous Edit
GETTING AROUND THE GRID - 9 Pressing GOTO and the numeric keypad’s +/- keys allows you to step though locate points sequentially. These include locate memories, grab markers and IN, SYNC and OUT points. NEXT/PREVIOUS EDIT By pressing AND HOLDING the GOTO key and the DATA ENTRY +/- keys, you can go to each edit in turn. -
Page 54: Jog/Spool Set
When both LEDs are off, the jog wheel has no function. This position is recommended when mixing down from the DD1500 so as to prevent accidental jogging during playback. NOTE: The jog wheel may also be used to trim cues - please the section TRIM in EDITING... -
Page 55: System Setup
The keys we are interested in are highlighted in the panel diagram above. The SYSTEM pages allow you to set certain parameters that will affect the DD1500 system as a whole. These include setting sample rates, timecode types and inputs, external connections, etc., as well as enabling disk formatting and file management, etc.. - Page 56 - when using it with external video equipment, to prevent drift of audio to picture, it is recommended to sync the entire system (i.e. VTR, DD1500, etc.) to one of the external wordclock or video sync sources described below.
- Page 57 This would be a typical selection to make when synchronising to film equipment. EBU 25 fps - This selects that the DD1500 will synchronise to timecode running at 25 frames per second. This would normally be selected when sync’ing to EBU timecode in Europe.
- Page 58 America, Japan or Canada. and 30 drop when working with black and white. 30d NTSC BW is unlikely to be used very often but please do not confuse the DD1500’s 30 drop- frame with other equipment’s which may actually be 29.97fps drop.
- Page 59 NOTE: When the DD1500 switches to VITC at very, very slow jog speeds, you will not hear audio as you jog but you will notice improvements in the accuracy of frame locking at such slow speeds.
- Page 60 It can also receive SMPTE/EBU and generate Bi-Phase at any of the rates available (or vice versa). Likewise, the DD1500 could be receiving SMPTE/EBU whilst simultaneously generating MTC or MIDI Clock. In this way, the DD1500 can be used as a very comprehensive timecode converter to help you overcome many of the awkward situations one can be faced with when receiving work done at different (or the wrong!) timecode rate.
- Page 61 TIME DISPLAY This allows you to set the type of timecode you wish the DD1500 to display. Normally, this is the same as the timecode type selected in the EXT. TIME SOURCE field (and the DD1500 will take care of this automatically) but you may choose to view another time display if you wish.
-
Page 62: Disk - Formatting Disks
Press FORMAT DISK (F5/F6) to see this screen: You may select whether to format the disk for use in a DD1000 or for the DD1500. You should select DD1500 (the default selection) - DD1000 format is only of use if you think the disk may be used in an Akai DD1000. - Page 63 SYSTEM SETUP - 10 If you have a PC keyboard connected, with the cursor on the LABEL field, you do not need to press name - simply start typing to enter a name of up to ten characters. Press RETURN once to complete the name and a second time to enter it. NOTE: Naming a disk is not compulsory! This is here entirely for your convenience.
-
Page 64: Notes On Formatting Disks
The full format and certify procedure takes between 20 minutes and an hour, depending on the size of the disk. During this time, the DD1500 writes a new, empty directory to the disk after which, if FORMAT & CERTIFY is selected as the format operation, it goes through the disk searching for bad blocks and marking them so that they won’t be used. -
Page 65: Show (Shift+System)
SYSTEM SETUP - 10 SHOW (SHIFT+SYSTEM) The SYSTEM key’s SHIFT function is SHOW. When you press SHIFT+SYSTEM, the key’s LED will flash and you will receive the following screen display: The options are split across two pages. The first page shown above offers the following: CUE INFORMATION Allows you to select: CUE NAMES... - Page 66 In both SHOW pages, you may reset the parameters to their default settings using the DEFAULTS soft key on F5/F6. Press either EXIT or SHIFT+SYSTEM again to close this screen. These are the basic settings one needs to make for operating the DD1500. We will look at other SYSTEM functions later on. Page 58...
-
Page 67: Recording
BASIC RECORDING Before we can do anything with the DD1500, we must first make a recording. Because the DL1500 has many standard multi-track tape recorder (MTR) keys, recording on the DD1500 is very simple. There are no special, separate record modes to encounter; simply select a track (or tracks) for record and press PLAY and RECORD as you would on a normal MTR. - Page 68 It will recorded over in the GRID but, because all recording and editing is non-destructive, you can set the DD1500 so that the actual audio will still be on disk so you can retrieve that at a later date if necessary.
-
Page 69: Advanced Recording
If you are using a computer keyboard to input names, just start typing. NOTE: The DD1500 has an ‘auto-increment’ function for names and so each new recording you make will have a new name based on the ‘seed’ name you give it here. For example, if you name a recording APPLAUSE, all subsequent recordings you make will be automatically named APPLAUSE 1, APPLAUSE 2, etc., until you specify a new ‘seed’... - Page 70 You may also select DESTRUCTIVE. This is a special type of record mode that behaves more like traditional tape. As mentioned, recording on the DD1500 is non-destructive by default but, sometimes when recording, it is possible to build up a lot of redundant audio on your disk, especially if you are dropping in and out over the same point time and time again (for example, when recording dialogue).
- Page 71 RECORDING - 11 NOTE: There are certain considerations regarding destructive recording that you should be aware of. • THERE IS NO UNDO FOR RECORDINGS WHEN DESTRUCTIVE MODE IS USED. • After you have just loaded a new project, as a safety factor, recording over cues in that project will not delete their audio from disk and the original project cannot be damaged.
- Page 72 11 - RECORDING NOTES REGARDING RECORDING TO A LIBRARY There are advantages and disadvantages to recording to a library. The advantage is that ALL recordings you make are kept safe in the library so, regardless of what you do to them in the project, you can always fall back on the original source recording.
- Page 73 RECORDING - 11 When recording, you will see this screen: As you are recording, so the FREE ON DISK field ‘counts down’ as disk space is used up. In the event of a mishap, you can abort the recording by pressing SHIFT and the red REC key simultaneously.
-
Page 74: Setting Record Levels
(i.e. they will reflect level changes set by the DD1500’s mixer) and you may select TRACK OUT 1-4, 5-8, 9-12, 13-16, this latter selection showing the actual levels of audio coming off disk before the mixer (i.e. - Page 75 +24dBs. This may be useful when recording signals from domestic or semi-professional equipment that runs at -10dBm (the DD1500’s analogue inputs are all calibrated to +4dBm). The default selection is +12dB. This sets that the amount of gain available on the fader between its 0dB setting and +12dB setting is +12dBs.
-
Page 76: Auto Punch-In/Out
PLAY and RECORD together. The RECORD track select key will flash as will the transport keys’ REC key as the DD1500 plays up to the IN time. When the IN time is reached, the DD1500 will automatically drop in to record and will drop out when the OUT time is reached. - Page 77 - one for the actual recording and the other for the muted track. The DD1500 deals with this in a way so that this should not be much of a problem and the way this works is designed to be as transparent as possible.
-
Page 78: Input Routing - Assigning Inputs To Tracks
11 - RECORDING INPUT ROUTING - ASSIGNING INPUTS TO TRACKS Because the DD1500 has more tracks than there are inputs, some way of assigning the inputs to tracks is needed. The default selection depends very much on the number of inputs you have installed in the system. - Page 79 RECORDING - 11 This shows the default assignment for a system with eight analogue inputs with each input being routed to the 8 tracks. Inputs can be assigned to tracks 9-16 by pressing the TR9- 16 key. You will see this screen display. With the cursor to the far left of the screen in the INPUTS column, you may assign inputs to tracks using the DATA ENTRY +/- keys.
-
Page 80: Bouncing Down Tracks
INPUTS page, route MIX A to tracks 7 and 8 and set a mix as appropriate using the fader and panpot (see the section MIXER for more details on mixing within the DD1500). When you press PLAY and REC to record tracks 7 and 8, you will record tracks 1-6 on them and you will hear it as it is being ‘bounced’. -
Page 81: Recording Digitally
If the digital audio signal gets disconnected or you select another digital input that has no connection, you will receive this prompt: If you are in the process of recording when this happens, the DD1500 will stop recording and playback. Please check your connections. - Page 82 However, if no tracks are selected for record, you may select a different wordclock sync source but, when you select tracks for record, the DD1500 will automatically switch from the newly selected wordclock source to the digital audio input.
-
Page 83: Playback
RECORD select keys on the upper panel. The DD1500 offers other play options not available on most tape machines or hard disk recorders, however. For example, there is REVERSE PLAY. Pressing SHIFT+PLAY will cause the DD1500 to play backwards. -
Page 84: Play To
This is useful for checking edits but can also be used for checking the last recording you made. Because the DD1500 automatically places the IN and OUT times at the start and end of a new recording, you may use PLAY IN>OUT to check it immediately after recording. -
Page 85: Play From
SOLOING A TRACK There is no dedicated SOLO key on the DD1500. This is not an oversight on our part as the same thing can be achieved using ALL and CLEAR. To solo a track, press CLEAR and select the track(s) you wish to solo. -
Page 86: 13 - Autolocator
13 - AUTOLOCATOR Once you start to build up a project, you need a convenient way of getting around it. Perhaps the simplest way is to use the rewind and fast forward keys. However, you often need to go to very specific points in a project. To facilitate this, the DL1500 has a powerful autolocator that allows you to store up to 100 numbered locate memories, 100 ‘grab’... -
Page 87: Storing Locate Memories
GRID: You may ‘grab’ the points at any time when the DD1500 is stopped or, in fact, when playing back. These markers are particularly useful for marking locate points of interest you may wish to come back to later (for example, sections in a piece of music, mistakes in a dialogue track, etc.) and up to 100 grab points may be marked in one project. -
Page 88: Clearing Locate Memories
13 - AUTOLOCATOR CLEARING LOCATE MEMORIES Sometimes, it may be necessary to clear (delete) one or more (or all) locator memories. There is no real benefit to this other than reducing clutter in the scroll bar by removing locate memories that are no longer required. CLEARING SINGLE LOCATE MEMORIES To clear a single locate memory, press SHIFT+GOTO(STORE), select the locator memory you wish to clear and press F3/F4 - CLEAR. -
Page 89: Cycle
AUTO PUNCH IN/OUT NOTE: The CYCLE function does not offer ‘seamless’ looping and there will be a small gap in playback as the DD1500 cycles back to the IN point. The exact length of the gap depends on the IN>OUT length. -
Page 90: Pre-Roll
The principle use of PRE-ROLL is when synchronising mechanical tape players (VTRs, MTRs, etc.) to the DD1500. Because mechanical devices need a certain amount of time to get up to speed, it is necessary to locate to a point a few seconds before where you really want to be so that the external devices get up to sync by the time you reach the actual locate point. -
Page 91: Editing
The IN, SYNC and OUT times are shown as is the IN/OUT length. Before we can look at editing, however, one very important aspect to the DD1500’s editing is the concept of LIBRARIES and CLIPS. The library function allows you to copy edits away to a library for re-use later on. -
Page 92: Directory - Using Libraries
(complete with fade up, fade down, level adjustment, sync points, etc.), which can be stored away in libraries for future use. In this way, you can use the DD1500’s libraries to assemble sound effects and music cue libraries as well as generally file your recordings and edits more efficiently. - Page 93 It is a good idea to become familiar with the concept of libraries as it is quite fundamental to successful and flexible operation of the DD1500. Version 2.00 - March, 1996...
- Page 94 Of course, the above example assumes that you have taken the time to create and assemble a series of libraries. If you are using the DD1500 for the first time, you will not have any libraries or clips so let’s see how to create a new library and place some clips in Page 86 Version 2.00 - March, 1996...
-
Page 95: Creating A New, Empty Library
EDITING - 14 CREATING A NEW, EMPTY LIBRARY Press the DIRECTORY key to receive this screen: Press F1/F2 - NEW LIBRARY. You will receive this prompt on the bottom of the LCD: The EXECUTE key will flash and you should respond accordingly - EXECUTE for YES, EXIT for NO/CANCEL. -
Page 96: Edit Clipboard
14 - EDITING EDIT CLIPBOARD The EDIT CLIPBOARD can be regarded as a miniature library. It can hold up to ten clips 0-9 which are available for pasting and inserting into a project at any time. The clipboard is shown on the VGA monitor at the top right of the screen and here you can see the edits you have placed in it. -
Page 97: Soft Keys
EDITING - 14 SOFT KEYS The soft keys below the LCD display functions which change according to the DD1500’s status. Sometimes these are used to go to other pages or call other functions, sometimes they are ‘action’ keys that perform specific functions. We have already seen some of their functions in the AUTOLOCATOR section. -
Page 98: To Select A Track From The In Point To The End
14 - EDITING NOTE: The OUT time CANNOT be placed before the IN time. Should this happen and you try to do an edit, the LCD will display the prompt. The same message will also be displayed if you try to do an edit and an IN and OUT time are at the same time. -
Page 99: Select Cue
EDITING - 14 SELECT CUE SELECT CUE marks the IN and an OUT at the start and end of a cue. This saves you having to specifically mark the IN and OUT before you can proceed. Typical operation is to line up the cue you are interested in on the NOW time, select the track for EDIT and press SELECT CUE. -
Page 100: Selecting Multiple Cues
14 - EDITING Pressing SELECT CUE will give this result: SYNC EDIT EDIT PLAY PLAY EDIT EDIT PLAY PLAY BLUE (PLAY) GREEN (SELECTED) EXAMPLE C - SELECTING MULTIPLE CUES When multiple cues are selected (i.e. several tracks in edit), all selected cues are highlighted green. -
Page 101: Copy To Clipboard
EDITING - 14 COPY TO CLIPBOARD This will copy the edit region within the IN/OUT marks or will copy the currently selected CUE(s) to the clipboard. Pressing COPY will display this screen: You can see the length of the edit region/cue(s) in the COPY LENGTH field. You cannot access this field and is shown for information purposes only. - Page 102 14 - EDITING You may also select the type of edit you wish to copy using F1 - TYPE? (or by moving the cursor specifically to the EDIT TYPE field). There are two choices you can make. WHOLE REGION selects that everything within the IN/OUT region will be erased: EDIT EDIT PLAY...
-
Page 103: Copy To Library
EDITING - 14 COPY TO LIBRARY You may also copy the edit region/cue(s) to a library. To do this, press either F5 or F6 - . If this is the first time you have copied to a library, you will receive a screen something like this: If the selected library is a new one, then it will be empty as shown above. -
Page 104: Copying To An External Disk
14 - EDITING COPYING TO AN EXTERNAL DISK It could be that you want to build a library up on an external disk. For example, your system may have a fixed hard drive where you keep your central library of sound effects, music cues, etc., and the removable MO is a ‘project’... -
Page 105: Cut To Clipboard
EDITING - 14 CUT TO CLIPBOARD CUT is similar to COPY except that, as well as copying the edit region/cue(s) to a clipboard, it also removes the audio from the GRID and closes the gap thus created, shifting all audio after the edit accordingly. For example: BEFORE CUT AFTER CUT Pressing CUT will display this screen:... -
Page 106: Cut To Library
14 - EDITING CUT TO LIBRARY You may also cut an edit region or cue (or group of cues) to a library. By pressing F5 or F6 - - you will see something like this screen: Here we see the library and, as with COPY, you may give the edit a name prior to cutting it from the GRID to the selected library. -
Page 107: Cut To Clipboard (Shift+Cut)
EDITING - 14 -> CUT TO CLIPBOARD (SHIFT+CUT) This key’s shift function does the opposite of CUT in that removes the selected edit region or cue(s) but slips all audio before the edit in time accordingly: BEFORE -> CUT AFTER -> CUT This type of cut may be used when you need to get rid of something but all audio after the cut point is perfectly synced. -
Page 108: Cut To Library
14 - EDITING -> CUT TO LIBRARY As with normal CUT, you may cut the selected edit region/cue(s) and place it in a library. Pressing F5 or F6 will display this screen: The same principles for cutting forwards to the library apply - you may name the edit region/cue(s) prior to cutting to the library and you may select a different library to place it in. -
Page 109: Erase To Clipboard
EDITING - 14 ERASE TO CLIPBOARD ERASE is similar to CUT except that it will remove the currently selected edit region/cue(s) but will keep the gap thus created. BEFORE ERASE AFTER ERASE Pressing ERASE will give you this screen: As with the other screens we have seen so far, the length you are about to erase is shown. -
Page 110: Erase To Library
14 - EDITING ERASE TO LIBRARY You may also erase audio and place it in a library. Pressing F5 or F6 will give you this screen: The principles are exactly the same as for copying or cutting to the library. You may name the edit region/cue(s) you are about to erase and you may select a different library to place it in. -
Page 111: Discard (Shift+Erase)
EDITING - 14 DISCARD (SHIFT+ERASE) The ERASE key’s shift function will discard material either side of the IN/OUT area but will not slip any subsequent audio. BEFORE DISCARD AFTER DISCARD Pressing DISCARD will show this LCD: Pressing EXECUTE will complete the action. The main use for DISCARD is to get rid of any rubbish in a cue before a certain point and after a certain point. -
Page 112: Paste From Clipboard
14 - EDITING So far we have seen how to copy and remove audio from the GRID. Now let’s have a look at how to put material into the GRID. PASTE FROM CLIPBOARD This will paste an edit over any material at the current NOW time. You will note that any gaps in the material being pasted will be pasted over any material that exists at the paste point. - Page 113 EDITING - 14 the exact point you want and then press PASTE, OUT, EXECUTE (to paste from default clipboard 0) or PASTE, OUT, 1-9, EXECUTE (to paste from the edit clipboard) . As you press the OUT key, so you will see the LCD’s ‘REFERENCED TO’ field change to SOURCE OUT.
-
Page 114: Paste From Library
14 - EDITING PASTE FROM LIBRARY It is also possible to paste material into the GRID from libraries. Pressing F5 or F6 will display this screen: Here, you may scroll up and down the list of library clips and select the one you wish to paste and then press EXECUTE to paste it. - Page 115 EDITING - 14 PASTING CLIPS FROM EXTERNAL DISK DRIVES You may select different libraries on different disks as you require by moving the cursor to the DISK field and selecting as appropriate. When you select an external drive, it will find the first library on that drive and list its contents (if any).
-
Page 116: Overlay (Shift+Paste) From Clipboard
14 - EDITING OVERLAY (SHIFT+PASTE) FROM CLIPBOARD Overlay is similar to PASTE in that it pastes over any existing material at the point of pasting but, if there are any gaps in the material being pasted, these are ‘transparent’ and will reveal any audio ‘underneath’. -
Page 117: Overlay From Library
EDITING - 14 OVERLAY FROM LIBRARY It is also possible to overlay material from the library. Pressing F5/F6 will give the usual library page: Operation is identical to PASTE. Use the CURSOR UP/DOWN/LEFT/RIGHT keys to select the clip you wish to overlay into your project and press EXECUTE to overlay the clip at the required point and also close the screen. -
Page 118: Insert From Clipboard
14 - EDITING INSERT FROM CLIPBOARD This will insert an edit at the current NOW time and will cause any audio after the insert point to be shifted. BEFORE INSERT AFTER INSERT Pressing INSERT will show this screen display: The default selection is to insert material from clipboard 0 but you may, of course, insert material from any of the clipboards 1-9 by selecting the appropriate number on the numeric keypad. - Page 119 EDITING - 14 You may also insert referenced to the source material’s SYNC mark. This is useful for bringing in material that needs to synchronise to specific visual events or to another piece of audio (a clichéd example would be to sync a music crescendo to a gun shot). Pressing INSERT, SYNC, EXECUTE would give this result: BEFORE INSERT AFTER INSERT + SYNC...
-
Page 120: Insert From Library
14 - EDITING INSERT FROM LIBRARY You may also insert clips into your project from the library. Pressing F5 or F6 will display this screen: As with PASTE and OVERLAY, you may use the CURSOR keys to scroll around this list of library clips and pressing EXECUTE will insert the currently highlighted clip into the GRID at the NOW time. -
Page 121: In->Now (Shift+Insert)
In this way, you may move a piece of audio into sync. Let’s take a practical example. Imagine you are working with the DD1500 connected to a VTR using RS422. You have pasted or inserted a few dog bark sound effects but one of them is slightly early and out of sync with the picture. - Page 122 14 - EDITING As the screen informs you, these are selected using the SYNC and OUT keys. Pressing SYNC displays this screen: The effect of this would be as follows: SYNC SYNC The SYNC point is moved to the NOW time. Of course, if you were to have pressed SYNC and then OUT together, you would have selected the whole track from the SYNC point to the end and the whole track would be slipped accordingly.
- Page 123 EDITING - 14 NOTE: You will note that the IN->NOW (and SYNC and OUT->NOW) can paste over material (as in the above example of OUT->NOW). Please be careful not to accidentally lose data this way. If you make a mistake, you can use UNDO to repair it. Of course, you can also use the NUDGE function to move and slip audio around but the IN->NOW and its associated functions are particularly useful because, using RS422 machine control, you can jog the VTR to achieve very precise picture sync, jogging back...
-
Page 124: Split Cue
14 - EDITING SPLIT CUE As its name suggests, SPLIT will split a cue in two. Although this can be done in other ways (NUDGE, IN->NOW, CUT, ERASE, etc.), these all involve either removing audio or moving it. SPLIT just splits the cue in two, making two cues out of one. Each cue may then be edited separately. -
Page 125: Select/Edit Cue
EDITING - 14 SELECT/EDIT CUE EDIT CUE allows you to edit a cue’s level and fade up and fade down parameters. Typical operation is to move the cue you are interested in onto the NOW time, select the appropriate track for editing and press SELECT CUE. This will select that cue for editing, marking an IN at the start of it, OUT at the end of it and a SYNC mark at the current NOW time. - Page 126 14 - EDITING Pressing EDIT CUE will display this screen: The parameters are: CUES This field is not accessible and it shows the number of cues currently selected. LENGTH This field is also not accessible and shows the entire length of the cue(s) selected or the length of the edit region.
- Page 127 EDITING - 14 If several cues are selected, this parameter allows you to set the level for all cues. You will note, however, that, as with all EDIT CUE parameters, as soon as you edit the level here, ALL cues will be set to the same level. If you need to adjust levels of cues relative to each other, each cue should be edited separately.
- Page 128 14 - EDITING USING EDIT CUE TO AFFECT MULTIPLE CUES You can also set the level and fade parameters for groups of cues by marking an IN and OUT time (or using SELECT CUE). This will select all cues within the IN/OUT region thus: SYNC EDIT EDIT...
-
Page 129: Trim
The overlap limit is set in the TRIM SET page. NOTE: The reason there is a limit to the overlap length is not a deficiency of the DD1500 but due to disk speed and SCSI bandwidth. If infinite crossfade length were possible, you would halve the number of tracks available to you. - Page 130 14 - EDITING It is also possible to ‘slide’ splices between butted cues around. For example, imagine the two recordings of numbers being spoken shown above are spliced together, you can trim the splice point as follows: You can extend the previous cue’s end ‘over’ the second cue’s start, thereby revealing more of the first cue and hiding more of the second or you can extend the second cue’s start, dragging it over the first cue’s end.
- Page 131 For example, if you intend to edit a PRE cue’s end, just lining that cue’s end point within ten seconds to the NOW time will be close enough for the DD1500 to take you there. You may find GOTO plus the DATA ENTRY keys is the easiest way to locate to a trim point.
-
Page 132: Trimming Pre
If you have not selected a suitable PRE trim point (i.e. the end of the cue is not on the NOW time or is too far away for the DD1500 to select it for you), you will receive this screen: This indicates that the trim point is nowhere near the NOW time. - Page 133 TRIM POST - see below. However, even if you do trim right the way back to the start of a cue, the DD1500 will leave just enough so that you can come back to this cue and trim it again, extending the cue’s end point to reveal the original audio.
-
Page 134: Slipping Pre
14 - EDITING SLIPPING PRE It is also possible to physically move or slip the cue when using TRIM. You will have noticed the two soft keys SLIP and TRIM on F1 and F2. The default selection is TRIM but you may also select SLIP. -
Page 135: Slipping Whole Track Using Slip Pre
EDITING - 14 SLIPPING WHOLE TRACK USING SLIP PRE In the TRIM SET page (SHIFT+TRIM), you may also set whether slipping a cue in TRIM will cause only the cue you are trimming to slip or the all audio before it. When SLIP WHOLE TRACK is selected, the LCD will display this screen: This indicates that all cues before the cue being slipped are also ‘active’... -
Page 136: Trimming Post
14 - EDITING TRIMMING POST Trimming the POST cue’s IN time is exactly the same as trimming PRE except that you are working on the start of a cue. To select POST, press TRIM to receive the ‘trim entry’ page: As the prompt suggests, you should locate to the start point of the cue you wish to trim and then press IN. - Page 137 EDITING - 14 Neither can you overlap it over the end of the previous cue beyond the overlap limit set in TRIM SET. I.e.: OVERLAP Also, you cannot extend the cue’s start beyond the end of the cue your are trimming. In any of these situations, you will receive the prompt: Version 2.00 - March, 1996 Page 129...
-
Page 138: Slipping Post
14 - EDITING SLIPPING POST As with PRE, you may also trim the POST cue and slip it in time. To do this, press the SLIP key. You will receive the following screen: The top line of the screen shows SLIP CUE POST, the POST block’s padlock symbol is shown as ‘unlocked’... -
Page 139: Slipping Whole Track Using Slip Post
EDITING - 14 SLIPPING WHOLE TRACK USING SLIP POST In TRIM SET (SHIFT+TRIM), you can set whether slip will affect the whole cue or will slip all audio after the cue. When SLIP WHOLE TRACK is selected in TRIM SET, the TRIM screen will show this display: This indicates that all audio after the cue you are editing is active and will slip. -
Page 140: Trimming A Splice Edit
14 - EDITING TRIMMING A SPLICE EDIT When two cues are butted together or overlapping, you may move the splice point around in TRIM. To select a splice for trimming, place the splice/overlap you are interested in on (or very close to) the NOW time and press TRIM to receive the ‘trim entry’ page: Now press the SYNC key. -
Page 141: Trimming A Splice - Both Locked
EDITING - 14 TRIMMING A SPLICE - BOTH LOCKED The top line of the screen shows TRIM PRE, TRIM POST and both blocks are highlighted. On the external monitor, both cues either side of the splice will be highlighted ochre. As you move the jog wheel or the DATA ENTRY or numeric keypad +/- keys, you will see the splice point move. -
Page 142: Trimming A Splice - Pre Slip
14 - EDITING TRIMMING A SPLICE - PRE SLIP It is also possible to trim the splice point as described above but set it so that the PRE cue slips in time. To achieve this, press F1 - SLIP. You will receive this screen: The top line shows that your are slipping the PRE cue and trimming the POST cue, the PRE block’s padlock ‘opens’... -
Page 143: Slip Whole Track Using Trim Splice (Pre Slip)
EDITING - 14 SLIP WHOLE TRACK USING TRIM SPLICE (PRE SLIP) When SLIP WHOLE TRACK is selected in TRIM SET, the LCD will show this screen: All cues before the splice will slip as you move the splice point. Version 2.00 - March, 1996 Page 135... -
Page 144: Trimming A Splice - Post Slip
14 - EDITING TRIMMING A SPLICE - POST SLIP It is also possible to trim the splice point as described above but set it so that the POST cue slips in time. To achieve this, press F5 - SLIP. You will receive this screen: The top line shows that your are trimming the PRE cue and slipping the POST, the POST block’s padlock ‘opens’... -
Page 145: Slip Whole Track Using Trim Splice (Post Slip)
EDITING - 14 SLIP WHOLE TRACK USING TRIM SPLICE (POST SLIP) When SLIP WHOLE TRACKis selected in TRIM SET (SHIFT+TRIM) the LCD will show: All cues after the cue you are editing will also slip with the splice. Version 2.00 - March, 1996 Page 137... -
Page 146: Undoing A Trim
14 - EDITING UNDOING A TRIM You cannot undo a trim within any of the TRIM pages but, when you leave the TRIM pages and return to the main working page, pressing UNDO will undo the trim you have just done. Page 138 Version 2.00 - March, 1996... -
Page 147: Trim Set (Shift+Trim)
EDITING - 14 TRIM SET (SHIFT+TRIM) It is possible to set the certain parameters relating to trimming cue in the TRIM SET page. Pressing SHIFT+TRIM will display this screen: The fields on this page are: SLIP TYPE This allows you set whether what you do in TRIM affects all audio on the track or only the cue you are trimming. -
Page 148: Nudge
14 - EDITING NUDGE This allows you to use the DATA ENTRY +/- keys to slip and nudge edits or audio into position. Pressing NUDGE gives this screen: This is a graphic representation of what is happening when you nudge. This page allows you to nudge the NOW time into position prior to marking an IN, SYNC or OUT time. -
Page 149: Undoing A Nudge
EDITING - 14 To select the whole track to nudge, press and hold SYNC then press IN and OUT together. This will mark the whole of the selected track and it will be highlighted green on the external monitor. You may, of course, have multiple tracks selected for editing. However you mark it, as soon as you press the DATA ENTRY + or - keys, the selected audio will slip forwards or backwards in increments of one frame or you may also use the numeric keypad’s +/- keys to slip in smaller increments of sub-frames (however, please... -
Page 150: Original Function
14 - EDITING ORIGINAL FUNCTION The ORIGINAL function appears on the main edit screen (F5). This allows you to move the selected cue/edit region to the time where it was originally recorded. For example, if you have slipped a piece of dialogue to a new position but wish to place it back to the point at which it was originally recorded, press ORIGNL. -
Page 151: Track Move
EDITING - 14 TRACK MOVE The TRACK key allows you to move a cue or an edit region to another track. This is faster and more convenient than using ERASE to remove the cue/region from one selected track, de-selecting that track and selecting the destination track and then pasting it back To move a cue/region from one track to another, select the source track using the TRACK EDIT keys and then select the cue or mark the region you want to move. -
Page 152: Edit Play Keys
14 - EDITING EDIT PLAY KEYS The five special play keys above the main transport keys are normally used when editing. Typical operation is to jog over an edit point and use PLAY TO, PLAY OVER or PLAY FROM to audition them quickly. PLAY TO PLAY OVER PLAY FROM... -
Page 153: Saving Projects
UTILITIES - SAVING PROJECTS - 15 UTILITIES AUTOLOCATOR EDIT NUMERIC ENTRY LINE OUT PLAYSHEET EXT M/C SYSTEM AUTO REHEARSE SHOW HEADPHONE USER KEYS MACRO CYCLE PRE-ROLL EXIT UNDO EXECUTE LEVEL LEVEL +12dB MACRO REC REDO MIXER EXT. TIME COPY ERASE PASTE INSERT TRIM... -
Page 154: Saving A Project With A Different Name
NOTE: It is not possible to save the project to another disk and the TO DISK field is shown for information only. The DD1500 always saves the project back to the disk it was loaded from. This is because saving a project to another disk would detach the project from the audio. -
Page 155: Compiling A Project
In other words, you want to ‘compile’ your project. The COMPILE function on the DD1500 is a special type of save routine and is used to create one ‘master’ disk for a project to be played from. Without COMPILE, if you were to... -
Page 156: Saving Mix Settings And Autolocate Memories
15 - UTILITIES - SAVING PROJECTS SAVING MIX SETTINGS AND AUTOLOCATE MEMORIES When a project is saved, if that project has locate memories or mix settings associated with it, they will also be saved. A ‘system settings’ file will also be saved automatically which will save the system sample rate, timecode settings, etc., relevant to the project. -
Page 157: Saving Settings Files
Furthermore, you may also save a default system settings file to the DD1500’s flash ROM so that the system always boots up exactly as you want it. If you are always track laying to picture on a VTR using an MO disk, you could set the system up as described in the example given above so that the system always boots up like this. - Page 158 15 - UTILITIES - SAVING PROJECTS NOTES ON USING SETTINGS FILES The settings files are an extremely useful way of configuring your system according to your needs or application. As mentioned, if you have a particular way of working that does not change, you can set the system up as necessary and then save those settings.
-
Page 159: Autosave
CAR CRASH THUNDER AUTOSAVE NOTE: If you use a DR8 disk on the DD1500, AUTOSAVE is automatically switched ON. ** WARNING ** IF YOU ARE USED TO WORKING WITH AUTOSAVE SWITCHED ON ALL THE TIME, BE AWARE THAT YOU MAY BE GIVEN A DISK TO WORK ON WHICH HAS THE AUTOSAVE FUNCTION SWITCHED OFF. -
Page 160: Load
TRACK ZOOM REVERSE Once you have a number of projects saved, it follows that you will want to load them into the DD1500. You may also want to initialise the DD1500 in order to create a project from scratch. LOAD Pressing SHIFT+SAVE (LOAD) will give you this screen: Here you can see a list of projects on the currently selected disk. - Page 161 UTILITIES - LOADING PROJECTS - 16 If you have been working on a project and have not saved it, if you request the system to load a project (or create a new one), you will now see the following prompt: This is telling you that pressing EXECUTE will load the new project and any changes you may have made to the existing project will be lost.
-
Page 162: Creating A New Project
The new project will be given a name automatically. You may rename this when you come to save it. As with loading a project, if the project currently in the DD1500’s memory has been edited and those changes have not been saved, you will receive the prompt: You should press EXECUTE to create the new project without saving or EXIT to abort the process. -
Page 163: Importing A Project Into A Project
UTILITIES - LOADING PROJECTS - 16 IMPORTING A PROJECT INTO A PROJECT So far, we have seen how the LOAD page is used to load entire projects into the DD1500. It is also possible to import DD1500 projects into other projects. -
Page 164: Importing Part Of A Project Into Another Project
16 - UTILITIES - LOADING PROJECTS IMPORTING PART OF A PROJECT INTO ANOTHER PROJECT It is also possible to import only part of another project by marking an IN and OUT region as appropriate in the destination project and then selecting SCOPE: IN > OUT in the IMPORT PROJECT page. - Page 165 You could, of course, merge two projects from DR8s into one 16-track project on the DD1500. That project could be saved and then taken to an Akai DR16 if all you want is a simple playback machine for mixdown (the same could be done with a DR8 as the playback machine providing the total number of tracks does not exceed 8).
- Page 166 16 - UTILITIES - LOADING PROJECTS LOADING SETTINGS FILES As described in the section SAVING SETTINGS FILES, you may save settings files to disk or to the flash ROM. When saving to disk, you may save several different system configurations for immediate recall in the LOAD page. To load a settings file, press SETTINGS (F1/F2).
-
Page 167: Ext. Time Key - Syncing To External Timecode
RCV LED flickers, this indicates a problem with the external timecode such as dropout. The DD1500 will ‘flywheel’ for a short while in the event of timecode dropout but, if the dropout is too long, the DD1500 will stop playing. -
Page 168: External Timecode Offset
NOTE 2: When using bi-phase, it is necessary to set the relative start of the film against the audio on the DD1500. This is done by locating the film to the very first frame and then locating the DD1500 to the start of the audio and pressing RESET ZERO. Please see the section SYSTEM - TIMECODE GENERATOR for details on this. - Page 169 EXTERNAL TIMECODE - 17 DISPLAY This offset is added to relative time before it is displayed. The options are OFF, ON, LED ONLY. OFF and ON should be fairly self-explanatory. LED ONLY applies the offset to the LED timecode display on the DL1500’s upper panel only - the timecode display on the external monitor does not show this offset.
-
Page 170: Setting Timecode Offsets
If the project starts at 00:00:00:00.0 but the incoming timecode starts at 1 hour, you should set a TIMECODE RECEIVE OFFSET (T/C RCV) of -01:00:00:00.0. This will subtract 1 hour from the incoming timecode, thereby effectively providing the DD1500 with timecode starting at 00:00:00:00.0. Conversely, if the project starts at, say, 10 hours but the incoming timecode starts at 1 hour, you would need to set +09:00:00:00.0 in the T/C... -
Page 171: Rs422 Control
However, because of the frame accuracy limit imposed on the DD1500 by the VTR over RS422, it is sometimes necessary to ‘isolate’ the DD1500 for greater editing accuracy, To do this, simply switch off EXT M/C and EXT. TIME - this will allow the DD1500 to be used ‘stand alone’. -
Page 172: Ext M/C Set
EXT. TIME input and the EXT.TIME key must be switched on (as must the EXT. M/C key). The DD1500 will receive timecode information in playback from the LTC connection but, when working in slow motion, it receives timecode over RS422 making locking of the two machines tighter. -
Page 173: Layback Function In Rs422 Master
For example, you may receive a video tape with just dialogue on it. This is sync-transferred to the DD1500 where it may be edited and tidied up if necessary and sound effects, music and other ‘sweeteners’ can be added using the DD1500’s multi-track capabilities. Finally, the whole thing is transferred back to the VTR. -
Page 174: Using The Layback Function
Another use of this may be to receive a video tape as described above but the ‘sweetened’ version on the DD1500 may be laid back to an RS422 equipped DAT machine thus preserving the dialogue on the original video with a synchronised ‘master’... -
Page 175: Rs422 Master Control Of Non-Linear Video Recorders
Using the ‘RS422 only’ external timecode selection, it is possible to take full advantage of non-linear hard disk video recorders such as the Akai DV1500 and FED V-MOD 100. When using any of the SMPTE+RS422 external timecode options, although locate/lock... -
Page 176: Auto Conform
Experienced users of auto conform on other systems might like to skip to "Setting up the DD1500 for Auto Conform". OVERVIEW OF AUTO CONFORM... - Page 177 UTILITIES - RS422 - AUTO CONFORM - 18 You will appreciate that there are many variations on the complex process of film making. The following description is intended as a general overview and is unlikely to represent exactly any actual production! Scenes are shot in the studio or on location.
- Page 178 EDL. At the end of the process, you will have a project on the DD1500 that has all the source audio automatically placed at the DESTINATION times dictated by the EDL. You have a copy of the master video tape and so now, all the source audio and the assembled picture are synced up.
-
Page 179: Setting Up The Dd1500 For Auto Conform
Setting up the DD1500 for an Auto conform is not a trivial process and there are a number of things you must consider if the auto conform is to go smoothly. -
Page 180: Setting Up To Import An Edl
The REEL NAME field allows you to select which half of the reel name you wish to use. When a cue is imported into the DD1500, it is automatically given a name by the DD1500 according to the reel number, edit number and the track set for that edit in the EDL. E.g.:... - Page 181 16. The DD1500 can display video edits on a spare audio track if required - this can often be a useful reference for the operator during post production. Such "video cues" will be ignored by the DD1500 during the conform process.
- Page 182 DD1500 tracks for edit. RECORD/EDIT If we required the cues to end up on DD1500 tracks exactly as per the digital track mapping table above, we would select DD1500 tracks 1,2,3,4 and 16 for edit. Import would then put the cues on those tracks. However, if we were to select DD1500 tracks 5,6,7,8 and 9 for edit, import would then put D1 edits to 5, D2 to 6, D3 to 7, D4 to 8 and V to 9.
-
Page 183: Importing The Edl
UTILITIES - RS422 - AUTO CONFORM - 18 IMPORTING THE EDL Before importing an EDL, you must load a project. Depending on the situation, you should either load the project you want to import the EDL into or use NEW PROJECT to create a brand new, empty project. -
Page 184: Performing The Auto Conform
Setting this parameter to greater than the size of these gaps will cause the DD1500 to make a single recording of a large chunk of the source reel instead of several shorter recordings. - Page 185 Once the first cue has been recorded, the DD1500 will locate to the next cue and will repeat the process recording the next cue in. This whole process will continue and you will see the DD1500 locating to the source reel’s cues, fast forwarding and rewinding and...
- Page 186 Assuming all the cues were recorded successfully, they will be shown as blue blocks with their waveforms. These may be played and edited in the normal way as any other DD1500 project. Once the auto conform process is complete, you should save the project in the normal way.
- Page 187 PRESS REC/# • Check the ROUTE INPUTS page to make sure that the audio inputs, digital or analogue, are routed to the correct tracks on the DD1500. • Press AUTO CONFORM - set parameters such as RECORD HANDLES, etc., as appropriate if necessary.
-
Page 188: Performing A Partial Auto Conform
IN/OUT region you have specified will be recorded into the DD1500. At the end of the process, the new audio will be placed within the IN/OUT region and will replace anything may have been there originally. Here’s an example of how this may be useful. - Page 189 UTILITIES - RS422 - AUTO CONFORM - 18 For example: PLAY PLAY PLAY PLAY PLAY PLAY PLAY PLAY Original conformed project EDIT EDIT EDIT EDIT EDIT EDIT EDIT EDIT EDIT Mark everything after the start of the scene to be inserted EDIT EDIT EDIT...
-
Page 190: Rs422 Slave Functions
VTR. In this way, as you perform your video edits, the DD1500m will capture the audio edits and so the audio tracks will be built up on the DD1500. That disk may then be removed and sent to post-production for ‘sweetening’. In this way, you alleviate the need for lengthy auto-conform procedures as the audio is being compiled at the same time as the video edits. -
Page 191: Rs422 Slave - Eavesdropping Mode
A video edit controller will have track assignment keys (usually A1-A4) on it to determine which tracks on the VTR the audio will be recorded to when an edit is performed. This page allows you to set which tracks on the DD1500 will be used when tracks on the video edit controller are selected. -
Page 192: Rs422 Slave - Full Slave Mode
A video edit controller will have track assignment keys (usually A1-A4) on it to determine which tracks on the VTR the audio will be recorded to when an edit is performed. This page allows you to set which tracks on the DD1500 will be used when tracks on the video edit controller are selected. -
Page 193: Using The Video Text Generator With Rs422 Slave
UTILITIES - RS422 - SLAVE - 18 USING THE VIDEO TEXT GENERATOR WITH RS422 SLAVE When using the DD1500m as an RS422 slave, there will be no DL1500 connected to the system as the DD1500m is being controlled by the video edit controller. In this situation, you have no way of knowing the status of the DD1500m. -
Page 194: Mixer
19 - UTILITIES - MIXER PLAY GROUP TR1-8/_ TR9-16/. 1/A 9 2/B 10 3/C 11 4/D 12 5/E 13 6/F 14 7/G 15 8/H 16 ALL/I CLEAR/J STORE/K G1/L G2/M HELP dl1500 REMOTE CONTROLLER RECORD/EDIT EDIT/- REC/# 1/N 9 2/O 10 3/P 11 4/Q 12 5/R 13... - Page 195 UTILITIES - MIXER - 19 Pressing the MIXER key will display something like this screen: This displays a graphic representation of the mixer’s current status and you may see the position of each tracks level and pan at a glance. As you move the fader and/or pan control, the screen will update in real time.
-
Page 196: Meters Setup
19 - UTILITIES - MIXER METERS SETUP In both pages, you may also set certain parameters relating to signal metering on the DL1500 and the external monitor screen. Pressing METERS (F3) will display this screen: The parameters are: PANEL METERS Here you may select what is displayed on the DL1500’s front panel meters. -
Page 197: Midi Mixer Function
DD1500. To record mix automation, set the sequencer to record, press PLAY on the DD1500 and use the controller to mix - the mix data will be recorded into the sequencer (you will need to consult your sequencer’s operator’s manual for more information on exactly how to achieve this). - Page 198 (although please note that if you make extensive edits and changes to the project on the DD1500 after having recorded mix data into the sequencer, you may have to edit the mix data separately or re-record it but this no different to many other automated mix packages).
-
Page 199: Dsp Functions
ZOOM OUT ZOOM IN TRACK ZOOM REVERSE The DD1500 has some powerful DSP functions you can use to further augment the editing possibilities available to you. These include: TIMESTRETCH This will lengthen or shorten a recording without changing its pitch. This can be used, for example, to make a piece of dialogue or music fit a scene more precisely. - Page 200 20 - UTILITIES - DSP FUNCTIONS REVERSE This will play back the selected cue or edit region backwards. This may be used as a special effect or can be used as a ‘profanity filter’ in place of the obvious ‘beep’ that is usually used.
-
Page 201: Timestretch
DD1500 works by making a copy of the original. It is necessary to make a copy for two reasons - firstly, the DD1500 needs the original data to get the data to insert. Secondly, in the event of a stretch going wrong, you still have the original to revert to using UNDO Unfortunately, however, perfect results using timestretch are sometimes difficult to achieve. - Page 202 - of course, these side effects can be put to good use for the creation of special effects!! Over smaller ranges, however, you will find the timestretch on the DD1500 yields excellent results and will become an invaluable tool in your work, whatever application you are working in.
-
Page 203: The Timestretch Page
NAME Here, you may create a name for the new recording that will be created by the timestretch process. On the DD1500, what happens is that you mark the region you want to stretch using the IN/OUT keys. When you initiate the timestretch, the process creates a new cue and replaces the existing one with the stretched version. - Page 204 20 - UTILITIES - DSP FUNCTIONS However, do not get too tied down with these preset descriptions because they are not sacrosanct - they are merely guidelines and the SPEECH 2B preset may do a fantastic job on a piece of classical music! A list of the presets are given later.
- Page 205 UTILITIES - DSP FUNCTIONS - 20 For example, imagine you have painstakingly synced up a whole pile of foley to picture but one effect needs stretching. In this case, selecting SLIP WHOLE TRACK would knock all these foley cues out of sync and so SLIP ONLY CUE may be a better choice here! The two choices are shown graphically here.
-
Page 206: Using The Timestretch Function
20 - UTILITIES - DSP FUNCTIONS USING THE TIMESTRETCH FUNCTION There are several ways in which the timestretch function may be used. The most obvious way is to mark the region or select the cue you want to affect using the green IN/OUT keys, select the preset you think is appropriate, set a STRETCH AMOUNT percentage (either using the DATA +/- keys or by typing in a value from the numeric keypad) and press the flashing EXECUTE key. - Page 207 UTILITIES - DSP FUNCTIONS - 20 Now let’s imagine you have the same situation but you want to stretch the music cue backwards to backtime its start so it overlaps with CUE A. Select TRACKS 2 and 3 for edit and use SELECT CUE to select MUSIC 1 L/R. Now jog back so that the NOW time is a little way into CUE A: CUE A MUSIC 1 L...
- Page 208 20 - UTILITIES - DSP FUNCTIONS You will have this result: CUE A MUSIC 1 L MUSIC 1 R The reverse of this can be done and you can stretch CUE A to butt up to the preceding cue. Use GOTO and the DATA - key to locate to the end of the previous cue so that you have this display: CUE A MUSIC 1 L...
- Page 209 UTILITIES - DSP FUNCTIONS - 20 In all cases, however you set the STRETCH AMOUNT parameter, whether it’s entering a value specifically in the STRETCH AMOUNT field or using STRETCH IN/OUT, when you initiate the process using the EXECUTE key, you will see this progress display: A highlighted bar will move across the screen to indicate progress.
-
Page 210: Pitch Shift
20 - UTILITIES - DSP FUNCTIONS PITCH SHIFT PITCH SHIFT allows you to re-tune a cue to a different pitch whilst retaining its original length. This is normally used for music cues for transposing them to a new pitch but it can be used for other applications if you wish. -
Page 211: The Timestretch/Pitch Shift Presets
UTILITIES - DSP FUNCTIONS - 20 THE TIMESTRETCH/PITCH SHIFT PRESETS The presets used for timestretch and pitch shift are as follows: FEM VOX This works well on female speech. MALE VOX This works well on male speech. LMALE VOX This is more appropriate for deeper male speech. VOCAL This works well with solo and ensemble singing voices in isolation and, in music studio applications would be... -
Page 212: How The Presets Were Created
The basic premise to using the DD1500’s timestretch and pitch shift presets is - “what is the nature of the material I want to process? - choose a preset whose name roughly describes it and give it a go. -
Page 213: Varispeed
UTILITIES - DSP FUNCTIONS - 20 VARISPEED Although it is possible to use SPOOL to play back a project at different speeds, you may wish to varispeed just one cue or region. This can be achieved using the VARISPEED function. Unlike TIMESTRETCH which makes a recording longer without changing pitch or PITCH SHIFT which will transpose a recording’s pitch but keep the length the same, VARISPEED makes the recording longer and lower in pitch or shorter and higher in pitch. - Page 214 20 - UTILITIES - DSP FUNCTIONS To process the cue/region, press the flashing EXECUTE key. You will get this display: Press EXIT to abort the process if you wish. At the end of the process you will see this display: If you complete the process, the processed version will replace the original.
-
Page 215: Digital Offline Eq
UTILITIES - DSP FUNCTIONS - 20 DIGITAL OFFLINE EQ Another DSP function on offer is DIGITAL EQ. This is an off-line EQ process giving four bands of EQ plus a low and high pass filter. Pressing EQ in the main DSP page will take you to this screen: As with all the other off-line DSP functions, the EQ process creates a new cue. - Page 216 20 - UTILITIES - DSP FUNCTIONS At the end of the process you will see this display: If you complete the process, the processed version will replace the original. Use PLAY IN>OUT to check the results. If you are not happy with the results, press UNDO to undo the process.
- Page 217 UTILITIES - DSP FUNCTIONS - 20 REVERSE Reverse allows you to mark an IN and an OUT region or to select a cue and have it play backwards. This can be useful as a special effect although it is also being used these days as a way of hiding profanities and expletives - rather than just ‘bleep’...
- Page 218 20 - UTILITIES - DSP FUNCTIONS PROCESSING TIMES Being off-line processes, all the DSP functions take time to process the data. With timestretch and pitch shift, the actual time it takes depends on the preset being used but generally, all the DSP functions take about 3 x the length of the audio being processed. In other words, a 10 second cue will take around 30 seconds to process.
-
Page 219: Library Management
Libraries are the key to organising audio on the DD1500. Much like you organise your work into folders in a Windows™ computer (or directories in DOS), so audio can be organised in libraries on the DD1500 making file handling that much easier. -
Page 220: Recording To A Library
21 - UTILITIES - DIRECTORY RECORDING TO A LIBRARY Whenever you make a recording, it is possible to set the DD1500 so that the recording automatically gets placed into a library of your choosing. You may wish to keep all recordings in their ‘raw’... -
Page 221: Copying Edits From Projects To Libraries
UTILITIES - DIRECTORY - 21 COPYING EDITS FROM PROJECTS TO LIBRARIES It is also possible to build libraries using the DD1500’s editing functions. In this way, you can copy perfectly edited cues from a project to a library for use at a later date. -
Page 222: Managing Your Libraries
CREATING A LIBRARY If you are using the DD1500 for the first time or are using a newly formatted disk, pressing DIRECTORY displays this screen: This shows us that there are no libraries on this disk. To create a library, simply press F1/F2 - NEW LIBRARY. -
Page 223: Opening A Library
UTILITIES - DIRECTORY - 21 OPENING A LIBRARY Once you have created some libraries and copied some clips into them from a project, you may have something like this screen display: This shows a typical list of libraries. As you can see, there are libraries relating to certain categories of sounds you have on disk and these are listed alphabetically. -
Page 224: Clip Info Page
21 - UTILITIES - DIRECTORY CLIP INFO PAGE The INFO key takes you to a page where you may see information regarding the selected clip. The INFO page looks something like this: The name of the clip under scrutiny is displayed on the top line as is its disk number. The CLIP LENGTH field shows the total length of the clip from start to finish. -
Page 225: Copying Clips Between Libraries
You may repeat the process. The way the copying works is that after you have copied a clip to another library once, when you use copy again, the DD1500 automatically selects that library next time you copy a clip and then returns you back to your original library after the copy has been done. -
Page 226: Moving Clips To Other Libraries
21 - UTILITIES - DIRECTORY MOVING CLIPS TO OTHER LIBRARIES When you copy a clip across to another library using COPY, the original clip is still in the ‘source’ library. You may wish to move a clip from one library to another, removing it from the source library and placing it in the destination library. -
Page 227: Deleting Clips
UTILITIES - DIRECTORY - 21 DELETING CLIPS It is also possible to delete clips in the library. To do this, press UTILS (F5) to receive this display at the bottom of the LCD: Select the clip you wish to delete and press DELETE (F4). You will receive this prompt: As the prompt informs you, there is no UNDO for this so proceed with caution. -
Page 228: 22 - System - Timecode Generator
Pressing SYSTEM displays this screen: Here, we see the main SYSTEM setup page where you may set certain parameters that affect the DD1500’s performance. We have seen these previously in the section SYSTEM SETTINGS. We will now look at other SYSTEM functions. -
Page 229: Bi-Phase Setup
When using bi-phase, it is necessary to set the relative start of the film against the audio on the DD1500. This is done by locating the film to the very first frame and then locating the DD1500 to the start of the audio and pressing either of the RESYNC softkeys. -
Page 230: I/O Pages
22 - SYSTEM - I/O I/O PAGES This key gives access to setting up the DD1500’s various inputs and outputs. Pressing F2 (I/O) displays this screen: On the rear of the DD1500m is a 9-pin D-sub connector that offers three GPIs and five GPOs (General Purpose Outputs). - Page 231 You may use the GPOs of another machine to remotely control the DD1500 (for example, a dialogue recording looping recorder). Some mixing consoles have simple transport controls which could be wired for simple remote control of a DD1500. Many possibilities.
- Page 232 22 - SYSTEM - I/O EXT TIMECODE OK - The DD1500 will send out a TTL pulse when external timecode is being successfully received. EXT WORDCLOCK OK - The DD1500 will send out a TTL signal when external wordclock is being successfully received.
-
Page 233: Audio
AES/EBU digital audio equipment whilst CONSUMER would be the choice when connecting to DAT machines that use the SPDIF format of digital inputs. NOTE: There is no equivalent page for the digital inputs because the DD1500’s digital audio receivers can automatically detect the format and adjust accordingly. -
Page 234: Video Text Generator
(especially when the DD1500 is being used as an RS422 slave without a DL1500 connected) and the video monitor can display the transport status (play, rewind, stop, record, etc.) as well as show the DD1500’s timecode position and how much time is free on disk. -
Page 235: Midi Functions - Tempo Maps
The function is accessed in SYSTEM via the MIDI key (F3). You will see this screen display: The DD1500 can act as a master to a sequencer synced to the DD1500 using MIDI Time Code (MTC) or MIDI clock with Song Position Pointer (SPP). Of these two options, MTC is... - Page 236 22 - SYSTEM - MIDI The DD1500 can store up to 10 tempo maps in memory. These are associated with any given project and are saved to disk with the project (typically, you will probably only ever make use of SONG 01 as the tempo map for your project). A tempo map can have up to 200 tempo changes and up to 20 time signature changes.
-
Page 237: Creating A Midi Tempo Map
SYSTEM - MIDI - 22 CREATING A MIDI TEMPO MAP To create a tempo map, use SONG 01 as the starting point. You will see that there is a tempo and t.sig (time signature) entry at the start of the song. These determine the map’s starting tempo and cannot be deleted. -
Page 238: Deleting Tempo Map Steps
22 - SYSTEM - MIDI You will note that as you add steps to the tempo map, once you exceed four steps, two up and down arrows will appear to indicate that there are steps ‘above’ and ‘below’ the screen: Use the cursor UP/DOWN keys to scroll through your tempo map. -
Page 239: Midi Mixer Function
In fact, by sending data from a sequencer, automated mixing is therefore possible on the DD1500. The MIDI control of the DD1500’s mixer is switched on by pressing SHIFT+MIDI (F3) in the SYSTEM page. You will see this temporary message:... -
Page 240: Disk Management
22 - SYSTEM - DISK DISK MANAGEMENT The SYSTEM - DISK pages are where you do your disk management routines such as deleting unwanted files and unused audio, renaming files, etc.. You may also format disks, copy files from one disk to another and back up disks to tape. Pressing DISK will show something like this display: You can see a list of the projects currently on disk 0. -
Page 241: Copying Files/Disks
SYSTEM - DISK - 22 COPYING FILES/DISKS It is possible to copy data from one disk to another. You may copy individual projects and libraries or copy the whole disk. Pressing COPY FILE (F3/F4) will give you this screen: The parameters are: FROM DISK Here you may select the ‘source’... - Page 242 22 - SYSTEM - DISK Pressing F5/F6 initiates the COPY process. You will receive this prompt: The selected source and the target disks are shown. The EXECUTE key’s LED will flash and you should respond accordingly, pressing EXECUTE to confirm or EXIT to cancel. During the copying process, the bottom line of the LCD will show something like this display: A highlighting display will move across the bottom of the LCD as the file is copied.
- Page 243 SYSTEM - DISK - 22 **IMPORTANT NOTES REGARDING COPY ** The COPY process copies the project/library and all referenced audio across to the target disk. This is to prevent audio becoming detached from the project or library with which it is associated.
-
Page 244: Delete
This prompt will appear for a few seconds. You should move the cursor to the file you wish to delete and press F5/F6 (DELETE) again. If you try to delete a project that is currently loaded into the DD1500, you will receive this prompt: You should either load another project or create a new one and then return to the DISK page to delete the project you originally wanted to delete. -
Page 245: Renaming Files
This prompt will appear for a few seconds. You should move the cursor to the file you wish to delete and press NAME again or start typing the name on the external keyboard. If you try to rename a project that is currently loaded into the DD1500, you will receive this prompt: You should either load another project or create a new one and then return to the DISK page to rename the project you originally wanted to rename. -
Page 246: Backing Up Your Work
A more cost effective method is to backup to some form of tape medium and the DD1500 allows you to backup the contents of your disk(s) to SCSI tape drives via the SCSI connection or to an ordinary DAT machine via the digital i/o. -
Page 247: Formatting A Tape For Backup
DD1500 may need to check the tape to make sure it is suitable for use. Under extreme circumstances, it may need to check the entire tape and so could take some time. If this is the case and the formatting seems to be taking a long time, you can press EXIT to abort the formatting process. - Page 248 22 - SYSTEM - DISK The fields on the SCSI BACKUP page are: TITLE You may give the backup a title of up to ten characters. This will be stored in the SCSI tape’s directory and you will be able to use this name to selectively restore the backup in future in the event of you archiving several different backups to tape.
-
Page 249: Backing Up Selected Files
SYSTEM - DISK - 22 BACKING UP SELECTED FILES Choosing SELECTED FILES in the BACKUP TYPE field will show this screen: To actually select the files, press SELECT FILES (F3/4). You will see something like this screen: You can select PROJECT or LIBRARY in the TYPE field, You may select a disk to backup in the DISK field. -
Page 250: Backing Up All Projects And/Or Libraries
22 - SYSTEM - DISK NOTE: This is the same as selecting the ALL PROJECTS or ALL LIBRARIES or ALL PROJS&LIBS option in the SCSI BACKUP TYPE field. However, whilst this may seem like an unnecessary duplication of a function, it might be useful if you want to backup all projects except one or two - i.e. -
Page 251: Performing The Backup
EXECUTE key. You will see this screen: Here, the DD1500 is getting the tape ready for the backup. First of all, it will look at the tape’s directory to make sure that there is no backup of the same name. If a backup of the same name exists on the tape, you will receive this message: In this case, press ABORT and give the backup a new name and try again (i.e. - Page 252 At the end of the backup, you will see this screen: The DD1500 will rewind the tape to the start in readiness for the next backup. Exactly how long this takes depends on the amount of data on the tape.
-
Page 253: Verifying A Backup
SYSTEM - DISK - 22 VERIFYING A BACKUP Once you have performed a backup, you may like to verify it to check that everything has backed up correctly. This is done by pressing the VERIFY key followed by EXECUTE. You will see this screen: You should press EXECUTE to continue, EXIT to abort. -
Page 254: Restoring A Backup
22 - SYSTEM - DISK RESTORING A BACKUP To restore data, in the SYSTEM DISK page press BACKUP. You will see this screen: Select SCSI TAPE. You will see this screen: Press RESTORE (F5/6). You will see this screen: As you can see, this is basically the reverse of the SCSI BACKUP page. The fields are: TITLE Selects/shows the name of the backup you wish to restore. -
Page 255: Performing A Restore
Similarly, if the tape contains just one backup of only libraries, you can still use the ALL PROJS & LIBS selection - if the DD1500 doesn’t find any projects, it will ignore this and will restore only the libraries it finds. The same would be true of projects. If the tape only Version 2.00 - March, 1996... - Page 256 FILES. To actually select the files for restore, press SELECT FILES (F3/4). First, you will see this screen: The DD1500 needs to read the directory on the tape to know what files are contained in it. Press EXECUTE to proceed (or EXIT to cancel). You will see this screen:...
- Page 257 LCD to further indicate progress. You will then see this display: What the DD1500 is doing here is ‘fixing up’ all references to the audio data that has just been restored so that any projects and/or libraries that may use the cues/clips that have just been restored will play correctly.
- Page 258 22 - SYSTEM - DISK If, when you perform the restore, a library or project on the disk you are restoring to shares the same name as one being restored, you will see this prompt: Pressing ABORT (F3) will abort the whole restore process. You will see this screen: If you press NO (F4), the restore will proceed as described on the preceding page but a new project or library will be created with a new automatically numbered name.
-
Page 259: Restoring The Entire Backup
SYSTEM - DISK - 22 RESTORING THE ENTIRE BACKUP Restoring an entire backup is essentially the same as the other types of restore except that when you press EXECUTE, you are prompted thus: You have the option to completely wipe the selected disk prior to restoring data back onto it. -
Page 260: Notes About Backup/Restore
(or if there is already quite a bit of data on the tape), the backup will be done across two or more tapes. The DD1500 will prompt you if this is the case and will tell you to insert another tape. If the tape is unformatted and unsuitable for use, you will be prompted to format the tape whereupon the backup will continue. -
Page 261: Suggestions For Backup/Restore
SYSTEM - DISK - 22 SUGGESTIONS FOR BACKUP/RESTORE • Try not to re-use tapes. They are relatively inexpensive to buy and potentially carry very expensive data so it is not wise to economise. • Do not use ordinary audio tapes unless you’re really stuck as tapes made specifically for backup will be more reliable. -
Page 262: Taking Care Of Your Tape Drive
22 - SYSTEM - DISK TAKING CARE OF YOUR TAPE DRIVE Tape drives need to be taken care of quite carefully. You should refer to your drive’s operator’s manual for more details on this but some general guidelines are: • As routine maintenance, the heads should be cleaned after every 25 hours or so of use. -
Page 263: Archiving Data To Dat
To connect your DAT machine, connect either the MIX A or MIX B digital outputs of the DD1500 (you can select which ones you will use in the DAT OPTIONS page) to the digital audio input of the DAT recorder. - Page 264 To perform the archive, insert a blank DAT tape into the DAT recorder and make sure it is rewound to the start. Put the DAT recorder into ‘record pause’. Get the DD1500 ready for archive, ‘unpause’ the DAT and then press ARCHIVE (F5/F6) on the DD1500. The archiving process will begin.
- Page 265 DAT 120 (i.e. it is set to archive for two hours and then prompt you) but, of course, the tape will have run out after an hour, the DD1500 will not know this and will continue to archive as though a DAT 120 tape is being used.
-
Page 266: Restoring From Dat
Here you may restore the contents of a DAT back to the disk via the digital audio I/O. To connect your DAT machine, connect the digital output of the DAT machine to one of the digital inputs of the DD1500 (you can set which one will be used in the DAT OPTIONS page). -
Page 267: Disk Utils
DD1000 COMPATIBILITY The DD1000 soft key has certain functions related to the handling of disks made on an Akai DD1000. We will come back to these later in a section devoted to these functions. Version 2.00 - March, 1996 Page 259... -
Page 268: Cleanup Disk
22 - SYSTEM - DISK CLEANUP DISK CLEANUP DISK allows you to clear out redundant recordings and so save valuable disk space. Pressing CLEANUP DISK shows this screen: It is possible to have a disk full of unreferenced audio files. These are pieces of audio that have no association with any project or library. - Page 269 SYSTEM - DISK - 22 DD1500 will search through all the projects/libraries it can find on the system in order to establish what audio should be kept and what should be deleted. Of course, it won’t find the removable disk because it is missing and so assumes that all the audio that it can find on the hard disk(s) related to the project on the removable (which is missing, of course) is unreferenced and will therefore delete it.
-
Page 270: Minimise
Pressing MINIMISE will give this prompt: Because the DD1500 has to go round and top and tail every piece of audio affected by the MINIMISE function, it can take a long time. After that, it has to ‘fix up’ all the cues that have been affected in all the projects/libraries and this will also take time. -
Page 271: Salvage
SYSTEM - DISK - 22 SALVAGE This is the opposite of CLEANUP. If you have, as described above, been dropping in over recordings so that the audio file becomes ‘detached’ and unreferenced from any project and/or library but you need to get them back, SALVAGE will make new clips out of them and place them in a ‘salvage’... -
Page 272: Operating System
22 - SYSTEM - OPERATING SYSTEM In the main SYSTEM SETUP page, pressing F6 - O/S - will take you to this screen: Here, you can see the current versions of software loaded into the DD1500 and DL1500. These fields are for information only. -
Page 273: Aknet Id
SYSTEM - OPERATING SYSTEM - 22 AKNET ID It is also possible to view the AKAINET connection by pressing F3/4. This will display a screen something like this: This page is for information only. You cannot change anything here. Press EXIT to return to the LOAD O/S page. Version 2.00 - March, 1996 Page 265... -
Page 274: Real-Time Clock Function In System
If you press CLOCK (F2), you will see this screen display: Here, you may set the DD1500’s real-time clock. This will have implications in future software releases when files will be date stamped. However, in the meantime, you may, if... -
Page 275: Dl1500 Audio Monitor
MO disk as a basic editing system can be set up in a small editing room with nothing more than a DD1500 and a VTR (or film playback machine), a DAT and/or CD for sourcing audio and a simple stereo audio monitoring system. After the basic editing is done, the disk can be transferred to the mixing room where it can be put into a system where all the track outputs are installed for ‘proper’... -
Page 276: Print Functions
24 - PRINTER FUNCTIONS PRINT FUNCTIONS It is possible to make hard copy of things like your disk directory, libraries and projects. PRINTING A PROJECT PRINT is found on F1 of the main edit screen and this is used to print out the contents of a project. -
Page 277: Printing Out The Disk Directory
PRINTER FUNCTIONS - 24 PRINTING OUT THE DISK DIRECTORY Pressing PRINT in DISK gives this screen display: The parameters are: PRINT Allows you to select what it is you want to printout. The options are: PROJECTS ONLY This will print only the projects on the selected disk. -
Page 278: Printing Libraries
24 - PRINTER FUNCTIONS PRINTING LIBRARIES In the DIRECTORY page, you may also printout libraries and their contents. Pressing F1 in the DIRECTORY page will show this display: The parameters are: PRINT You may select the following options for printout: LIBRARY This will printout the currently selected library and a list of the clips... -
Page 279: Printer Setup
- no harm will come to it as it will either work or it won’t! Please consult your Akai dealer for information about which printer models are recommended. -
Page 280: 25 - Dd1000 Disk Compatibility
25 - DD1000 DISK COMPATIBILITY DD1000 DISK COMPATIBILITY The DD1500 can read and use disks made on the Akai DD1000 and it is possible to play Qlists created on a DD1000 directly on the DD1500 LOADING DD1000 QLISTS The LOAD PROJECT page has a new field. When you select a drive that has a DD1000 disk in it or insert a DD1000 disk into the current drive, when you enter the LOAD PROJECT page a new field TYPE: DD1500 appears. -
Page 281: Dealing With Dd1000 Envelopes
The envelope file (i.e. the waveform) for a DD1000 stereo recording (take) is created from the left channel only and when a DD1000 stereo recording is seen in a DD1500 project (i.e. spread across two tracks), the DD1500 will use only the left channel envelope information on both tracks (this should not be such a huge limitation as stereo recordings invariably show little difference between the two sides). -
Page 282: Playing Dd1000 Disks Created On A Dd1500 On A Dd1000
PLAYING DD1000 DISKS CREATED ON A DD1500 ON A DD1000 Some degree of backwards compatibility is also possible between the DD1500 and DD1000 and any DD1000 disks you have worked with on the DD1500 may still be used on a DD1000. -
Page 283: Formatting A Dd1000 Disk In The Dd1500
256 DD1000 cues have been used up. WARNING: If you load a DD1000 Qlist into a DD1500, work on it and then save it again on the DD1500, you will lose any FADE and MIDI events that may have been on the original and you will lose all cut names. -
Page 284: Stereo Edits Saved In Dd1000 Format
25 - DD1000 DISK COMPATIBILITY STEREO EDITS SAVED IN DD1000 FORMAT Unlike the DD1000, the DD1500 allows you to edit the left and right channels of a stereo recording independently on separate tracks. Such edits made on the DD1500 cannot be... - Page 285 In this way, it doesn’t matter which drive the disk is in - the DD1500 is looking for the disk label, not the SCSI ID. It will find this and so it will play back correctly regardless of the drive the disk is in.
-
Page 286: Notes On Choosing A Disk Drive
It is only with older drives you may experience performance problems but, even then, the DD1500 will try the best it can to get as many tracks off disk as possible. You should be able, therefore, to connect any SCSI drive and it should work. -
Page 287: Notes Regarding The Use Of Multiple Disk Drives
NOTES REGARDING THE USE OF MULTIPLE DISK DRIVES The DD1500 can have several disk drives on line at any one time and these may be a combination of fixed hard disk drives or removable disk drives. The DD1500 can play audio from any disk at any time. -
Page 288: Pin Wiring - Dd1500
APPENDIX 2 PIN WIRING - DD1500 ANALOGUE XLR CONNECTIONS PUSH PIN 1 GROUND PIN 2 PIN 3 COLD RS422 9-PIN CONNECTION RS422 LEVEL VTR CONTROL RS422 MASTER RS422 SLAVE Frame Ground Frame Ground Receive A Transmit A Transmit B Receive B... -
Page 289: Bi-Phase Input
APPENDIX 2 BI-PHASE INPUT TTL LEVEL BI-PHASE SYNC INPUT SIGNAL No Connection Ground RZ (Input) No Connection +5V (Output imp 22Ω) Ground SZ (Input) No Connection D-Sub 9 Pin Female Frame Ground BI-PHASE OUTPUT TTL LEVEL BI-PHASE SYNC OUTPUT SIGNAL No Connection Ground RZ (Output) -
Page 290: Pin Wiring - Dl1500
APPENDIX 2 PIN WIRING - DL1500 DIGITAL AUDIO LINK FROM DD1500m RS422 Level AES/EBU Format DIGITAL AUDIO INPUT SIGNAL Frame Ground MIX In A MIX In B No Connection Ground No Connection MIX In A MIX In B D-Sub 9 Pin Female No Connection S-VGA MONITOR OUTPUT ANALOGUE LEVEL... -
Page 291: Setting The Dd1500M Rear Panel Dip Switches
APPENDIX 3 SETTING THE DD1500M REAR PANEL DIP SWITCHES The DIP switches on the rear panel set the system up for the type of disk drive you are using. Use DIP switch #1 on the DD1500m’s rear panel to set the track configuration according to the memory installed. - Page 293 DATA ENTRY/NUDGE KEYS 40 AKAINET connection 265 DD1000 Compatibility 259 AKAINET Termination 12 , 27 DD1000 Disk Compatibility 272 Analogue to Digital Converters 17 DD1500 ‘FLOWCHART’ 7 ANALOGUE UNIT 10 DD1500 Connections ANALOGUE XLR PIN WIRING DIAGRAM Bi-Phase 26 RS422 VTR 22...
- Page 294 INDEX Digital Inputs (See DD1500m) DIGITAL INPUTS A AND B 10 Digital Outputs (See DD1500m) EDIT CLIPBOARD 38 Digital recording 73 EDIT CUE (see EDITING) Digital to Analogue Converters 17 EDIT PLAY KEYS 144 DIP SWITCHES 12 EDIT REGION 5 , 29 DIRECTORY 6 EDITING 83 Auditioning a clip 215...
- Page 295 NOTES REGARDING SCSI 15 , 278 HELP 43 NOW TIME 5 , 33 HELP KEY 31 NUDGE (See EDITING) HOW THE DD1500 WORKS 7 NUDGE SET (See EDITING) NUMERIC KEYPAD 32 , 38 Numeric Names 42 IN KEY 89 IN TIME 5 , 89...
- Page 296 INDEX POWER UP 27 SET FUNCTIONS 41 Power up - problems 27 Setting the DD1500m DIP switches 283 Power up screens 27 SHIFT 41 Power up-RESTART 28 SHIFT key 31 , 41 Powering up the system 27 SHIFT+GOTO (STORE) 79 PRE-ROLL 81 , 82 SHIFT+JOG 46 PRINTER PORT 20...
- Page 297 INDEX UNDO 41 , 89 UNDO KEY 89 USING A COMPUTER KEYBOARD 42 Using Multiple Disk Drives 279 USING THE SOFT KEYS 40 UTILITIES KEYS 31 VARISPEED (See DSP) , (See DSP) VGA MONITOR LAYOUT 33 VIDEO - VITC/SYNC (B) IN 11 video sync signals 11 video sync termination 11 VITC Synchronisation 11...
Need help?
Do you have a question about the DD1500 and is the answer not in the manual?
Questions and answers