Hougen HMD914 Operator's Manual
Portable magnetic drills
Hide thumbs
Also See for HMD914:
- Instruction manual (20 pages) ,
- User manual (16 pages) ,
- Operator's manual (12 pages)

Related Manuals for Hougen HMD914


Summary of Contents for Hougen HMD914
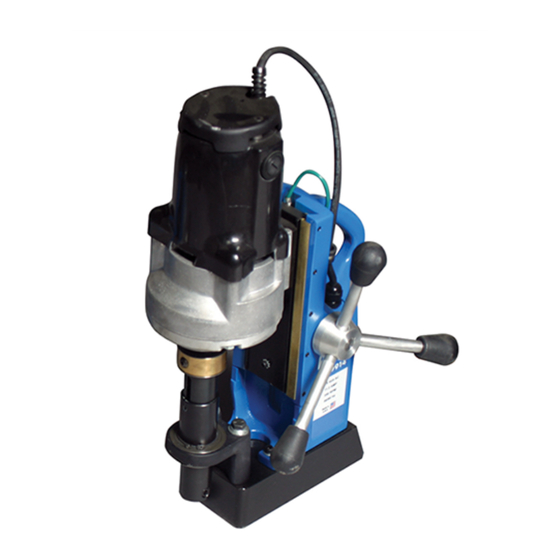
- Page 1 HMD914 & HMD914S PORTABLE MAGNETIC DRILLS OPERATOR’S MANUAL OPERATOR’S MANUAL FOR USE WITH “12,000-SERIES” HOUGEN FOR USE WITH “12,000-SERIES” HOUGEN CUTTERS CUTTERS ® ® ®...
-
Page 2: Commercial / Industrial Limited Warranty
Photographs and Specifi cations shown are accurate in detail at time of printing. Manufacture reserves the right to make improvements and modifi cations without prior notice. Hougen, Hougen-Edge, and Punch Pro are proprietary trademarks of Hougen Manufacturing Inc. Ogura and the Ogura logo are proprietary trademarks of Ogura & co., Ltd. Vac-Pad are propriety trademark of Drillmate PTY, Ltd... -
Page 3: Safety First
(10569) and then screw the handles into the 3. Complete and mail the Product Registration Card hub. Do not overtighten. NOW. It is important that Hougen Manufacturing, Inc. 8. Your Magnetic Drill was factory adjusted prior to shipping. have a record of product ownership. -
Page 4: Important Safety Instructions
12. Non-Conforming Cutting Tools Keep Work Area Clean Your Mag Drill is designed to use Hougen Cutters. Cluttered areas and benches invite injuries. The use of drilling tools having different shank styles Keep dirt and chips from under the Cutter area. - Page 5 The Safety Switch Indicator Light is a Standard Safety Fea- manual. Do not operate tool if switch does not turn ture on HMD914(S) magnetic drills. Its purpose is to inform it on and off. the user that an unsafe condition exists.
-
Page 6: Operating Instructions
5. Turn Feed Handle, raising the cutter until the pilot is above the work surface. 6. Open the cutting fl uid valve several full turns (Models HMD914 only) 7. Make certain that cutter is clear of workpiece and turn motor On by pressing the motor START button. - Page 7 INSTALLING HOUGEN CUTTER IN ARBOR 1. Disconnect power source. 2. Lay drill on its side with feed wheel up to be sure arbor clears table if unit is in normal operating position. 3. Turn feed handles until cutter mounting set screws are exposed and then completely remove the set screws.
-
Page 8: Drill Maintenance
Adjusting Arbor Support Bracket for Depth 40451 Bolt 40391 Lock Washer 04375 40299 Spacer 40392 Flat Washer Front Support Bracket 04375 40299 Spacer Front Support Bracket 1" & 2" Depth of Cut 3" Depth of Cut NOTE : Spacers must always be installed with short side toward arbor Drill Maintenance In order to minimize wear on moving parts and insure Coolant bottle must be attached to inducer under... - Page 9 COOLANT BOTTLE ASSEMBLY - P/N: 40442 40433 51042 50035 40419 40417 40429 40420 40424 40422 40326 51042 40333 See Parts List on Page 15 40304 40338 Checking Operation of Checking Operation of Cutting Fluid Arbor Automatic Cutting Reservoir (HMD914S) Fluid Inducer Note: The automatic cutting fl...
-
Page 10: Panel Components
PANEL COMPONENTS 05193 (HMD914) Panel Assembly 05217 (HMD914S) HMD914 P/N: 05192 05190 HMD914S P/N: 05216 02402 04891 04893 90571 05180 White 04879 04878 Wire 04881 04877 Note: When inserting LED into wiring harness make sure red anode lines up with white wire... -
Page 11: Hookup Diagram
HOOK UP DIAGRAM Motor Black Black from Circuit Board (P3) White from Circuit Board (P4) Motor White Blue from Power In (White) Circuit Board (P2) Power In (Black) Brown from Circuit Board (P1) Safety Switch (Blue-J4) J1 J2 LED (J3) Ground (Green) Ground (Green) From Magnet... -
Page 13: Motor Parts List
Motor Bolt Sequence 1. Tighten bolts in the sequence shown to 5 - 10 in/lb. 2. Retighten bolts in the same sequence to 35 - 40 in/lb. Motor Parts List Part # Description Part # Description 40258 Motor Cord 40281 Motor Slug 40260 Housing, Brush End... -
Page 14: Exploded View
03737 04961 05049 40221 04375 40234 05286 10517 40223 40312 COOLANT BOTTLE SHOWN ON PAGE 9 10725 - Carrying Case Note 1: 40242 - HMD914 Includes: 05049, 10517, 40222, 40223, 40256, 40312 03737 - HMD914S 40242 for Coolant arbors only... -
Page 15: Parts List
Safety Switch Bracket 40300 O-Ring 04961 Plunger Assy 40301 Thrust Washer 05049 Arbor Spring 40302 Retaining Ring 05192 Control Panel (HMD914) 40303 Coolant Fitting 05116 Control Panel (HMD914S) 40304 Tubing 1/4” OD 05286 Magnet 40309 Cord Clamp 05345 Warning Label 40312 Roll Pin-Modifi...
Need help?
Do you have a question about the HMD914 and is the answer not in the manual?
Questions and answers