Keiser M3I Installation And Operation Manual
Indoor cycle
Hide thumbs
Also See for M3I:
- Installation and operation manual (20 pages) ,
- Manual (82 pages) ,
- Assembly and operation manual (28 pages)
Table of Contents
Advertisement
Advertisement
Table of Contents

Related Manuals for Keiser M3I


Summary of Contents for Keiser M3I
- Page 1 M3i INDOOR GROUP CYCLE M3i INDOOR CYCLE INSTALLATION AND OPERATION MANUAL...
-
Page 2: Table Of Contents
12_FINAL INSTALLATION AND CHECKING FOR PROPER OPERATION 13_SETTING TRIP UNITS TO MILES OR KILOMETERS (KM) AND BIKE ID NUMBER 14 — M3i SERIES COMPUTER 16 — SET UP AND OPERATION 16_EMERGENCY STOP 16_ADJUSTMENT KNOB INSTRUCTIONS FOR SEAT AND HANDLEBAR HEIGHT... -
Page 3: Important Safety Instructions
M3i INDOOR GROUP CYCLE IMPORTANT SAFETY INSTRUCTIONS Read these instructions. of experience and knowledge if they have been given supervision or instruction concerning use Keep these instructions. of the cycle in a safe way and understand the Heed all warnings. -
Page 4: Tools Required For Assembly
M3i INDOOR GROUP CYCLE INTRODUCTION Thank you for purchasing Keiser’s premier M3i indoor cycle. Your new resistance system is a revolutionary way to exercise providing a smoother, quieter, and more predictable workout. WEIGHT AND FOOTPRINT Total Weight 91 lbs (41.27 kg) M3i Footprint Length 60.5 inches (1537 mm) x Width 25.75 in (654 mm) -
Page 5: Parts List
M3i INDOOR GROUP CYCLE PARTS LIST Description Part Number 7/16-20 Acorn Nuts 555022 7/16 Washers 9384 M6 x 1, Hex Nut 9508 M6 x 1 x 45, Hex Head Screw 9525 M6 x 1 x 20, Socket Head Cap Screw... -
Page 6: Product Overview
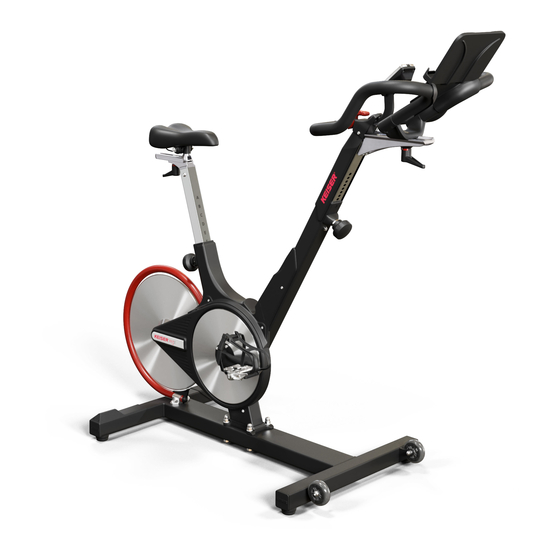
M3i INDOOR GROUP CYCLE PRODUCT OVERVIEW ® Seat Computer System with Bluetooth smart Forward/Backward Seat Adjustment Handle Resistance Lever/Emergency Brake Up/Down Seat Adjustment Knob Neutral Position Handlebar Flywheel Guard Forward/Backward Handlebar Adjustment Handle Belt Cover Up/Down Handlebar Adjustment Knob Flywheel... -
Page 7: Mounting The Cycle To The Base
M3i INDOOR GROUP CYCLE MOUNTING THE CYCLE TO THE BASE NOTE: Due to the weight of the cycle, it is recommended that two people perform this part of the assembly. 1. Align the holes of the cycle with the studs of the base, refer to Figure 1. -
Page 8: Installing The Flywheel Guard
M3i INDOOR GROUP CYCLE 3. Align the holes of the flywheel with the holes of the hub. NOTE: The flywheel should be flush against the hub. Install the hubcap: a) Align the holes of the hubcap with the holes of the flywheel, refer to Figure 4. -
Page 9: Installing The Pedals
M3i INDOOR GROUP CYCLE 4. Attach the brackets on the end of the flywheel guard, refer to Figure 8. Use the M6 x 1 x 45 hex head screw and nut (supplied). Hand tighten the screw and nut. 5. Tighten the brackets to the base frame with the two Allen screws and washers removed in step 1. -
Page 10: Installing The Computer
M3i INDOOR GROUP CYCLE INSTALLING THE COMPUTER 1. Use a #2 Phillips screwdriver and remove the computer cavity, refer to Figure 12. mounting screw from the handlebar tube, refer to 3. Slide the computer up into the two locking ears. - Page 11 M3i INDOOR GROUP CYCLE 5. Attach the handlebar slide to the handlebar tube with no gap between the handlebar slide and the handlebar the four 8 mm screws previously removed. Use a 6 tube, refer to Figure 16. mm Allen wrench to tighten screws. There should be Figure 15.
-
Page 12: Assembling The Device Holder
M3i INDOOR GROUP CYCLE ASSEMBLING THE DEVICE HOLDER To install the device holder, apply force in the direction shown in Figure 19. The device holder will fit to the handlebars as shown in Figure 20. Figure 20. The assembled handlebar and Figure 19. - Page 13 SETTING TRIP UNITS TO MILES OR KILOMETERS (KM) AND BIKE ID NUMBER (Unless otherwise specified or requested at the time of purchase, the M3i trip distance is set to miles.) NOTE: STEPS 1 THROUGH 7 MUST BE COMPLETED WITHIN 1 MINUTE...
-
Page 14: M3I Series Computer
The Bluetooth Smart enabled computer allows Bluetooth Smart Ready devices such as cellphones, tablets, and comput- ers to gather information about the ride. M3i compatible apps allow data to be stored to track progress over time and make the data available to other fitness applications. Classrooms are able to utilize real time performance tracking pro- grams which give the entire class an opportunity to see their performance compared with others in the class. - Page 15 M3i INDOOR GROUP CYCLE Figure 22. M3i Computer Overview WARNING: Heart rate monitoring systems may be inaccurate. Over exercising may result in serious injury or death. If you feel faint stop exercising immediately. p15.
-
Page 16: Set Up And Operation
SET UP AND OPERATION The M3i cycle is intended for cardiovascular workout. Special programs have been designed for group exercise environ- ments. The cycle must always be used in a supervised area under control of a trained and authorized instructor. The fol- lowing pages are a brief overview of the features necessary for safe operation of the cycle. -
Page 17: Leveller Foot Adjustment
Figure 25. Leveler Foot Adjustment POSTURE AND BODY POSITION Keiser recommends that the back is always in a neutral position. To avoid injury, maintain good posture and control of both the upper and lower body, refer to Figure 26. Figure 26. Basic Posture... -
Page 18: Selecting Seat Height
M3i INDOOR GROUP CYCLE SELECTING SEAT HEIGHT WARNING: • Maximum weight of the rider shall not exceed 300 lbs (136 kg). • If the hips rock back and forth with each pedal stroke, the seat position may be too high. Uneven rocking from side to side may result in hip or back injuries. -
Page 19: Handlebar Height Adjustment
M3i INDOOR GROUP CYCLE HANDLEBAR HEIGHT ADJUSTMENT WARNING: Placing the handlebars too low may over-stress the arms, mid back and neck. Maintain a high, comfortable position until a higher skill level is reached. 1. The handlebar should be adjusted after performing... -
Page 20: Operation Of The Cycle
Take the time to pedal during a cool down period. ® • Download the ride averages to any Bluetooth smart ca- pable phone or tablet with an M3i capable application. • Stretch after every workout. Figure 34. Hill Climb or Standing Riding Position p20. -
Page 21: Preventative Maintenance Schedule
M3i INDOOR GROUP CYCLE MAINTENANCE PREVENTATIVE MAINTENANCE SCHEDULE WARNING: The safety level of the equipment can only be maintained if it is regularly inspected for damage and wear. Immediately replace defective parts and do not use the equipment until all repairs have been completed and thoroughly tested. -
Page 22: Computer Battery Replacement
KEISER is under license. Other trademarks and trade names are those of their respective owners. - Changes or modifications not expressly approved by Keiser Corporation could void the user’s authority to operate the equipment. - Upon end of life of this cycle, be sure to remove the batteries and scrap the machine according to your local laws and regulations. - Page 23 M3i INDOOR GROUP CYCLE WARRANTY The Keiser M3i Indoor Cycle is warranted to the original purchaser, to be free from defects in materials and workmanship. NOT COVERED UNDER WARRANTY • Loss caused by accident, abuse, improper use or neglect. •...
- Page 24 2470 S. Cherry Ave. Fresno, CA 93706 WWW.KEISER.COM Keiser, the Keiser logo, and other trademarks associated with Keiser products referred to in this publication are trademarks of the Keiser Corporation. All other product names and services are the property of their respective companies.
Need help?
Do you have a question about the M3I and is the answer not in the manual?
Questions and answers
lubrication of M3i where, oil or grease
Lubrication should be applied to the threads of the threaded stud and threaded nut on the Keiser M3i. A heavy grease, preferably white or clear in color, such as Hydrotex MT-55 or Dow Corning 111, should be used—not oil.
This answer is automatically generated
lubrication of M3i
@Kaj Ornfeldt Clausen