Advertisement
Table of Contents
Advertisement
Table of Contents

Related Manuals for Keiser m3 TBT


Summary of Contents for Keiser m3 TBT
- Page 1 USER MANUAL...
-
Page 2: Before Assembling
BEFORE ASSEMBLING Always follow the steps in this manual as you assemble your M3 TBT. Do not skip, substitute or modify any steps or procedures of this assembly, as doing so could result in personal injury and will void your warranty. -
Page 3: Loose Parts Inventory
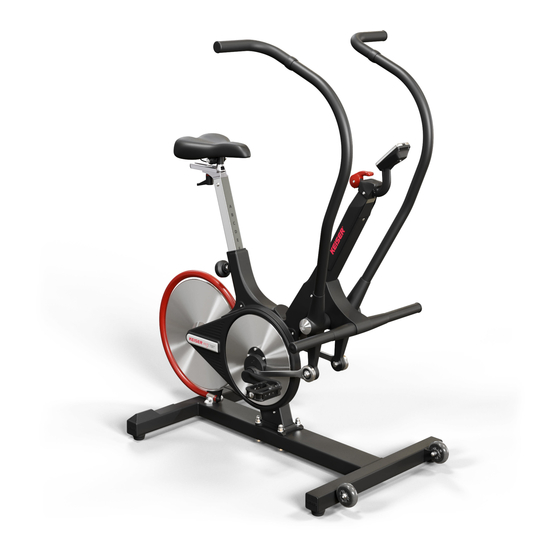
LPS #3 Heavy Duty Rust Inhibitor w/straw 2 - 10mm Wrenches Socket Wrench/Ratchet 13mm Socket 17mm Socket or Open-end Wrench NOTE: The substitution or modification of any part or component, other than what is approved by Keiser, will void your warranty. - Page 4 KEISER M3 TBT Total TBT Weight: 113 lbs (51.3 kg) Footprint: Length 49 in (1245 mm) x Width 29 in (737mm) - Saddle - Resistance Shifter - Forward/Backward Seat Adjusment Handle - Water Bottle Holder - Up/Down Seat Adjustment - Foot Rests...
-
Page 5: Assembling Plastic Cover
TBT ASSEMBLY ASSEMBLING MAIN FRAME TO THE BASE FRAME Step 1: Carefully lower the Main Frame onto the base frame over the base screws, with the front of the TBT facing the transport wheels on the Base Frame. (Fig. 1) Step 2: Insert one washer on each of the four base frame studs. -
Page 6: Assembling Flywheel, Hub, And Hub Cap
ASSEMBLING FLYWHEEL, HUB, AND HUB CAP Step 1: Before starting the assembly of the flywheel, hub, and hub cap, make sure that the shifter lever is in the downward position. (Fig. 6) NOTE: Not following this step may scratch the flywheel. Step 2: Remove the plastic wrapping from around the axle, hub, and hub cap. -
Page 7: Mounting Computer
ASSEMBLING PEDAL TO CRANK ARM Step 1: Unwrap the pedal set and Loctite 242, obtain the Torque wrench, 15mm crowfoot, 6” extension, and 15mm open-end wrench. Step 2: With a clean cloth, wipe the threaded area of the pedals. Apply Loctite 242 to the pedal threads. - Page 8 MOUNTING HANDLES AND LINKS Step 1: Obtain the Left (A) or Right (B) Handle, and slide it over the pivot shaft as shown (Fig. 13). Step 2: While holding the Handle, secure the Large Washer (N2) and the Hex Head Cap Screw (N5) using a ratchet and the 13mm socket.
-
Page 9: Flywheel Guard Installation
Step 3: Using the ratchet and a 6” extension, tighten and torque the Foot Rests to 47 Nm (35 ft-lbs) (Fig.18). Step 4: Insert the Foot Rest End Caps (O2) intoboth Foot Rests (Fig. 19). FLYWHEEL GUARD INSTALLATION Step 1: Make sure to have all parts and tools present prior to assembly. Step 2: Assemble the brackets (B) to the tube (C) With the bolt and nut (A) finger tight. - Page 10 Step 4: Place the assembled flywheel guard over the holes and hold the tube guard as shown, to the left of the flywheel. Place the open end of the tube guard over the casting. Step 5: Swing the tube over the flywheel, aligning the tube centered with the flywheel. Step 6: Tighten the brackets to the base frame with the screws and washers that were removed in step three.
-
Page 11: Checking For Proper Operation
Please read all the information provided for safe operation. IMPORTANT SAFETY INFORMATION & INSTRUCTIONS • The Keiser M3 TBT is NOT designed with a freewheel, but a fixed gear system. The Handles are attached to the crank arms through the links and the eccentrics. The crank arms and Handles can not be disengaged independently. - Page 12 Serious injury or death can occur from over-training and should be taken very seriously. • The Keiser M3 TBT is to be operated in a commercial fitness environment, all use should be supervised by a qualified fitness professional.
- Page 13 TBT FITTING WARNING: Maximum weight of the rider shall not exceed 300lbs /136kg. SEAT POST HEIGHT POSITIONING • Stand beside the TBT, close to and beside the saddle. • Position the seat so that the top of the saddle is level with your iliac crest (hip), then re-tighten the T-Handle after adjustment.
-
Page 14: Computer Battery Replacement
All M Series cardio equipment is calibrated with a tool at the factory and there is no need to calibrate, unless a component associated with the resistance mechanism or computer require service. For more information visit: www.keiser.com/service, or contact the Keiser service department at 1-800-888-7009 | 559-256-8000 | service@keiser.com. -
Page 15: Preventative Maintenance Chart
PREVENTATIVE MAINTENANCE CHART Every Class Member thoroughly inspect each TBT (1) Member wipe off sweat (2) Weekly For The 1st Month Check and re-torque eccentrics, crank arms, handles, pedals, foot rests & main frame mount nuts (3) Weekly Thoroughly inspect each TBT (4) Clean with warm water and soft towel (5) Check computer for low battery indication (6) Monthly... - Page 16 - Improper maintenance. - Improper assembly by the purchaser. - Failure to follow instructions as stated in any of the manuals provided with the Keiser M3 TBT The warranty terms begin with the date of original delivery to be evidenced by appropriate shipping documents.
Need help?
Do you have a question about the m3 TBT and is the answer not in the manual?
Questions and answers