Table of Contents
Advertisement
Quick Links
Advertisement
Table of Contents

Related Manuals for Yamaha Motif XF6


Summary of Contents for Yamaha Motif XF6
- Page 1 MUSIC PRODUCTION SYNTHESIZER Owner’s Manual...
-
Page 2: Special Message Section
SPECIFICATIONS SUBJECT TO CHANGE: The infor- mation contained in this manual is believed to be correct at the time of printing. However, Yamaha reserves the right to change or modify any of the specifications without notice or obligation to update existing units. -
Page 3: Important Safety Instructions
Explanation of Graphical Symbols The lightning flash with arrowhead symbol within an equilateral triangle is intended to alert CAUTION the user to the presence of uninsulated RISK OF ELECTRIC SHOCK “dangerous voltage” within the product’s DO NOT OPEN enclosure that may be of sufficient magnitude to constitute a risk of electric shock to persons. - Page 4 • It emits unusual smells or smoke. and have it inspected by qualified Yamaha service personnel. • Some object has been dropped into the instrument. • There is a sudden loss of sound during use of the instrument.
-
Page 5: Saving Data
Yamaha cannot be held responsible for damage caused by improper use or modifications to the instrument, or data that is lost or destroyed. Always turn the power off when the instrument is not in use. -
Page 6: Welcome
Welcome A message from the MOTIF XF Development Team Thank you for purchasing the Yamaha MOTIF XF Music Synthesizer. Since the first MOTIF was launched in 2001, the MOTIF series has evolved with the times and has finally reached fourth- generation status. -
Page 7: Accessories
• Copying of the software or reproduction of this manual in whole or in part by any means is expressly forbidden without the written consent of the manufacturer. • Yamaha makes no representations or warranties with regard to the use of the software and documentation and cannot be held responsible for the results of the use of this manual and the software. -
Page 8: Main Features
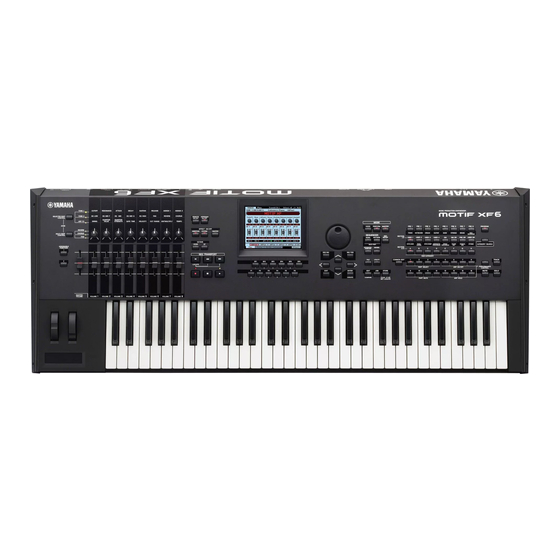
Responsive, expressive keyboard The MOTIF XF6 features a 61-key keyboard, while the MOTIF XF7 has 76 keys with the high-quality FSX keyboard and the MOTIF XF8 has 88 keys with the high-quality BH (Balanced Hammer) keyboard. All are equipped with a touch response feature (both initial touch and aftertouch). -
Page 9: Table Of Contents
Contents Welcome Creating a swing feel—Play Effect..........40 —A message from the MOTIF XF Development Team ....6 Storing the created Song ............40 About this Manual ............... 6 Creating an original Pattern Accessories................. 7 About the accessory disk............7 Pattern Structure ............... -
Page 10: Controls And Functions
E0 F0 G0 A0 B0 1 Keyboard 5 ASSIGNABLE FUNCTION buttons The MOTIF XF6 features a 61-key keyboard, while the MOTIF According to the XA Mode (Expanded Articulation Mode) XF7 has 76 keys and the MOTIF XF8 has 88 keys. All are... - Page 11 Controls and Functions NOTE For more information about 1 – 5, refer to “Controller Block” in the Reference Manual. 9 [MULTI PART CONTROL] button ! [REMOTE ON/OFF] button (page 61) Pressing this button changes the functions assigned to the The Remote mode lets you control sequencer software on eight knobs in the Performance /Song/Pattern mode.
- Page 12 Controls and Functions $ [MASTER EFFECT] button B [INC/YES] button (page 19) When this button is pressed (the lamp lights), the Master For increasing the value of the currently selected parameter. Effect is applied to the overall sound of this instrument. Also, Also, this is used to actually execute a Job or a Store to access the Master Effect setting display, press and hold operation.
- Page 13 Controls and Functions Functions of the Number [1] – [16] buttons Mode [PERFORMANCE [TRACK] button [MUTE] button [SOLO] button CONTROL] button Voice Play — Keyboard transmit channel setting — — Normal Voice Edit — Changes the Edit mode from Common Edit Element Mute setting Solo Element selection to Element Edit and Element selection (1 –...
-
Page 14: Rear Panel
Yamaha dealer. The use of an inappropriate and easy connection to an IEEE1394-compatible computer. replacement can pose a fire and shock hazard! NOTE Yamaha recommends that you use an IEEE1394 cable with a length of 4.5 meters or less. 3 ETHERNET connector NOTE... - Page 15 Controls and Functions 9 FOOT SWITCH jacks # PHONES (Headphone) jack (page 16) For connection of an optional FC3/FC4/FC5 Footswitch to the This standard stereo phones jack is for connection to a set of SUSTAIN jack and a FC4/FC5 Footswitch to the stereo headphones.
-
Page 16: Setting Up
When turning the power on: ground lead to the ground screw. If you’re unsure how to connect, then contact your Yamaha dealer or service center. First, the MOTIF XF, then the connected powered speakers. • Even when the Power switch is in the off position, a small amount of electricity is still flowing to the unit. -
Page 17: Adjusting The Volume And The Brightness Of The Display
Setting Up Adjusting the Volume and the Selecting another Song Brightness of the Display Make sure that the cursor is located on the Song Adjust the volume levels of the MOTIF XF and the connected Number in the Track View display. amplifier/speaker system. -
Page 18: Resetting The User Memory To The Initial Factory Settings
Setting Up Loading the Demo data Press the [INC/YES] button to execute the Demo Load operation. In the default settings (when shipped from the factory), The Demo data is loaded to the Song and Pattern memory several Demo Songs and Patterns are stored to the location, then the Song Play Track View display appears. -
Page 19: Basic Operation
Basic Operation Moving the Cursor mode. (Some displays may not have any sub-functions for these buttons.) Use these four buttons to navigate the display, moving the The example display below is called up by pressing the [F5] cursor around the various selectable items and parameters button then pressing the [SF1] button. - Page 20 Basic Operation Naming (Inputting Characters) This indicates that you can call up the List by pressing the [SF6] LIST button. You can freely name the data you’ve created, such as Voices, Performances, Songs, Patterns and files saved to a USB storage device. When the cursor is located on such a naming parameter, the CHAR icon appears at the lower right corner of the display.
-
Page 21: Modes
Modes There are several operation modes in the MOTIF XF, and they can be selected by using the nine mode buttons. These modes include: Voice, Performance, Song, Pattern, Mixing, Sampling and Master. Depending on the selected mode, you can play and perform on the keyboard and create your own original music. -
Page 22: Playing The Keyboard In The Voice Mode
Playing the Keyboard in the Voice mode In the Voice Play display (the top display of the Voice mode), the Voices according to the Voice type. In the Voice Play you can select and play a single Voice. The Voices of this display, you can select the desired Voice from various Voice instrument are divided into the following two types: Banks and play it. -
Page 23: Using The Category Search Function
Playing the Keyboard in the Voice mode Using the Category Search Below is a list of the Categories and their panel abbreviations. function Abbreviation Category Piano Piano The Voices are conveniently divided into specific Categories, Keys Keyboard instruments (Harpsichord, Clav, etc.) irrespective of their bank locations. -
Page 24: Changing The Arpeggio Type
Playing the Keyboard in the Voice mode Changing the Arpeggio type Transmitting Arpeggio playback as MIDI data The Arpeggio type assigned to each of the [SF1] – [SF5] The Arpeggio phrase can be transmitted as MIDI data by buttons can be changed as desired. setting the following parameters to on: ... -
Page 25: Using The Controllers
Playing the Keyboard in the Voice mode Using the Controllers The Voice Play display lets you confirm the assignment status for each of the six Controllers—in other words, The MOTIF XF gives you an amazing amount of control whether or not the specific function is assigned. (See the options. -
Page 26: Voice Editing
Playing the Keyboard in the Voice mode Voice Editing Press the [SELECTED PART CONTROL] button a few times so that the TONE 2 lamp lights, then “Editing” refers to the process of creating a Voice by rotate the Knob (at the far right). changing the parameters that make up the Voice. -
Page 27: Enhancing The Sound With Effects
Playing the Keyboard in the Voice mode Enhancing the sound with Effects If desired, set each of the parameters. Try narrowing in on the desired sound by finely editing the This instrument features a wide variety of Effects, letting you parameters provided for each Effect Type. -
Page 28: Playing The Keyboard In The Performance Mode
Playing the Keyboard in the Performance mode As in the Voice Play mode, the Performance Play mode is where you select and play the instrument sounds of this synthesizer. However, in the Performance mode, you can mix several different Voices together in a layer, or split them across the keyboard, or even set up a combination layer/split. -
Page 29: Creating A Performance By Combining Voices
Playing the Keyboard in the Performance mode velocities triggers Strings sounds with a fast attack speed. Press the [PERFORM] button. Playing the note with high velocities triggers Orchestra Hits. The current Performance name will change to “Initialized Perform” in the display. Orchestra Hit Part 3 NOTE... -
Page 30: Changing The Arpeggio Settings For Each Part
Playing the Keyboard in the Performance mode Move the cursor to the NOTE LIMIT LO of the Select the Category, Sub Category and Type of the Part 2. Arpeggio for each of the Parts 1 – 4. The Category determines the instrument type, the Sub Set the lowest note of Strings sounds with a Part 2 Category determines the rhythm type, and the Type determines the Arpeggio type itself. -
Page 31: Recording In The Performance Mode
Recording in the Performance mode While experimenting and playing around with Arpeggios in the Performance mode, you may find some rhythm patterns and phrases that you like, and you may want to store them for future recall. The best and easiest way to capture these is to record your keyboard playing to a Song or Pattern. -
Page 32: Recording Arpeggio Playback To A Pattern
Recording in the Performance mode 2 Pattern number After recording, press the [SONG] button to enter Select a destination Pattern number. Executing the the Song Play mode, then play the recorded Song. Performance Recording overwrites and erases all the previously recorded data of the specified Pattern. Make sure As desired, record the keyboard performance to another to select a Pattern which contains no data. -
Page 33: Audio Record/Playback
Audio Record/Playback With the Audio Record / Play function, you can now record your performances on the MOTIF XF as WAV-format audio files (44.1-kHz, 16-bit, stereo) on a USB storage device or a computer connected via a network. What’s more, the MOTIF XF can now also play WAV or AIFF audio files stored on a connected USB storage device or computer. -
Page 34: Playing An Audio File
Audio Record/Playback Playing an audio file Play the keyboard. If you set the trigger level to a value between 1 and 127, Using the MOTIF XF, you can now playback WAV and AIFF recording will begin automatically whenever the playback audio files stored on a USB storage device or a networked volume exceeds that level;... -
Page 35: Using As A Master Keyboard (Master Mode)
Using as a Master Keyboard (Master Mode) The Master mode lets you: • Create and store up to 128 programs, each containing a Voice, a Performance, a Song or a Pattern—which can be instantly called up for use. • Assign up to eight separate Zones in each Master program for use as a master keyboard. You can use the Master mode to memorize the settings you use most often, including the information on which mode is used, and call up these settings instantly anytime you need them with a single button press. - Page 36 Using as a Master Keyboard (Master Mode) Press the Number [1] button to enter Zone Edit. Set the parameters for Zone 1 on each of the [F1] – [F5] displays. Press one of the [2] – [8] buttons then set the parameters for Zone 2 –...
-
Page 37: Creating An Original Song
Creating an original Song Now that you’ve learned some of the basic features of the MOTIF XF—including how to select Voices and Performances, play with the Arpeggios, and record your playing and Arpeggio playback to a Song or Pattern—you’re ready to create your own original Song. -
Page 38: Recording To A Track
Creating an original Song Adjusting the volume of each Part Set the following parameters on the Record Setup display. You can adjust the volume for each of eight Parts, using the With the [TRACK] lamp turned on, press the Number panel sliders. -
Page 39: Correcting Wrong Notes
Creating an original Song Press the [ARPEGGIO ON/OFF] button so that the After completing recording setup, press the [R] lamp lights. (Play) button to start recording. Press the [R] (Play) button so that its indicator flashes, then actually start recording after the count-in. When you reach the end of the above notation, press the [] (Stop) button to stop recording. -
Page 40: Creating A Swing Feel-Play Effect
Creating an original Song NOTE The Song location at which you edit or input the event is After completing the settings, press the [T] (Top) button, indicated by MEAS (measure), BEAT and CLOCK. A then press the [R] (Play) button to start the Song and listen quarter-note (one beat when the time signature is set to “4/ to the swing feel in the playback. -
Page 41: Creating An Original Pattern
Creating an original Pattern The Patterns of the MOTIF XF feature short but fully realized instrumental parts that you can repeat (loop), combine, and arrange in any order you want—giving you the basic material for creating a Song. This section covers what you can do in the Pattern mode. -
Page 42: Viewing The Demo Pattern's Patch Display
Creating an original Pattern Viewing the Demo Pattern’s Patch Creating a Pattern by using display Arpeggio From the Patch display called up via the [F4] button, you can In addition to creating a Pattern by recording your keyboard confirm what “Phrase” is assigned to each track of the performance conventionally, you can also use the powerful Pattern Section. -
Page 43: Storing The Created Pattern
Creating an original Pattern Creating a Pattern Chain for Set the following parameters as required in the Arpeggio Record display. converting to a Song Set the Switch parameter to on. In these instructions you’ll learn how to assign each of the Set the Voice with Arpeggio (ARP) parameter to on. - Page 44 Creating an original Pattern Press the [SF4] Insert button to call up the Insert Assign the “end” indicator to the 14th measure. Event window and assign Section A to the 1st beat of the 1st measure. After making sure that the Event Type is set to “Section,” MEAS is set to “001,”...
- Page 45 Creating an original Pattern Converting a Pattern Chain to a Song Recording Melodies Continuing the instructions from above, this next section Finally, record the melody part with the backing parts explains how to convert the created Pattern Chain to Song converted from the Pattern Chain.
-
Page 46: Multi-Timbral Tone Generator Settings For Song/Pattern Playback (Mixing Mode)
Multi-timbral Tone Generator Settings for Song/Pattern Playback (Mixing mode) A Mixing refers to the multi-timbral tone generator settings for the Song/Pattern playback. A Mixing consists of 16 Parts, which correspond to the tracks, and in the Mixing display you can adjust the various mixing related parameters for each Part. From the Song Play or Pattern Play display, press the [MIXING] button to call up the Mixing display, letting you confirm the Mixing settings for each Part: Voice, volume, pan, etc. -
Page 47: Using The Sampling Feature
Using the Sampling feature The MOTIF XF has a powerful Sampling function that lets you record audio signals—such as vocals from a microphone or electric guitar—and integrate the resulting Samples with the Voices and Performances of the instrument. The Sampling mode lets you record sounds—such as vocals from a connected microphone, the signal from an electric guitar, or audio from an external CD or MP3 player—directly to the instrument, and store them as Samples. -
Page 48: Sampling In The Voice/Performance Mode
Using the Sampling feature Sampling in the Voice/ Press the [F6] Standby button to call up the Record Standby display. Performance mode When you enter the Sampling mode from the Voice mode or Set the following parameters on the Standby Performance mode, you can create your own original display. - Page 49 Using the Sampling feature Sampling Edit procedure Press the [F6] Stop button to stop Sampling. • If you set Confirm to on in step 8 above, the Sampling Finished display appears. Press the [SF1] Audition Press the [INTEGRATED SAMPLING] button to button to hear the sampled sound.
-
Page 50: Sampling In The Pattern Mode
Using the Sampling feature Sampling in the Pattern mode Play back the audio source (CD player) and adjust the audio input level with the GAIN knob on the In addition to its use in the Voice and Performance modes, rear panel to set the appropriate level. the Sampling mode can also be entered from the Song and Adjust the GAIN so that the level is high enough for a clean Pattern modes. - Page 51 Press the keys to which the sliced sample are If this information is available, enter the appropriate values to the assigned in order (from C1 for the MOTIF XF6, parameters above. E0 for the MOTIF XF7, and A-1 for the MOTIF XF8)
-
Page 52: Sampling A One-Shot Sound In The Song Mode
Using the Sampling feature Sampling a one-shot sound in the Trigger Mode Select “measure.” Song mode Punch In/Out At Punch In, set the measure number at which the Sampling starts automatically during Song The MOTIF XF conveniently lets you sample audio material, playback. -
Page 53: Saving A Waveform To The Flash Memory Expansion Module
Using the Sampling feature Saving a Waveform to the Flash Memory Expansion Module This section covers how to save a Waveform (to which the Sample has been assigned via the Sampling function) to the optional Flash Memory Expansion Module (page 76). In the Sampling mode, press the [JOB] button to enter the Sampling Job mode. -
Page 54: Making Global System Settings (Utility Mode)
Making Global System Settings (Utility mode) In the Utility mode, you can set parameters that apply to the entire system of this instrument. To enter the Utility mode, press the [UTILITY] button. Pressing the [EXIT] button returns to the original display. This section describes some useful functions in the Utility mode. -
Page 55: Adjusting The Tuning
Making Global System Settings (Utility mode) Changing the Design Type on the Top display for each mode Tuning You can change the design type on the top display for each of the Voice, Performance and Master Play mode. Holding the [EXIT] button and pressing the Cursor [<] button will set the Type to “1”... -
Page 56: Using A Connected Computer
For details, refer to “Setting Up” on page 16. Download the appropriate USB-MIDI Driver from our website. After clicking the Download button, extract the compressed file. http://www.global.yamaha.com/download/usb_midi/ NOTE Information on system requirements is also available at the above web site. NOTE The USB-MIDI Driver may be revised and updated without prior notice. -
Page 57: Using The Midi Terminal
Information on system requirements is also available at the tone generator from the external MIDI instrument or above website. The Yamaha FW Driver may be revised and computer, you should set the MIDI Port to 1 on the updated without prior notice. Make sure to check and connected MIDI device or computer. - Page 58 Using a Connected Computer Signal flow of audio and MIDI data via an Make sure that the IEEE1394 connector of the MOTIF XF is enabled for MIDI communication. IEEE1394 cable Press the [UTILITY] button to enter the Utility mode, then The illustration below shows the flow of audio signals and press the [F5] button followed by the [SF2] button to call up MIDI messages when connecting the MOTIF XF and a...
-
Page 59: Song Playback From A Daw Using The Motif Xf As A Tone Generator
XF6(7, 8)-1” or “Yamaha MOTIF XF Port1.” When connecting FW IN Main Out Monitor L, R MOTIF XF6(7, 8) Main L and R via IEEE1394, set this to “MOTIF XF6(7, 8) Main.” FW IN L, R MOTIF XF6(7, 8) FW L and R... -
Page 60: Using Another Tone Generator Together With The Motif Xf
When connecting via USB, set this to “Yamaha MOTIF XF6(7, 8)-1” or “Yamaha MOTIF XF6(7, 8) Port1.” When USB TO HOST connector connecting via IEEE1394, set this to “MOTIF XF6(7, 8) Main.” Keyboard Tone generator Set the MIDI output port of the tracks for playing... -
Page 61: Using The Motif Xf As An Audio Interface
Output Select of the FW, then select “L&R” or “asL&R.” NOTE The setting here applies to the audio signals output from FW ports MOTIF XF6(7, 8) FW L and R of a computer. Press the [STORE] button to store this setting. Display information... -
Page 62: Setting Up For Remote Control
Using a Connected Computer Computer Software that can be then set the MIDI Output Port to “Yamaha MOTIF XF6(7, 8)-2” or “Yamaha MOTIF XF6(7, 8) Port2” or “MOTIF XF controlled from the MOTIF XF Remote. Cubase, SONAR, Logic Pro, Digital Performer... -
Page 63: Using The Motif Xf Editor Vst
Using a Connected Computer Controlling the DAW software from the Using the MOTIF XF Editor VST MOTIF XF The MOTIF XF Editor VST lets you edit the Voice in the Voice/ Performance mode and Mixing setup in the Song/Pattern To enter the Remote Control mode, press the REMOTE [ON/ mode of the MOTIF XF from your computer, giving you even OFF] button (the lamp flashes). -
Page 64: Saving / Loading Data In The File Mode
Saving / Loading Data in the File mode In the File mode, you can save/load data such as Voice, Performance, Song, Pattern and Waveform created on this instrument. To enter the File mode, press the [FILE] button. This section explains how to save/load all the data on the user memory of this instrument as an “All” file (extension: X3A). Saving the settings to a USB Loading the settings from a USB storage device... -
Page 65: Usb Storage Devices
(battery or external power supply) types can be used. Before purchasing USB storage devices, please consult your Yamaha dealer, or an authorized Yamaha distributor (see list at end of the Owner’s Manual) for advice, or see the following web page: http://www.yamahasynth.com/... -
Page 66: Display Messages
Display Messages LCD Indication Description Are you sure? Confirms whether you want to execute a specified operation or not. Arpeggio memory full. The internal memory for Arpeggio data is full, preventing storing the recorded sequence data as an Arpeggio. Bad disk or memory. The external storage device connected to this synthesizer is unusable. - Page 67 Display Messages LCD Indication Description Now saving... Indicates that a file is being saved. Now scanning autoload file. Scanning for the files specified for Auto Load. Now transmitting MIDI bulk data... Indicates this synthesizer is transmitting MIDI bulk data. Overwrite. A save operation will overwrite data on the external storage device as destination, and this message confirms Are you sure? whether it is OK to continue or not.
-
Page 68: Troubleshooting
No sound? Wrong sound? When a problem like this occurs, please check the following points before assuming that the product is faulty. You may solve your problem by executing the Factory Set (page 18) after backing up your data to an external storage device. If the problem persists, consult your Yamaha dealer. No Sound. - Page 69 Troubleshooting When the Element to which “Key Off Sound” of the XA Control parameter is assigned does not sound, are you releasing the note after the AEG decays? The “Key Off Sound” Element will take over the AEG level of the previous Element if both the Elements belong to the same Element Group.
- Page 70 Troubleshooting Are the filter settings appropriate? Excessively high filter resonance settings can cause distortion. [VOICE] [EDIT] Element/Key selection [F3] Filter [PERFORM] [EDIT] Part selection [F4] EG Filter [SONG]/[PATTERN] [MIXING] [EDIT] Part selection [F4] EG Filter ...
- Page 71 Troubleshooting When this occurs in the Performance mode/Song mode/Pattern mode, check whether the Insertion Switch (INS SW) parameters are set properly or not. [PERFORM] [EDIT] [COMMON EDIT] [F5] Effect [SF2] InsSwitch [PERFORM] [EDIT] Part selection [F1] Voice [SF1] Voice [SONG]/[PATTERN] ...
- Page 72 Troubleshooting Song/Pattern (Phrase) cannot be recorded. Is there enough free memory for recording? Check the available amount of the sequencer memory on the Song Information window (called via [SONG] [F2] [SF6]) or Pattern Information window (called via [PATTERN] [F2] [SF6]). The total MOTIF XF memory capacity determines the number of Songs/Patterns (phrases) that can be recorded.
- Page 73 Press the [FILE] button to enter the File mode, then set the device to the USB storage device. Check the amount of currently available (unused) memory of the USB storage device indicated at the right top of the display. Is operation of the USB storage device guaranteed by Yamaha? For details, see page 65. MOTIF XF Owner’s Manual...
-
Page 74: Installing Optional Hardware
MOTIF XF6 cause improper operation or serious damage. If you are unable to retrieve a dropped screw, consult your Yamaha dealer for advice. • Install the optional units carefully as described in the procedure below. Improper installation can cause shorts which may result in Rear cover for the FW16E irreparable damage and pose a fire hazard. - Page 75 Installing Optional Hardware FW16E Replace the cover with the two screws you removed in step 2 above. Turn the power of the MOTIF XF off, and disconnect the AC power cord. Also, make sure to disconnect the MOTIF XF from any connected external devices.
- Page 76 Installing Optional Hardware FL512M/FL1024M Remove the cover from the bottom. With the rear panel of the MOTIF XF facing you, remove the screws from the cover by using the Phillips screwdriver. After Configuration removing the screws, slide the cover away to remove it. Two types of the Flash Memory Expansion Module are available as follows: Important...
- Page 77 Installing Optional Hardware number on the display; “Unmounted” is shown if it is not. Insert the Module vertically in the slot and face the screws If “Unmounted” is shown though you have installed the (of the Module) to the female screws respectively. Module, execute the instructions again from step 1 then check whether or not the Module has been installed NOTE...
-
Page 78: Specifications
Specifications Keyboards MOTIF XF8 88 keys, Balanced Hammer Effect Keyboard (Initial Touch/Aftertouch) MOTIF XF7 76 keys, FSX Keyboard (Initial Touch/Aftertouch) MOTIF XF6 61 keys, FSX Keyboard (Initial Touch/Aftertouch) Tone Generator Tone Generator AWM2, with Expanded Articulation block Polyphony 128 notes... - Page 79 Reference Manual and Data List), DVD-ROM (containing DAW software) *Specifications and descriptions in this owner’s manual are for information purposes only. Yamaha Corp. reserves the right to change or modify products or specifications at any time without prior notice. Since specifications, equipment or options may not be the same in every locale, please check with your Yamaha dealer.
-
Page 80: Index
Index [FILE] button ..............21, 64 File mode ................21, 64 A/D INPUT jacks ............... 15, 47 FireWire expansion board (FW16E) cover ......14 AC IN ..................14 FL512M/FL1024M ..............74, 76 Arpeggio ................. 23 Flash Memory Expansion Module ...........47 [ARPEGGIO ON/OFF] button ..........11 FOOT CONTROLLER jacks .............15 Arpeggio tempo .............. - Page 81 Recording Type ............48, 50, 52 Reference Manual ..............6 Waveform ................53 Remote mode ................. 61 [REMOTE ON/OFF] button ............11 Ribbon Controller ..............10 Yamaha Steinberg FW Driver ..........57 Sample ..................47 Zone ..................35 Sampling ................. 47 Sampling mode ............... 21 Save ..................64 Screen Setting ................
- Page 82 Yamaha Corporation of America or its subsidiaries. of other electronic devices. Compliance with FCC regulations does * This applies only to products distributed by YAMAHA CORPORATION OF AMERICA. (class B) COMPLIANCE INFORMATION STATEMENT...
- Page 85 Niederlassung und bei Yamaha Vertragshändlern in den jeweiligen Bestimmungsländern erhältlich. Pour plus de détails sur les produits, veuillez-vous adresser à Yamaha ou au distributeur le plus proche de vous figurant dans la liste suivante. Para detalles sobre productos, contacte su tienda Yamaha más cercana o el distribuidor autorizado que se lista debajo.
- Page 86 Yamaha Web Site (English) http://www.yamahasynth.com/ Yamaha Manual Library http://www.yamaha.co.jp/manual/ U.R.G., Digital Musical Instruments Division © 2010 Yamaha Corporation 012MWTO-C0 WU88930 Printed in Japan...
Need help?
Do you have a question about the Motif XF6 and is the answer not in the manual?
Questions and answers