Advertisement
Quick Links
®
POWERNAIL
CO.
Models 20FS Pneumatic PowerStapler™
OPERATION AND MAINTENANCE MANUAL
MANUAL DE OPERACION Y DE MANTENIMIENTO
MANUEL D'INSTRUCTIONS ET D'ENTRETIEN
WARNING
Read this manual before you use this stapler. Follow all safety warnings and instructions. If you are
uncertain about the operation of the stapler, call us directly at 1-800-323-1653 for assistance or contact
the closest Powernail Dealer for help. Please retain this information for future reference.
REV 12.10.12
Advertisement

Related Manuals for Powernail PowerStapler 20FS


Summary of Contents for Powernail PowerStapler 20FS
- Page 1 Read this manual before you use this stapler. Follow all safety warnings and instructions. If you are uncertain about the operation of the stapler, call us directly at 1-800-323-1653 for assistance or contact the closest Powernail Dealer for help. Please retain this information for future reference. REV 12.10.12...
-
Page 2: Table Of Contents
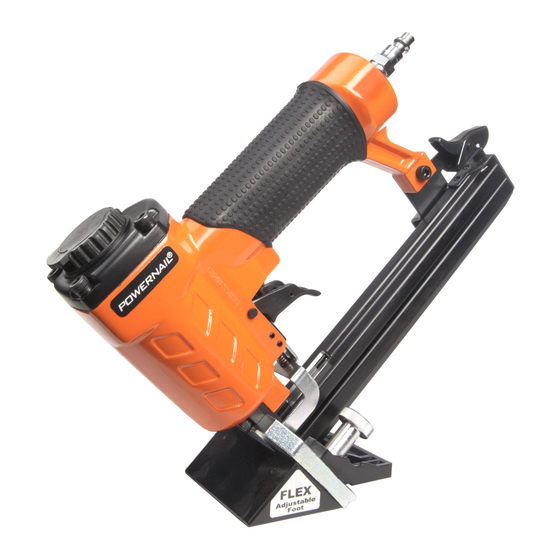
INTRODUCTION The PowerStapler ® Model 20FS trigger pull stapler is designed to bring Powernail quality and fl ooring expertise to a pneumatic Stapler. The PowerStapler Model 20FS is designed for use with 1”, 20 gauge PowerStaples ®. The Model 20FS staples fl ooring from 5/16” to 1/2” through the use of a FLEX foot that can be adjusted to fi... -
Page 3: Safety Instructions
Stapler is intended for use installing wood fl ooring and is not to be used for purposes not specifi ed in the operations manual. Do not use any staples other than Powernail® Powerstaples which are specifi cally designed for use in any Powerstapler. Powercleats Staples are available in various lengths. Contact your Powernail Dealer for Powernail Staples. - Page 4 The unique body design allows for different grip angles and has an adjustable exhaust port to redirect stapler exhaust. For a superior pneumatic stapler, look to the company that has been the industry’s quality leader, Powernail ® Company, Inc. Figure 1.
-
Page 5: Air Supply
OPERATION, continued... QUICK CONNECTOR STA PLER SETTING Your air tool is fully assembled when you receive it. After you have adjusted the stapler foot to a sample of your fl ooing and you are ready to use it, attach the air line and any desired air system accessories. -
Page 6: Maintenance
MAINTENANCE (Tools needed: 3mm & 4mm allen wrench) 20FS Disassembly, Inspection & Trouble Shooting (See fi gure 6.) 1) Remove the adjustable foot parts and set aside (76) (74) (73) (77) 2) Remove the two M4 screws (61) from the staple channel rear support (58) 3) Remove the two M5 screws (80) from the body (22) 4) Slide the staple channel assembly down off the drive blade. - Page 7 MAINTENANCE, continued... (See fi gure 6.) 20FS Reassembly & Adjustments 1) Install silver colored safety slide (75) into the silver foot (71) 2) Next install the gate (50) and gate plate (72) over the safety slide (75) 3) Install the two M4 screws (78) thru the front of the silver foot (71) thru the gate plate (72) thru the gate (50) into the fi...
- Page 8 20FS SCHEMATIC 37 38...
-
Page 9: Schematic / Parts List
PARTS LIST ITEM DESCRIPTION PART # ITEM DESCRIPTION PART # Screw Spring Washer Bushing Gate 09-20FS-5050 Exhaust Cover Fixed Magazine Unit 09-20FS-5051 Seal Washer Screw Spring (Magazine, 2 count) 09-20FS-5053 Cylinder Cap Feeder Shoe Retainer Gasket 09-20FS-5007 Feeder Shoe Seal Stopped Plate Spring O-Ring (36.3 x 2.5) - Page 10 Part number: 06-99650 Model 50P FLEX™ Model The Powernail Model 50P FLEX is truly a fl exible 50P FLEX nailer which can nail down the wide variety of fl ooring found in today’s market. Using the adjustable foot, you can fi...
-
Page 11: Troubleshooting Chart
TROUBLE SHOOTING CHART Here are some common issues may occur during use. If the stapler is not working as it should be, stop using the tool immediately and resolve the issue before continuing. PROBLEM POSSIBLE CAUSE SOLUTION Air leaking between body and drive 1. -
Page 12: Powernail Company Info
POWERNAIL COMPANY, INC. 1300 Rose Road, Lake Zurich, IL 60047 US Phone: 1-800-323-1653 or 847-847-3000 www.powernail.com...
Need help?
Do you have a question about the PowerStapler 20FS and is the answer not in the manual?
Questions and answers