Powernail 50P FLEX Operation And Maintenance
Pneumatic powernailer
Hide thumbs
Also See for 50P FLEX:
- Operation and maintenance manual (20 pages) ,
- Operation and maintenance (16 pages) ,
- Operation and maintenance manual (8 pages)
Table of Contents
Advertisement
Quick Links
POWERNAIL
CO.
®
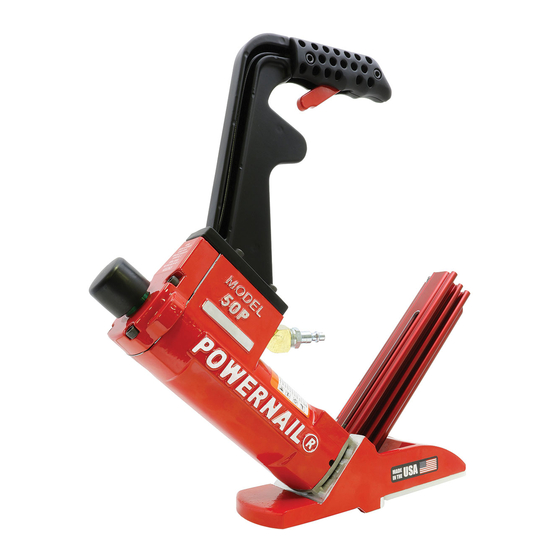
Powernail 50P FLEX Pneumatic Powernailer
®
50P FLEX
REV 3 MASTER
OPERATION AND MAINTENANCE MANUAL
MANUAL DE OPERACION Y DE MANTENIMIENTO
MANUEL D'INSTRUCTIONS ET D'ENTRETIEN
WARNING
Read this manual before you use this Powernailer®. Follow all safety warnings and
instructions. If you are uncertain about the operation of the nailer, call us directly
at 1-800-323-1653 for assistance or contact the closest Powernail Dealer for help.
Please retain this information for future reference.
rev. 2019.04.18
Advertisement
Table of Contents

Related Manuals for Powernail 50P FLEX


Summary of Contents for Powernail 50P FLEX
- Page 1 Read this manual before you use this Powernailer®. Follow all safety warnings and instructions. If you are uncertain about the operation of the nailer, call us directly at 1-800-323-1653 for assistance or contact the closest Powernail Dealer for help. Please retain this information for future reference.
-
Page 2: Table Of Contents
Troubleshooting Chart..19 LIMITED WARRANTY POWERNAIL® Company, Inc. warrants to its customer, and to the fi rst end-use purchaser of POWERNAIL fl ooring nailers purchased from an authorized POWERNAIL distributor, that each serialized manufactured nailer by POWERNAIL®, for a period of 12 months from the date of purchase, and with respect to the nailer body (specifi... -
Page 3: Safety Instructions
Nailer is intended for use installing wood fl ooring and is not to be used for purposes not specifi ed in the operations manual. Do not use any nails other than Powernail Powercleats Nails which are specifi cally designed for use in any Powernailer. Powercleats Nails are available in various lengths. Contact your Powernail Dealer for Powercleats Nails. -
Page 4: Operating Instructions
Read these instructions carefully before you use the Nailer. To use the Powernail 50P Flex, adjust the nailer FLEX foot to a sample of your fl ooring (see instructions below). When the nailer foot is adjusted to your fl ooring, simply place the nailer on the fl oor and pull nailer back so the triangles (Figure 2) catch the edge of the fl... -
Page 5: Top Load Channel
OPERATION, continued... Loading Top Load Channel: To Load the Powernail Flex: Pull back the spring loaded nail pusher towards the end of the channel until the pusher plate locks (Figure 4). Place up to one stick (100) of Powercleats® (18-gauge) nails, 1" , 1-1/4" , 1-1/2" or 1-3/4" long into the nail feed slot located on the top of the channel (Figure 5). -
Page 6: Parts & Service
Be sure to state the quantity of the The air must be clean and dry. Dirty and/or wet part(s) required. Contact your Powernail Dealer air will damage the Nailer. A combination fi lter- for the necessary parts or service. -
Page 7: Drive Blade
Nailer Body by pulling on the Driving Blade. There are 7 seals that may require replacement. 10. Hold the Piston Rod (#13) with an 11/16" We recommend that you have your POWERNAIL socket over its hex end opposite the Piston. Dealer replace the Seals. - Page 8 OPERATION, continued... Piston using a bent paper clip or pick, being 12. Unscrew the Piston from the Piston Rod using box careful not to scratch the inside walls of the wrenches and separate the Piston, Piston Rod and seal groove or the edge of the Piston with the Return Cylinder.
- Page 9 Be sure the Piston is facing the correct way, ears up, hex down. 5. Assemble the Driving Blade, Dowel Pin and Jam Nut on to the Piston Rod. For Step-by-Step Videos and Instructions, Visit our Web Site at: www.Powernail.com...
-
Page 10: Parts List
POWERNAIL 50P FLEX PARTS LIST For this parts list and other Powernailer schematics, please visit the Powernail Parts Store at www.powernail.com SOLD SEPERATE OR ITEM # PART NO. DESCRIPTION ASSEMBLY / KIT # 09-50P3001 BODY 09-50P3150 CAP (LOW PROFILE) 09-50P3202 1/4-20 X 5/8"... - Page 11 6 OZ. INDUSTRIAL LIGHT AIR TOOL OIL A-12 09-44529768 BOX WRENCH (2) 09-50PTUKITR2 TUNE-UP KIT FOR ALL (R2) 50P, 50P FLEX, & 50P POWER ROLLERS A-14 09-50PFOOTKIT R2 FOOT ASSEMBLY (includes R2 Foot, Gate, Gate Plate, and Screws) A-15 09-50P3050A...
-
Page 12: Rear Load Channel And Original Foot Parts List
POWERNAIL 50P FLEX REAR LOAD CHANNEL AND ORIGINAL FOOT PARTS LIST If your nailer was manufactured in or before 2017, you may have the rear load channel confi guration and/or original foot, gate, and gate plate. These parts have since been revised but are still available as replacement parts. -
Page 13: Schematic
POWERNAIL 50P FLEX SCHEMATIC For this and other Powernailer schematics, please visit the Powernail Parts Store at http://www.powernail.com FLEX Conversion Parts. #60-73 For Step-by-Step Videos and Instructions, Visit our Web Site at: www.Powernail.com... -
Page 14: Seal Locations Diagram
SEAL PLACEMENT... -
Page 15: Safety Labels
NAILER SAFETY DECALS Warning! • Read and understand the tool labels and manuals before operating. • Operators and others in work area MUST wear EYE and EAR protection. • Use safety glasses with side shields. • NEVER point tool at yourself or others in the work area. -
Page 18: Clear A Jam With The R2 Foot
3. Inspect and clear any jams in the 4. Re-install the gate plate and screws. Tighten fi rmly. drive blade pathway. Nailer is now ready for use. Check out our Repair and Maintenance Videos online at: http://www.powernail.com/repair... -
Page 19: Troubleshooting Chart
POWERNAILER TROUBLE SHOOTING CHART PROBLEM POSSIBLE CAUSE SOLUTION Check air supply for 80 psi minimum to 110 psi 1. Zero or Low air pressure maximum 2. Lack of lubrication Manually lubricate through male air inlet fi tting 3. Excessive dirt inside nailer Disassemble and clean Driving blade 4. - Page 20 Visit www.Powernail.com • Dealer Locator • Repair Tech Videos • Rental Locator • Cool Tools Cleat Calculator • Parts Store • Cleat Depth Chart • Product Information • Training Schools Featured Products Powerjack® Model 500 Truly a Tinker's TOOL, the POWERJACK Model 500 is designed to push or pull fl...
Need help?
Do you have a question about the 50P FLEX and is the answer not in the manual?
Questions and answers