Sign In
Upload
Download
Table of Contents
Contents
Add to my manuals
Delete from my manuals
Share
URL of this page:
HTML Link:
Bookmark this page
Add
Manual will be automatically added to "My Manuals"
Print this page
×
Bookmark added
×
Added to my manuals
Manuals
Brands
Toshiba Manuals
All in One Printer
e-Studio332s
Operator's manual
Toshiba e-Studio332s Operator's Manual
Hide thumbs
1
2
3
4
5
6
7
8
9
Table Of Contents
10
11
12
13
14
15
16
17
18
19
20
21
22
23
24
25
26
27
28
29
30
31
32
33
34
35
36
37
38
39
40
41
42
43
44
45
46
47
48
49
50
51
52
53
54
55
56
57
58
59
60
61
62
63
64
65
66
67
68
69
70
71
72
73
74
75
76
77
78
79
80
81
82
83
84
85
86
87
88
89
90
91
92
93
94
95
96
97
98
99
100
101
102
103
104
105
106
107
108
109
110
111
112
113
114
115
116
117
118
119
120
121
122
123
124
125
126
127
128
129
130
131
132
133
134
135
136
137
138
139
140
141
142
143
144
145
146
147
148
149
150
151
152
153
154
155
156
157
158
159
160
161
162
163
164
165
166
167
168
169
170
171
172
173
174
175
176
177
178
179
180
181
182
183
page
of
183
Go
/
183
Contents
Table of Contents
Troubleshooting
Bookmarks
Table of Contents
Preface
Emergency First Aid
Importer to the Eu/Authorised Representative
Environmental Information
ENERGY STAR ® Program
For Your Safety
Disclaimer Notice
Table of Contents
Manual Composition
About this Manual
1 Setup
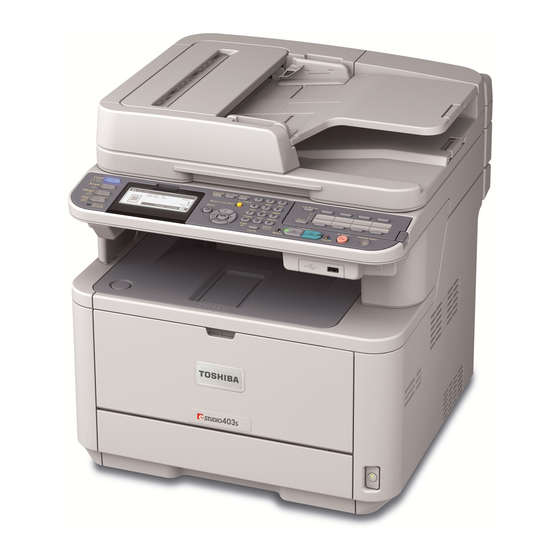
Overview of Machine
Contents of the Package
Available Options
Installation Requirements
Names of Components
Installing Your Machine
Unpacking Your Machine
Turning on and off Your Machine
Power Save Mode and Sleep Mode
Turning off Your Machine
Turning on Your Machine
Auto Power off
Returning to the Standby Mode
Sleep Mode
Installing Options
Installing a Second Tray Unit
Operator Panel
Default Screen
Entering Text Using the Operator Panel
Loading Paper and Documents
Paper
Supported Paper Types
Paper Weight
Paper Recommendations
Storing Paper
Loading Paper
Loading Paper on the Mp Tray
Configuring the Tray Settings
Registering Custom Sizes
Paper Output
Documents
Document Requirements
Loading Documents
Scannable Area
Basic Settings for Faxing (for E-STUDIO403S Only)
Setting for Country Code
Connecting a Telephone Line
Other Cases
Settings for each Dialing Type
Setup of Date/Time
Specifying Sender Information
PBX Connecting
Setting for Super G3
Specifying Reception Mode
Connecting to a Computer
Network Connection
Installing a Printer Driver
Using Bonjour
USB Connection
Configuring the Network Settings
Checking the Common Setup Information
Setting up Scan to E-Mail and Internet Fax
Setting up Scan to Network PC
Enter the Value in C-2 in the Entry Field and Click [OK]
Select the [Allow] Check Box for [Full Control], and then Click [OK]
Click [If You Understand the Security Risks but Want to Share Files Without Running the Wizard, Click Here.]
Select the
Proceed to "Creating a Profile for Scan to Network
Managing Profiles
Printing Configuration
Printing Procedure
2 Copying
Basic Operation
Starting a Copy Job
Canceling a Copy Job in Progress
Configuring Copy Settings
Changing the Scan Size (Scan Size)
Changing the Paper Tray (Paper Feed)
Changing Image Orientation of Document (Direction)
Making Enlarged or Reduced Copies (Zoom)
Enabling Continuous Scan Mode (Continuous Scan)
Making Duplex Copies (Duplex Copy)
Adjusting Copy Density (Density)
Changing Document Type (Document Type)
Adjusting the Background Removal
Changing Scan Resolution
Resetting Copy Settings
3 Faxing (for E-STUDIO403S Only)
Basic Procedure for Faxing
Sending a Fax
Specifying a Destination
Deleting Specified Destinations
Configuring Fax Settings
Changing Scan Size (Scan Size)
Changing Resolution (Resolution)
Adjusting Density (Density)
Printing the Sender Name
Checking and Canceling Fax Transmission
Canceling Fax Transmission
Canceling a Reserved Job
Checking Transmission and Reception History
Machine Behavior in Fax Reception
Reception Behavior
Printing Received Faxes
Phone Book
Speed Dial
Registering and Editing
Registering from History
Deleting
Group Dial (Group Number)
Registering and Editing
One-Touch Key Pad
Register All Telephone Numbers
Registering the Machine
Basic Procedure for Scan to Fax Server
Transmitting Data to Fax Server
Specifying the Destination
Deleting the Specified Destination
Stopping the Fax Transmission
Basic Procedure for Internet Faxing
Sending an Internet Fax
Specifying a Destination
Checking, Deleting, and Changing Destinations
Canceling Transmission
Receiving Internet Faxes
4 Scanning
Installing Scanner Drivers (TWAIN/WIA/ICA Driver)
Installation Procedure
For Windows
For Mac os X
Using Actkey Software
Installing the Software
Starting the Software
Setup to Use the WSD Scan
Installation Procedure
Scanning Methods
Scan to E-Mail
Direct Input
Using Ldap Search
Scan to Network PC
Scan to USB Memory
Scan to Local PC
Scan to Remote PC
Canceling the Current Scan Job
Registering Address Book
Address Book
Group List
Register All E-Mail Addresses
Importing Addresses from a File
Registering the Machine
Registering Network Scan Destinations
5 Using as a Printer
Printing from a Computer
Printing
Canceling a Print Job
Printing from USB Memory
Starting a Print Job
Configuring Print Settings
Canceling a Print Job
6 User Authentication and Access Control
About User Authentication and Access Control
Authentication by PIN
Registering a PIN
Enabling Access Control
Operation When PIN Authentication Is Enabled
Operation from a Computer
Windows Only
Authentication by User Name and Password
Registering User Name and Password
Enabling Access Control
Operation When User Name and Password Authentication Is Enabled
Operation from the Computer
7 Troubleshooting
Paper Jams
Checking Error Messages
Clearing Paper Jams
Error Code
Paper Feed Jam
Multipurpose Tray
Document Jam
Inside the Adf
Error Messages
Error Messages Displayed on the Screen
Checking the Machine's Status from the <STATUS> Key
Other Issues
Unable to Print from a Computer
Network Connection Problems
Usb Connection Problems
Unable to Install a Printer Driver Successfully
Restrictions on each os
Copying Issues
Faxing Issues
Scanning Issues
Image Quality Issues
Feeding Issues
Machine Issues
When the Power Goes out
8 Maintenance
Replacing Consumable Items
Replacing Toner Cartridges
Replacing the Image Drum
Cleaning Your Machine
Cleaning the Surface of the Machine
Cleaning the Document Glass
Cleaning Document Feeding Rollers in the ADF
Cleaning Paper Feed Rollers
Cleaning LED Heads
Moving Your Machine
9 Appendix
Specifications
Copier Specifications
Fax Specifications
Pc Fax Specifications
Internet Fax Specifications
Scanner Specifications
Scan to Usb Memory Specifications
Scan to Local Pc Specifications
Printing Specifications
Print from Usb Memory Specifications
Network Specifications
Basic Steps in Windows
Index
Advertisement
Quick Links
Download this manual
MULTIFUNCTIONAL DIGITAL SYSTEMS
User's Manual Basic
Table of
Contents
Previous
Page
Next
Page
1
2
3
4
5
Advertisement
Table of Contents
Need help?
Do you have a question about the e-Studio332s and is the answer not in the manual?
Ask a question
Questions and answers
Related Manuals for Toshiba e-Studio332s
All in One Printer Toshiba e-STUDIO330AC Hardware Troubleshooting Manual
Multifunctional digital color system (58 pages)
All in One Printer Toshiba e-STUDIO330AC Quick Start Manual
Multifunctional digital color systems (74 pages)
All in One Printer Toshiba e-Studio 452 Operator's Manual
Multifunctional digital systems basic function (362 pages)
All in One Printer Toshiba e-STUDIO350 Service Handbook
Multifunctional digital systems (764 pages)
All in One Printer Toshiba e-STUDIO5540C Scanning Manual
Multifunctional digital color systems / multifunctional digital systems (134 pages)
All in One Printer Toshiba e-STUDIO6540C Management Manual
Multifunctional digital color systems / multifunctional digital systems (192 pages)
All in One Printer TOSHIBA e-STUDIO5540C Management Manual
Multifunctional digital color systems / multifunctional digital systems (282 pages)
All in One Printer Toshiba e-STUDIO6550C Series Manual
Multifunctional digital color systems/multifunctional digital systems (50 pages)
All in One Printer Toshiba e-STUDIO206L Service Manual
Multifunctional digital systems (1524 pages)
All in One Printer Toshiba e-STUDIO287CS User Manual
Multifunctional digital color systems (78 pages)
All in One Printer Toshiba E-STUDIO287CS User Manual
(368 pages)
All in One Printer Toshiba E-STUDIO2500AC Template Manual
Multifinctional digital systems (30 pages)
All in One Printer Toshiba E-STUDIO2000AC Printing Manual
Multifunction digital systems (174 pages)
All in One Printer Toshiba e-Studio2000AC Software Troubleshooting Manual
Multifunctional digital colog system / multifunctional digital systems. e-studio5005ac series; e-studio5008a series; e-studio7506ac series; e-studio8508ac series (82 pages)
All in One Printer Toshiba e-studio 456 series User Manual
Toshiba all in one printer (9 pages)
All in One Printer Toshiba e-STUDIO A Series Operator's Manual
Ip fax function (109 pages)
This manual is also suitable for:
E-studio403s
Table of Contents
Print
Rename the bookmark
Delete bookmark?
Delete from my manuals?
Login
Sign In
OR
Sign in with Facebook
Sign in with Google
Upload manual
Upload from disk
Upload from URL


Need help?
Do you have a question about the e-Studio332s and is the answer not in the manual?
Questions and answers